When I first heard about people melting and casting metal in
their back yard I just had to try it. The whole processed
seemed magical to me. It still does.
I did this project a nearly a decade before I had access to
CNC mills, lathes, 3D printers, or even laser cutters. So the
idea of being able to make multiple copies of a part, and
making the parts out of metal was a game changer for me. It
was part of what got me learning how to use a lathes and
mills, and greatly increased my ability to make physical
things. Even with today's ready access to 3D printers I would
still recommend making a foundry.
My first fountry was a coffee-can foundry. It is a small, charcoal
fired, and suitable for melting small quantities of low
melting point metals like zinc or aluminium alloys. Its like
having the Easy-Bake oven of doom in your backyard!
The basic idea is you use air forced over burning charcoal to
heat up your foundry and melt down the metal in your
crucible. Once you have liquid metal, you pour it into a previously
prepared mold, let it cool, and you have your cast metal part.
A Little Background
The earliest reference to a coffee can foundry I have found was and article in
The Journal of the Home Metal Shop Club of Huston, Texas, Volume 2, Number 5, back in 1997.
Gordon Lawson's article
"A Miniature Foundry"
gives a basic description of a building a single use aluminium foundry from common household
supplies.
David Gingery did an amazing series of books on using a home
foundry to build a metal shop from scratch. Even if you don't
intend to build a foundry of your own I highly recommend his
books, they are amazing. He documents how to first build a
home foundry, then use it to build lathes, mills, drill
presses, metal shapers and accessories. I learned a lot about
metalworking just by reading them.
Gingery's
book "The
Charcoal Foundry" is cheap, well written, and is
covers everything you will need to know to build a simple
backyard foundry and cast some simple parts from metal.
For other cheap coffee can foundry designs I recommend looking W. E. John's
Metalcasting pages on his "Gizmology"
web site and "Jim"'s
Coffee Can Foundry foundry pages.
Either of these designs should service for a couple of small melts before having
to be rebuilt or thrown away.
All of the previously mentioned foundries were designed to be cheap. Most will cost less then
$20-$30 to build and fire for the first time. Their designers intended them only as an introduction
to metal casting. After building one of these foundries I would seriously recommend ordering
David Gingery's The Charcoal Foundry book.
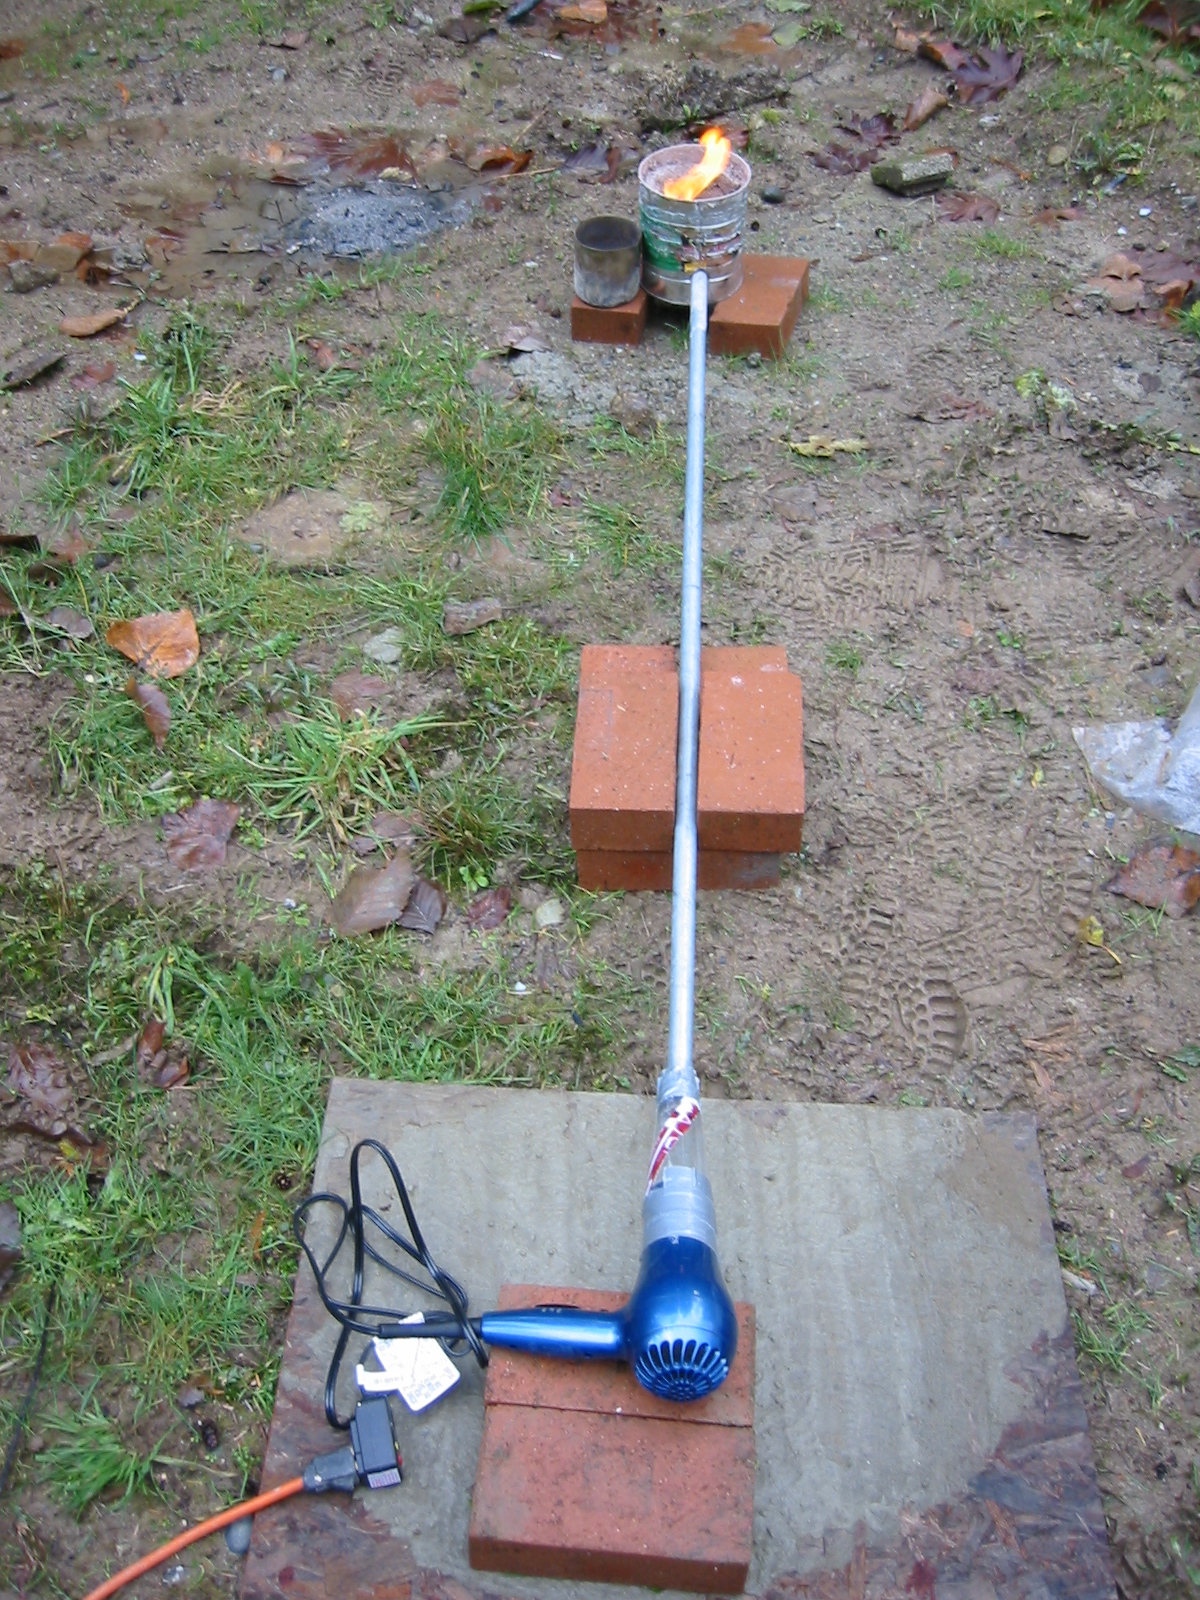
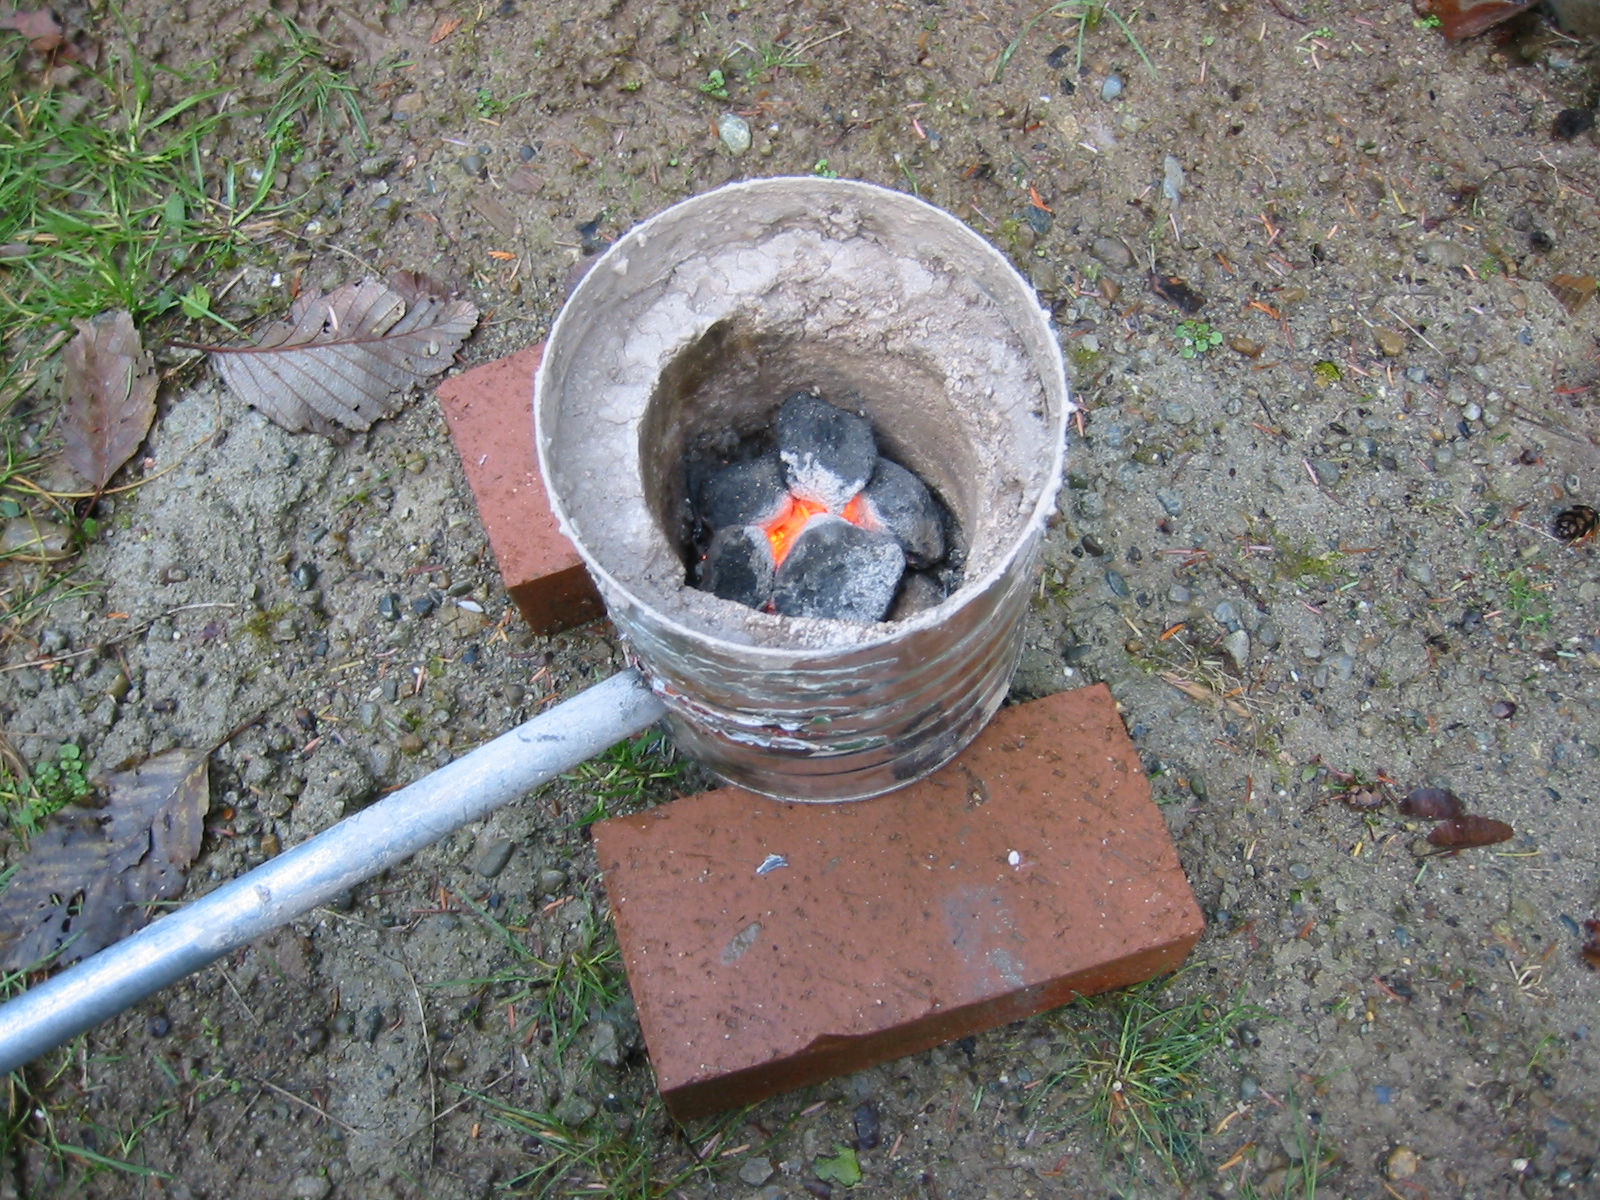
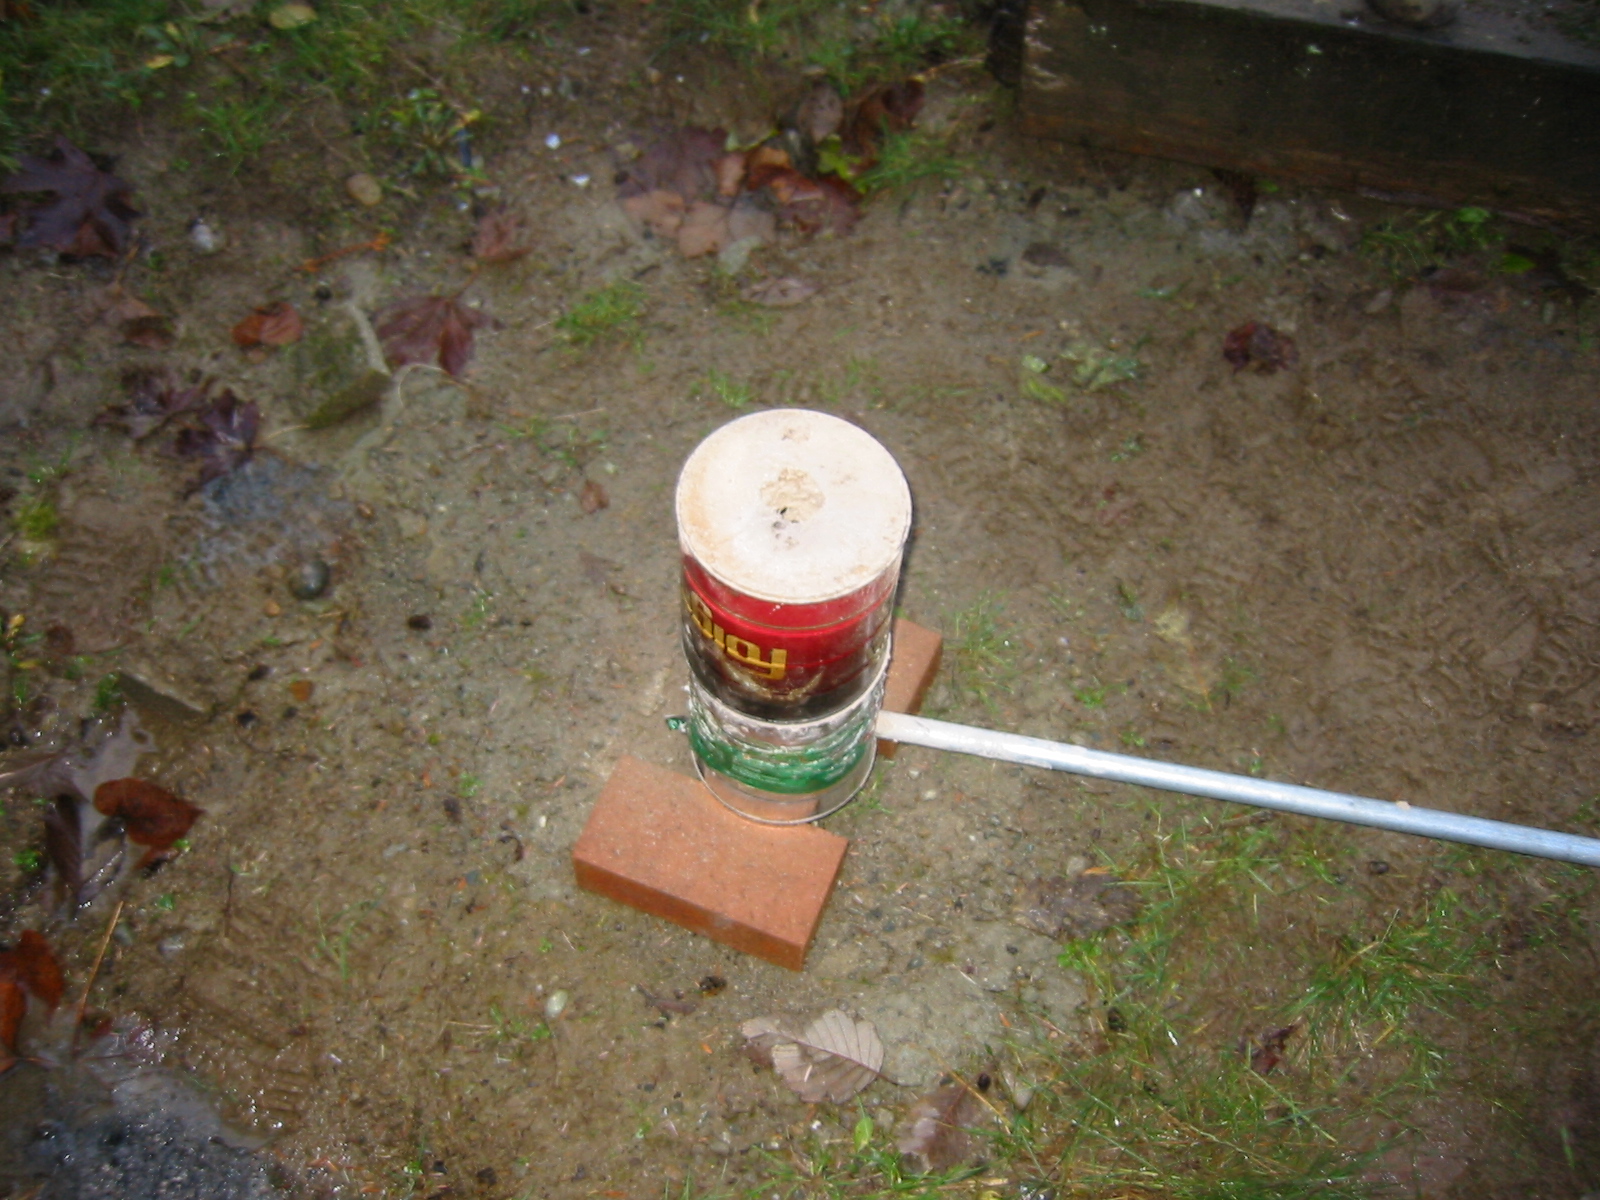
Building the Foundry
The foundry is charcoal fired. A hair-dryer is used to force air over
charcoal brickets. After the brickets heat up the foundry walls you can
put a crucible into the foundry and start melting some metal. Since the
hair drier is plastic I used a long pipe to force the air into the foundry.
The length of the pipe allows the pipe to cool before it comes into contact
with the plastic.
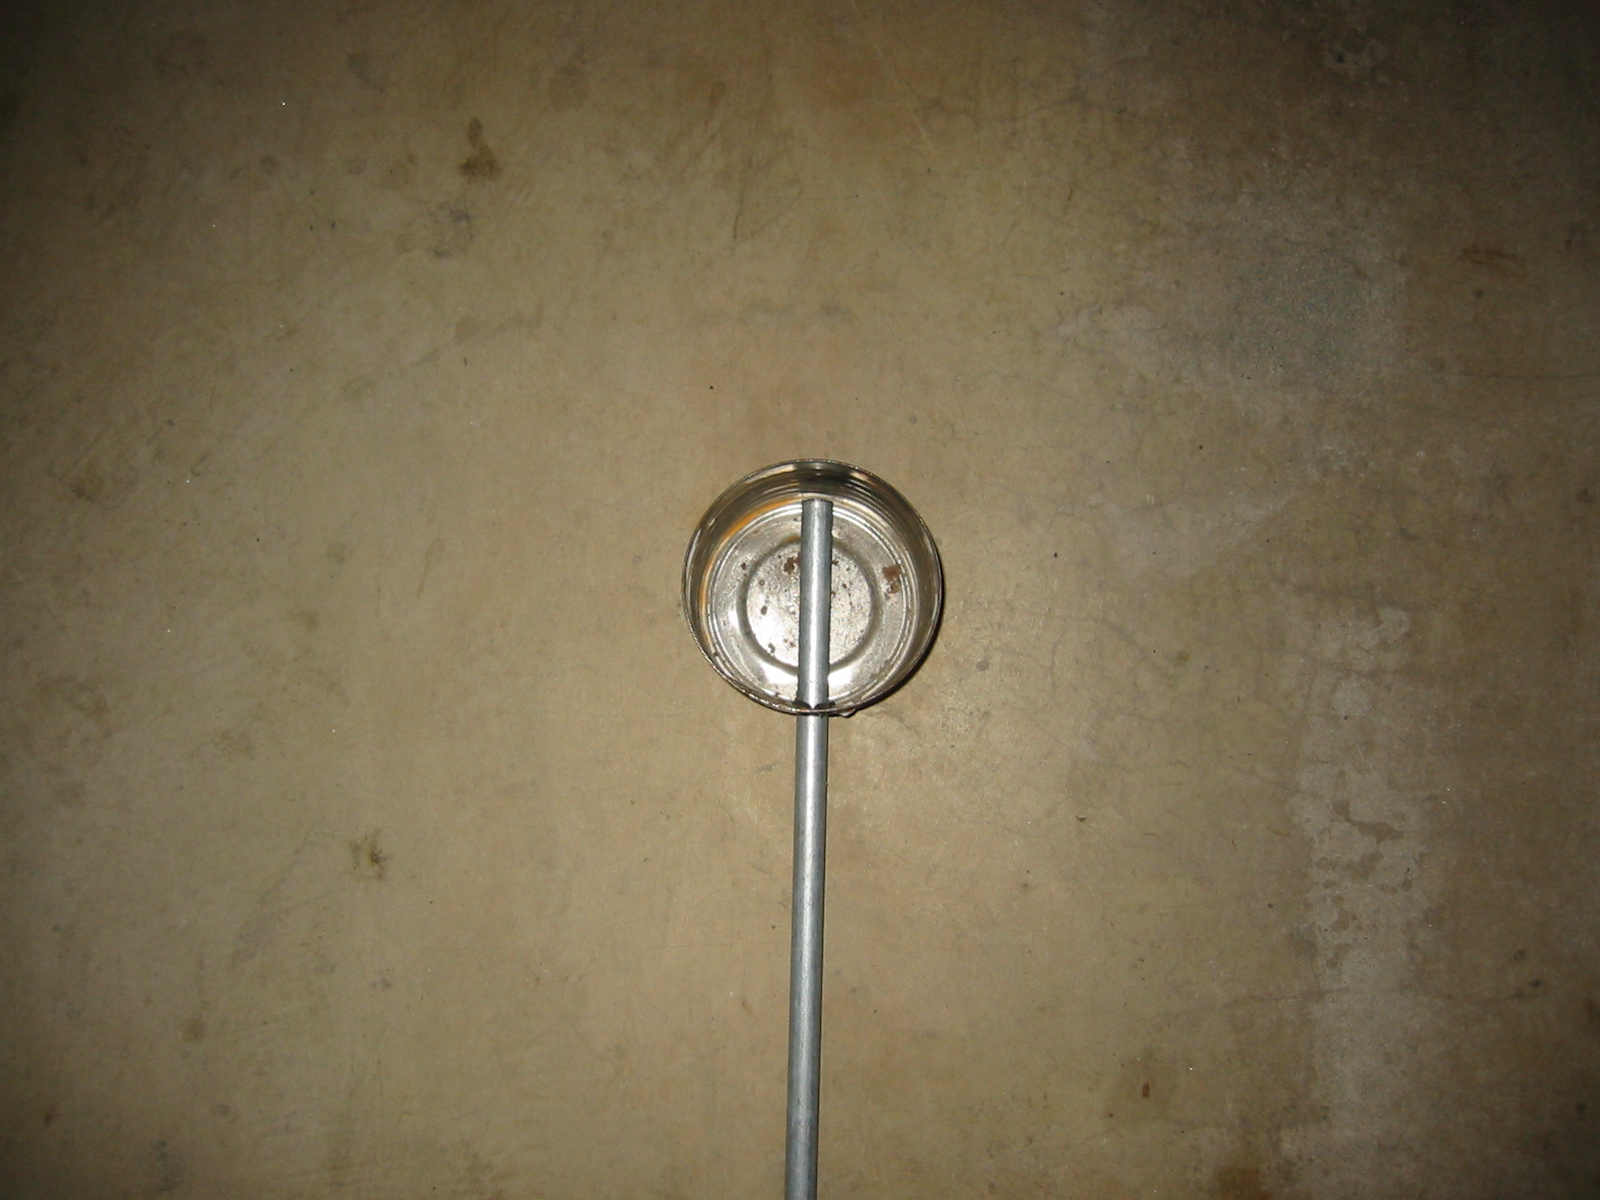
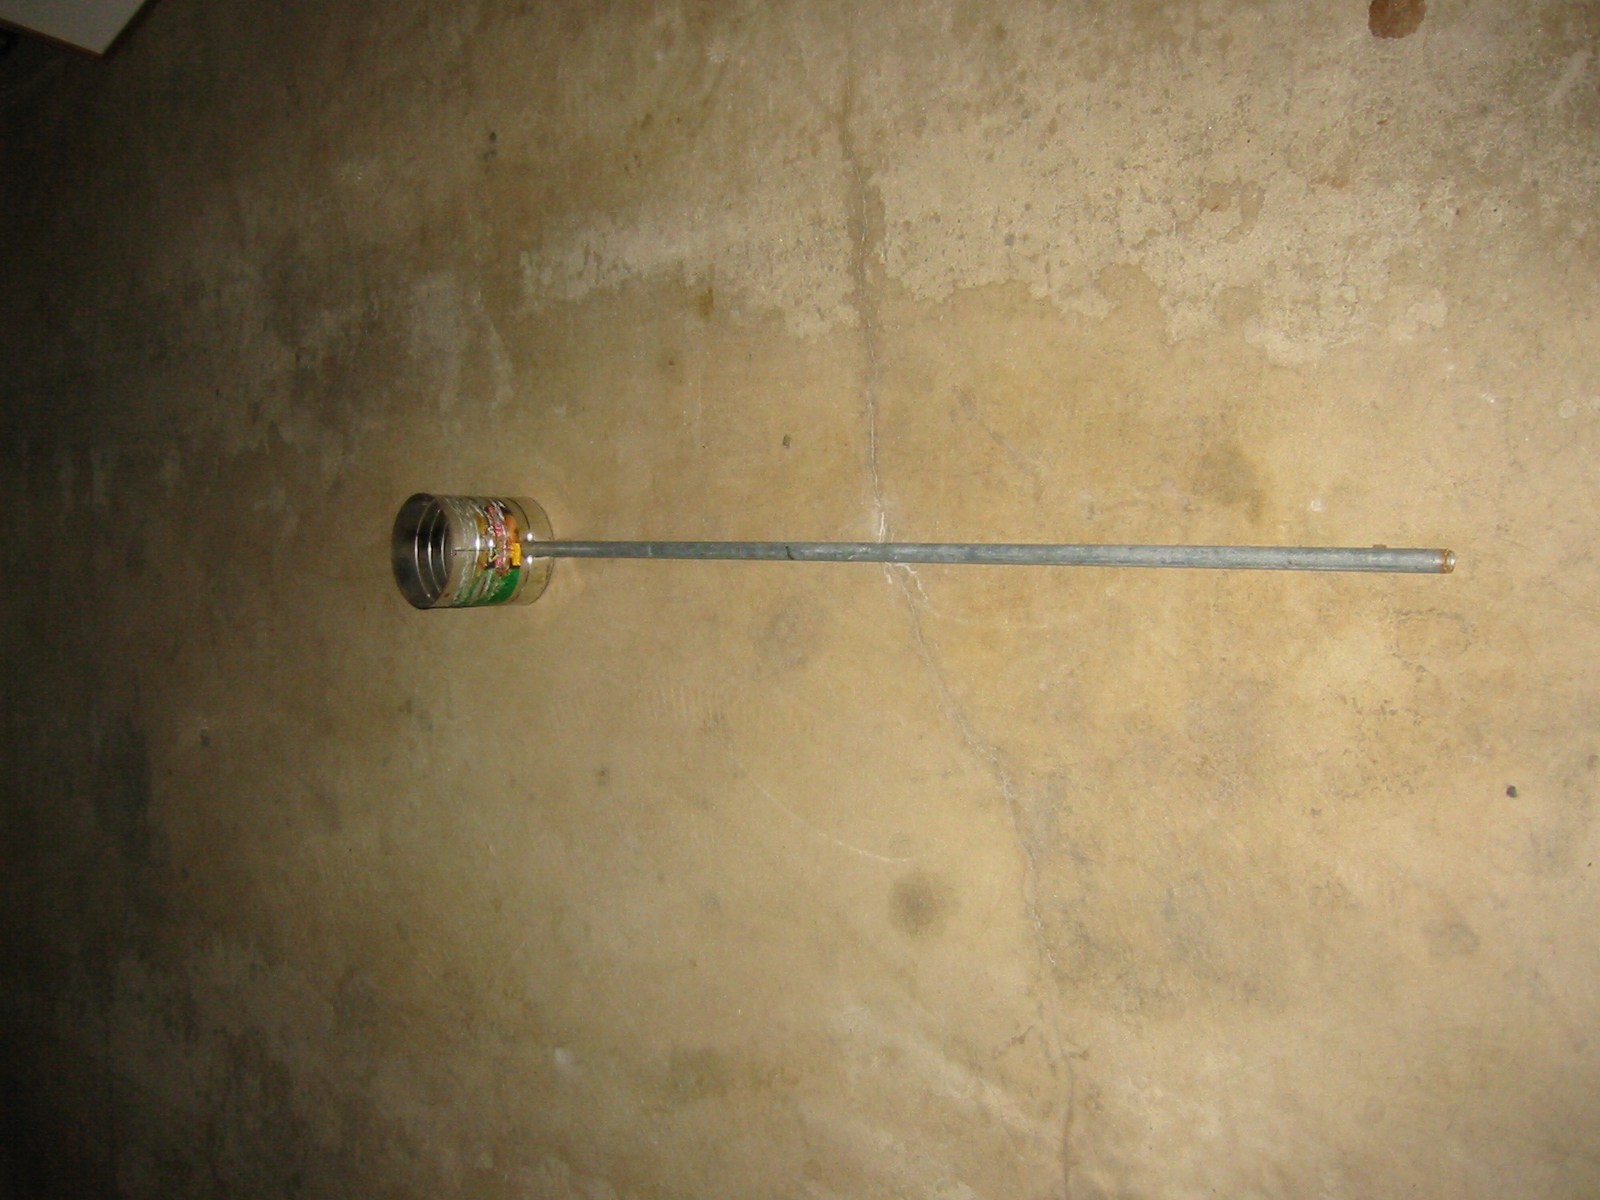
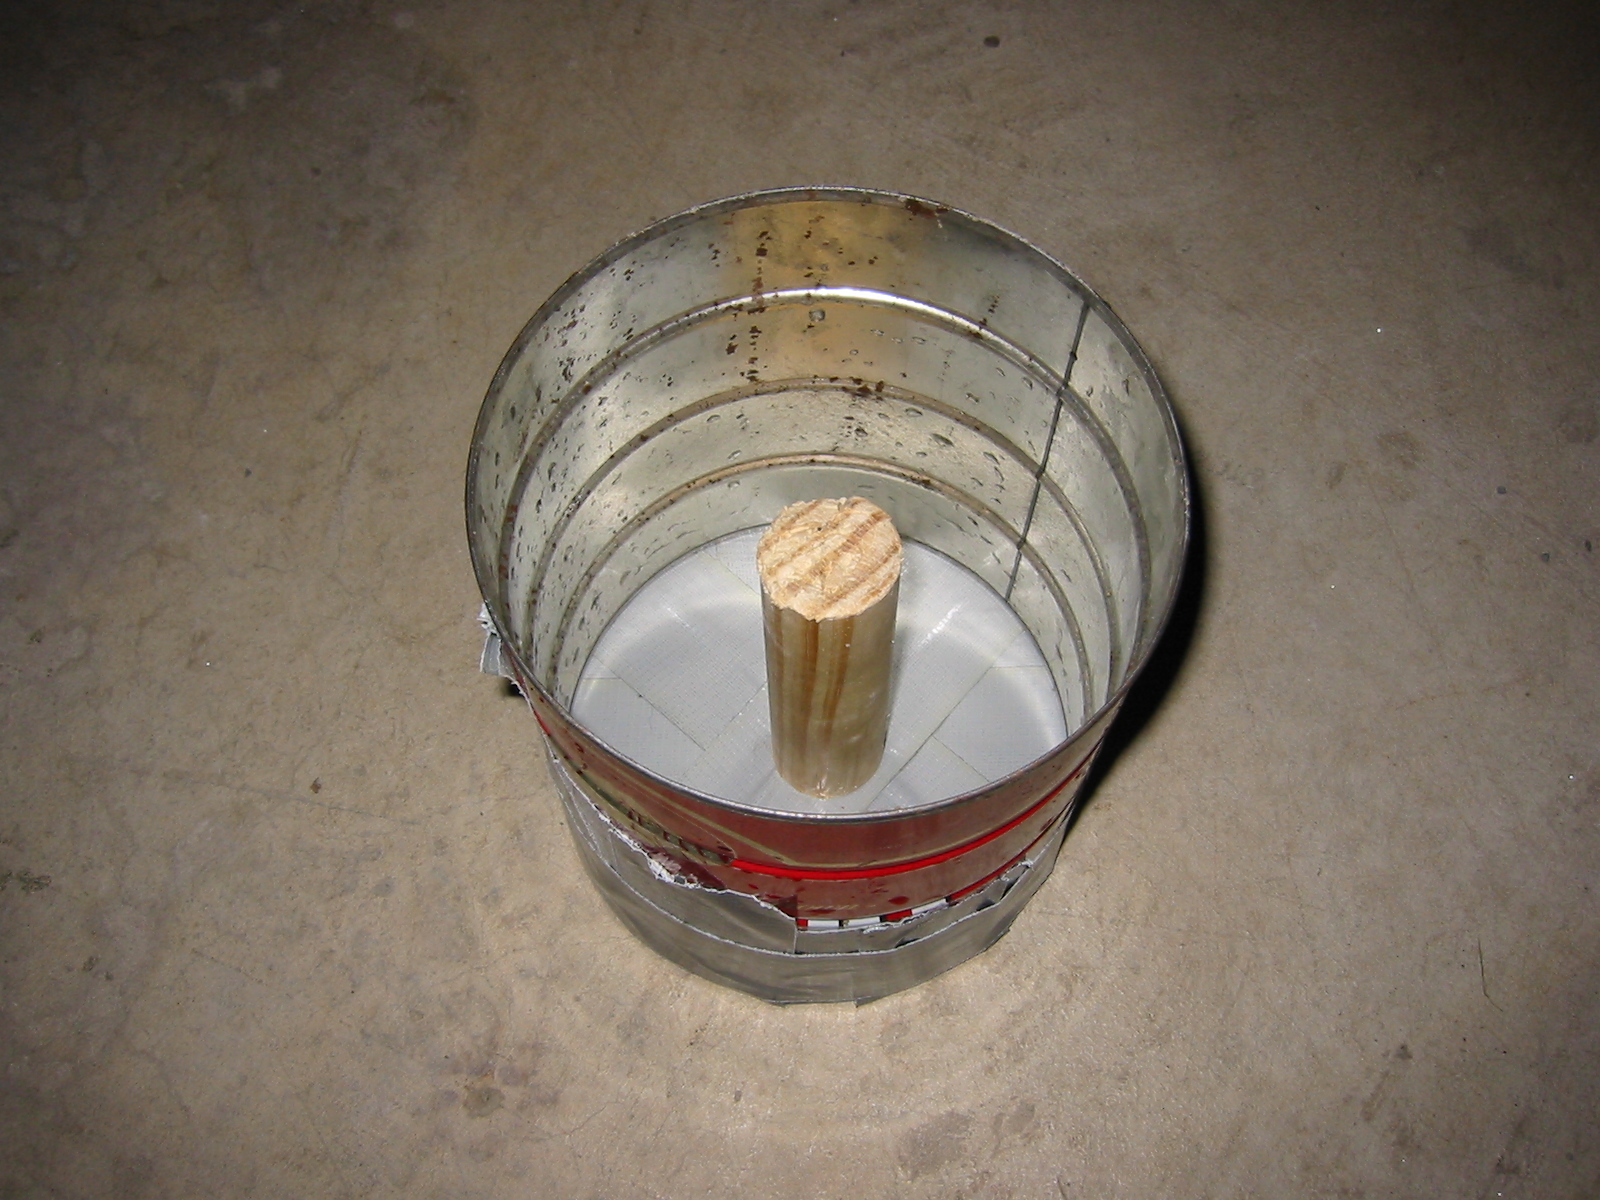
Laying out the Airway:
I started by cutting a hole in the base coffee-can and measuring and laying
out the air pipe for the flue. When you add the slurry to cast the walls of
the foundry you keep the pipe a little farther inside the coffee can in order
to act as a form. Once the refractory dries the pipe can be withdrawn forming
the flue.
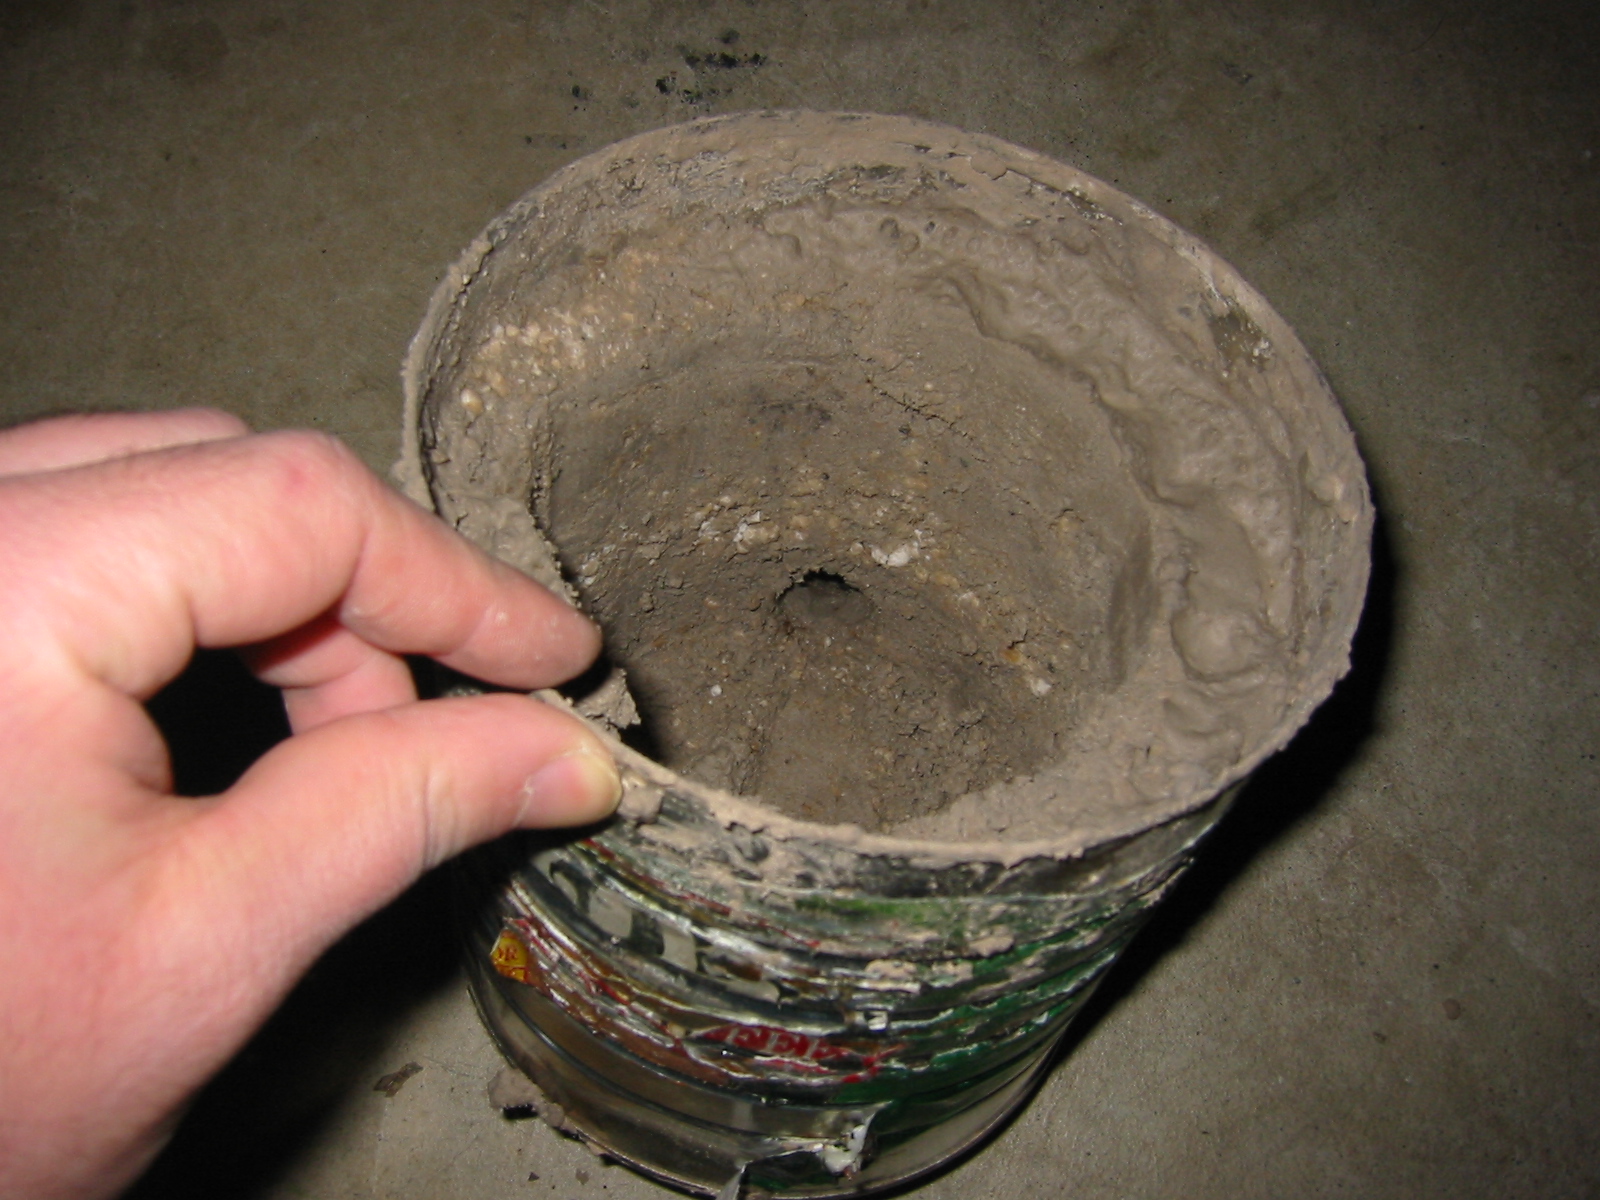
Forming the Walls:
The walls of the foundry were made from a mixture of Perlite and watered down
chimney cement. The chimney cement was about $20 and the Perlite was about $5
for a giant bag. Buying a commercial refractory, which I did for my later and
larger foundry, cost about $50.
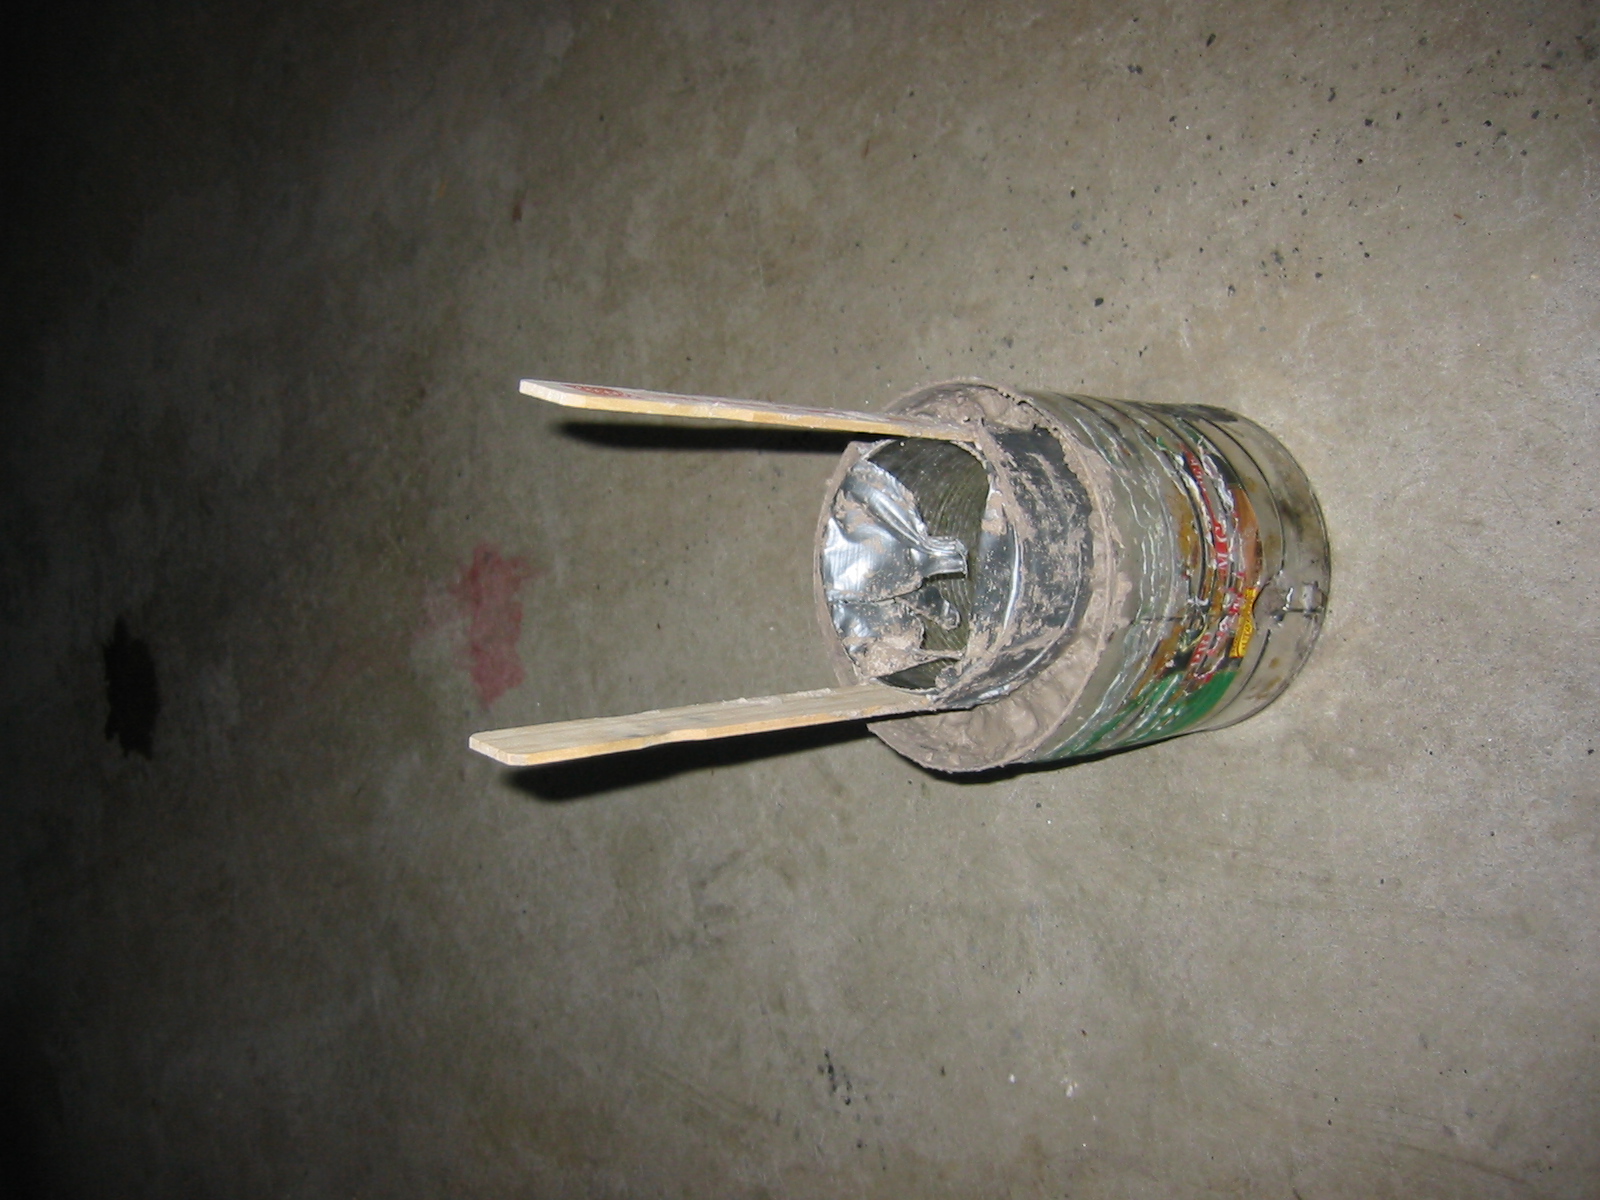
In the Gingery book they
recommend a cool collapsible core that you can dismantle once the walls of the foundry
are dried. In retrospect hat would have been a better idea. I chose to use strips of
wood taped to either side of a can as the interior form. Once the walls had dried
the strips allowed me to be able to remove the can. The problem was that the core
stuck to the walls and broke off the top of the inner lining while being removed.
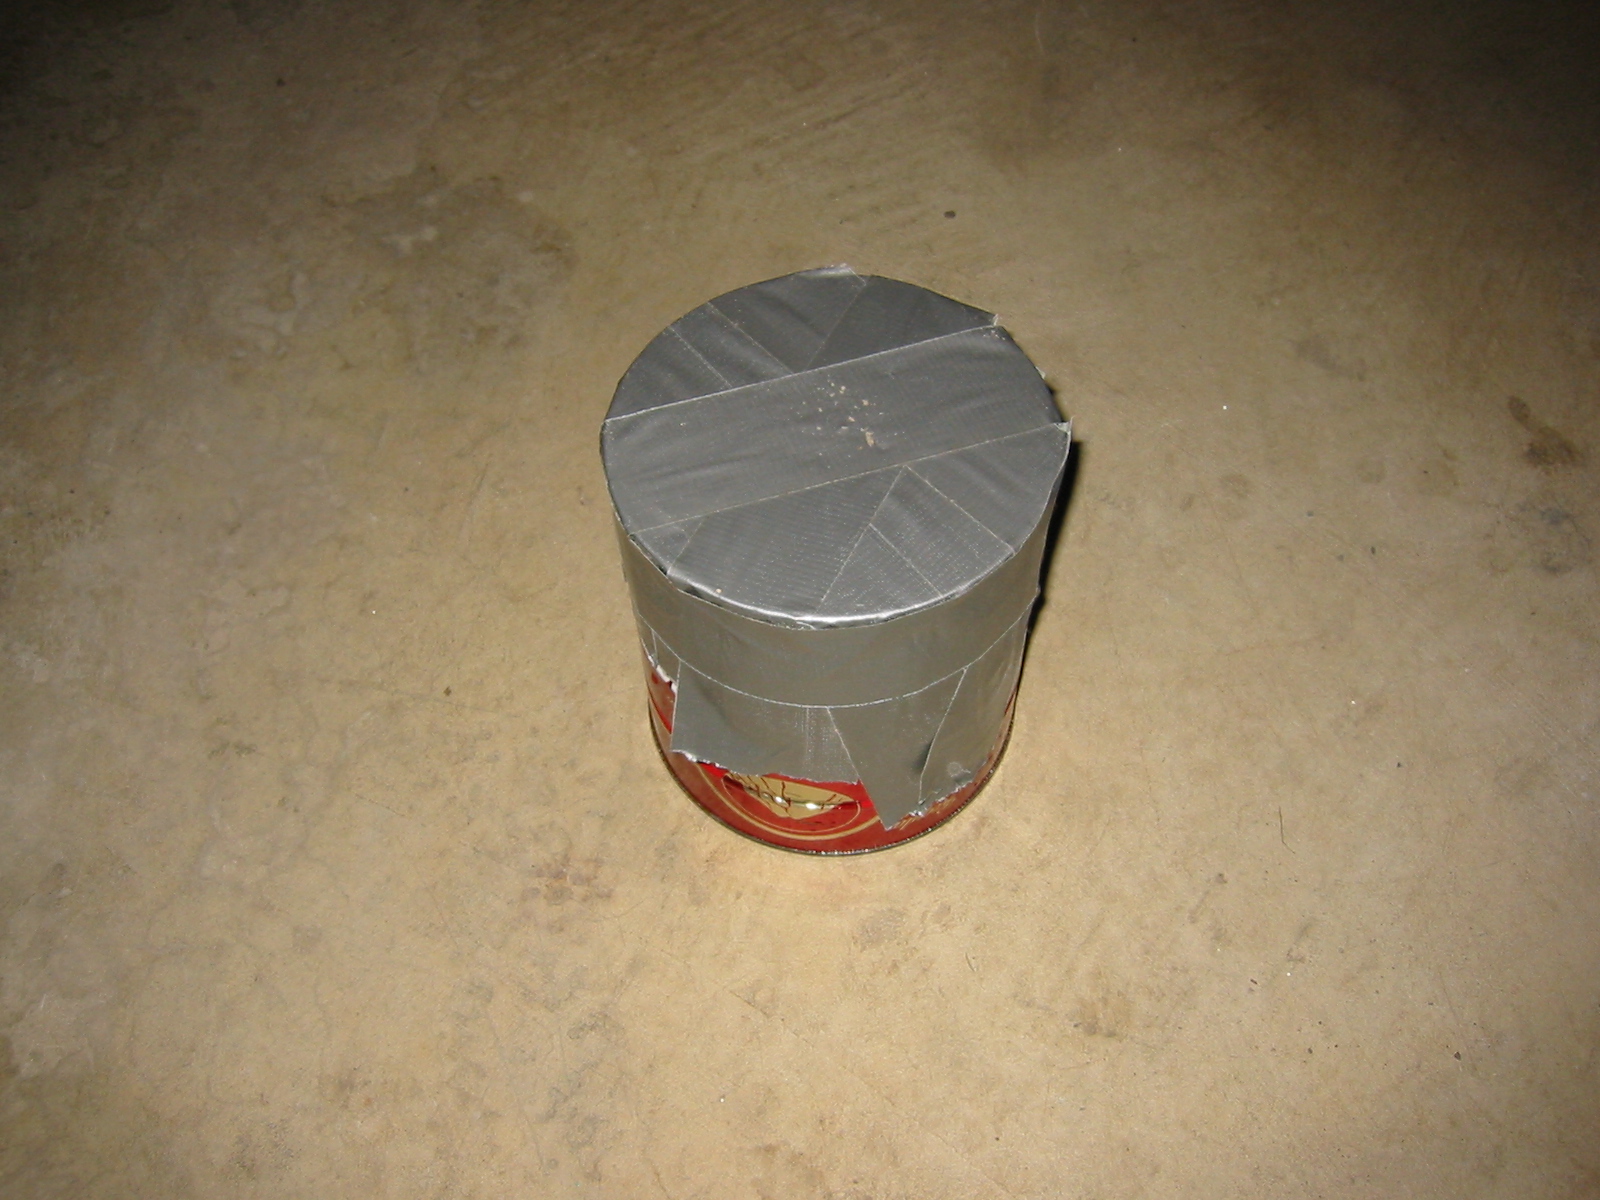
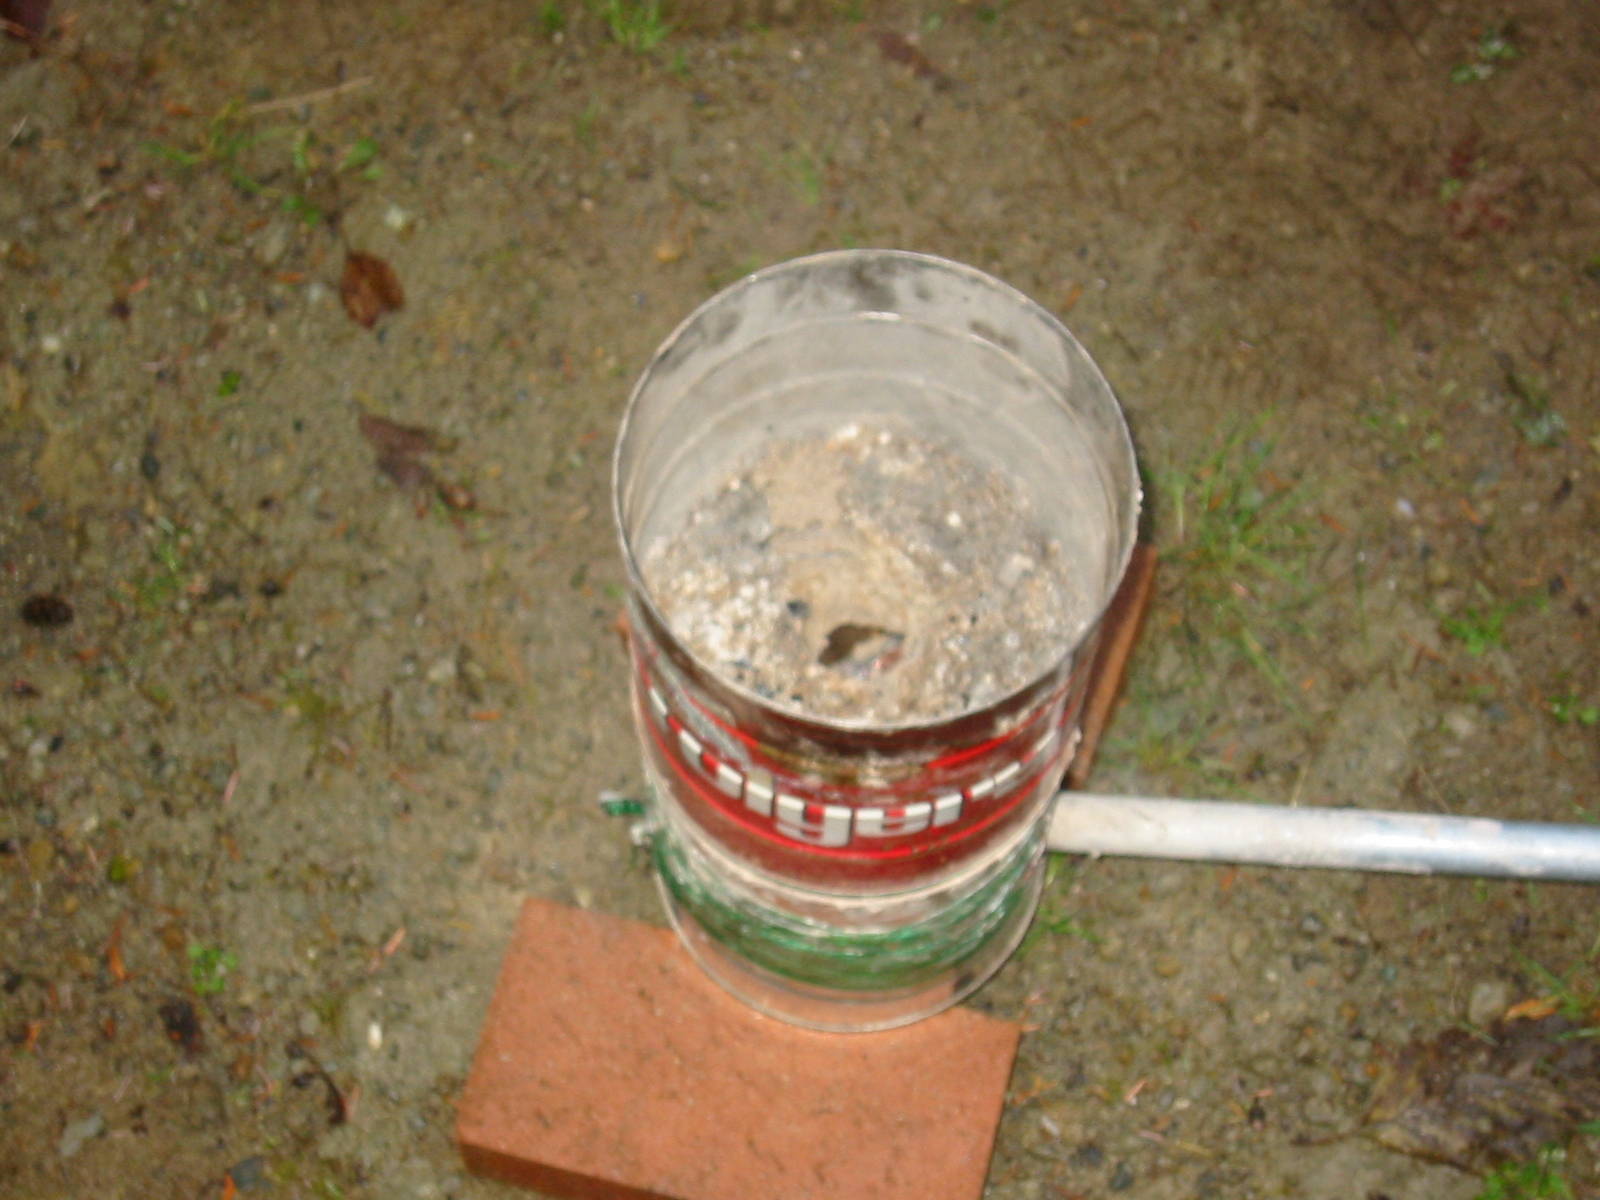
Forming the Lid:
In order to keep the temperature inside the foundry as high as possible,
and increase our overall fuel efficiency, we cast a lid for the foundry
at the same time we cast the walls. The lid should have a vent hole to vent
the exhaust gasses.
To form the lid I removed both ends of a coffee can and then covered one
end with duct-tape. I stuck a section of dowel to the duct-tap in order
to form the vent hole.
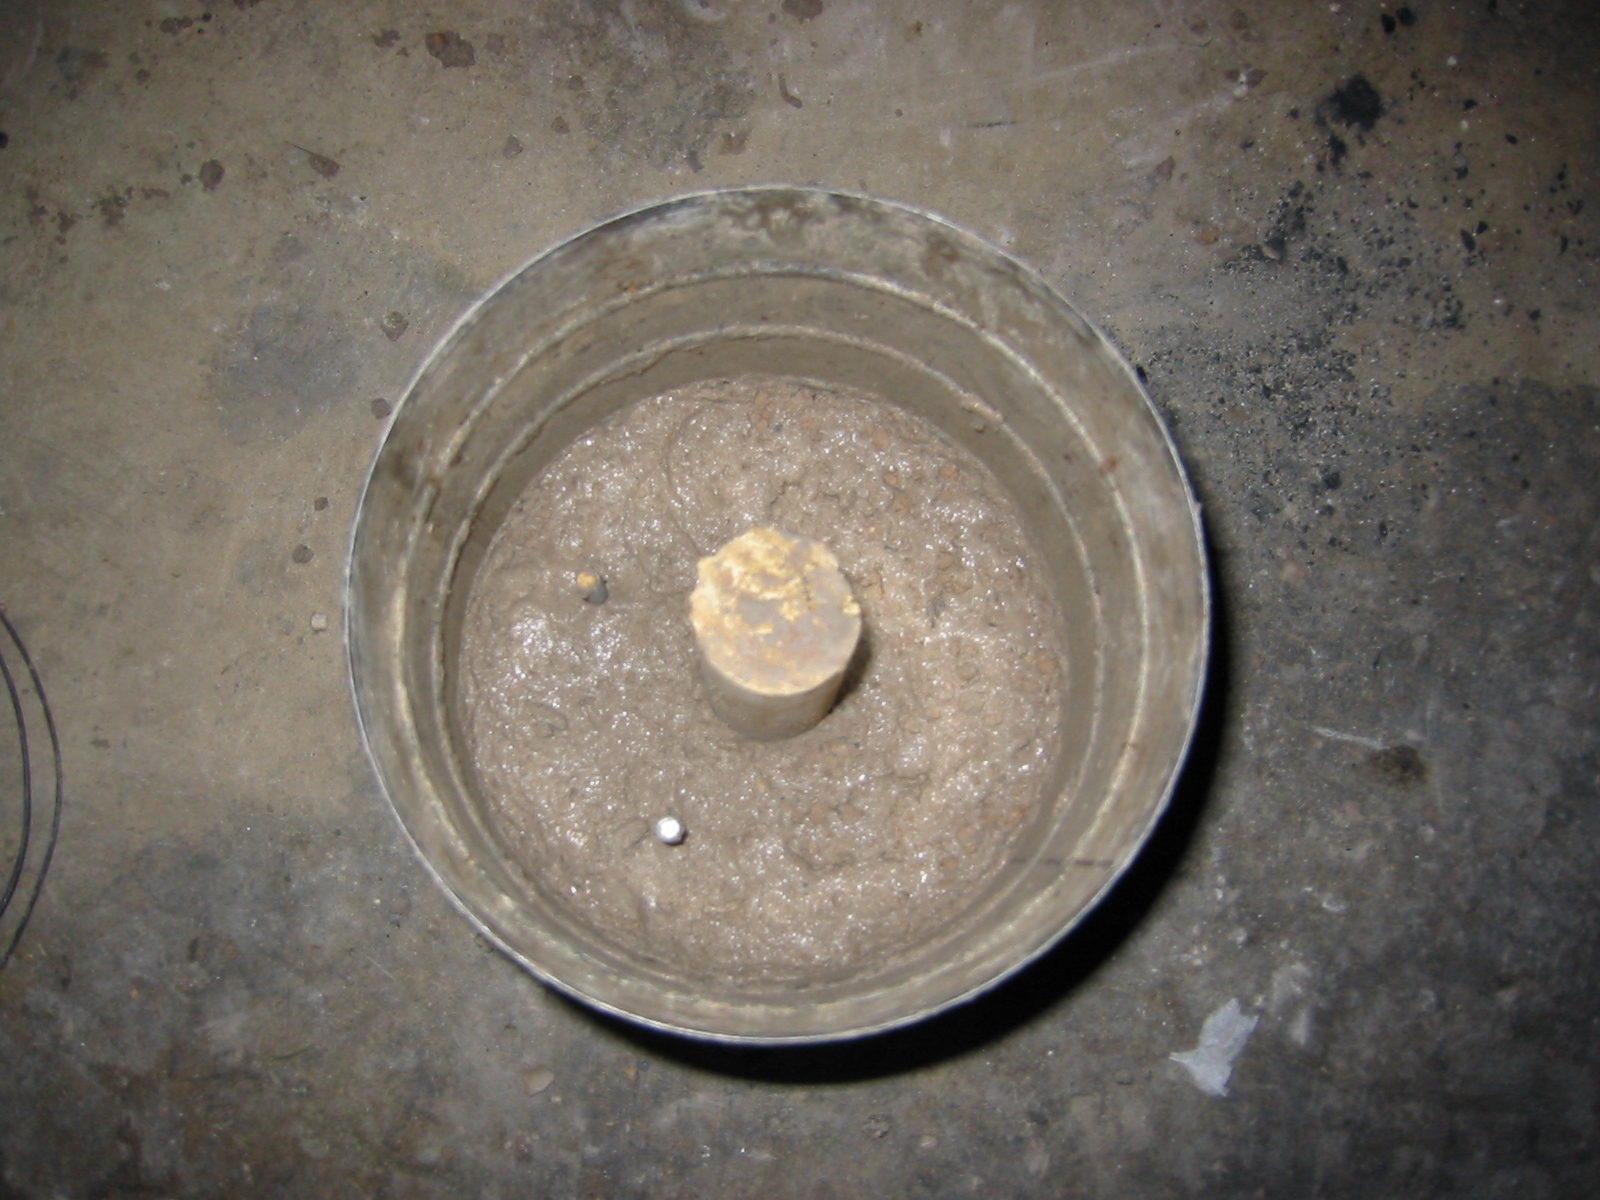
Several centimetres of the same refractory slurry used in casting the walls
were packed, and levelled, in the lid. Once the slurry dried the tape was
removed that the foundry fired. Firing the foundry burns out the wooden
dowel.
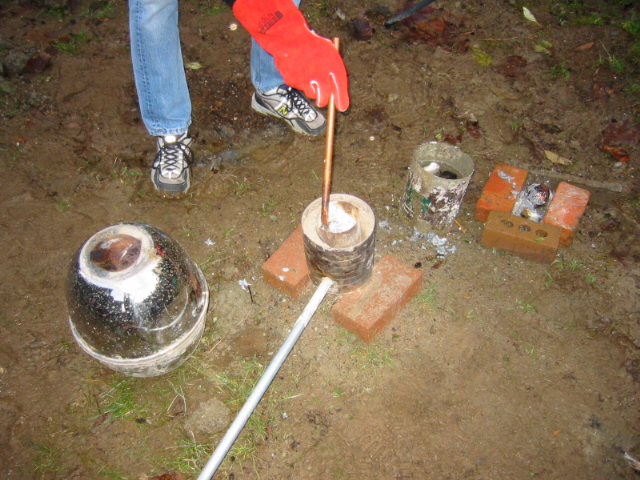
Using the Lid:
The way the lid is cast it can either have the refractory section directly on top
of the foundry base (pictured far left) or with the refractory held above the base by
uninsulated walls (pictured near left).
In the arrangement where the lid is directly over the base we the walls of the
coffee can provide a space where we can place the crucible while not directly
melting. This keeps things hot and dry and speeds the times possible between
castings.
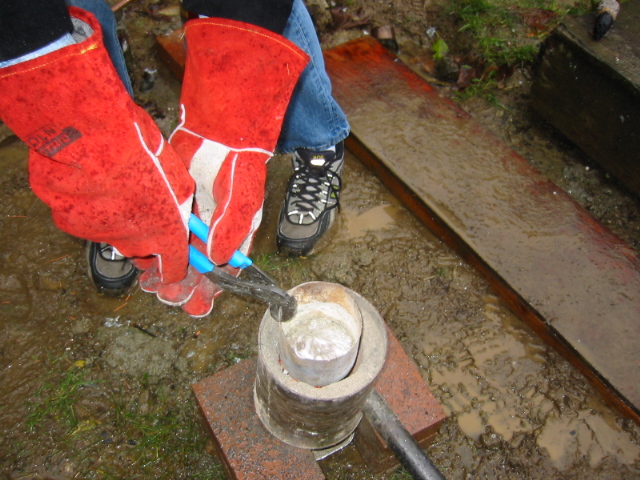
Skimming the Dross
As the metal was melting we poked it periodicly with a long piece of wire. The chunks
of metal go soft on the inside first like chocolate on a hot day. So to speed up the
melt we would push the plastic metal down into the hotter part of the crucible.
So what is with the flashlight? Well we by the time this melt got going it had
gotten dark. I really recommend not trying to pour at night. It just makes everything
more dangerious then it already is. The camera flash illuminated the sceene but absent
that the only thing we could see was the glow of the coals and whatever was in the pool
of light lit by the flashlight.
I use a section of pipe to skim the top of the molten metal in order
to skim the dross. Pennies tend to build up a lot of dross and I would recommend
you buy some zinc from a dealer if you plan on doing a lot of casting.
By "squeezing" the dross skimmed from the top of the molten metal against the side
of the crucible you are able to drastically reduce the amount of metal lost during
skimming.
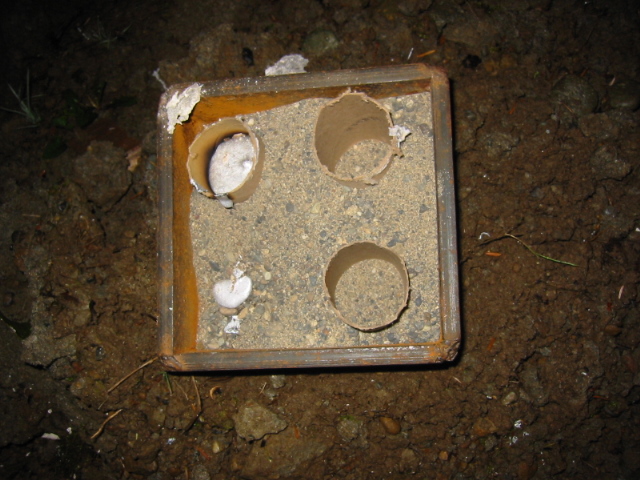
Pouring Ingots
Sand Ingots
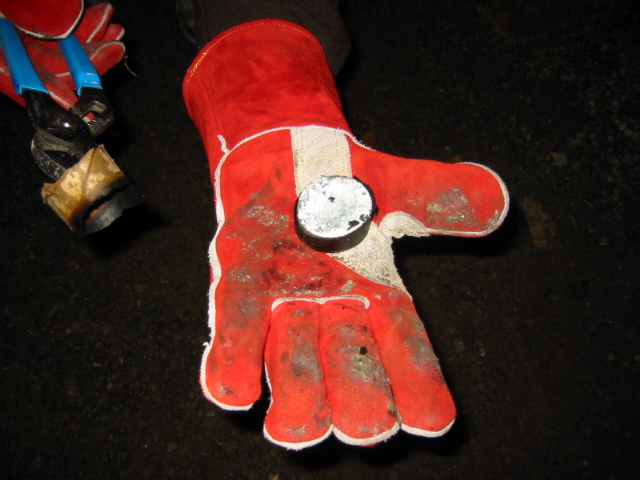
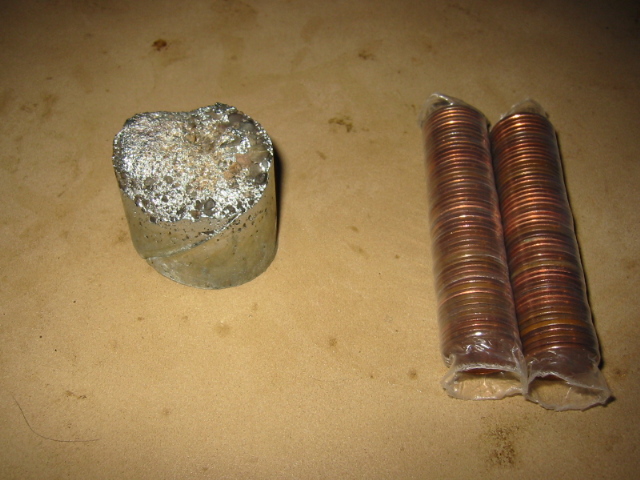
For my first pour I wanted to melt some Zinc and cast an ingot. I wanted to
use Zinc as it has a relatively low melting point and is easily obtained in
small quantities by melting American Pennies. My first molds were just sections
or toilet paper rolls pushed down into sand.
Before and After
As far as I could judge the Ingot shown left was made of close
to 100 pennies.
Poured Ingot Mold
I was surprised to find out that I could get the metals too hot. This is especially true for
zinc alloys which puts out some nasty vapors when melted, and really starts pouring them out
if you get it too hot. I found the best pours were happening if we poured off the
lowest viscosity material in the cruible and then remelted the rest without trying
to fource anything that would easily pour into the molds.
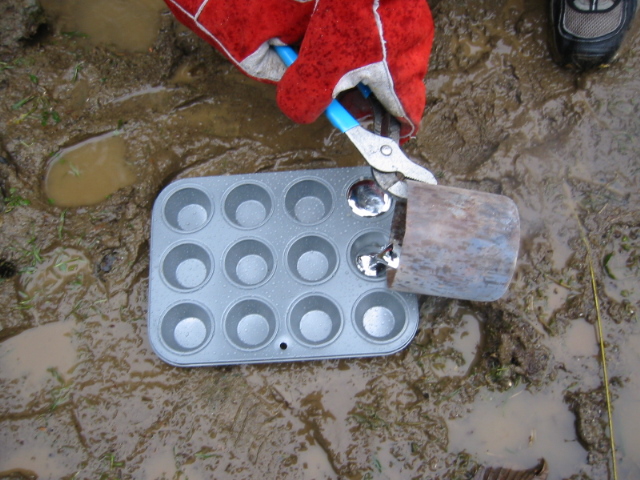
While the sand molds are an easy first mold they tended to get a lot of
crud mixed into the ingots as you can plainly see in the picture. For later
pours I bought a miniature muffin tin at the grocery store. It was simple and
worked well and I highly recommend it. If you do use a muffin tin for an ingot
mold just make sure that you get one without any Teflon or other stick resistant
coating as it burns off and stinks like hell.
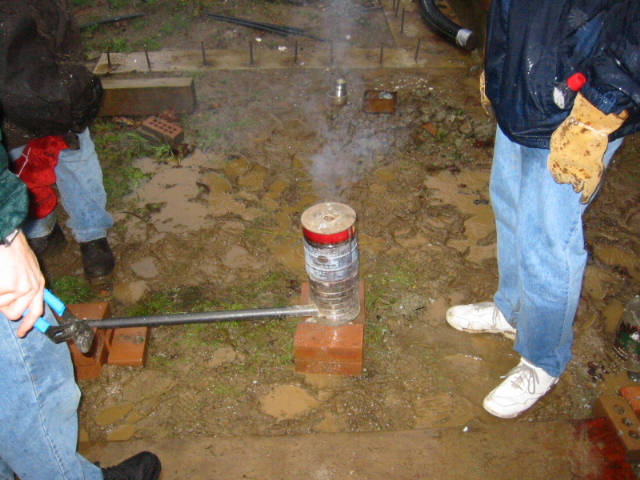
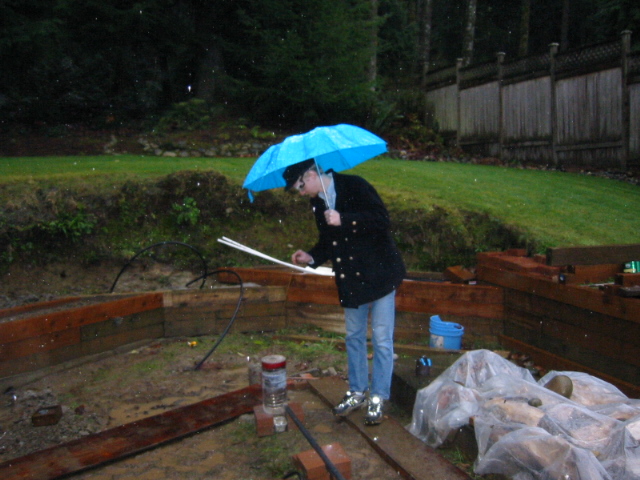
A Wet Norwegian
No, no, no... a wet Norwegian is not some weird new type of pornography if
that is what you are thinking. It is just Konrad checking the melt
with a dross stick we made out of an unfolded coat hanger.
So what's with the umbrella, well that is one of the most important things
I learned on this project. You don't want to do any casting in wet weather.
More to the point you don't want any moisture around either your melting
area or your molds. Not only does it make the melting an pattering harder
but anything wet that comes in contact with molten metal is a potential bomb.
In my limited experience enough steam is immediately generated to splatter
molten metal on anything nearby. Seriously do not try and cast in the rain!