Categories
esp8266

Esp8266 error: “don’t use rtc mem data”

Update: Turns out my problems, while repeatable, were likely to do my libraries being set in a non-homogeneous state. It appears that an auto partially rolled back the SDK version being used, which was weird. A full make clean, and rebuild fixed the problem I was having. Still the reset problem is fairly common with the ESPs and Espressif SDK. This guy summed it up the ESP Reset Problem really well.

So this error was a beast to find – and I saw some others online were having the same problem – so I figured I should post about it someplace Google could find it.

I’m using the espressif development tools, which are getting better, but remain only sparsely documented. My problem started after a change in my code started the ESP crashing on power up. The crash presented, or so I thought, like a flash write error contaminating the boot loader.

I was getting this error about messing with RTC memory:


r
ets Jan 8 2013,rst cause:2, boot mode:(3,6)

load 0x40100000, len 29920, room 16
tail 0
chksum 0x07
load 0x3ffe8000, len 924, room 8
tail 4
chksum 0xbf
load 0x3ffe83a0, len 4528, room 4
tail 12
chksum 0xde
csum 0xde
don’t use rtc mem data

Well, it turns out the problem was my starting to use the init_done_callback code when I upgraded SDK versions. I jumped from a 1.x SDK to a 1.4. The init_done_callback code was added into the SDK somewhere in that range. The call works fine, and I had been using it for a while in my code when I ran into problems merging the timer code. It is not in the documentation anywhere yet, but you apparently can’t mess with the os timers within the init_done_callback function.

Since it looks like init_done_callback is how you launch code after all the underlying espressif code has finished I’m thinking this is a bug. For now I’m going to change to launching my timers before setting the callback, and use a flag to wait until espressif init’s done.

Here’s a cut down version of the code triggering the problem:

void ICACHE_FLASH_ATTR user_init(void){
user_gpio_init();
user_uart_init();

// Problem killing the timer is here! I should handle timers outside callback.
system_init_done_cb(init_done_callback);
}

void init_done_callback(void)
{
// Callback launches fine – but its the setting of os_timers that triggers
// the crash / messing with timer memory error.
start_keepalive_timer(KEEPALIVE_INTERVAL_SECS);
}

void ICACHE_FLASH_ATTR start_keepalive_timer(int interval)
{
#ifdef DBG_KEEPALIVE
os_timer_disarm( &dbg_keepalive_timer);
os_timer_setfn( &dbg_keepalive_timer,
(os_timer_func_t *)dbg_keepalive_timerfunc,
NULL);
os_timer_arm(&dbg_keepalive_timer, (1000 * interval), 1);
#endif
}
Categories
BrightLeaf I am going to try Science!

Fun with data!

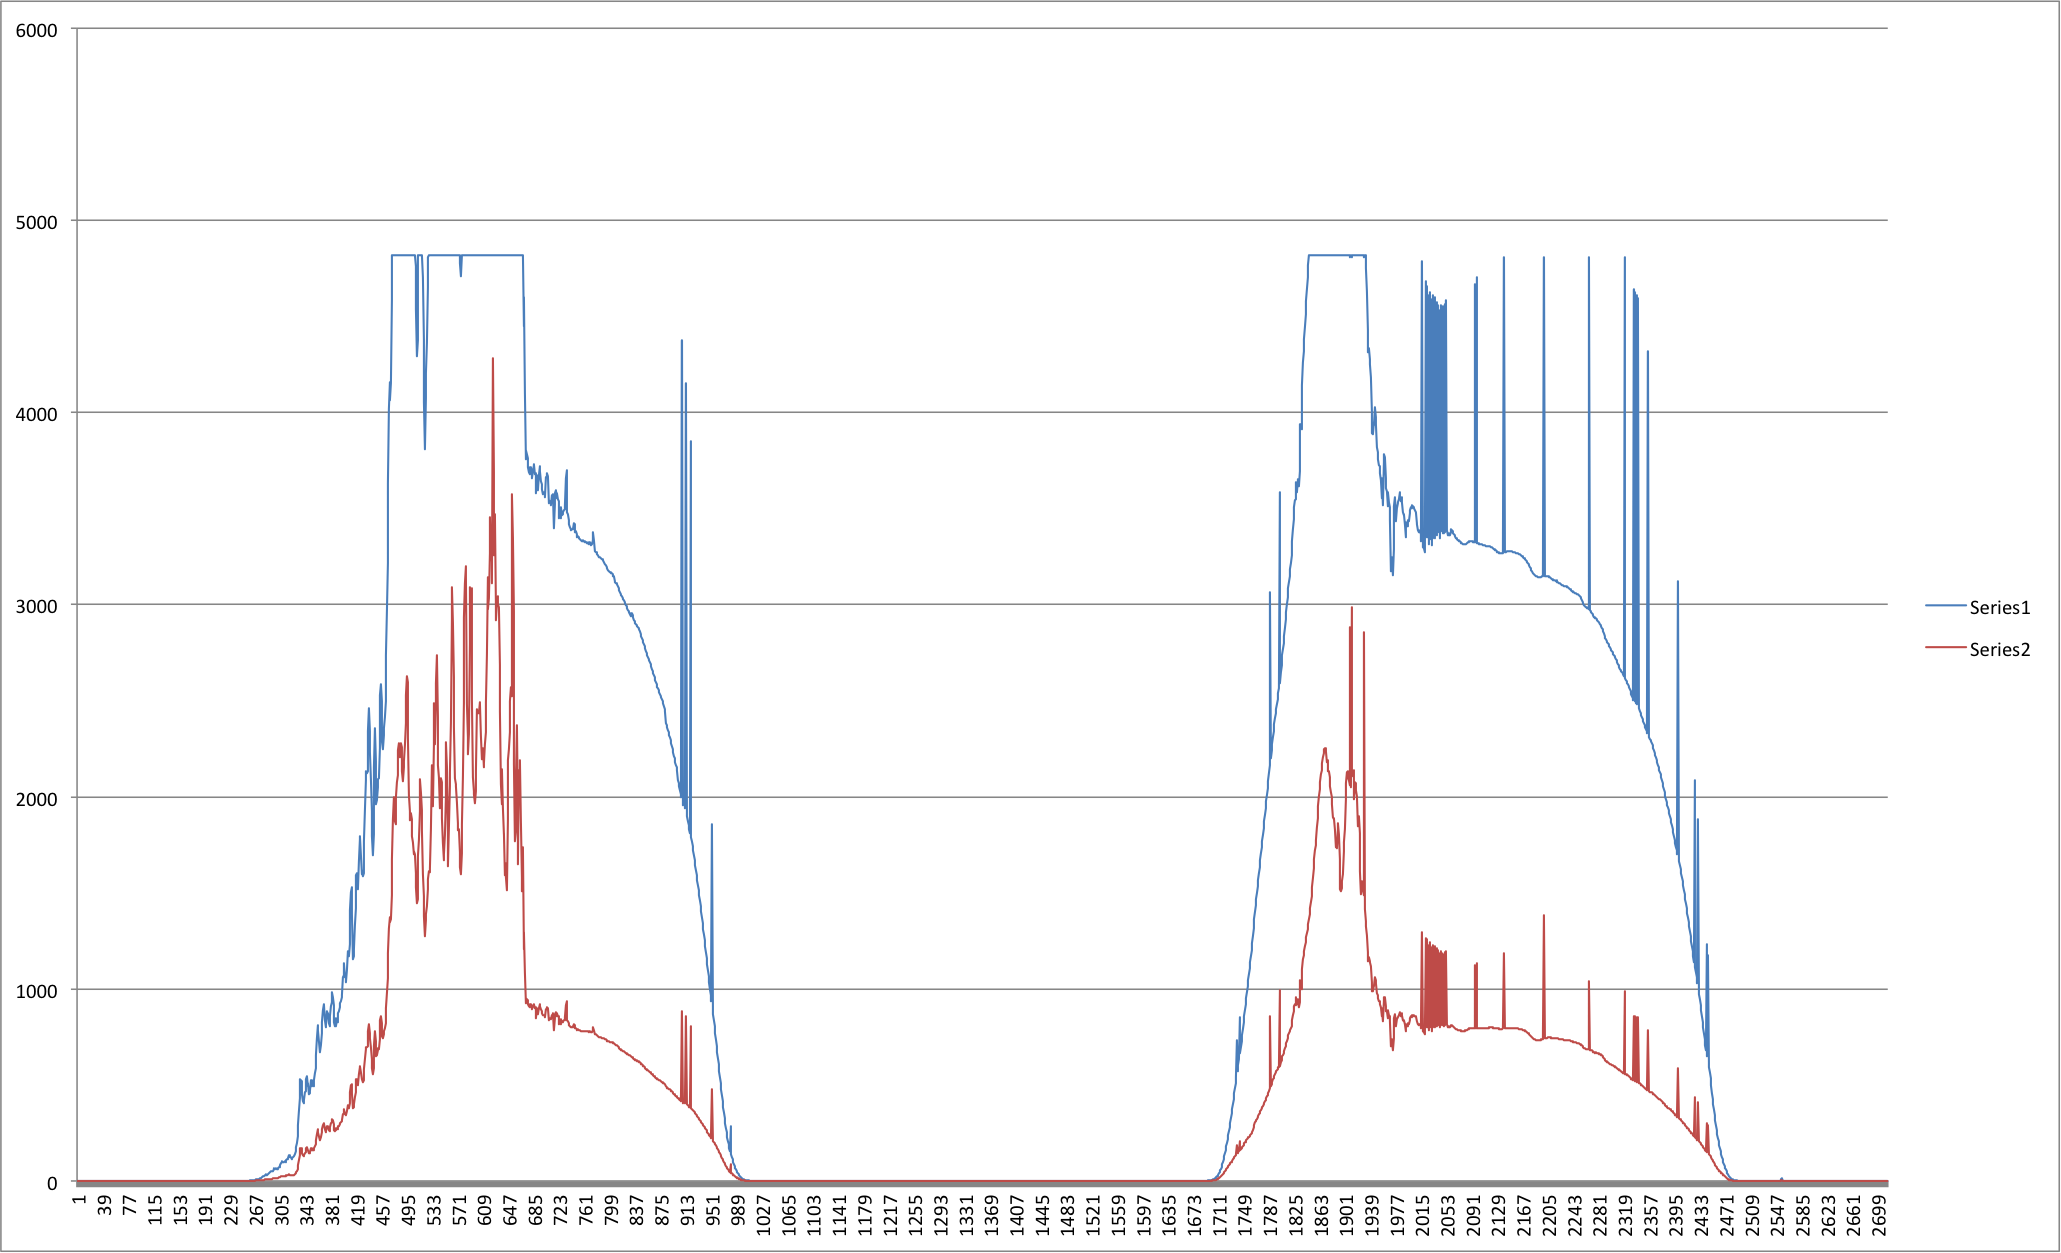
So lately I have been playing with data measuring light levels throughout the day. I am fascinated With just how much my brain and eyes filter and smooth my perception of light, making me unaware of startlingly large changes.

This graph shows data taken from the same light sensor sampling over two days. The red series of data reflects UV light levels, and the blue reflects UV + Visible light levels.

sensor_id85_day2

Two back-to-back days can vary in duration by 40 minutes! Sure sunrise and sunset times between two days only change slightly, but cloud cover and weather has a massive impact on the light profile of the day. During darkening leading up to sunset the brightness can halve every seven-minute for two hours without it being noticeable!

Some data is just fun to play with.

Categories
esp8266 Projects

Pythagorean Plotter, 4-day Hacking Session

When some of my friends come to town to visit we go see the sites, which is fun. Others though come to town and we spend the entire visit on a hacking session broken up with beer drinking and bad movies. My friend Phil’s is in town for such a visit – and we are doing a 4-day hacking session building a wall plotter. We are calling the plotter Wilbur.

The unique part of our wall plotter is we are building it around industrial suction cups. Our goal is to be able to sneak into a friend’s office, or up to a window, and suction cup the plotter onto the white board or window. The goal is a stealth graffiti system for pranks on friends.

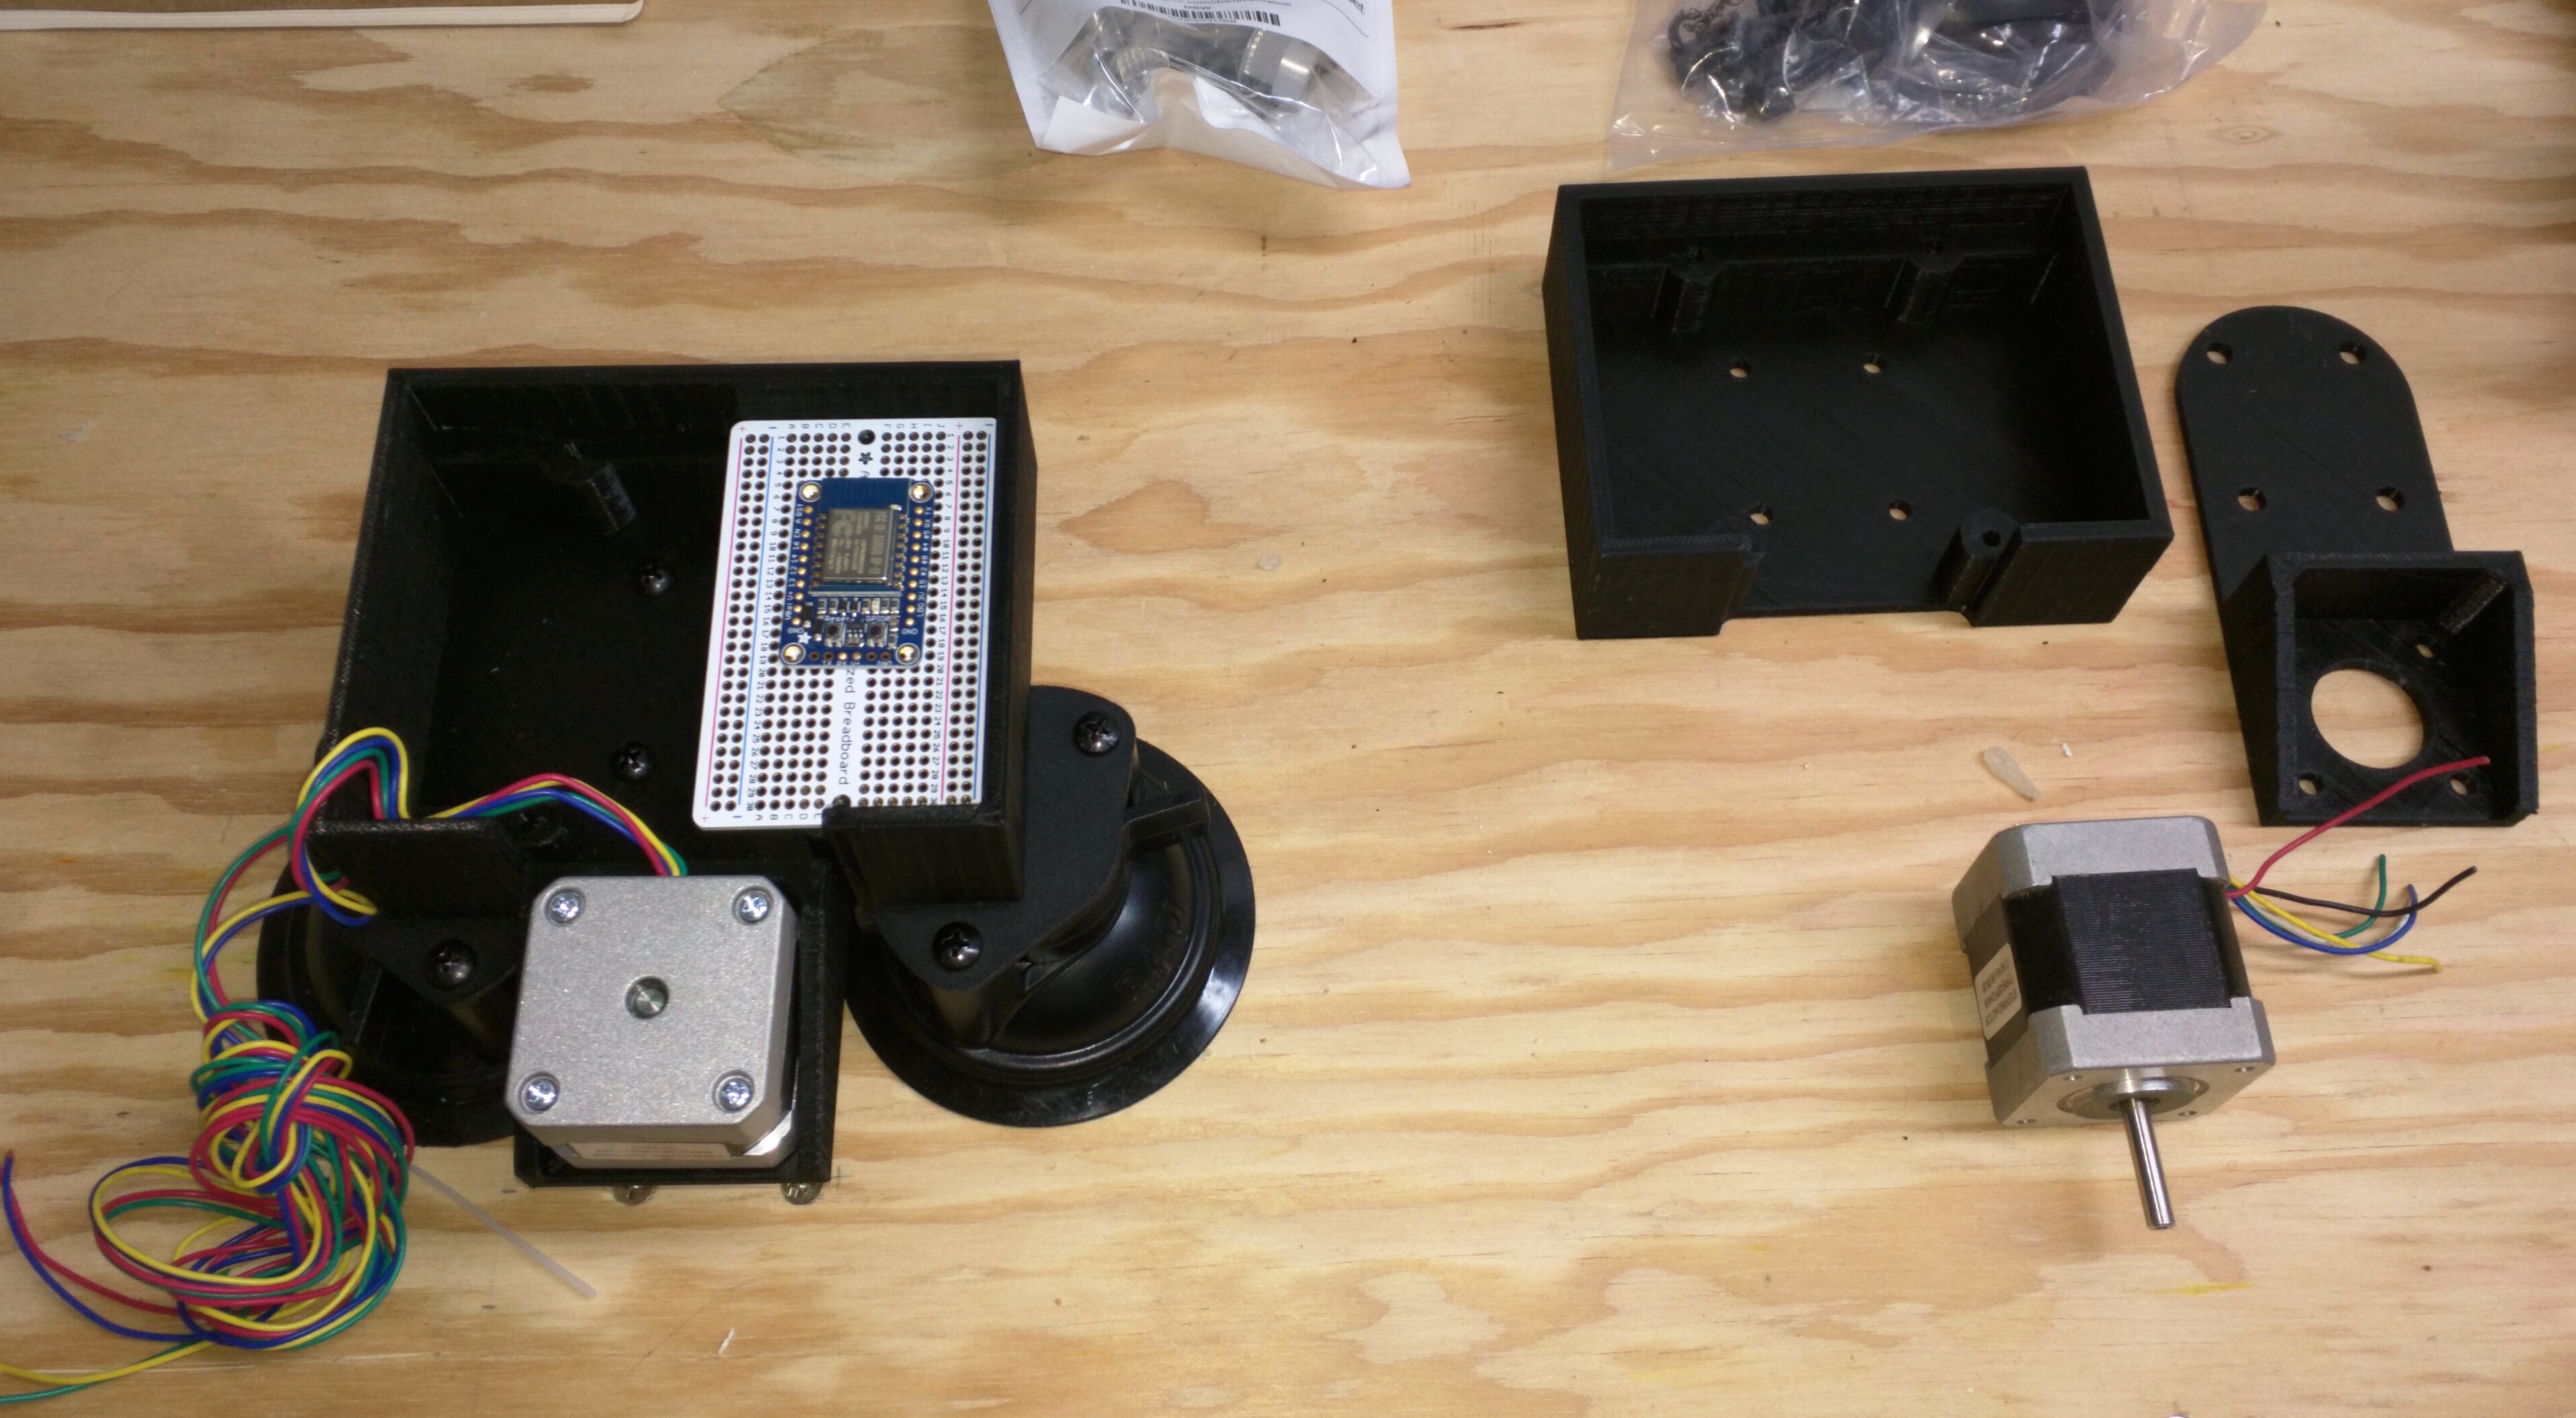
In preparation for Phil hitting town I ordered up some RAM double suction cup mounts, and then CAD modeled up a case coupling the mechanical elements to the stepper motor mounts.

Wilbur_Ploter_Day1_Mechanical_P1

I split the design into two parts so that would bolt together, and to the underlying RAM mount. The electronics are fairly simple, and esp8266 to handle WiFi and computing, and another stepper driver board for handing the motor. Since we are using a counterweighted design all we need to be able to do is control the direction and stepping of each motor, as well as provide pen up / down commands. From those simple pieces we should be able to build a system with very complex output.

The required action shot. Phil soldering. Which reminds me – he’s actually coding while I write this, so I better get back to it.

Phil_Soldering_FallVisit_Day1

Categories
Projects Prototyping Smart Matter

Finishing the extruder mechanical assembly…

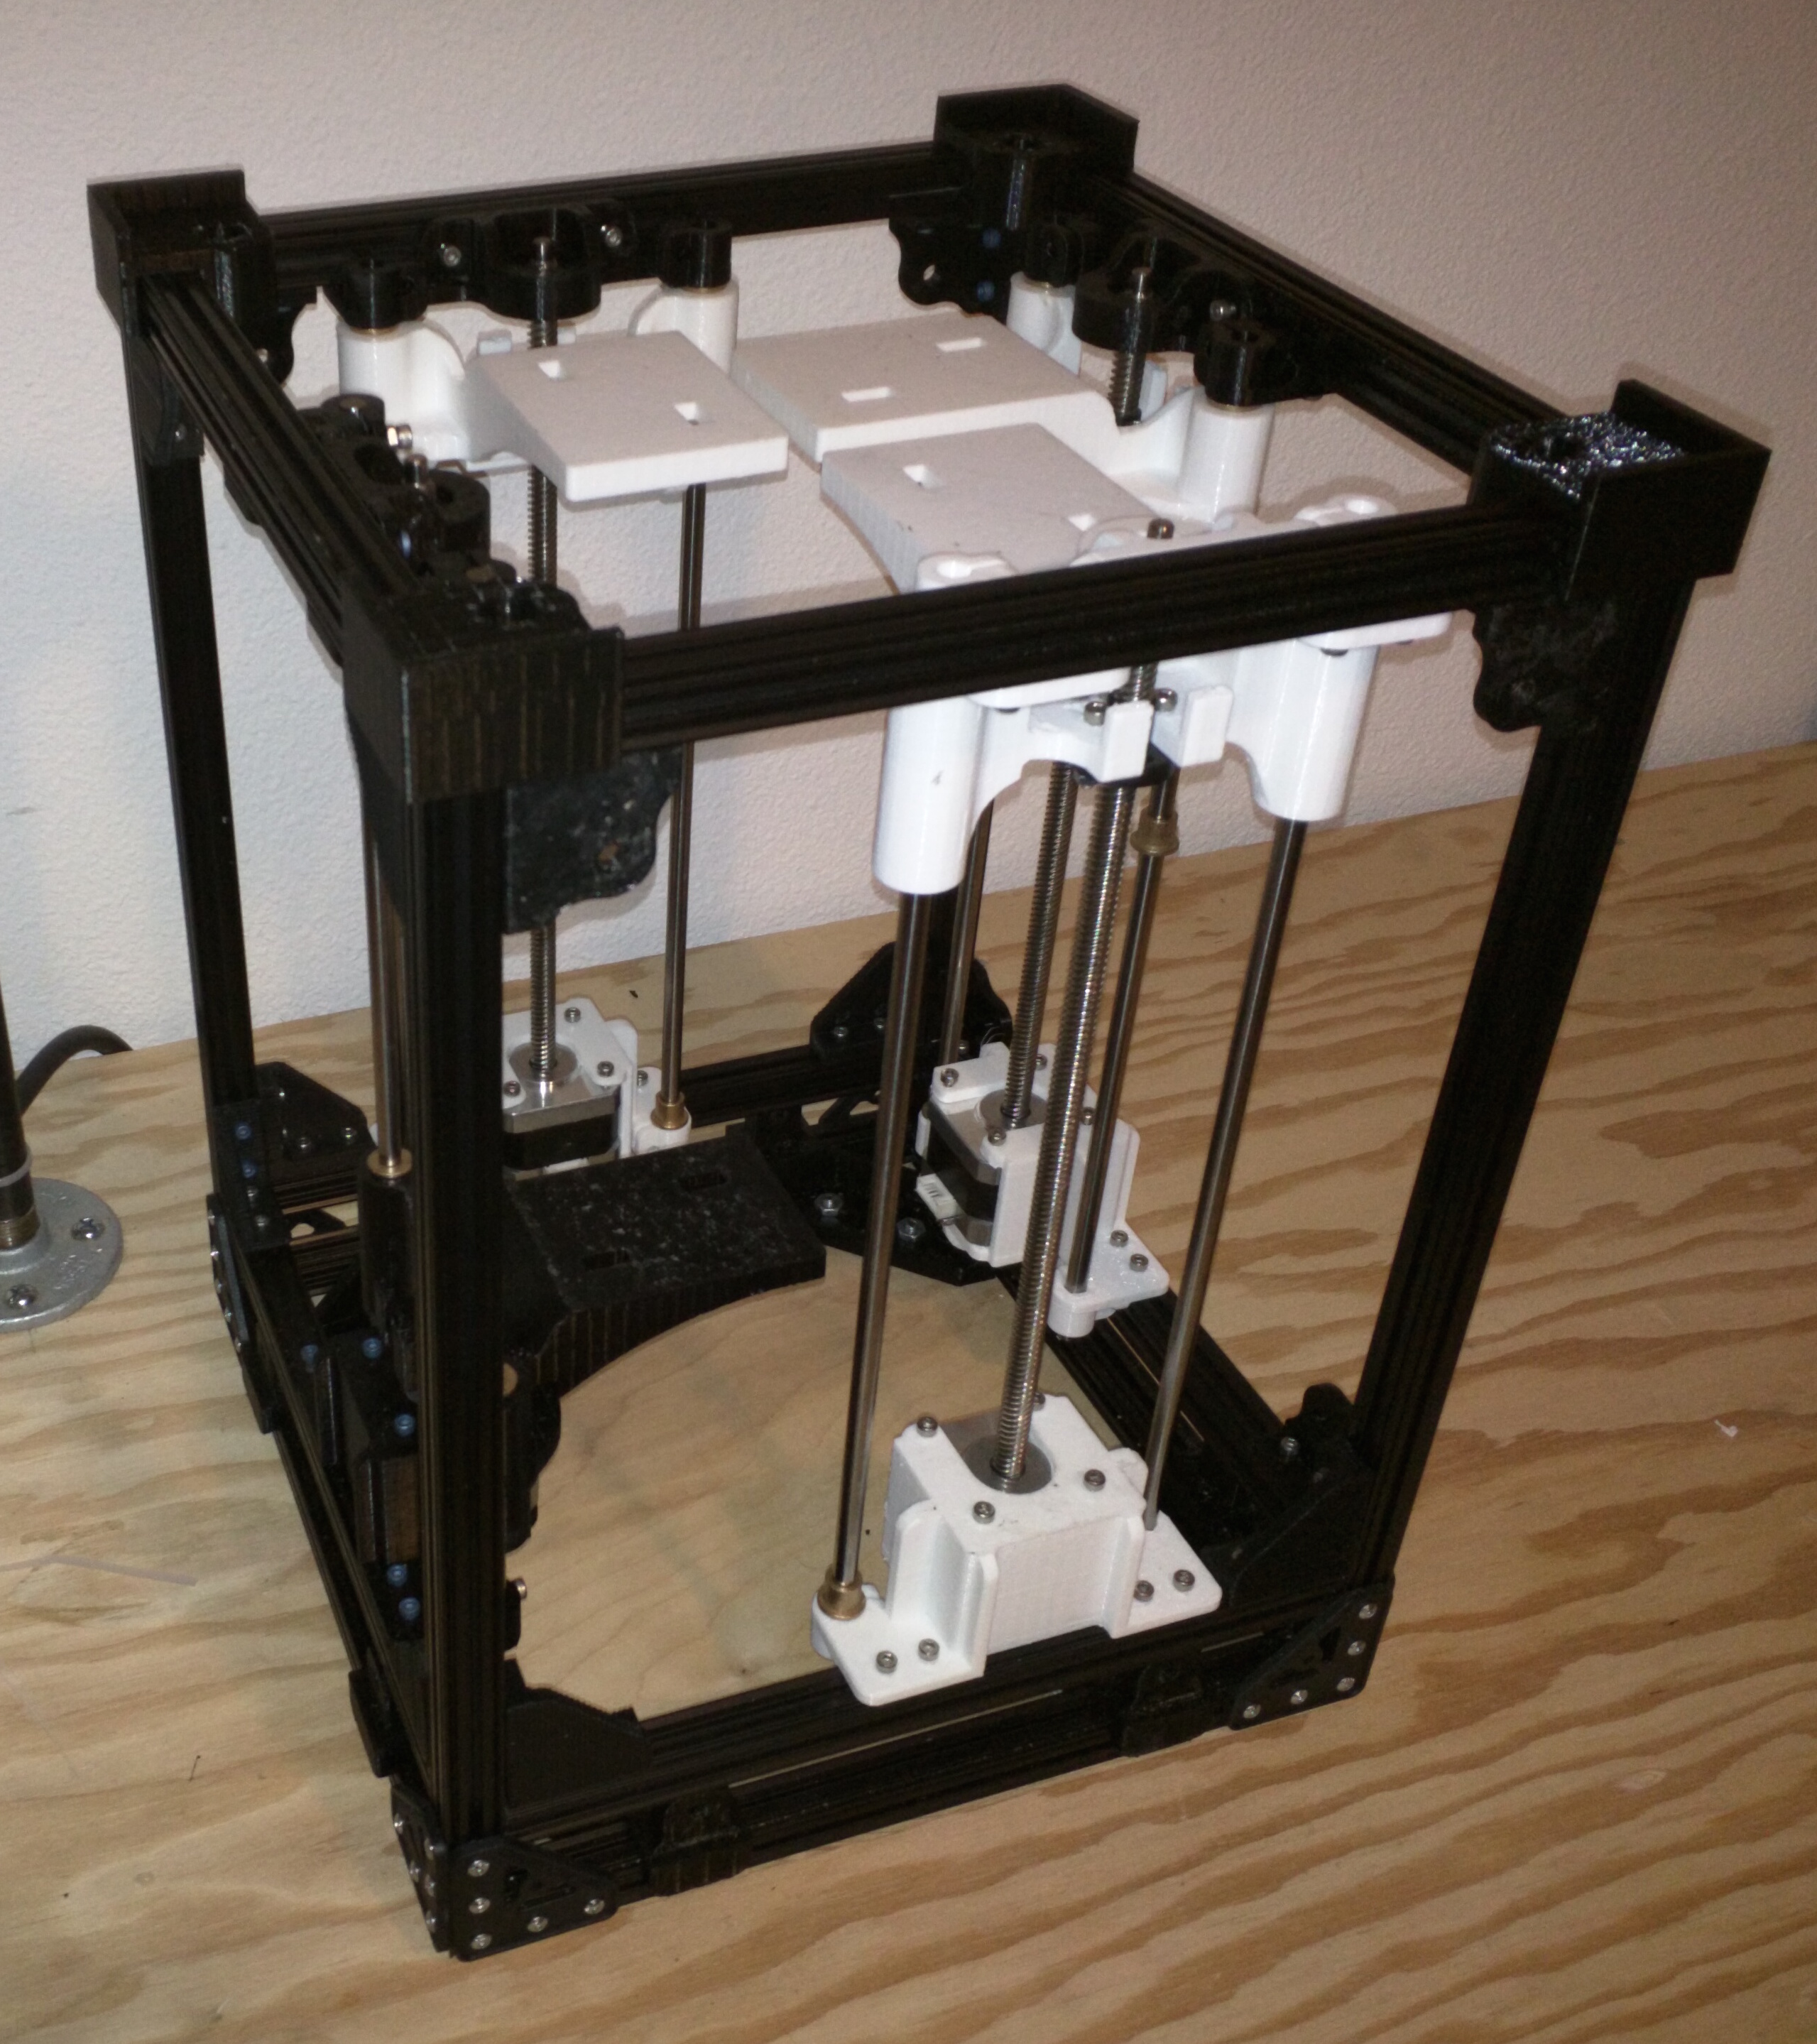
I love long weekends. The rest of the parts I ordered finally showed up Friday, and I was able to finish assembly of the main extruder body. Well “finish” is a bit of a stretch. I’m going to tear it down to machine some of the metal parts, and then re-assemble it – but I’m happy with the design expect to be able to start installing the electronics.

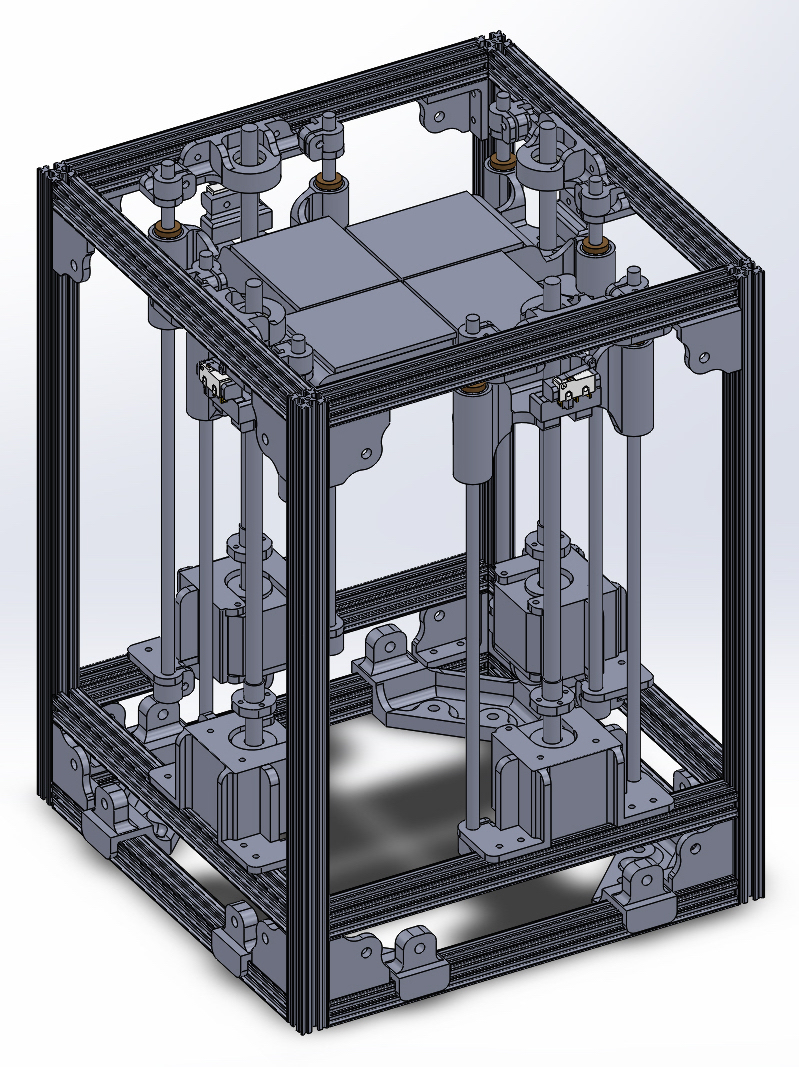
Its nice to see things finally shaped up the way I designed them in SolidWorks.

SmallBodelTableAssembly

IMG_20150905_235601

Its weird, you can make and test incredibly complicated designs in CAD, and these days 3D printers even let you hold versions of the parts as you design them, but most times it is not until I do the physical assembly of the first prototypes that I really feel a sense of accomplishment. There is feeling of transformation from virtual to the real that takes place somewhere during assembly, and it is a transformation that I have been unable to satisfactorily quantify or capture.

As an HCI researcher that elusiveness is a problem I have been chewing on, trying to figure out how to attack for a while now. We are about to see an explosion of virtual and augmented reality technologies release for public consumption – and it seems like understanding what drives that magic transformation will be critical. It is however, not the problem I am working on currently – so back to work.

Categories
Shop Woodworking

Hack for using a cheap vise…

A few years ago I got so frustrated picking things up all night, I made one of the most useful tools in my shop. I was using it last night and realized it might be a trick worth passing along.

The problem is that cheaper vises “ratchet” when trying to hold a work piece that does not span the run of the jaws. So when the sides of the vise leave parallel, force gets applied unevenly to the work piece, which means the vise does a horrible job of gripping the work piece.

The solution I used since I was a kid was fairly simple – just put a scrap piece of the same width as the work piece on the other side of the vise. Its fast and work works, but it is generally a pain since you keep one hand one the work piece when loading and unloading the vise, and use the other to work the vise, which means the spacer usually falls through the vise to the floor. When you are cutting a lot of pieces, especially small ones, this means you keep having to pick things up off the floor.

vise_ratchet_stop2

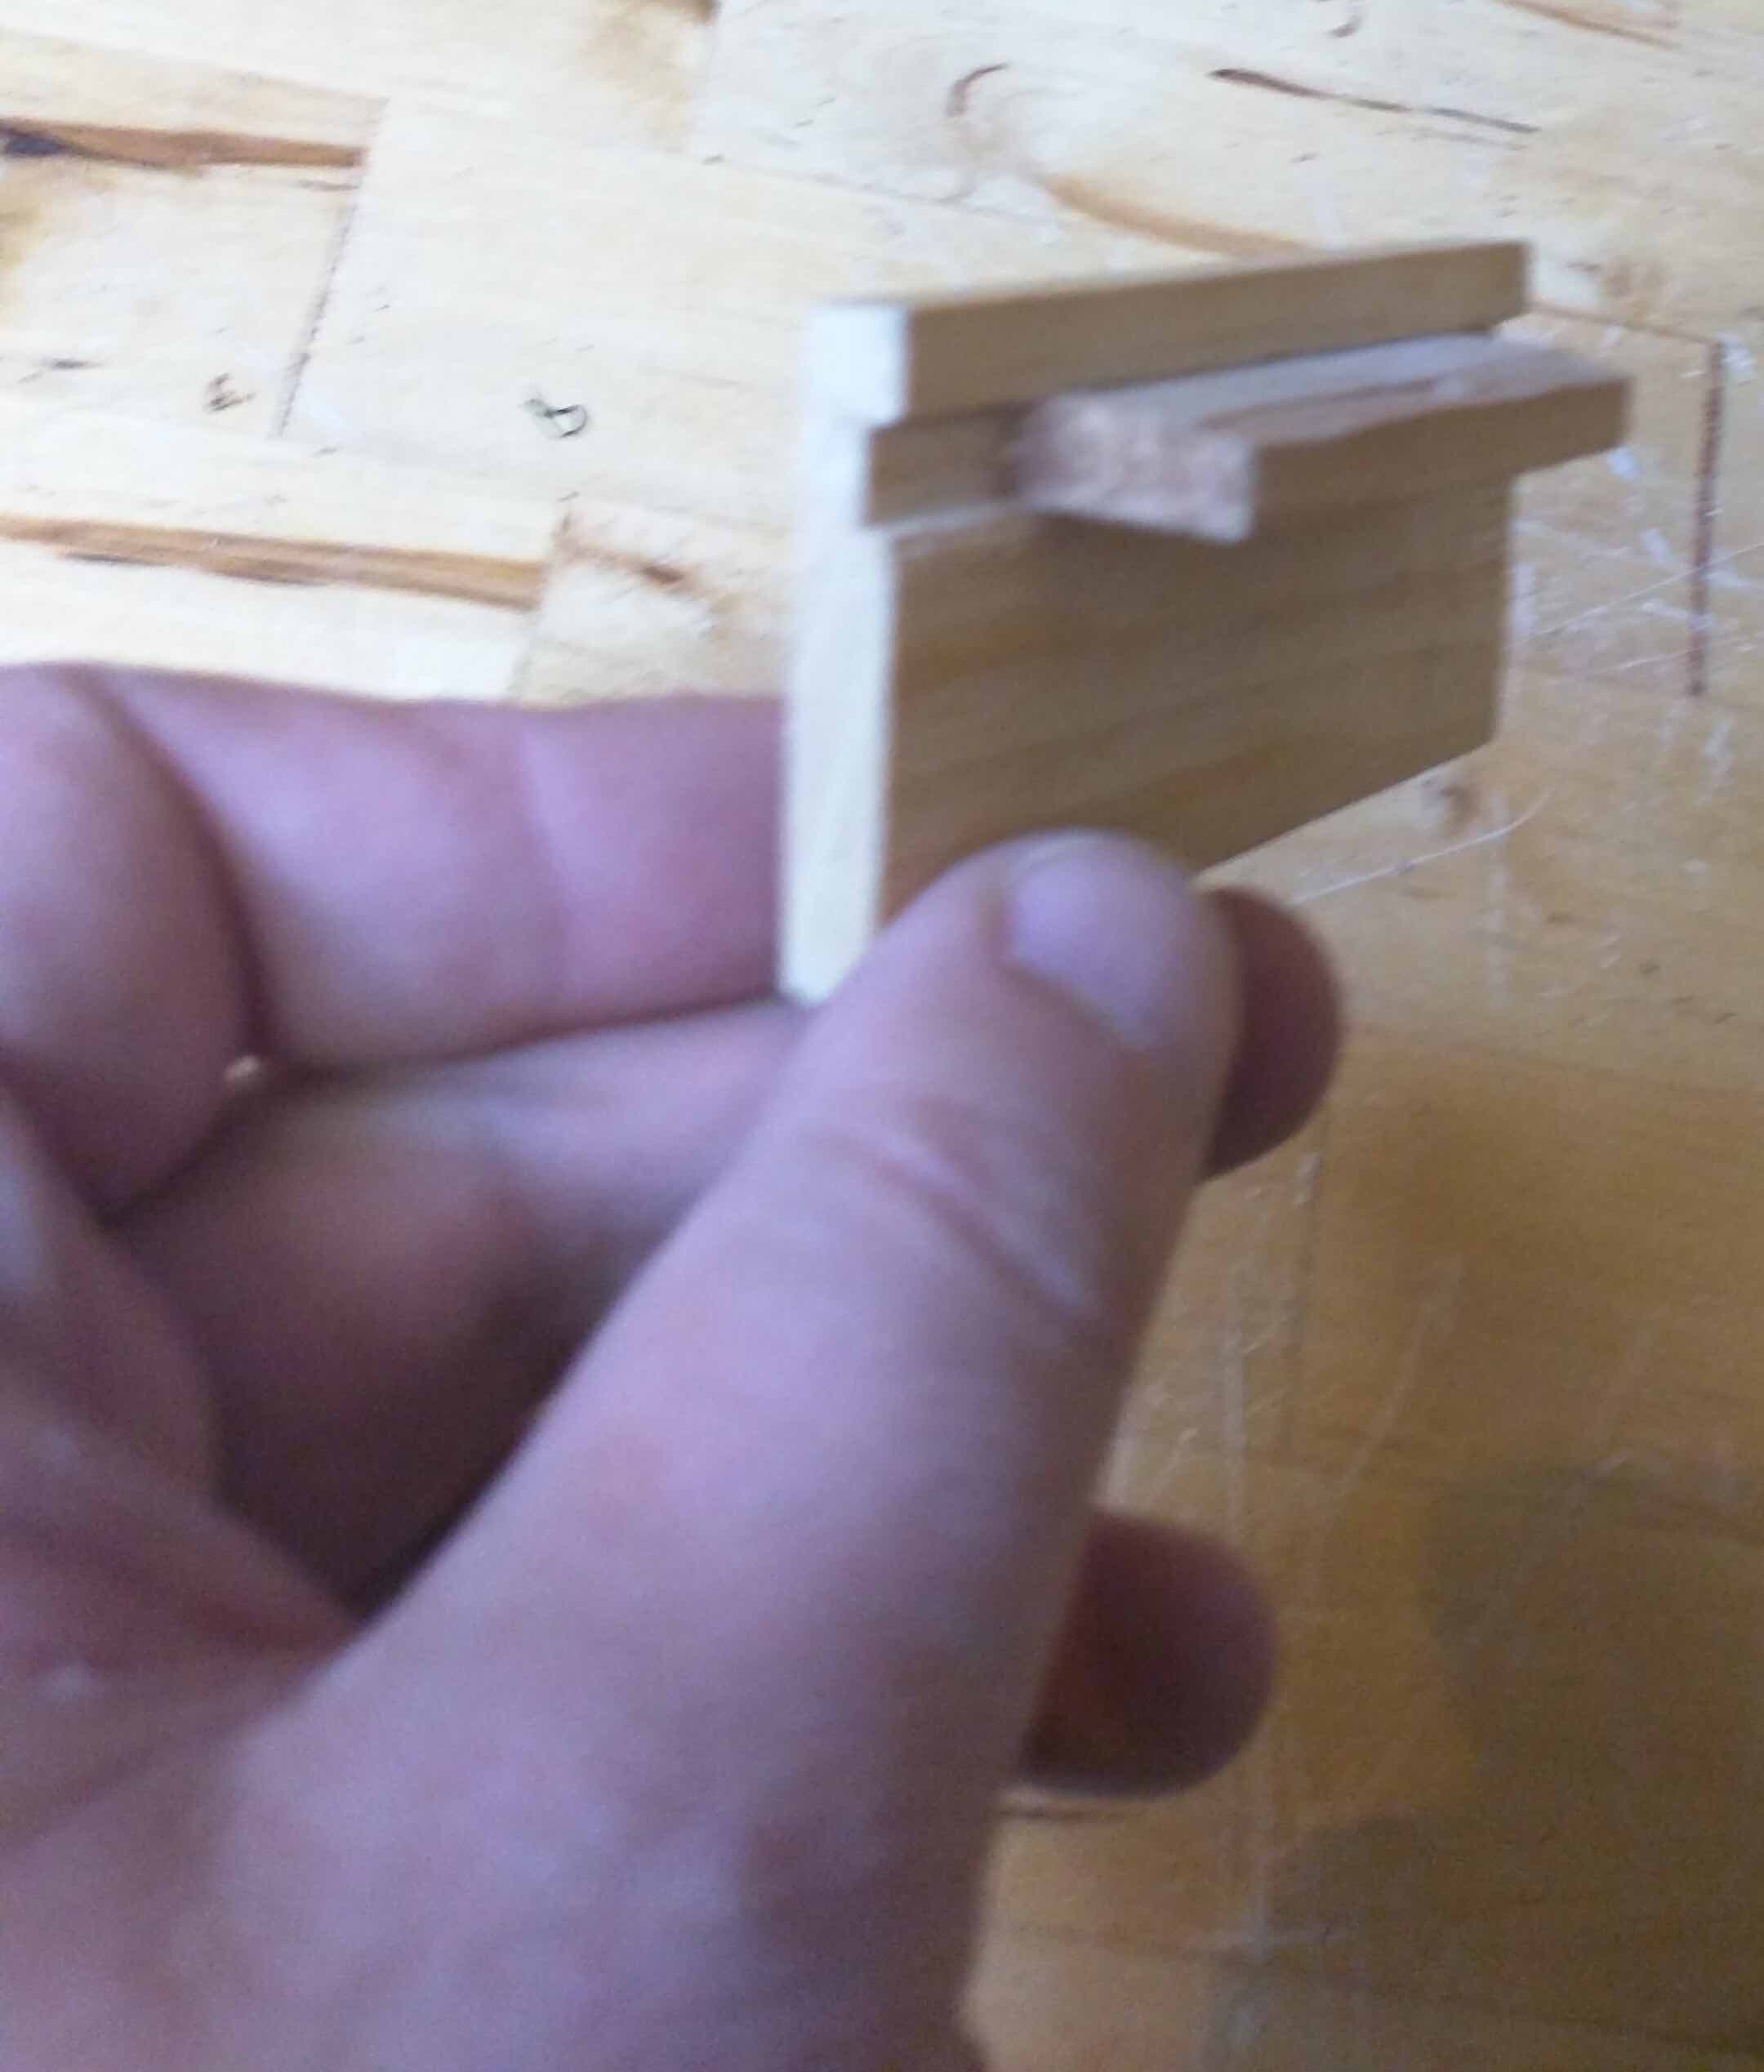
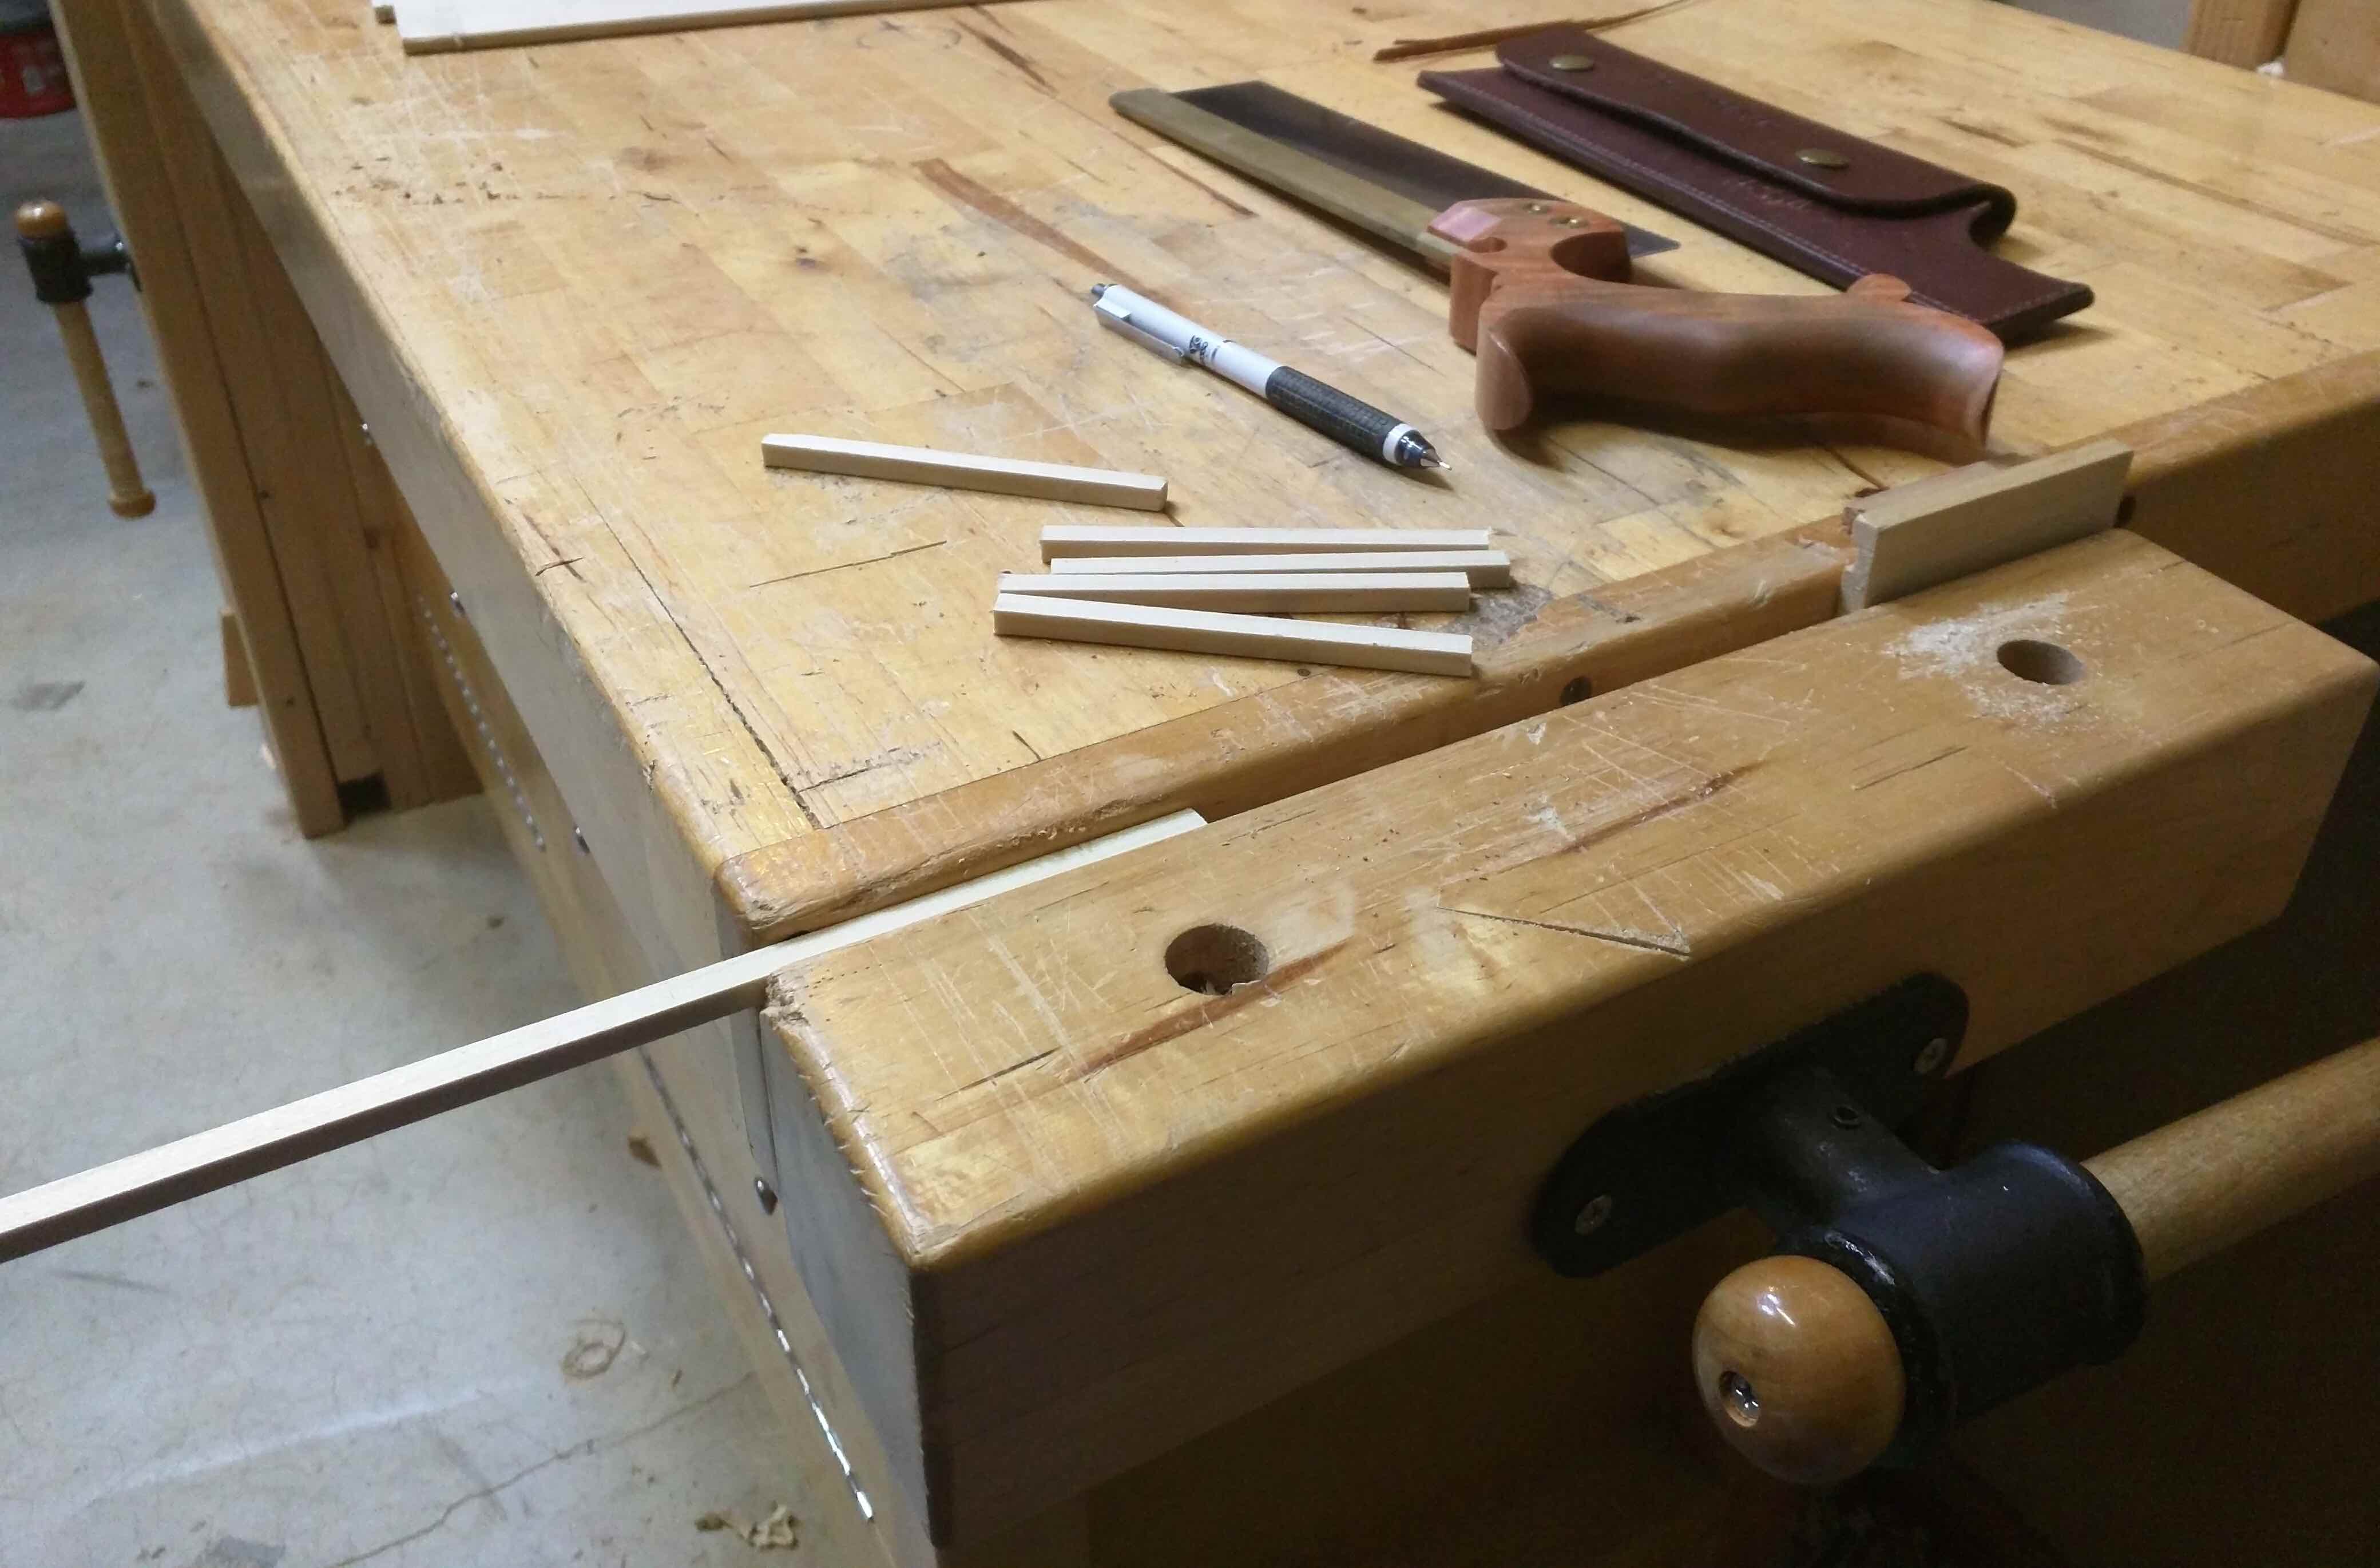
After an evening of repeatedly picking the spacer up off the floor, I routed a small channel in a piece of scrap and glued another piece onto it to act as a lip. This prevents the spacer from falling through the jaws of the vise when loading and unloading the work piece. I did it without thinking as a quick hack, and inadvertently created a tool I use all the time. You only need to make one for each width you commonly use.

vise_ratchet_stop1

This trick makes tasks like cutting a bunch of pins massively faster.

Categories
Quotes

How to build a boat….

I hadn’t seen this quote before and it resonated with me:

“When you want to build a ship, do not begin by gathering wood, cutting boards, and distributing work, but rather awaken within men the desire for the vast and endless sea.”
Antoine de Saint Exupéry

Categories
Projects Prototyping Smart Matter

“The Turn”, my favorite part of prototyping

One of my favorite moments in bringing an idea to life is when the assembly bench is loaded with parts, and you are about to start assembly of everything for the first time. I never thought of it in these terms before – but it is actually like “The Turn” in a magic trick. You are, as you assembly the various bits, taking a bunch of ordinary things and transforming them into something extraordinary.

Christopher Priest explains the parts of a magic trick in The Prestige:

Every great magic trick consists of three parts or acts. The first part is called “The Pledge”. The magician shows you something ordinary: a deck of cards, a bird or a man. He shows you this object. Perhaps he asks you to inspect it to see if it is indeed real, unaltered, normal. But of course… it probably isn’t. The second act is called “The Turn”. The magician takes the ordinary something and makes it do something extraordinary. Now you’re looking for the secret… but you won’t find it, because of course you’re not really looking. You don’t really want to know. You want to be fooled. But you wouldn’t clap yet. Because making something disappear isn’t enough; you have to bring it back. That’s why every magic trick has a third act, the hardest part, the part we call “The Prestige”.

smart_matter_prototype_Aug31st2015

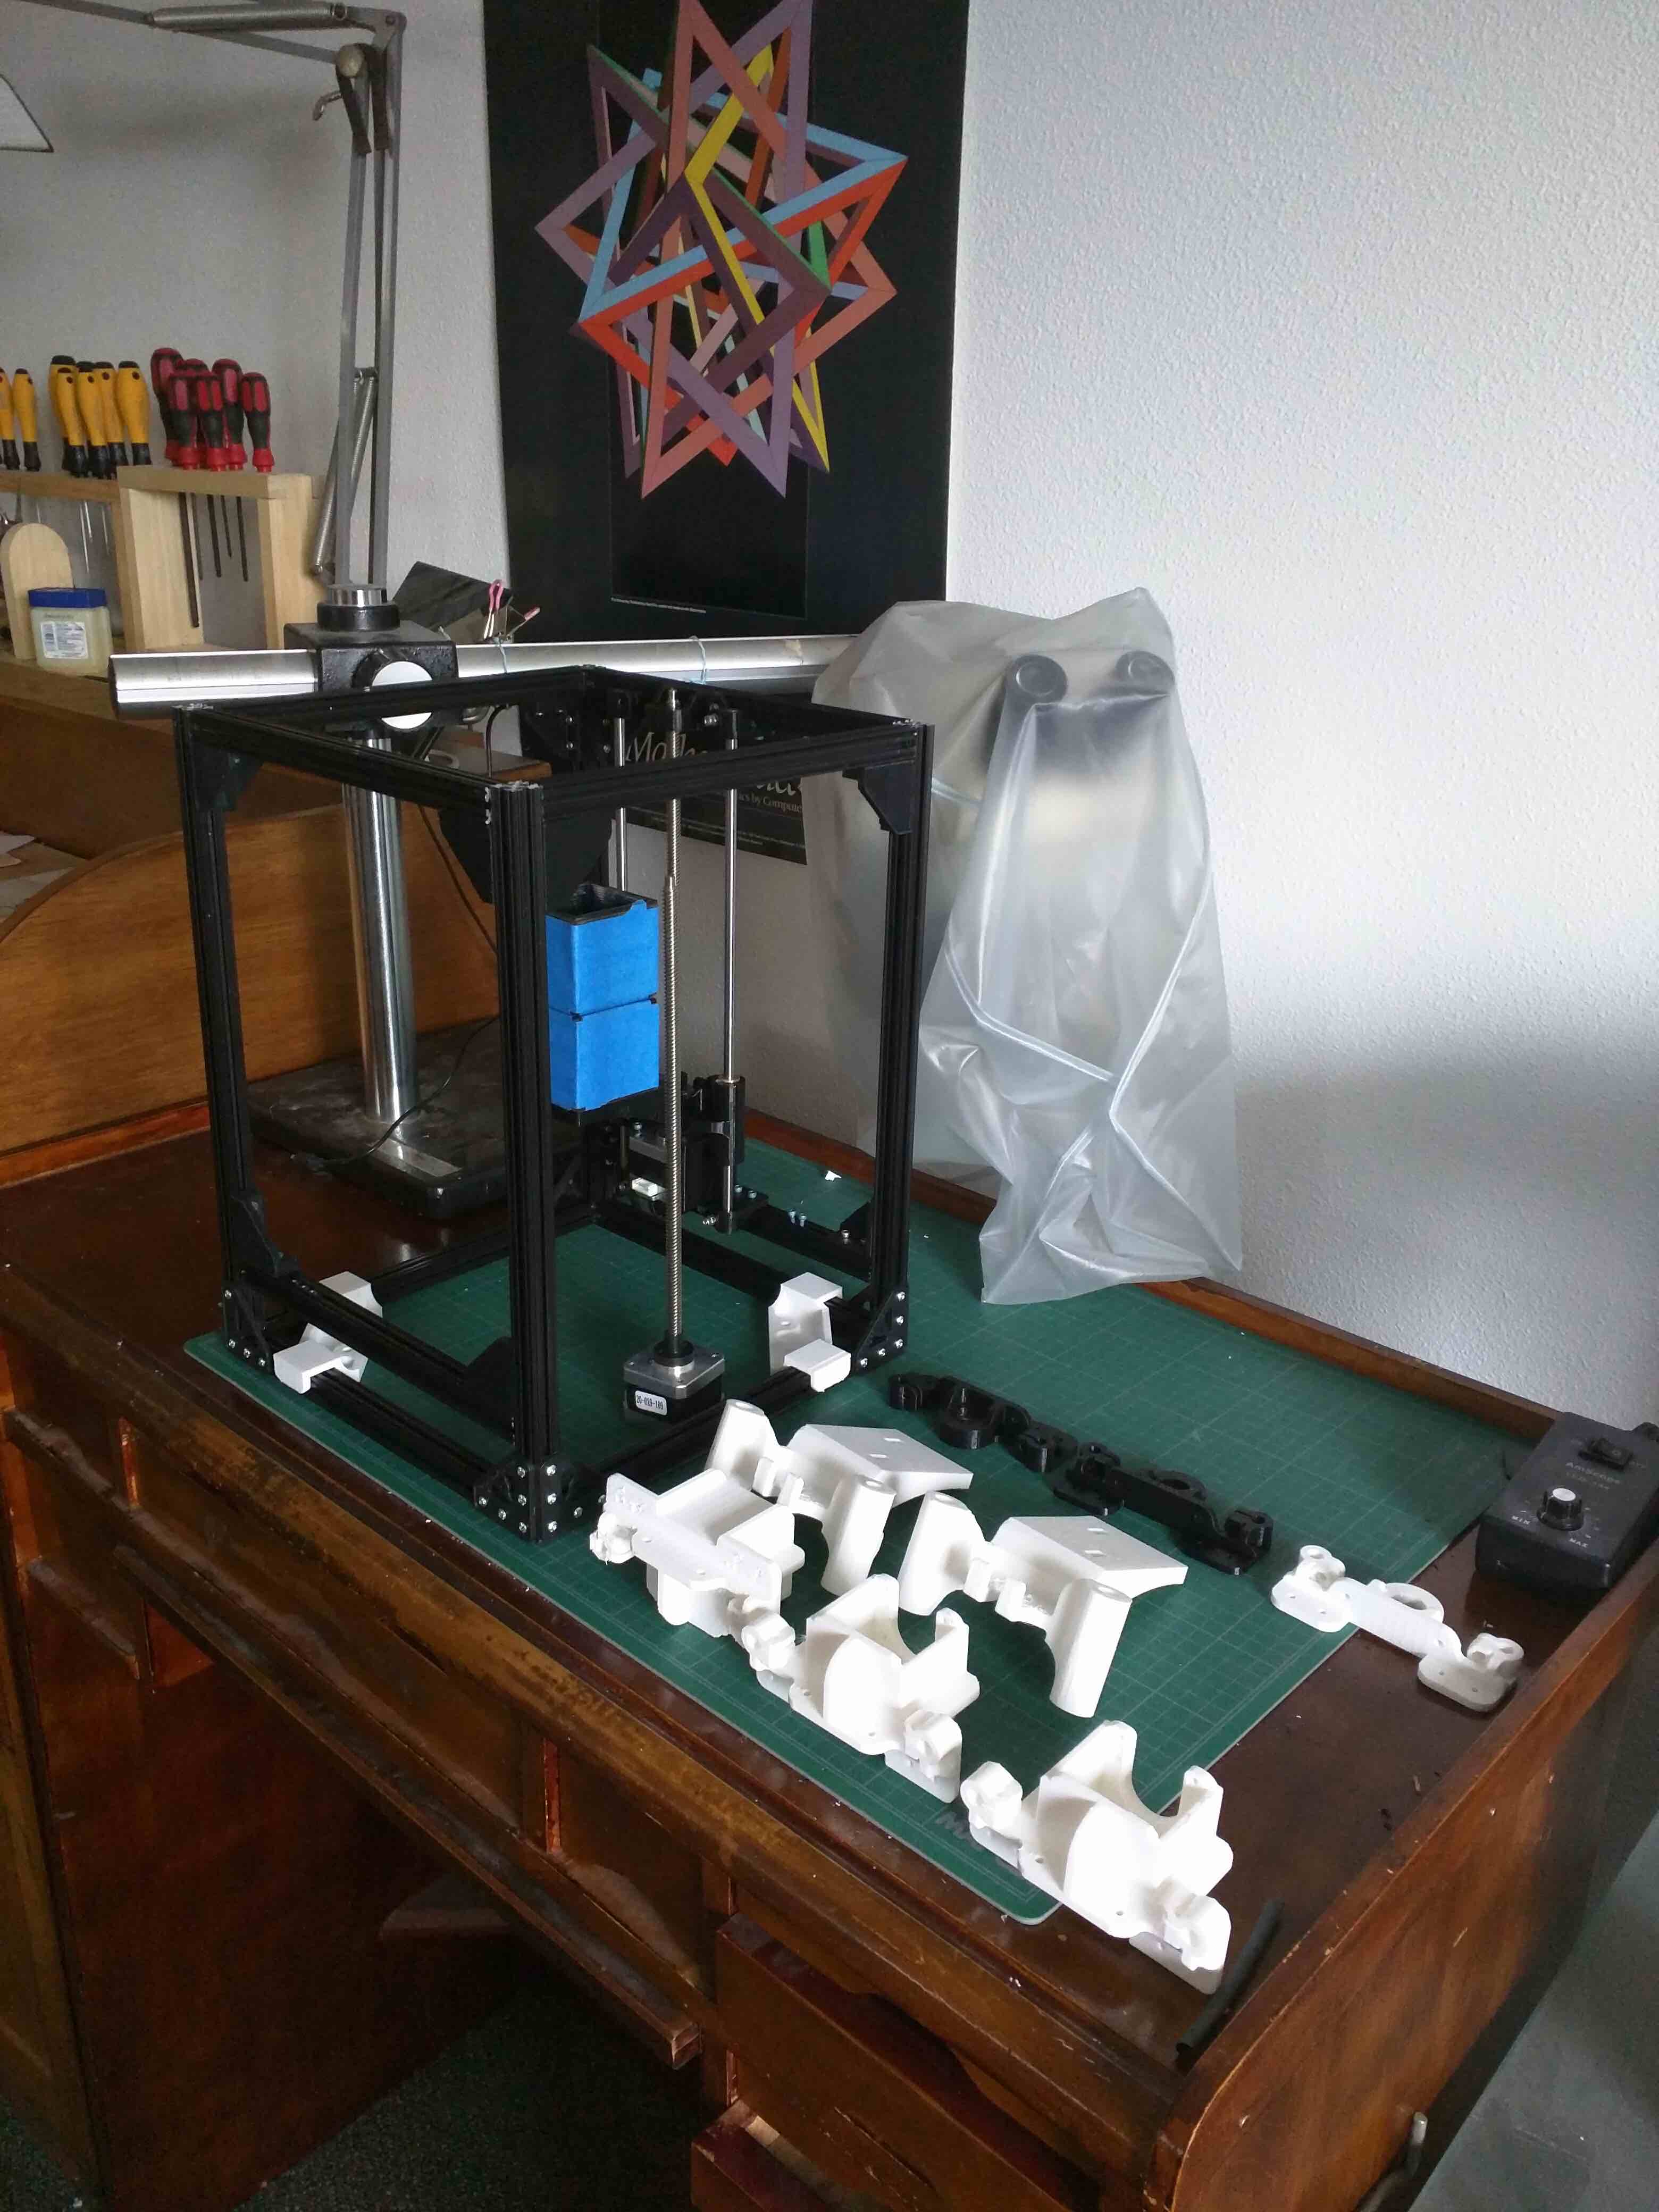
Pictured here is the proof of concept I am currently working on for a smart matter extruder. So far it has been about 80 hours of non-stop printing, and I am waiting for the last mechanical part to finish printing so I can start assembly.

Categories
Uncategorized

Improved Ammonia Fountain

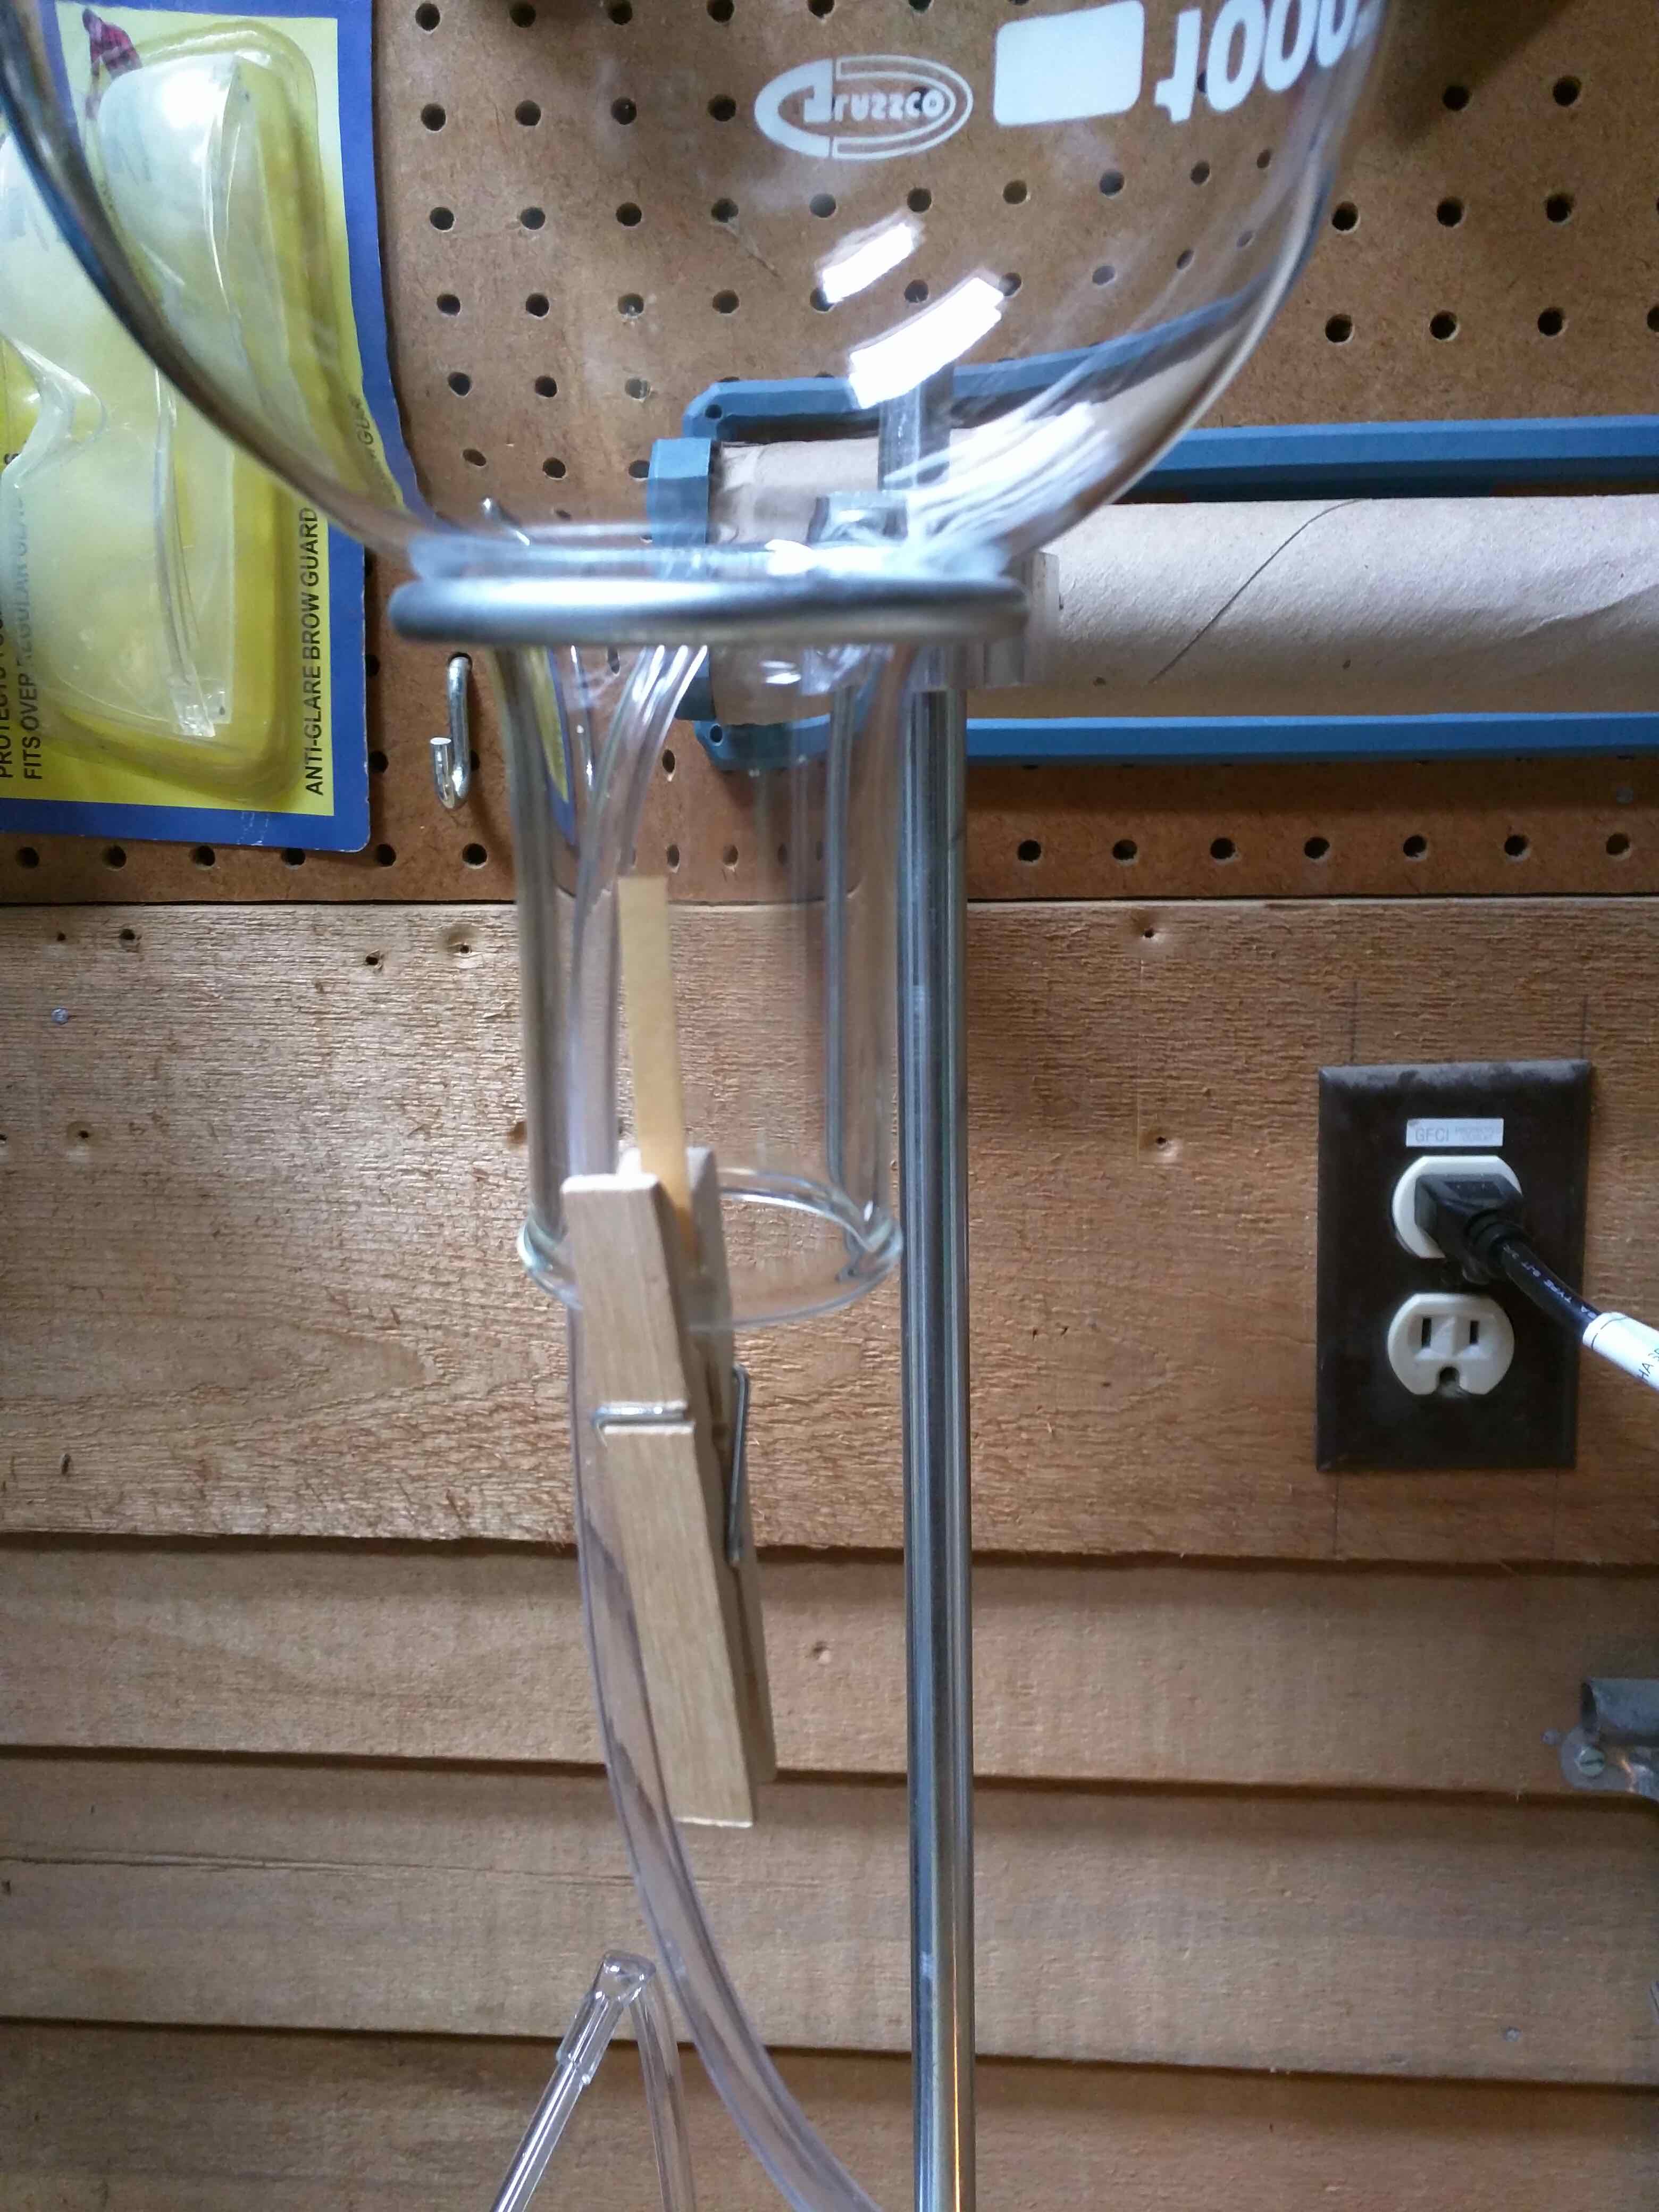
The big improvement was replacing the surgical tubing with fish tank tubing from the pet store. A chemist friend tipped me to the fact that with just a little Vaseline, the fish tank tubing will slide onto 6mm OD glass tubing we are using and make a great seal. That seemed to work great, was cheap, and was much easier to work with. I also increased the inverted NH3 catch flask size from 250mL to 1000mL. That should make for a better looking fountain.

In order to detect when the flask was full of NH3 I used a clothespin to clip a litmus paper inside the flask stem. Last time we just bombed the flask with way more gaseous NH3 than needed. It worked, but was inelegant. The idea with the paper was filling the flask to have just enough gaseous NH3 to work. Turns out the paper is hard to read when reacting to gaseous NH3.

ammoniafountainv2b

It turned out we filled up the flask partially with ammonia – but nowhere near as much as we needed to draw enough vacuum to trigger the fountain, just enough to trigger the litmus paper. The whole point of these projects is to get a better feel for physical chemistry, and practices at the lab work. So I did learn a lot, but it was still frustrating.

Categories
Chemistry I am going to try Science!

First try at an ammonia fountain

Last night a friend came over and we tried to set up an ammonia fountain. We are both working on improving our working knowledge of chemistry – and the ammonia fountain is a good project to practice a bunch of basic labs skills. It is also fun to watch.

I didn’t have any Phenolphthalein, so my partner in crime/chemistry suggested that we use the juice from boiled red cabbage as our PH indicator. The cabbiage contains an anthocyanis (flavins) pigment. You just boil the sliced up cabbage for about a half hour – then drain off the now purple fluid. That fluid changes to either red or green depending on PH of material added to it. Both of us were surprised at how well the homemade indicator worked.

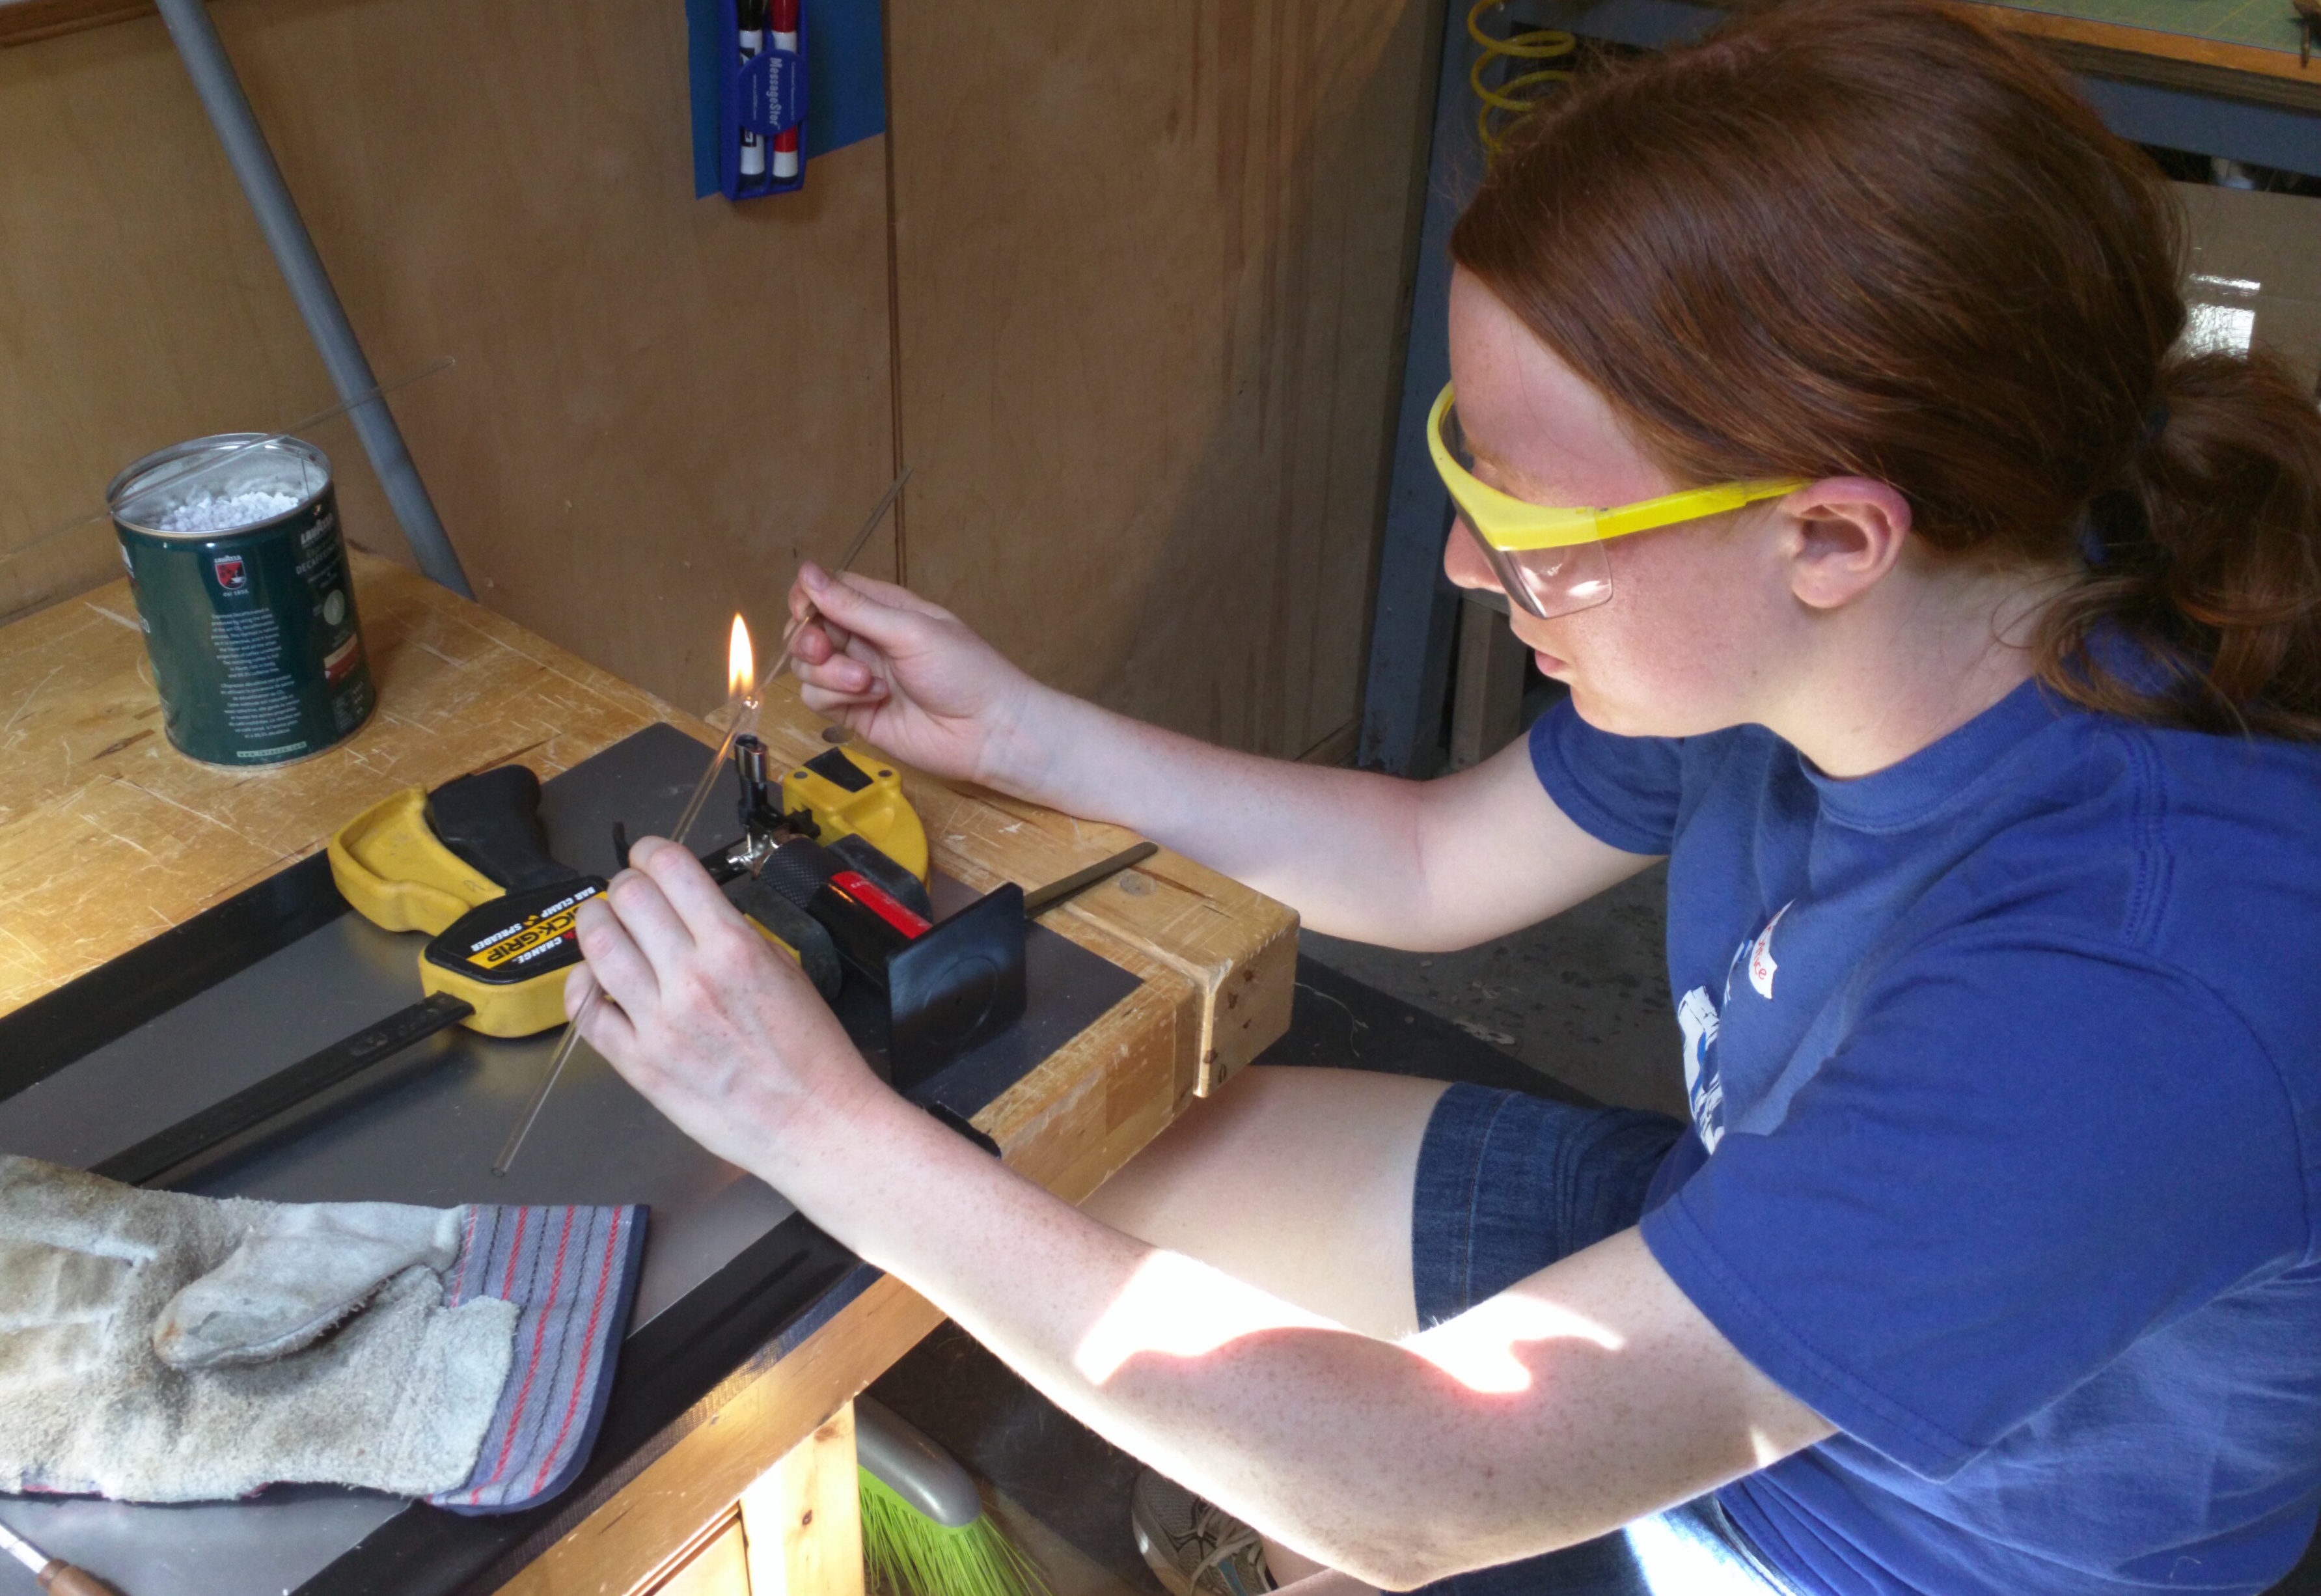
Where things kind of went off the rails was with our seals. I don’t have much in the way of chemistry equipment yet – so I am making or buying what I need for each experiment. We started the day cutting and bending sections of gas tubing for connecting the different vessels together. I then drilled out solid rubber stoppers to the appropriate size to snuggly fit the tubes. While I need to get something hotter than a butane torch so it does not take forever, hot working the glass was fun.

Bending Glass Tube
Bending Glass Tube

The problem came from out inter-tube connections. To make it easier to un-stopper and re-stopper we used latex surgical tubing to connect the glass pipes. The NH3 glass will eat away at the latex, but at a slow enough rate I was not worried about it for this experiment. We used clothes pins as low pressure release seals on the surgical tube. Our problem was that the inner diameter of the tubing was too large, and even with tape over the ends we never got a good enough seal. This first attempt at an ammonia fountain did go off – however while it started to fountain PH indicator, which changes color in the presence of gaseous NH3, the poor seal quality quickly let enough air into the system that it kills the pressure difference which drives the fountain.

First Try at an Ammonia Fountain

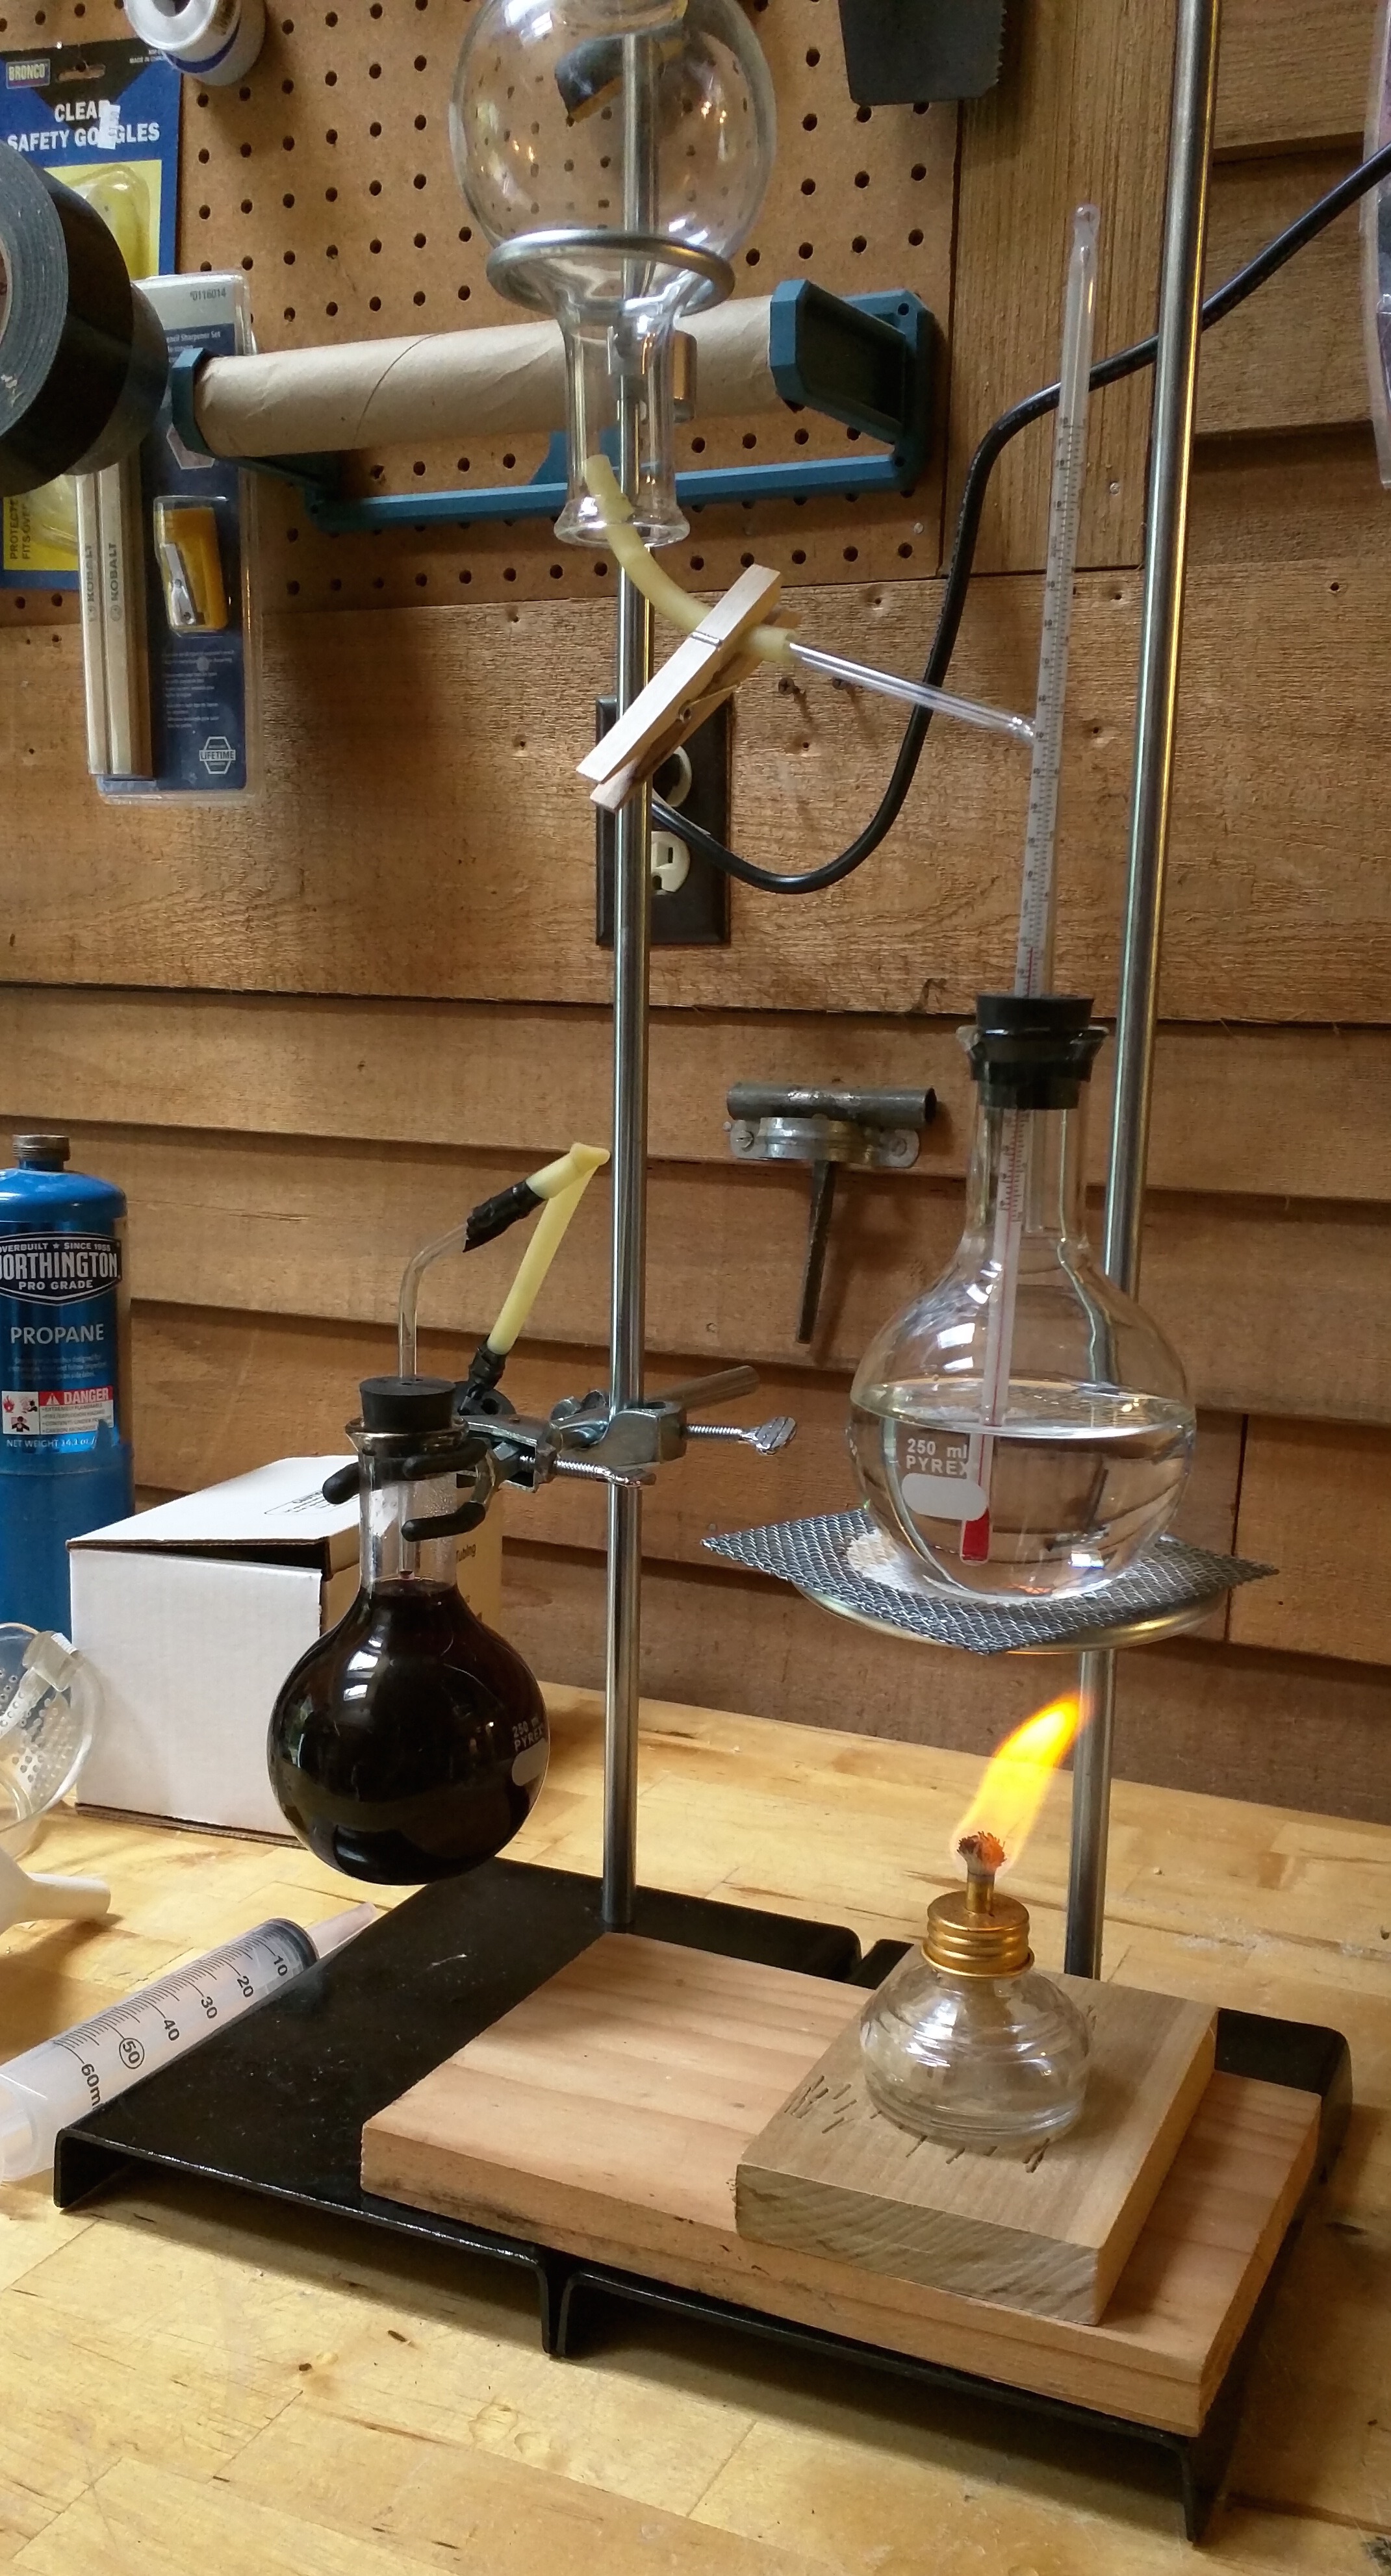
In the picture you can see the heated flask where we were off gassing NH3 connected to our inverted flask used to catch the lighter than air NH3 gas. Once the inverted flask is full of NH3 gas, we remove the feed tube, then re-stopper the inverted flask connecting it to the flask full of PH indicator. Squeezing the dropper injects some water into the inverted flask, water that absorbs the NH3 creating a partial vacuum in the flask, which in turn draws the PH indicator up the tube creating the fountain. The indicator has the fluid change color when it enters the inverted flask.

All in all a fun day, we just need to re-do the experiment once I buy a few things. We will probably use a larger flask as well. A 250mL boiling flask just does not have enough volume to look impressive once the fountain gets going. Still, this already looks like a great experiment to do in teaching science to kids. Because of the ammonia gas I am going to hold off at least another year before trying it with my nephew – but this one is definitely going in the rotation. The color change and the fountain look like magic.

Categories
Chemistry

Common Household Chemicals

Just posting this so I keep it handy. They put together a nice list of common household chemicals, their chemical formulas, and where you can find them.

Here is a clickable link to their list http://www.chymist.com/Common%20chemicals.pdf here.