Categories
Projects Robits!

Scratch that hatch

I am building my AUV to be a configurable platform on which to try out a bunch of ideas, so I am going to need some sort of hatch through which I can assemble, repair, and modify the internal components.

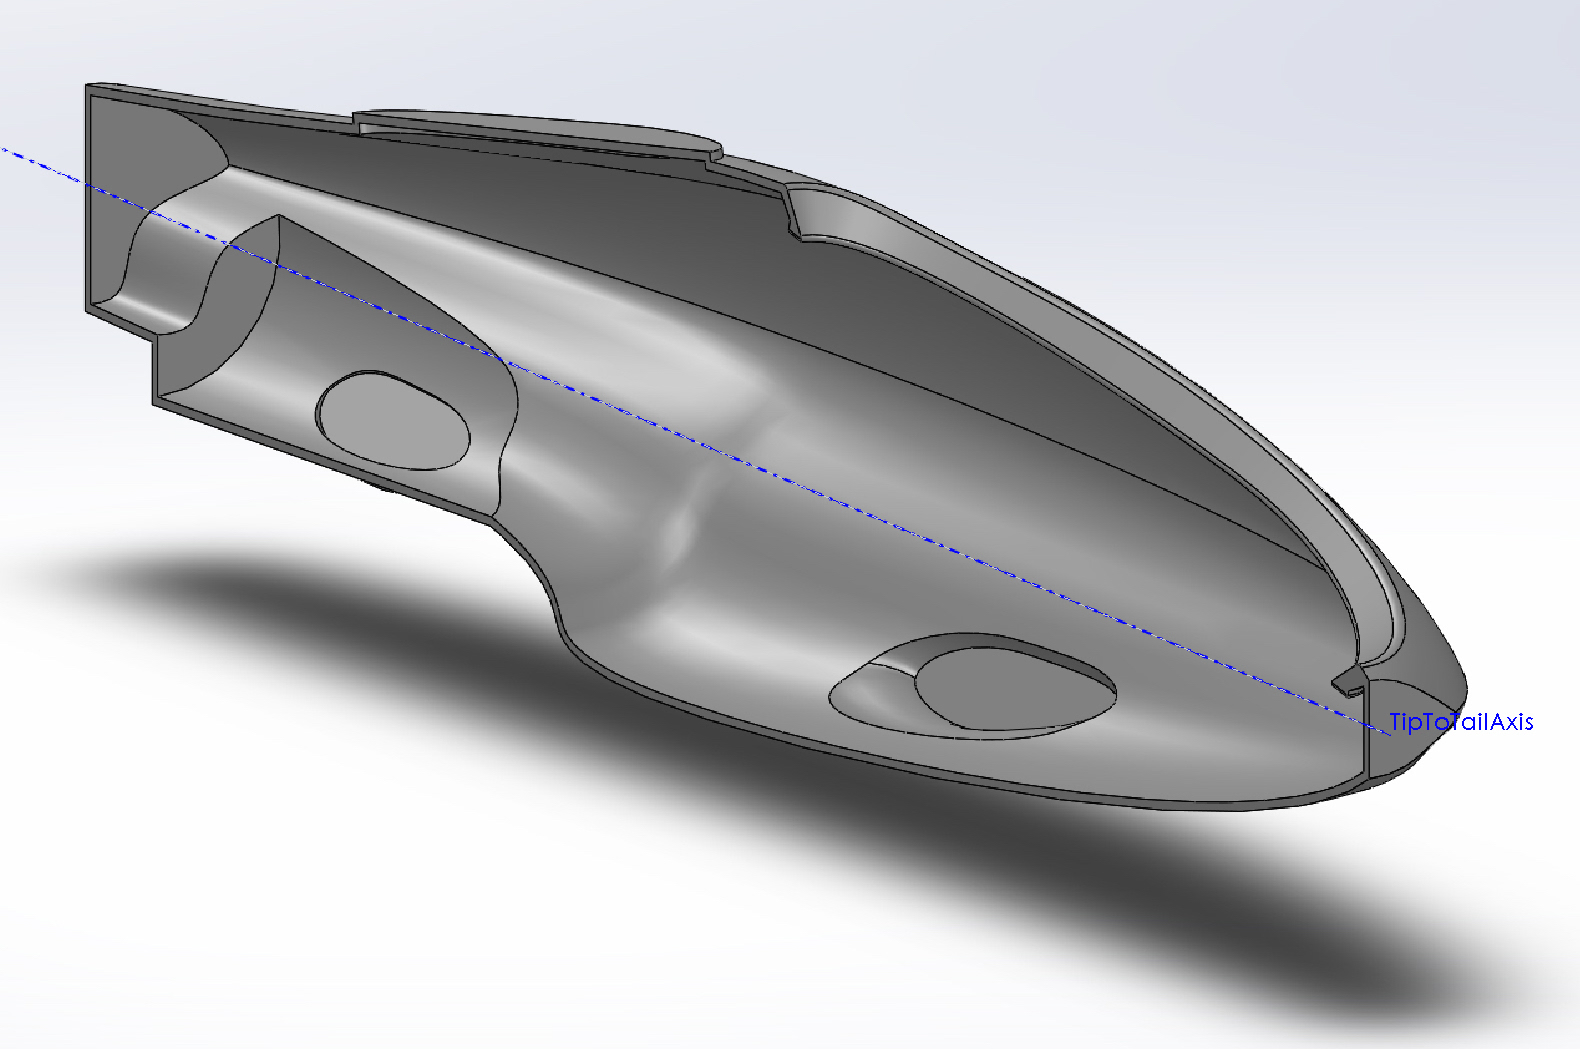
My first thoughts were to make a sort of beveled seat you can see here. The beveled seat in the hull mates to a complimentarily beveled plug piece. You have a rubber layer between the two pieces, and the more water pressure there is on the plug the tighter the seal.

Modor_BigBelly_NoTail_Printable_V4

Unfortunately after talking this design over with some friends who has a lot of experience deploying things deep in the ocean, I decided not to use the wedge hatch. Apparently at depth even slight deformations of the hull can corrupt the seat seal, and the hatch will sweat water into the pressure chamber. My maximum target depth for this is only 250 feet, but I would like the design to be able to stay submerged for very long periods – so a sweating seal is a problem.

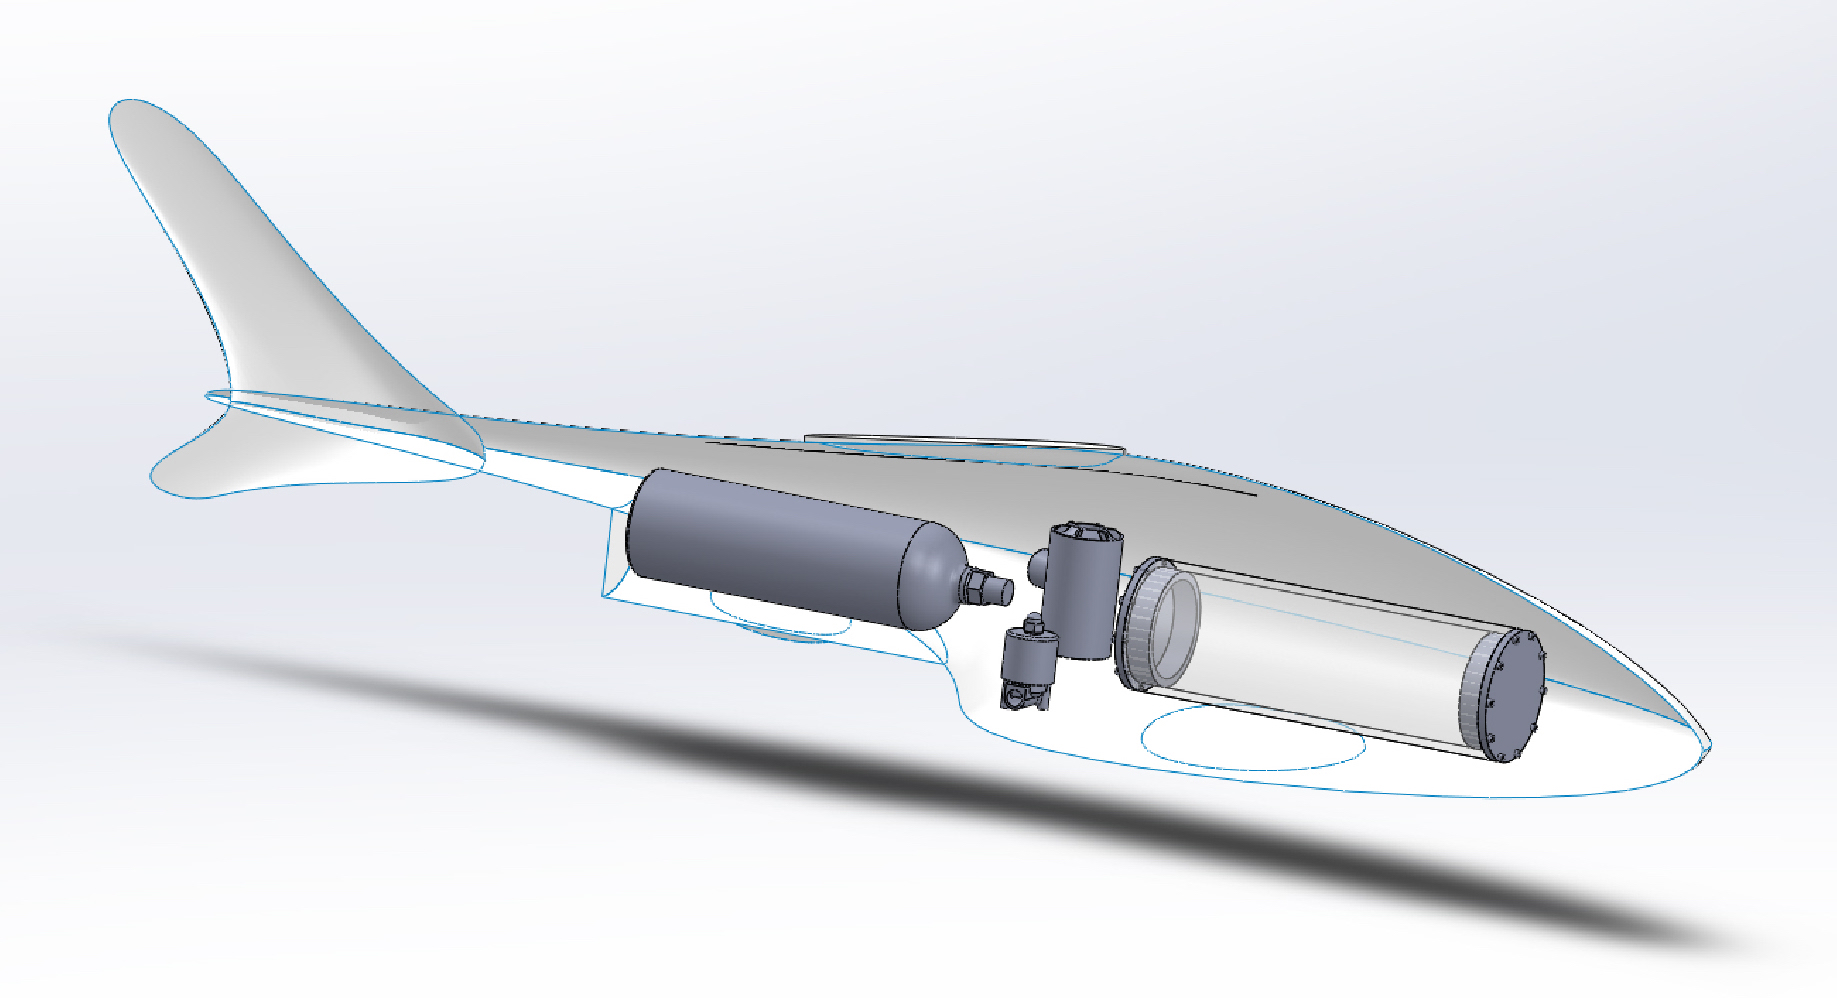
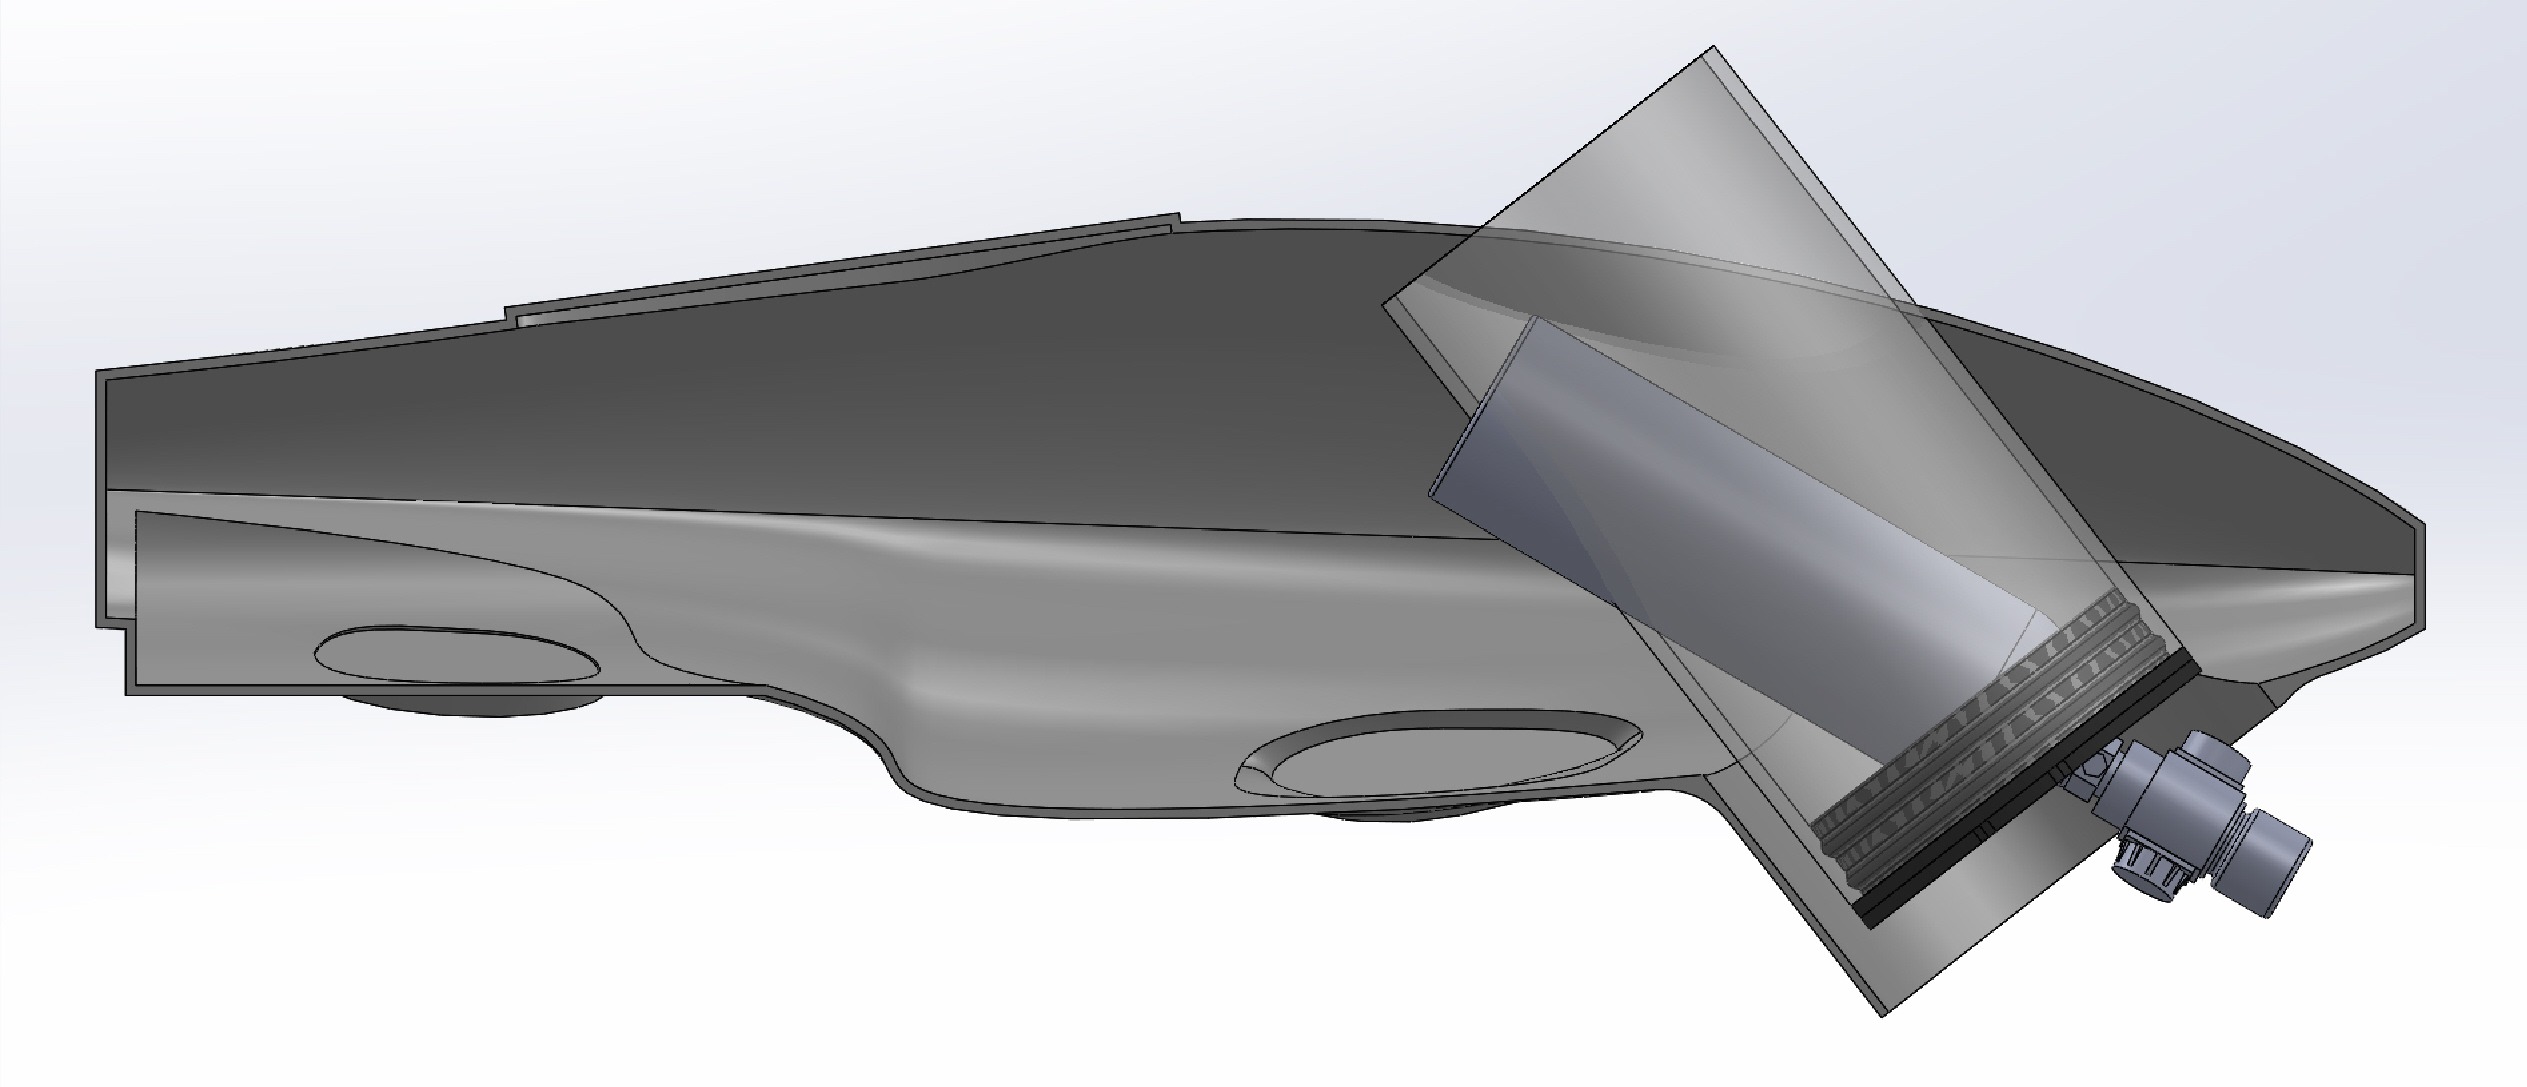
Right now the leading contender is using the pressure rated caps Blue Robotics sells for their watertight enclosures. Here you can see a hull design where a 6-inch plug has been added towards the nose. The tank you can see is a 24 Oz CO2 tank and pressure regulator. I’m checking that I can install the tank and regulator through the hatch.

Modor_Bigbelly_Hatch_Assem

I have not found a hatch position that I like yet, but the one pictured is as close as I have come. Things get a lot easier if I switch the CO2 tank to be screwed on from outside the pressure hull, while keeping the pressure regulator contained in the hull, so that’s what I am likely to try next.

One nice part about using the Blue Robotics pressure flanges – is that they offer clear outer faces of an optical quality. So I can easily add internal cameras looking outward through the hatches. So if I can make this hatch style work, I will probably add several smaller ones for camera and sensor mount points.
Categories
For Friends & Family Quotes

The Killer Rabbit of Caerbannog

I just found out my nephew had never seen Monty Python’s Killer Rabbit of Caerbannog sketch! Posting it here to share with him, everyone else – enjoy!

Follow. But! Follow only if ye be men of valor! For the entrance to this cave is guarded by a creature so foul, so cruel, that no man yet has fought with it… and lived! BONES of full fifty men lie *strewn* about its lair! So! Brave knights! If you do doubt your courage or your strength, come no further, for death awaits you all with nasty, big, pointy teeth…

Categories
For Friends & Family I am going to try Science!

Science Fair Ideas

[This ones for my nephew]

Tristan,

Here are some examples of the robotic jamming actuators I was talking about. The actuator is a ballon filled with coffee grounds. Then when they pull all the air out of the ballon, it squeezes the granules of coffee together, and it becomes solid. The actuator works by pushing it up against an object to pick up while it is soft. Then drawing out the air to harden the actuator. This traps that part letting you pick the part up.

Here is a home build version that uses a syringe, a ballon, a funnel and some tubing to make the actuator. The syringe is used to pull out the air.

This is another home build jamming actuator, but instead of a syringe they use a home vacuum to draw out the air.

It would be a lot of work, but you could build a robotic arm sort of like this one, but with a jamming actuator as opposed to the gripper you can see in the video. If you liked this idea, if you drew up plans I can print them for you.

If you like the arms, but don’t like the jamming actuators check this out. These guys made arms from syringes and popsicle sticks, then had them fight in a robot arm sumo matches!

More details on these arms here: Hydrolic-JudoBots

If we designed a version of this type of arm to be printed, I could make you enough parst for two arms. Then you could wrestle them with your friends.

Categories
Robits!

“Growing” robotic tubes!

I am experimenting with soft robotic actuators lately, and that has me reading papers and tracking what work people are publishing again. This has to be one of the coolest soft robotic ideas I have run across.

Information about this groups research is available here:
Robotic eversion actuators (growing tubes)

I highly recommend looking at their video. Ideas elegant in its simplicity. Arstechnica has a decent writeup of the tech, with a better description of how it actually works available here: Arstechnical Writeup

Categories
Projects Robits!

Hull of a day…

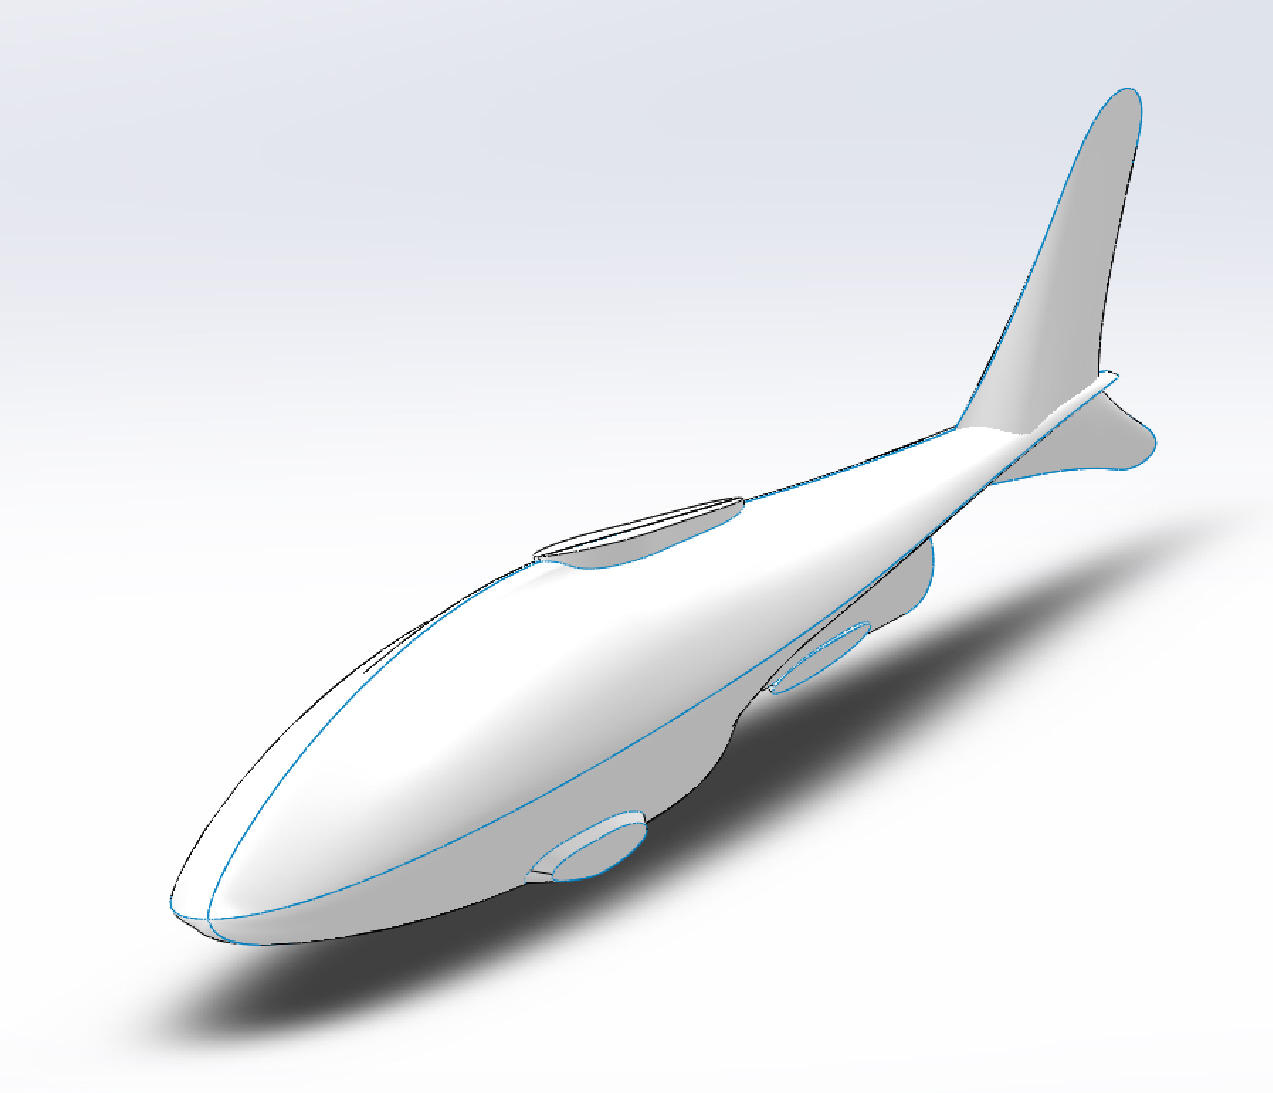
Whoop! I finally have a hull design. I found a STL model for the type of shark I wanted my design to mimic. The white you can see poking up behind the red shark is my hull design.

Modor_BigBelly_V8_picture1

The elliptically shaped flats on the hull are for mounting fins. This approach will let me push out the problems of fin design until later. I’m hip deep in problems as it is. I also like that it will let me repair the fins, try out multiple fin designs, and remove them for transport. I’m going to shop off the tail as well, but I am debating how to add control surfaces, so I left it intact for now.

Modor_BigBelly_V8

Here you see the outer surface of the hull. I am trying a cast acrylic hull design. The wall thickness will be just over an inch. So there is much less room inside the hull then it initially seems. Since things are going to be tight I modeled up the critical parts first so I could play with different layout designs and test fit.

Component_Layout_Assem

The ballast system is driven off of a 24oz CO2 tank, which you can see got pushed out into the tail. Electronics will be housed inside a 4inch pressure chamber. The weird grey cylinder is a bilge pump being repurposed for propulsion and steering. I am still figuring out where to put another pump, ballast tanks, ballast weights, batteries, and some other goodies.

I have a lot more work to do on this – but I am happy how it is shaping up.

Categories
Projects Robits!

Making watertight electrical connector

One of the problems the AUV project needs to solve it making electric connection through a pressurized hull. I found this interesting tutorial for making making watertight electrical connectors from pvc.

Categories
3D Printing Projects

Filling 3D printed parts with epoxy

Interesting paper on filling 3D printed parts with epoxy resin, which is what I am already thinking of doing for casting a pressure hull. So well worth a read.

The paper is: “Strengthening of 3D Printed Fused Deposition Manufactured Parts Using the Fill Compositing Technique”.

Categories
Projects Robits!

Settling in on a hull design

Initially I was drawn to Rays for a bio-inspired design. However, eventually I would like to use the active ballast to have the AUV be able to glide over large distances and Rays don’t really glide through the water in the right way.

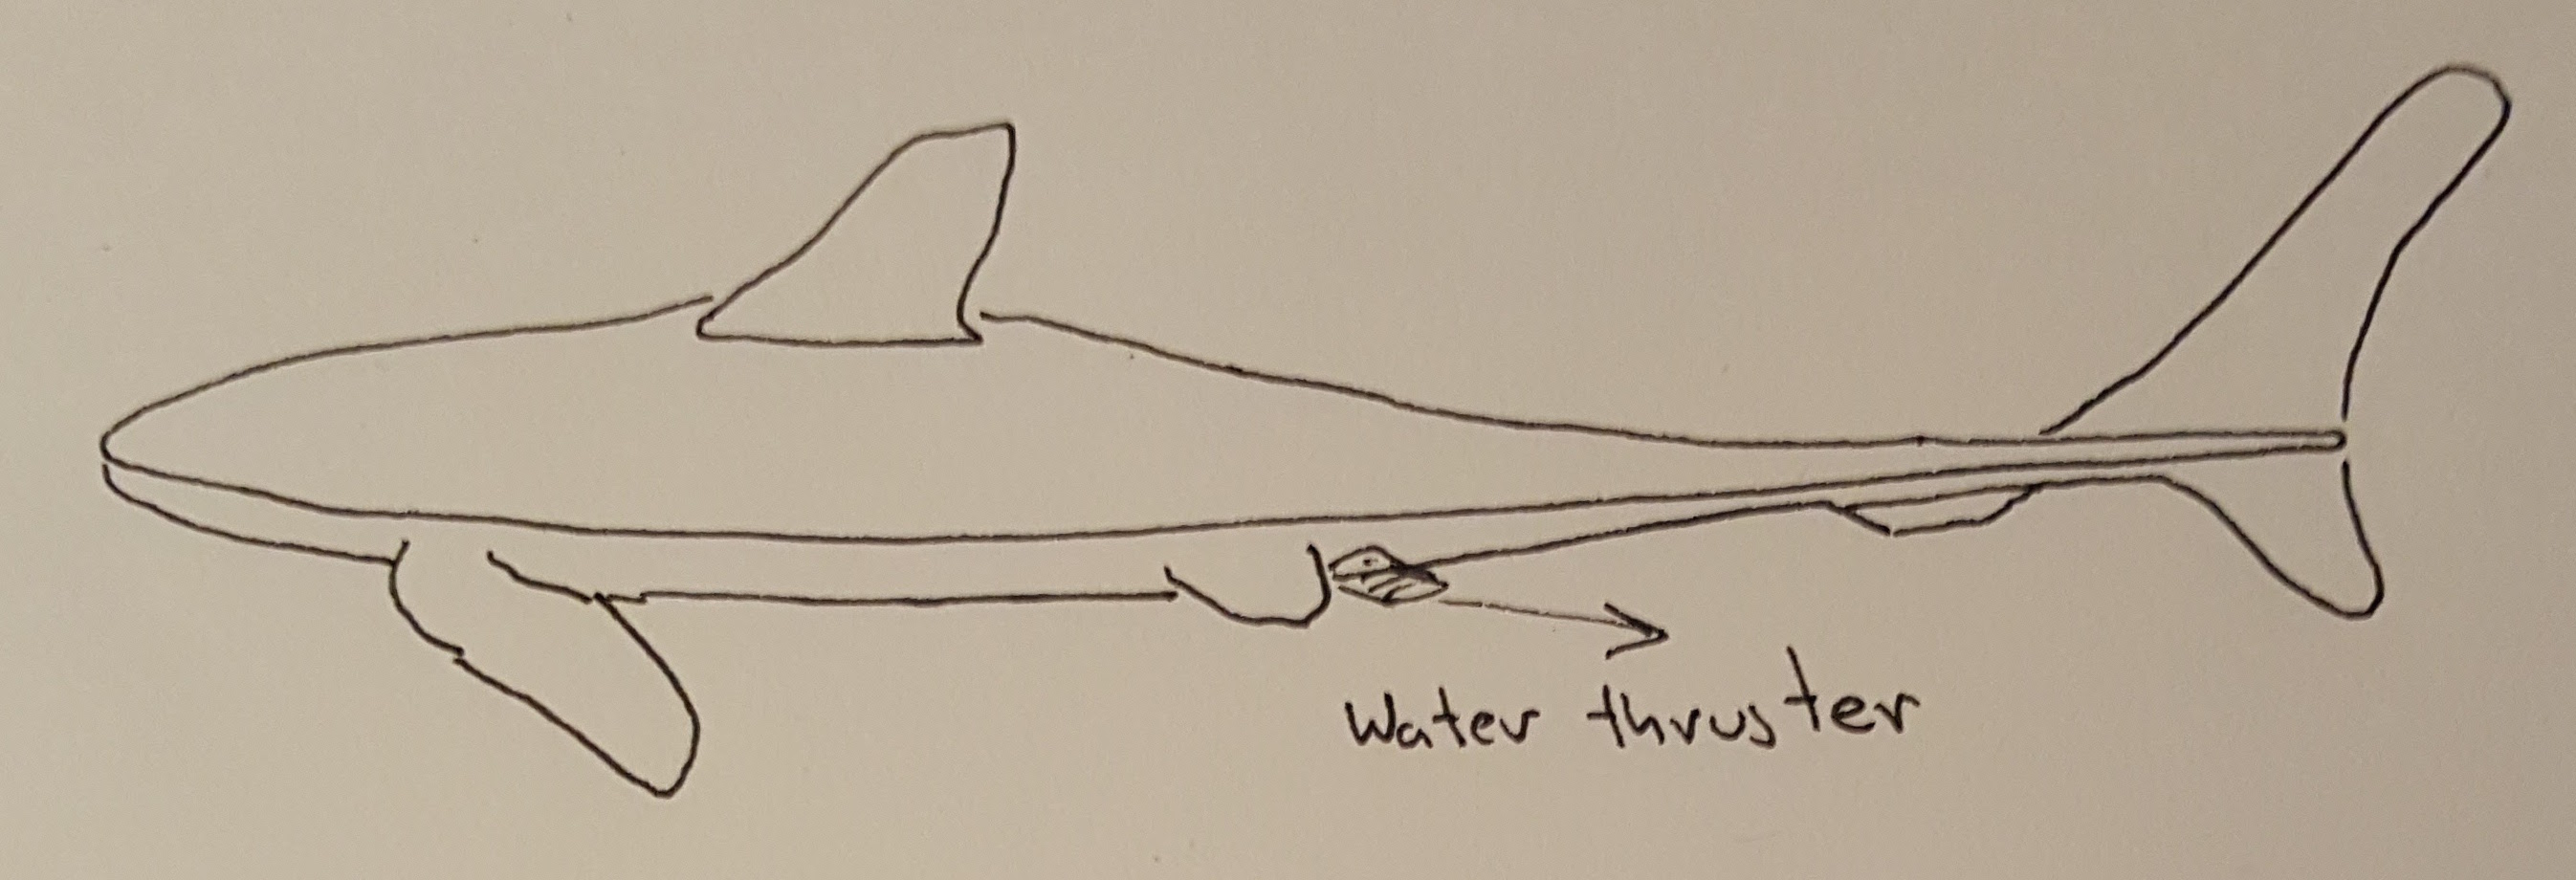
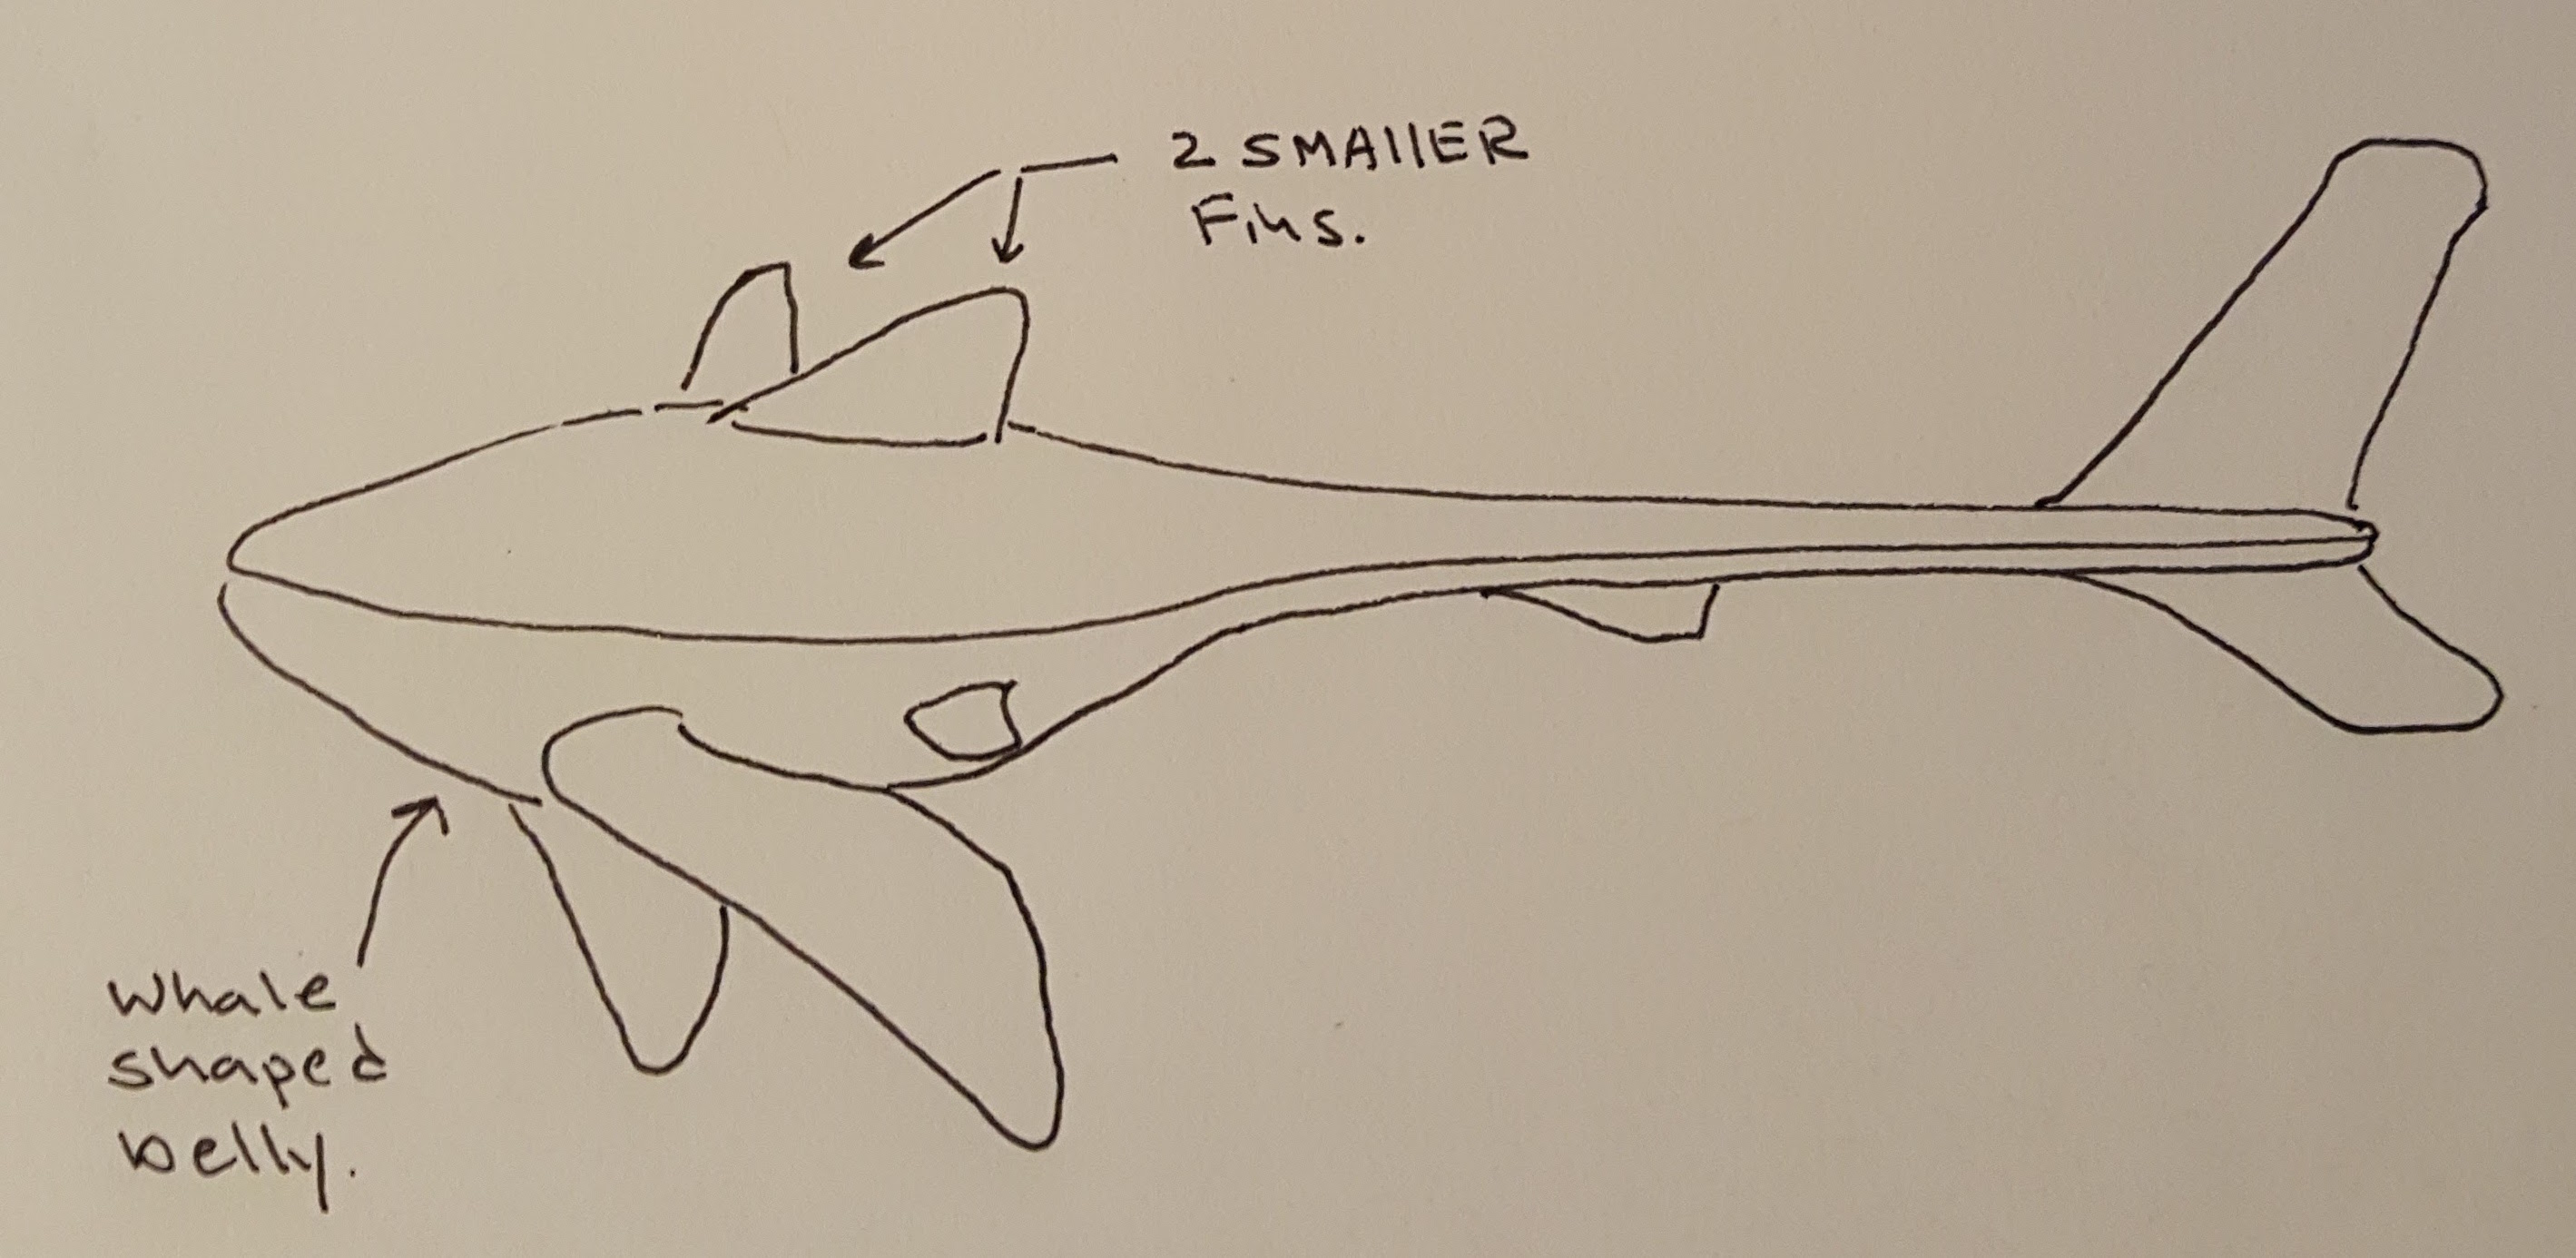
So right now I am thinking I will use the general design of a small shark. After some quick measurements though I’m going to blow out its belly to be more like a grey whale. That should still give more storage and decent flow over the frame.

Bigbelly

I am toying about adding two smaller fins – if I am right it could help with glide stability – but man it does not look weird. I will probably ditch the two fins, but keep the long thin tail. Since I am going to be printing all the hull mold pieces in chunks on my 3d printer – I also am strongly incentivized to minimize hull surface area.

Bigbelly 2

Categories
Robits!

Cool tutorial on making pneumatic muscles

Interesting tutorial in making pneumatic muscles. (here)

Categories
Projects Robits!

Soft robotics manta-ray inspired UAV

The Softrobotics Toolkit Manta-Rae project is well documented project using soft robotics techniques to make an manta-ray inspired UAV.