Categories
3D Printing

Making a Nerf Scope

For the last few years I have been working with my nephew on concepts like drawing things you want to build, making schematics, and keeping a lab notebook. We started when he was six, so at almost 8 he is comfortable with the processes. Still I was pretty blown away bow how comfortable he had become with the design process. He showed up for the visit with a bunch of designs. After a Nerf battle, we ended up designing and printing up a scope for his Nerf rifle.

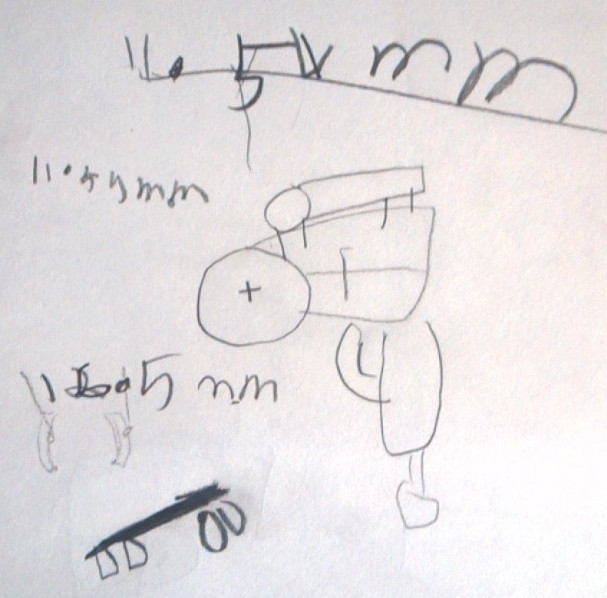
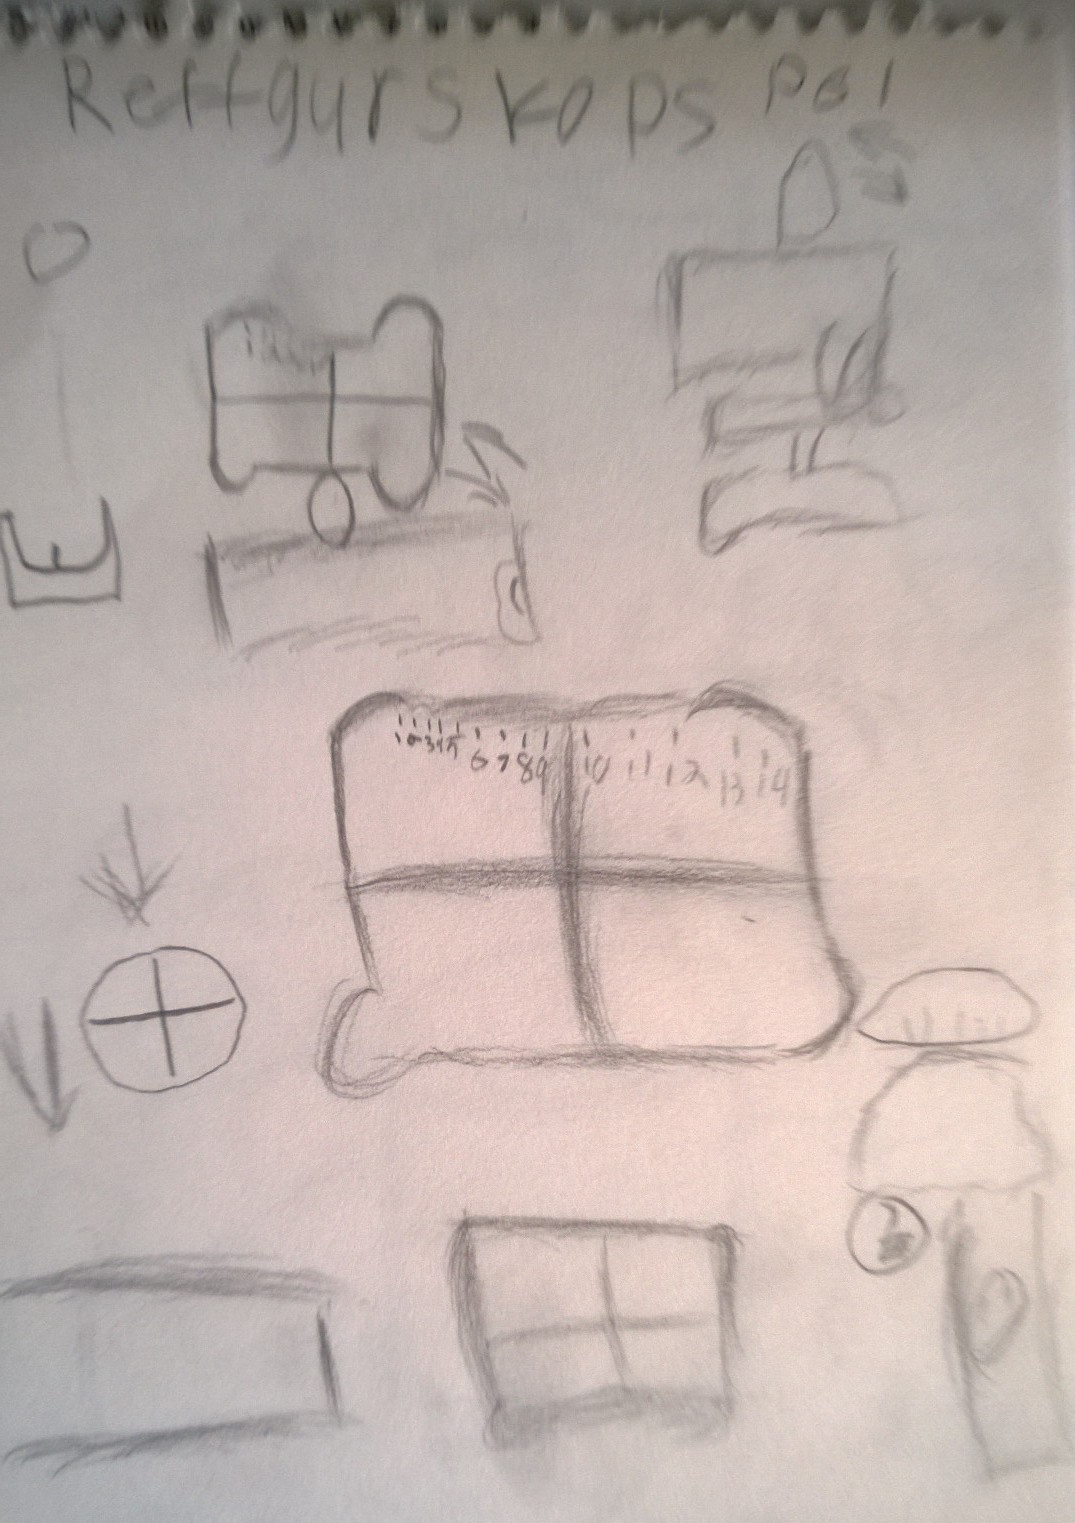
Main thing that blew me away is that he drove the design process, iterating through a bunch of pretty different scope designs on paper before talking to me about what he wanted to build. Then when we were talking, we were able to refer to his drawings, even to the point where he merged two previous ideas coming up with a new one. It was actually really similar to how I normally work with professional designers. It was very cool.

scope_measurements

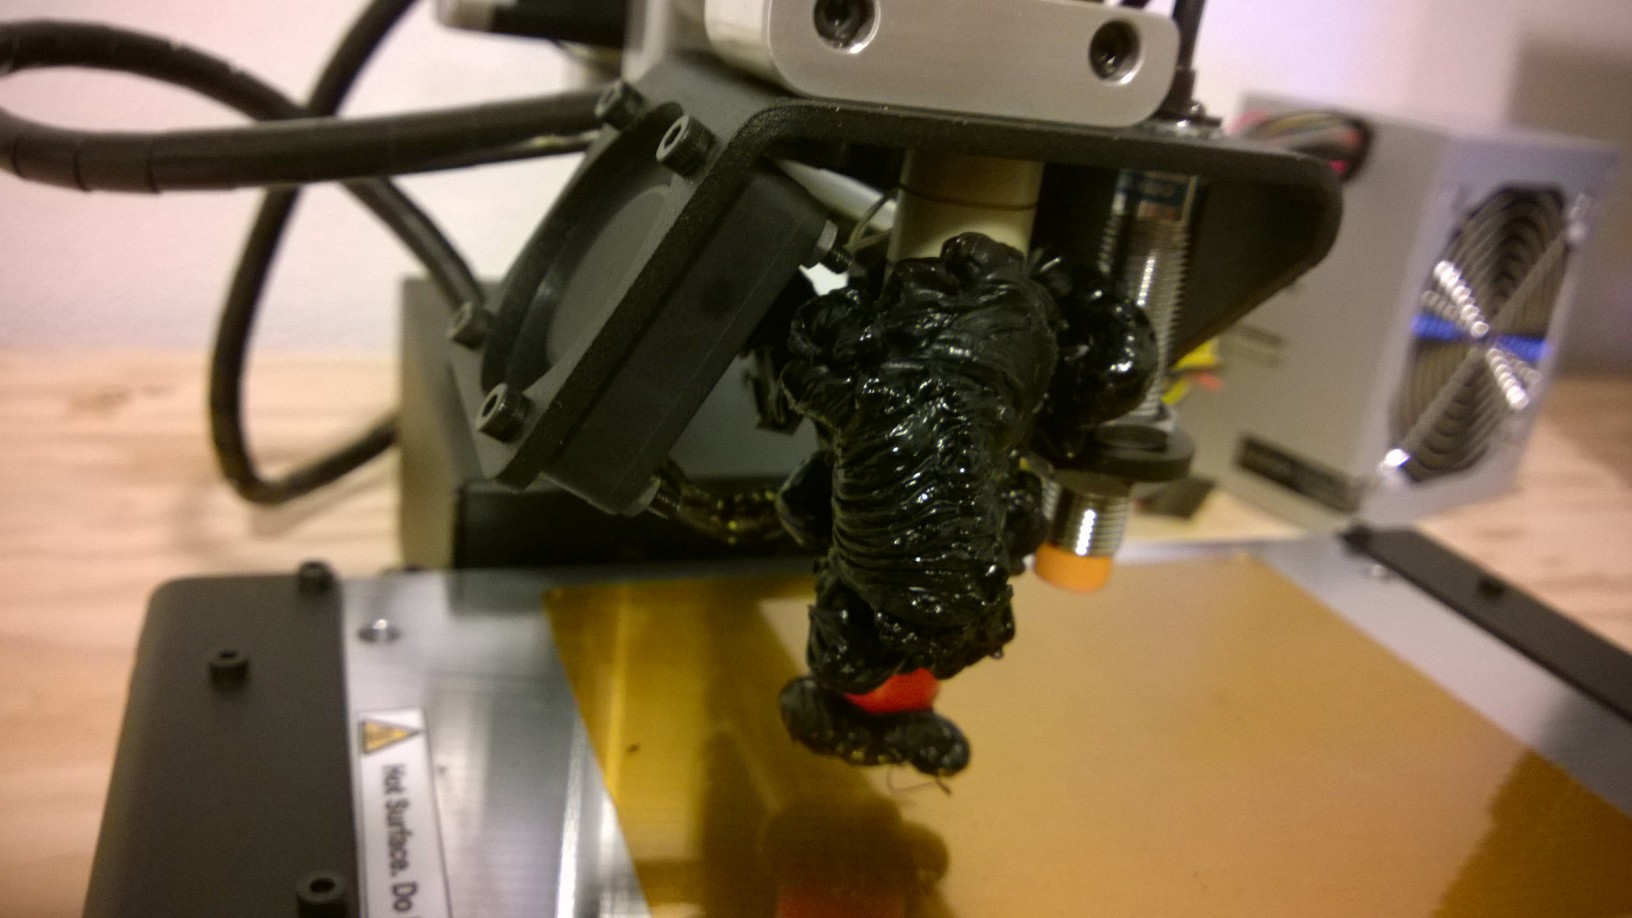
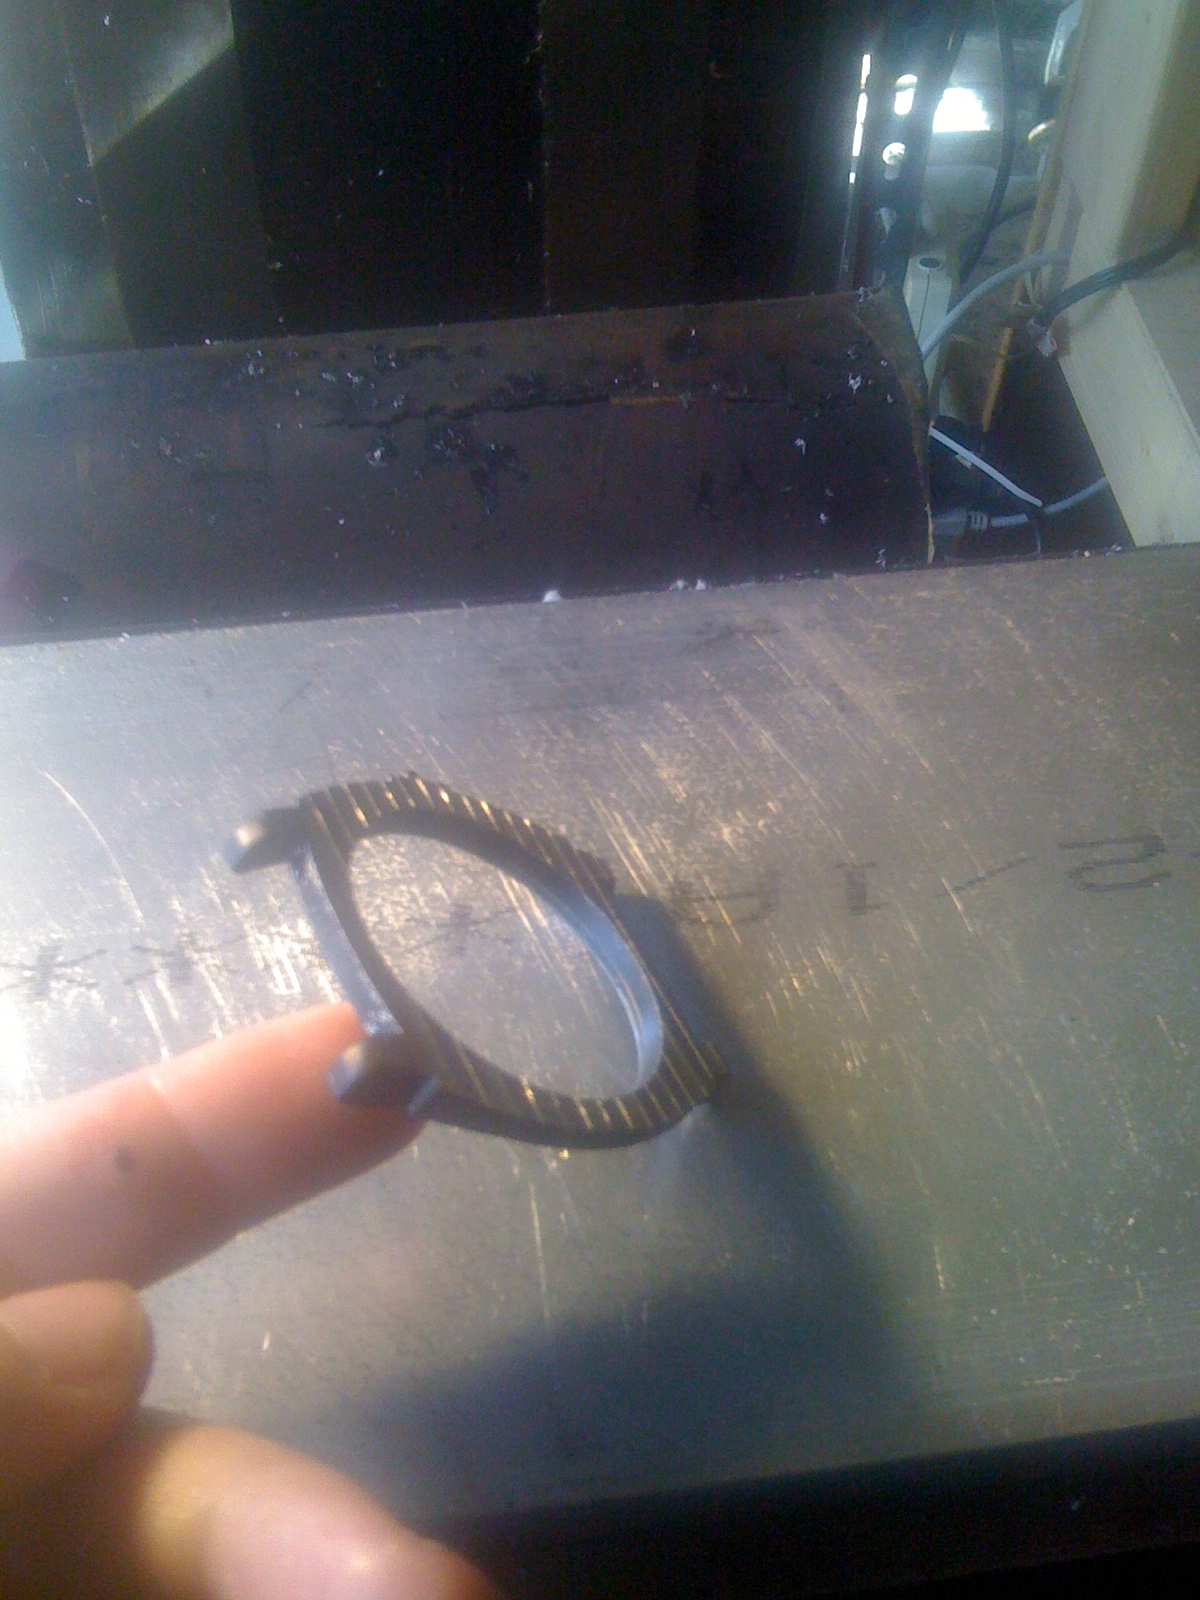
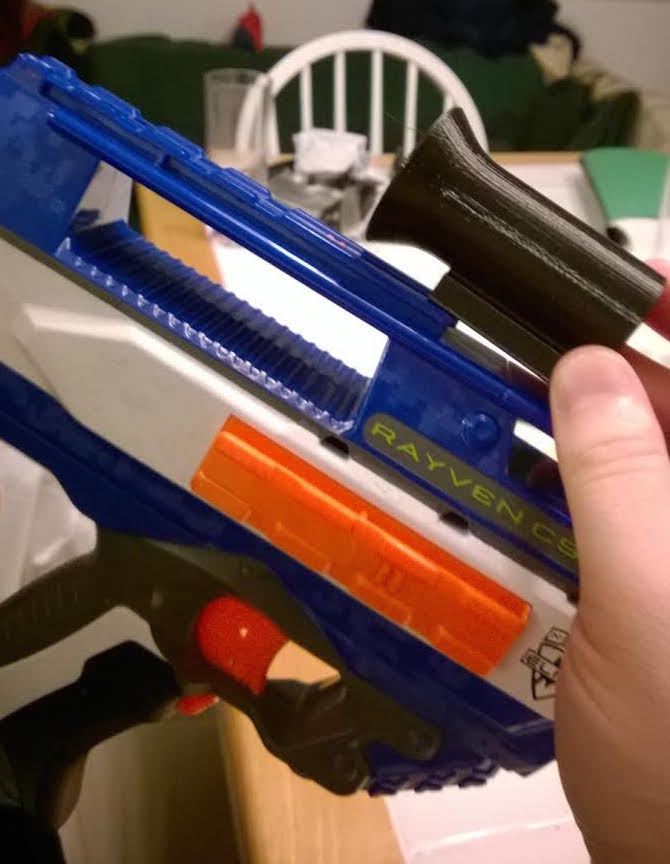
Something I really liked about projects printing up my nephews designs is that he gets to work though failures, and learn about the power of iteration and value of measuring twice. In this case we designed the scope, but since we were not designing it to fit against a model of the gun – we were not checking clearances. So our first version looked good – but didn’t fit on the support rail.

scope_fail

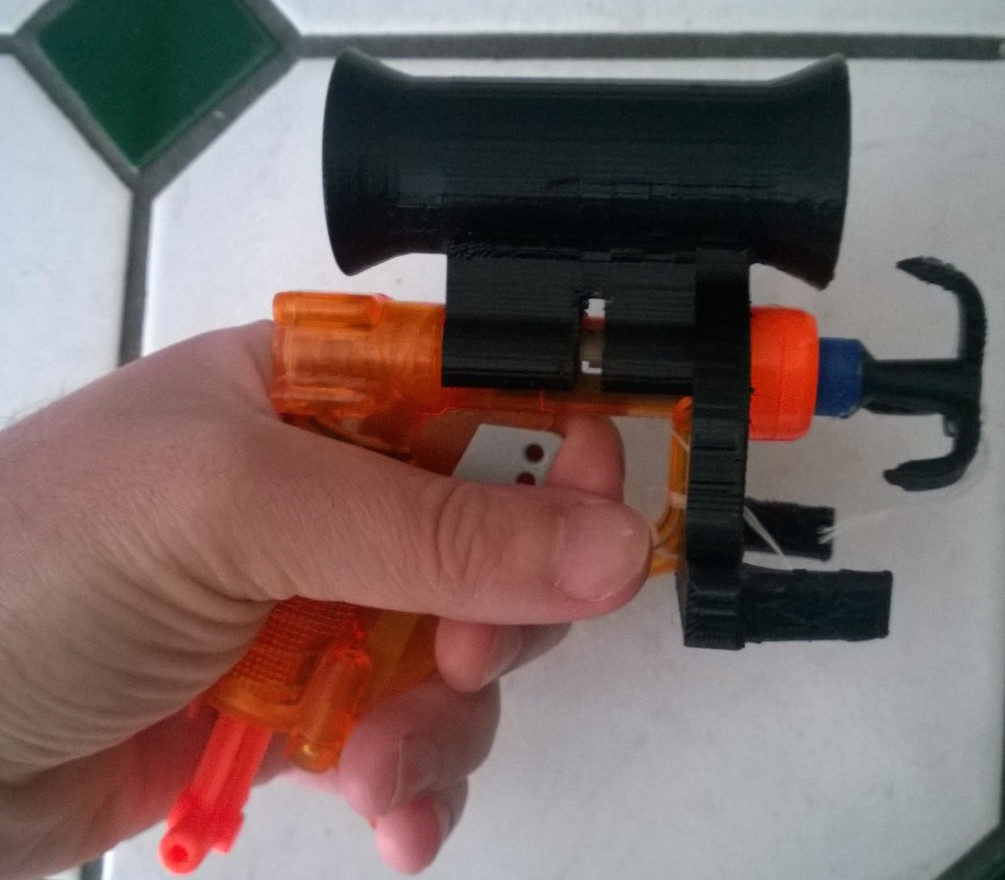
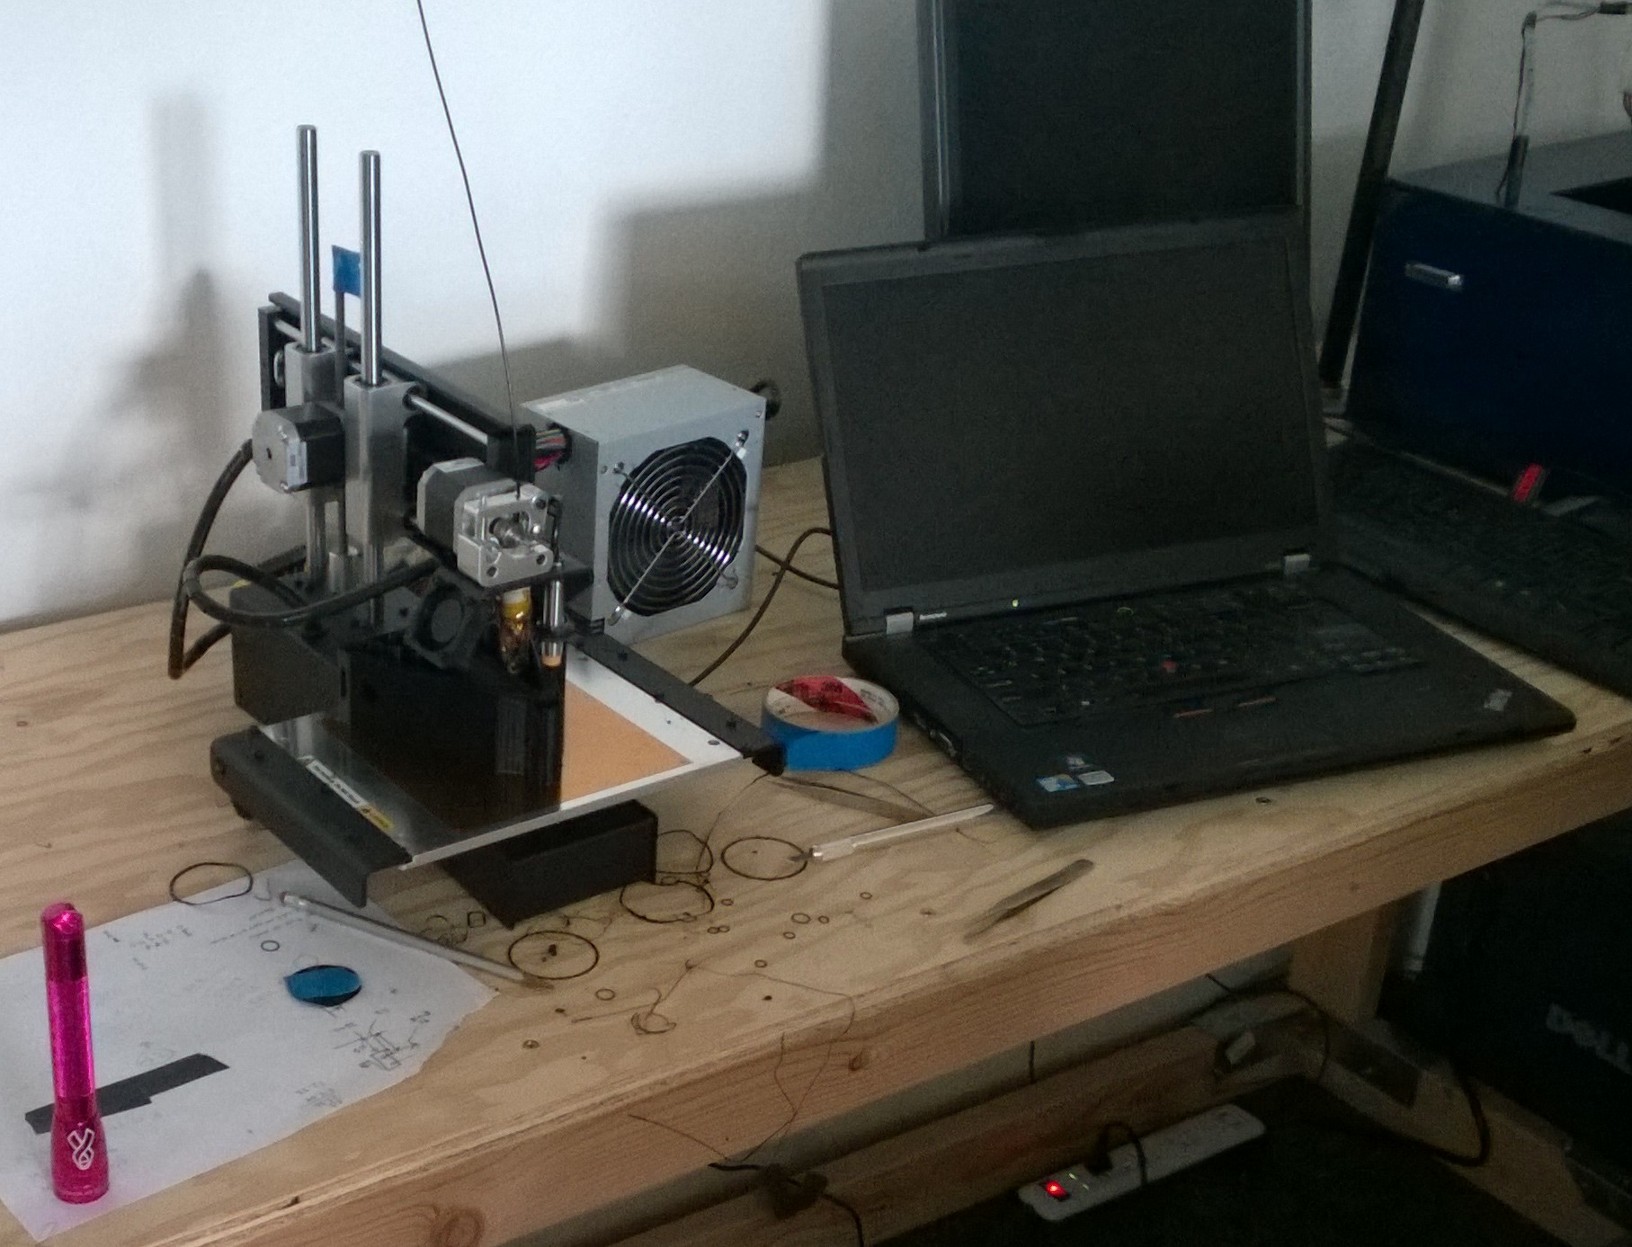
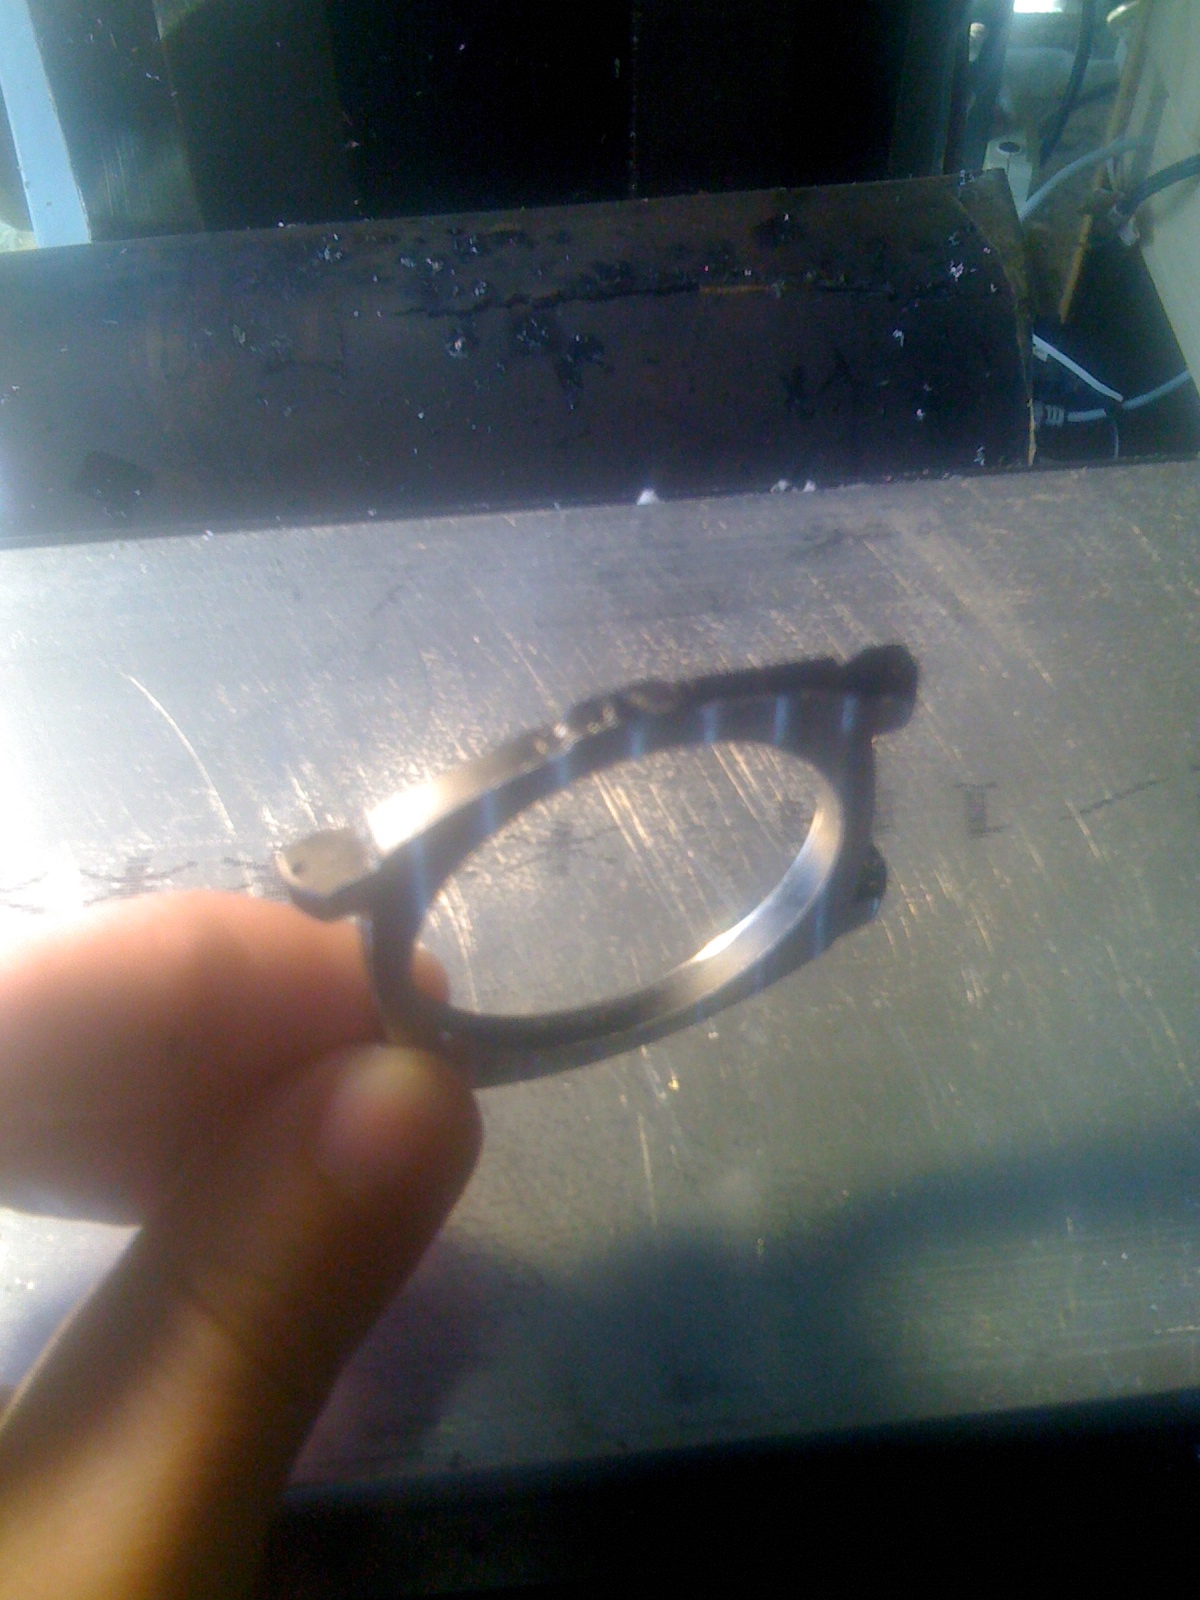
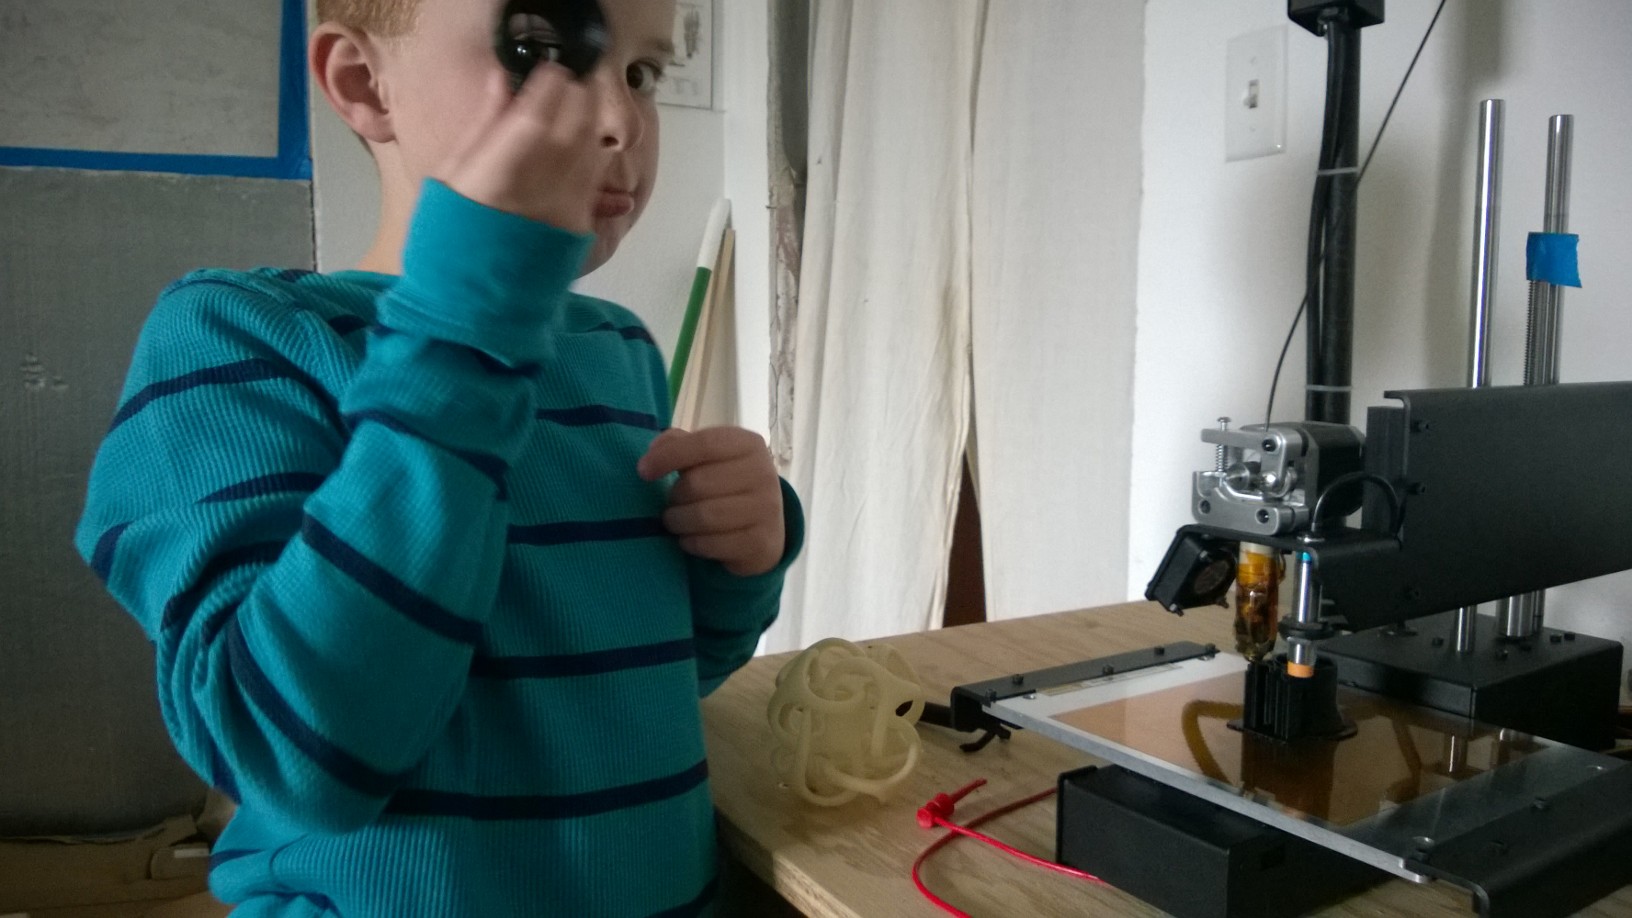
My nephew got to figure out what was wrong with the design, then how to fix it. After that we revised the design and printed out a new scope, which you can see being tested here. Again, I was impressed that he was not paralyzed by disappointment, we just set to figuring out how to fix things.

scope_test_1

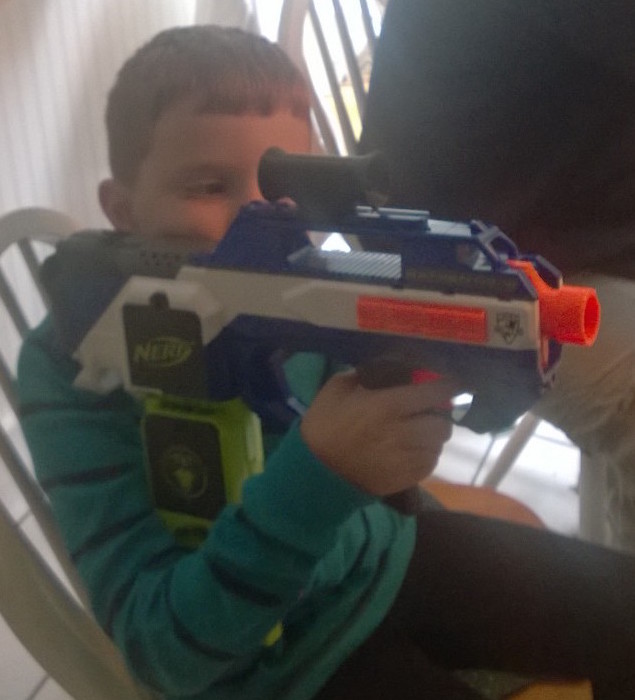
Here’s an action shot of the scope.

scope_p2_mounted

All in all I plan on doing a lot more projects like this. Pretty much the only problems were the boring parts for my nephew. Watching the printer was cool, but after a while that changed into “hurry up and print”. Also my doing the CAD modeling while he watched was hard. I explained stuff and asked him questions so he was engaged while I implemented what he told me to – but it still taxed the attention span of a 7-8 year old. Still, over all we both had a lot of fun and learned a lot. I highly recommend projects like this if you have a printer and a little person.

Categories
3D Printing Toy making

A $6 Nerf Grappling hook

Started printing this version, which prints both the hook and the dart body. Problem with that is the printed dart body does not work with the compressed air spring driven Nerf guns or the electric Nerf guns dart accelerators. It was kind of a disappointment for my nephew.

http://www.thingiverse.com/thing:360571

My nephew and I did find this version of the grapping hook. It required cutting up a Nerf dart, but it worked amazingly well. It was also fast to print.

http://www.thingiverse.com/thing:604853

nerf_grapplinghook_dart

We bought a Nerf Jolt to use to launch the darts. Amazon has them for $6, and it works perfectly with the grappling hook dart. They also sell them in groups of 4, which would let parents and adults watching kids to stash them around the house. You know, in case you wanted to retaliate to any surprise Nerf attacks.

After we made the grappling hook, we designed and printed up a modification to the Nerf scope we designed so it clipped onto the Jolt. My nephew did the design and used calipers to take the needed measurements, and I did some translation into Solidworks for him.

jolt_scope_measurements_1

With printers, VR, and AR all taking off someone seriously needs to make a decent CAD package targeted at kids. My nephew is a pretty impressive kid, but I was still surprised by how he walked through designing his scope. This was actually the second scope we built, so I’ll talk about his designing in another post, but I was impressed. He iterated a bunch of really specific designs on paper before telling me exactly what he wanted his scope to look like. He even tried out different lollipop and crosshair designs.

For “rope” we used a 15 foot section of dentil floss. Use the un-waxed type if you have a choice, it helps keep it from knotting. I added a front cross bar and spars to hold the “rope” on the grappling hook. Firing the dart would cause the “rope” to unspool as the dart flew, and winding up the rope kept it from getting tangled when not in use. Still, using the spars also meant that the kid firing the grappling hook had to re-wind after every shot. So I think I should have not added anything to my nephews design. It did provided an opportunity teach him what feature creep on a spec was, and that it is not your friend.

nerf_grapplinghook

All in all we spent a good hour playing with the grappling hook, launching it at different things and trying to reel them in. The calipers we used to take measurement were also a bit of a hit in their own right. In retrospect though I would wait until the child in question was 9-10. The CAD modeling takes a good while even if you are keeping things simple and attention spans can begin to get exceeded.

Categories
I am going to try Science!

A Non-Newtonian fluids and shear thickening science project

Non-Newtonian is both insanely cool, and something a young mad scientist in training can directly experience and play with. Cornstarch mixed with water is a shear thickening Non-Newtonian fluid.

Shear thickening is basically what it sounds like; the fluid thickens when shear forces are applied. The fluid thickens when you apply forces into the fluid. The most spectacular example of this effect is people running across tubs filled full of the stuff. Run fast enough and the fluid supports them, but stop or run slow enough and they start to sink into the fluid. Another cool example of shear thickening is to fill the cone of a speaker pointed up with the fluid. Then playing sound causes the fluid to do all sorts of weird things.

Even though larger volumes of the fluid lend themselves to spectacular demonstrations, you can do some really cool science experiments with less than a cup of corn-starch. My nephew was visiting on short notice and we were able to put this experiment together only on what I had in the house for cooking.

We mixed up a mixture of cornstarch to water at 35:65 by weight. That’s actually a bit soupy a mix, but it made it easier to work with for a longer time with my nephew. Next we covered a small speaker with plastic wrap. My nephew was able to use used a cotton swab to stir the cornstarch slurry in the beaker, then spoon it out onto the speakers surface.

Cornstarch_and_sound_loading

Once the cornstarch was on the speaker we used a function generator to sweep different frequencies and waveform shapes. While driving at fixed frequencies let us feel differences in the fluid at different frequencies, and let us do better science, it wasn’t as interesting as just driving random sound. My nephew still thought it was cool – but I think I am going to do another run of this with him using a larger speaker and sound.

Cornstarch_and_sound_different_sounds

When we were driving the speaker we could turn the function generator off and on having the material in the speaker switch from acting like a fluid, to acting like a solid – which was cool for an 8 year old. What also worked was showing him how driving at different volumes and frequencies changed the viscosity.

Cornstarch_and_sound_mixing

Its hard to see in the picture, but with the shear-thickening my nephew was able to drag and lift the liquid around like it had a very high viscosity right up until it started acting like a solid and breaking. At which point it would fall back into the pool acting alike a liquid. Hard to describe, but a cool illustration of both viscosity and Non-Newtonian shear thickening.

All in all I highly recommend this for anyone wanting to show kids that science is cool. If you don’t have any of the electronics, you can mix up a small quantity of cornstarch and water in the palm of a kids hand. Then when you tap it, it turns solid for a moment. Not as cool as using the speaker, but fast and can show kids something cool in a few minutes.

Categories
3D Printing Projects

Round Two on Printed Lego Walkers

The first LEGO walker was really cool, however it was more a single printed toy of the same size and scale of a LEGO mini-fig and not a LEGO toy in its own right. Looking around thingiverse a bit more my nephew and I found this walker design, which snapped together as a series of four custom LEGO pieces.

Lego_Walker

http://www.thingiverse.com/thing:462844

It is hard to make out details because I printed it in black ABS, but this walker really came out pretty sweet. I think I will modify this design before my nephew visits next, making the legs more easily detachable – but still – it was still really cool to be able to sit down with my nephew, pick out one toy to make from hundreds of possible options, and then just print it. I mean this is what the world is like when he is 8, he is growing up with that kind of magic being the reality of his world. How cool is that.

Categories
3D Printing Toy making Uncategorized

(3D printer + awesome nephew) = Toys!

So I have be playing with 3D printers for the better part of a decade – and I cant believe I never though of this! Most of what I do is making parts for prototypes – I haven’t been making toys.

My nephew is in town and I wanted to show him what you could do with a 3D printer. He’s 8 – and awesome – so we made some accessories for a Nerf gun under his direction. Once we were done with that though, we found this guys design for a mini-fig walker. (Design here http://www.thingiverse.com/thing:171087).

WP_20150313_012

The designer painted his, which looks better, but I don’t really want to give kids painted parts to play with. They tend to end up in their mouths. Turns out there are a bunch of interesting designs for mini-figs out there.

At this point I pretty much need to design and make my nephew some new toys, but until I have time to sit down and design something for him myself, these designs look neat.

Lego Walker http://www.thingiverse.com/thing:462844
MiniFig Mech http://www.thingiverse.com/thing:22834
MiniFig Mech 2.0 http://www.thingiverse.com/thing:22835

Categories
Tools Watchmaking

New Watchmaker’s Lathe

Wahoo! My new watchmakers lathe finally showed up! I have wanted a watchmakers lathe like this, or a turn, for about ten years. Its hard to find a complete one in good condition.

Making a watch from scratch, meaning cuting everything from raw metal, is one of the projects on my bucket list. That project itself is long time off. For now I am just collecting horology books and tools and working on building basic skills. There’s a lot of skills and concepts to pick up.

newlathe_boxed_2_26_2015

So this type of lathe is made for turning very small objects between centers. What do I mean by very small? Well the lathe is bow driven, and it is not uncommon for people to use the core of a feather as the bow. The lathe dog that came with it is less than an inch long.

newlathe_P1_2_26_2015

The lathe comes with a number of centers of different sizes, as well as several varieties I have never seen before. Several centers look hollow and bowed out forming a spring, so you can hold the work piece impaled on the pin. It’s a fascinating method for holding the work piece, but given the low masses involved – and the high stiction forces – I can’t see why it would not work.

newlathe_graverstand_2_26_2015

I found the graver cross slide support is unusual in that it is only held in place by friction. The graver resting on the support translates into a downward pressure that should hold the cross slide in place. I was surprised at this design choice, since the lathe does use a screw turn just sets the cross slide support angle.

newlathe_P2_2_26_2015

The turns are held in a bench vise, hanging out over the watchmaker’s bench.

So now to go make some very small round things!

Categories
3D Printing Prototyping

Impressions of the Printrbot simple

The prototypes I am building required enough printing that I decided to get a second printer. Looking at what was available I decided to go with the Printrbot simple, and all and all I have been impressed with it.

Since I was in a hurry I spent the extra $50 and bought the printer pre-assembled and ready to print. Surprisingly it really was ready to print. I just slid it out of the box, plugged it in, and was printing 20 minutes later. Hey, I read the directions.

Even with the heated bed upgrade the printer was only half the cost of the Replicator Mini – so I was pleasantly surprised to see the print quality rivaling any Makerbot I have used. It definitely is better than the uPrint printers I have used. Given that, and that it does not use proprietary filament I have to say I am quite happy with the printer.

printrbot_2_23_2015.jpg

So what I was not happy with was my first real print turning into a blob of molten plastic. It is not as bad as it looks, just 2 hours with a hot air pencil to clean the head up. Recalibrating the auto leveling Z sensor fixed things and the printer has been running non-stop.

printrbot_jam_2_23_2015

The one horrible thing is the Cura software they suggest using for the printer – so I am planning on at least switching to something like Pronterface soon.

So all in all I am very happy with the printer. The blob was my rushing things because I was impressed with the printer and wanted to play with it. I’ll probably build it an enclosure, and swap out the hot end eventually, but it was well worth the $750.

Categories
Quotes

Now thats an inspirational quote….

So I normally don’t go in for inspirational quote – but a friend recently posted this and it is just too good not to save especially coming up on St. Valentines day.

“Tell someone you love them today, because life is short. But shout it at them in German, because life is also terrifying and confusing.”

Categories
Prototyping

A quick trick for prototyping watches that look like watches

So I have seen a lot of really cool watch prototypes lately, and most of them have been horribly finished. So I figured I’d post about this trick I’ve used prototyping watches a number of times. It lest you pretty quickly make a watch prototype that looks like and off the shelf watch. While the trick delivers really nice looking prototypes, it is about more than just vanity. For a watch prototype, the mount is critical. It’s the foundation everything will be built atop. The mount be comfortable, well balanced, and robust enough to actually survive on someone’s wrist without them having to consciously change how they go about their day. The trick, is for a prototype to achieve all those attributes by repurposing an existing watch.

Basically you can buy a cheap (say $20 watch) for its case. You want to pick out out a watch with enough size to house your intended electronics. The watch I am demonstrating the technique with here is one of the huge ugly watches that were recently popular, but the trick works with watches of all sizes.

Mounting the watch case

Once you picked out your watch you want to remove the band and the glass, and mount it to a backing plate. Make sure that the watch you are buying actually has a removable band, not all of the cheaper ones do. As for the glass, some of the cheaper watches glue the glass in place – but for this trick you can usually just tap it out with a tiny hammer.

For mounting, believe it or not, with light cuts 3M heavy duty double-sided foam tape has enough strength to hold the watch during machining. The watch pictured here is just taped to a ½ inch thick block of aluminum.

Machining down the case

At this stage you can just take light cuts, milling the watch down to expose the movement cavity. You can see here something weird about the cheap import watches. A lot of manufactures of cheap watches use a single small movement in all their watches regardless of size, and then use a plastic insert to hold the movement in place. Be careful milling out the case, that insert can catch on the endmill and go flying.

I didn’t remove the movement from this watch prior to milling, as the back was actually glued shut. Like I said it was a really cheap watch. Once you mill off the top you can remove the movement out the front, and then fix the back so it opens.

Exposing the movement

So when you are done – you are left with something like this. A base piece that is watch shaped, with mounts for attaching a watchband. With a little caliper work at this point you can design a 3D printable top that is pretty arbitrary, to hold your prototypes guts. With a few iterations of hitting the print with high build spray on primer and sanding, and matching the paint color to the frame, you are left with what looks like a single cast watch frame.

Watch_Prototyping_Trick_Finished_P2

Watch_Prototyping_Trick_Finished_P1

I have found this trick yields very reliable, solid, wrist worn prototypes that actually end up looking like watches. Unfortunately, all the prototypes I have done this for were under NDA, but I think this post should give enough of the idea that people can repeat the process. Happy prototyping.

Categories
Uncategorized

Thing a day, Thing #23 Hex Wrench Rack

I am working on a few side projects at the moment and took a few days off from thing a day. I’still am shooting to wrap up the experiment on thing #30. So to get back to it – things number 20, 21, and 22 were more drawer liners and look just like things 13, 14, and 15. Unfortunately I have a lot of drawers that I want to make liners for, so I am chipping away at them.

Thing number 23 is another tool rack. I have been building a couple projects that all use hex nuts, and are spread over multiple benches in the shop. Figured I would make a traveling rack for hex wrenches.

Thing_a_day_number_23

This is the first time I used ball end wrenches, and I have to say – I really love them. Specifically, they let you drive the hex nuts from an angle of up to 30 degrees. As mechanism get more complex that’s a really sweet benefit.