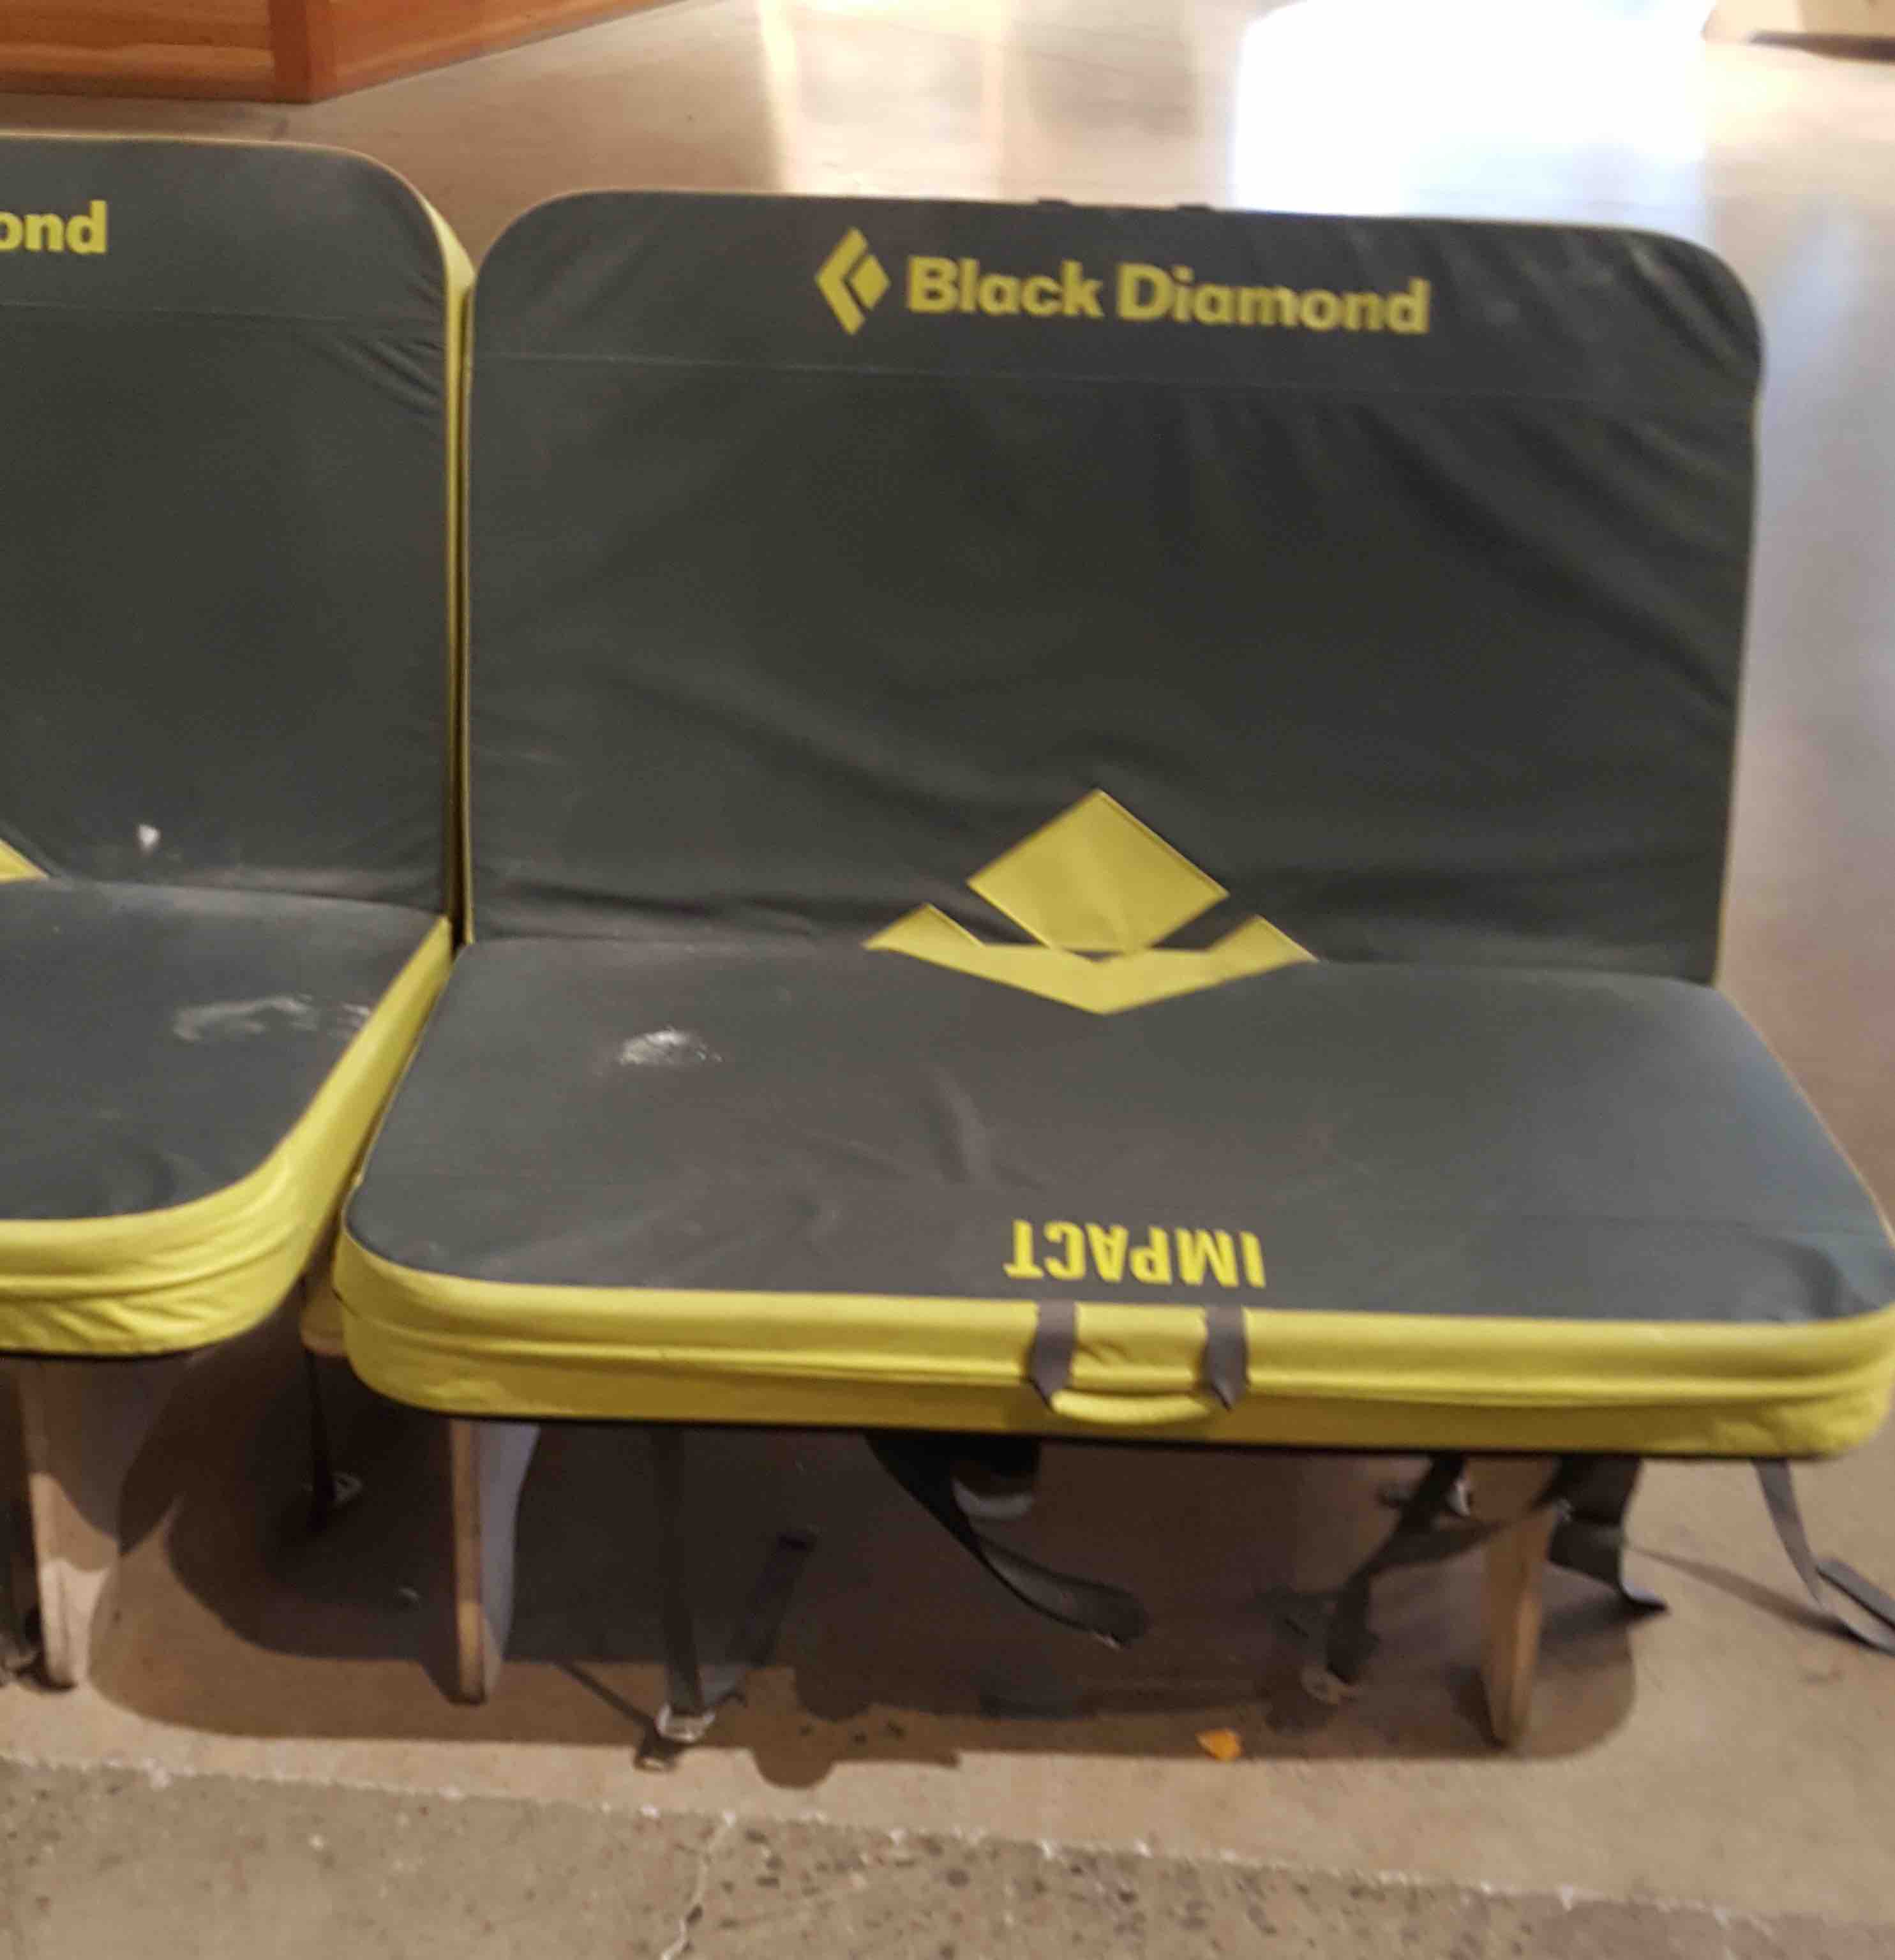
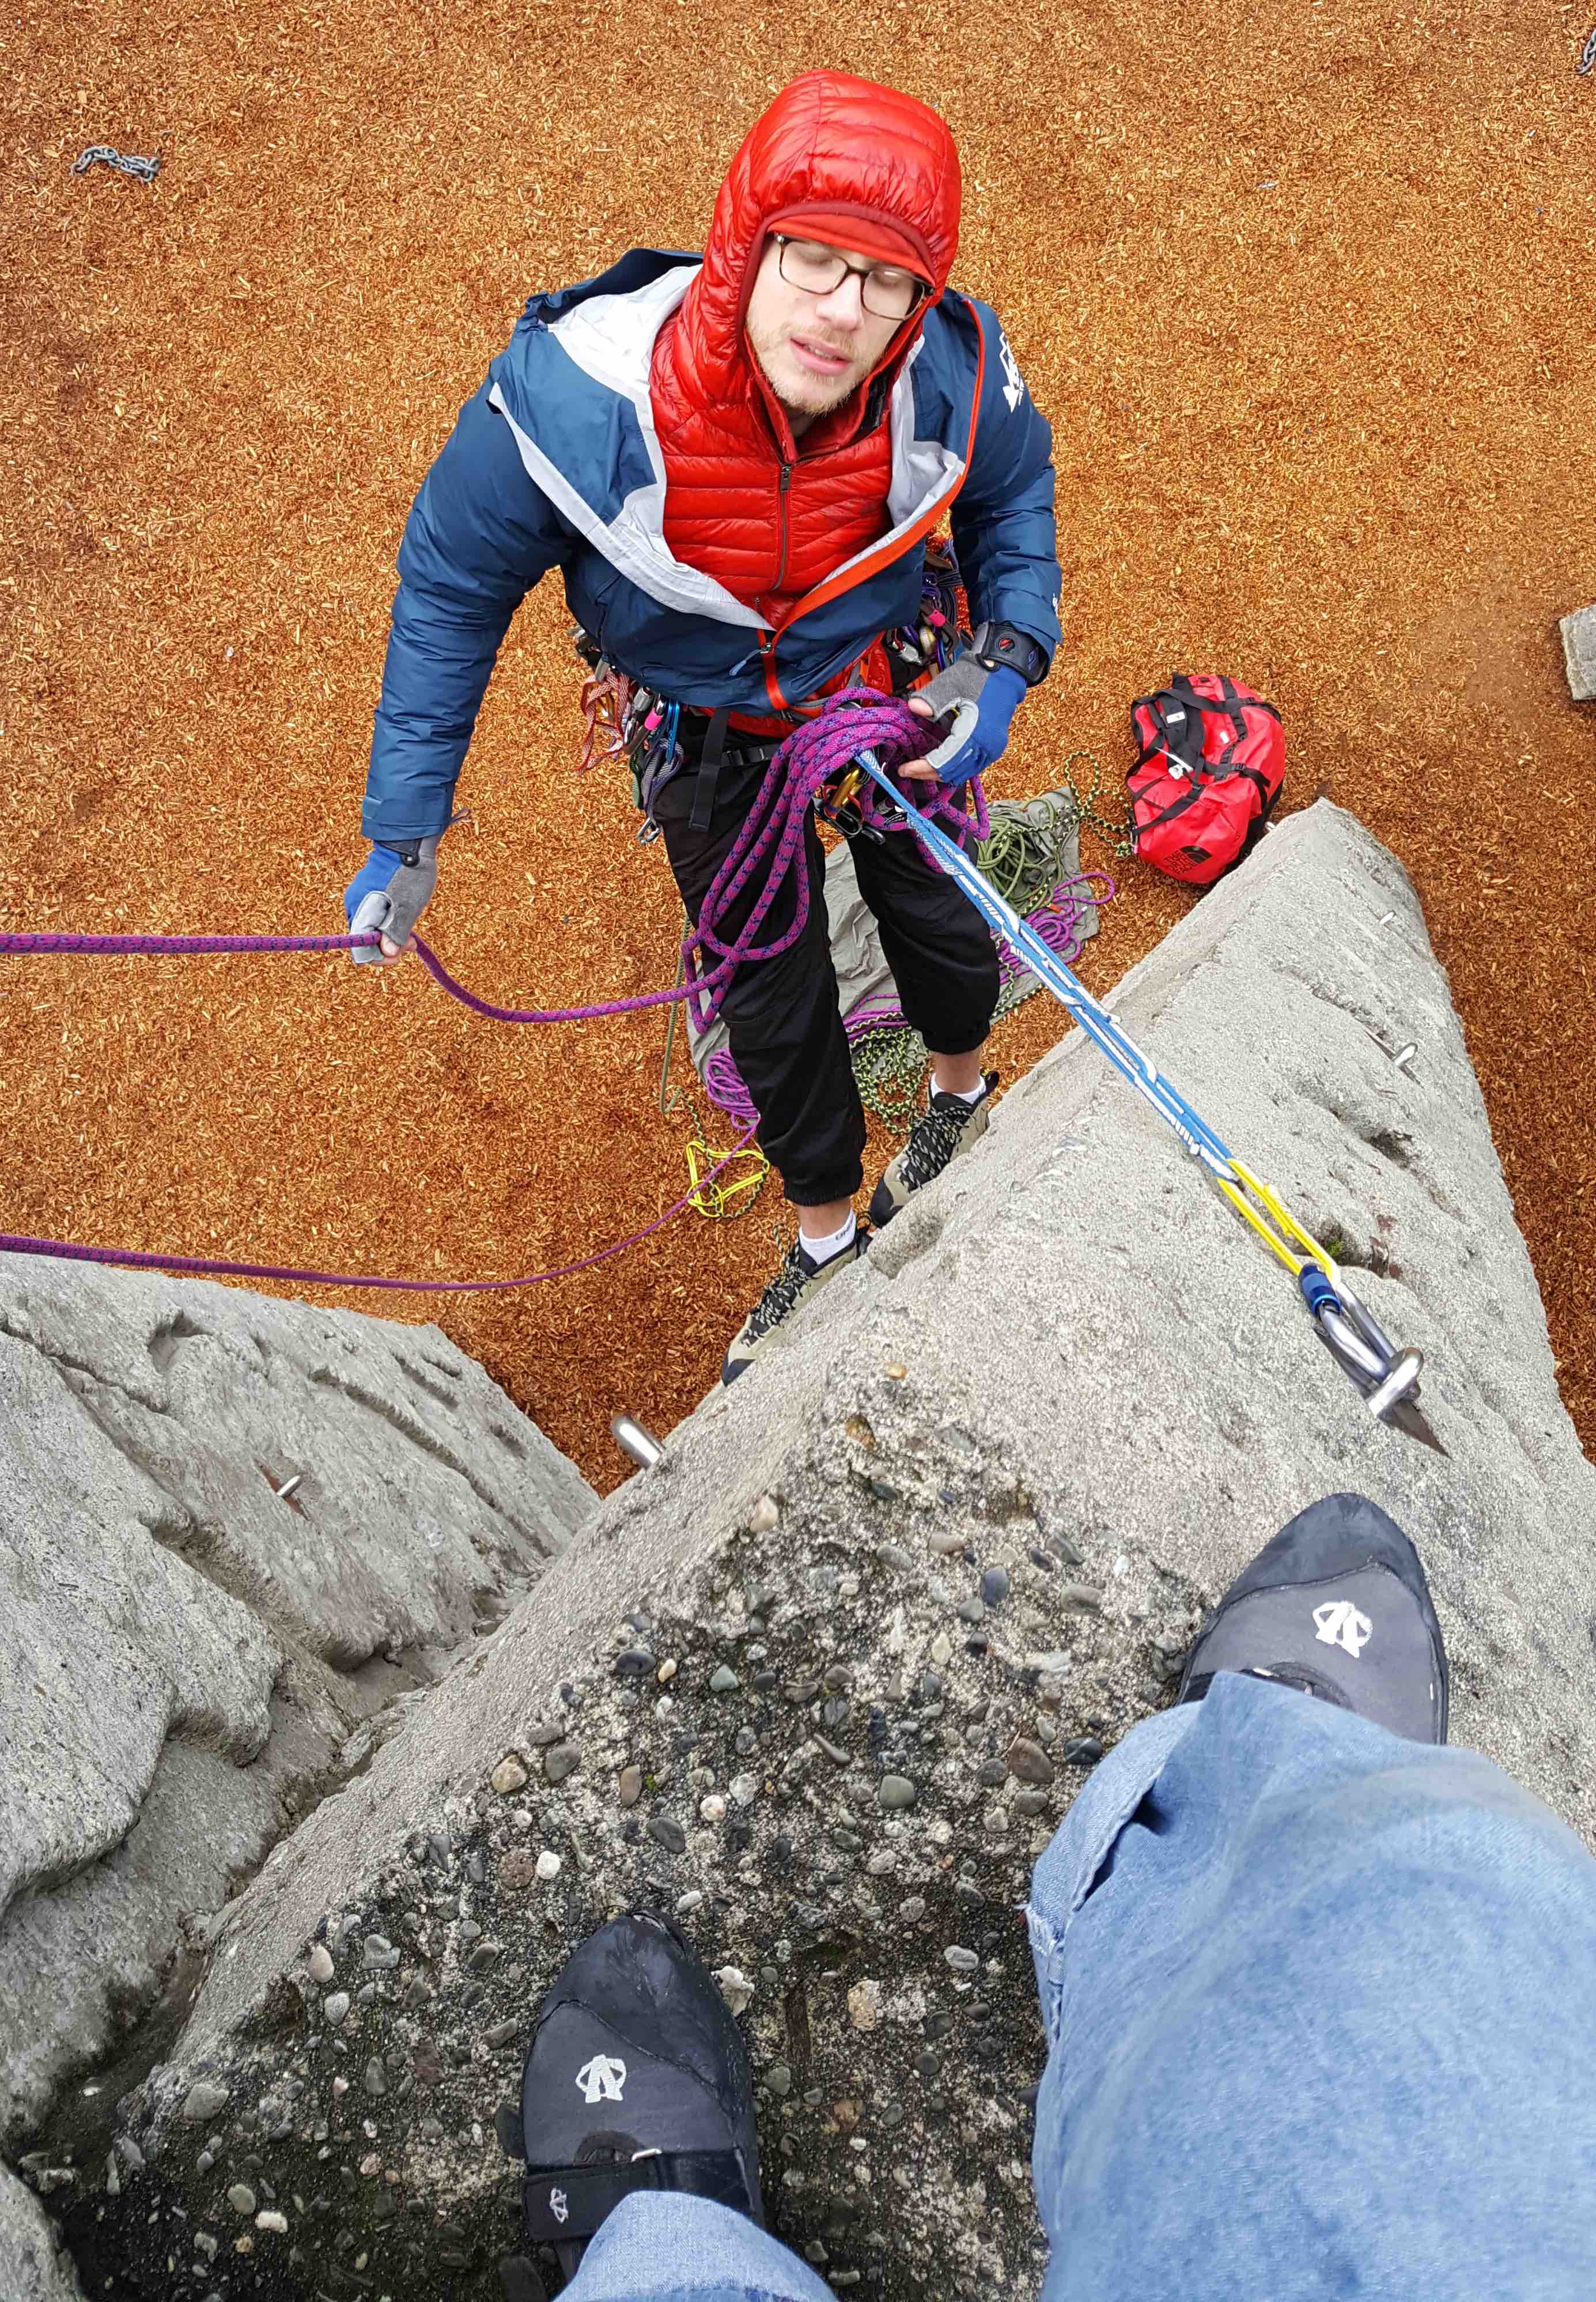
I have started interviewing for gigs outside of Seattle – and that has me thinking about furniture and moving. Well the Seattle Bouldering Project has some awesome – but comfortable – collapsible chairs. I am thinking they would be easy to make, easy to move, and a decent way to store crash pads the 99.9% of the time when you are not climbing.
This picture shows how the pieces of the chairs slot together (and Tyler tying his shoes). I’d probably add some reinforcement to the sides of the slots, but with a high quality plywood they should be really strong.
I am thinking I could sew up a cover for when they are acting as couch cushions. That would give me something easy to wash, and help a bit as the crash pads get used I am not dragging dirt or chalk dust back into the house.
More I think about it the more I am really liking this idea.
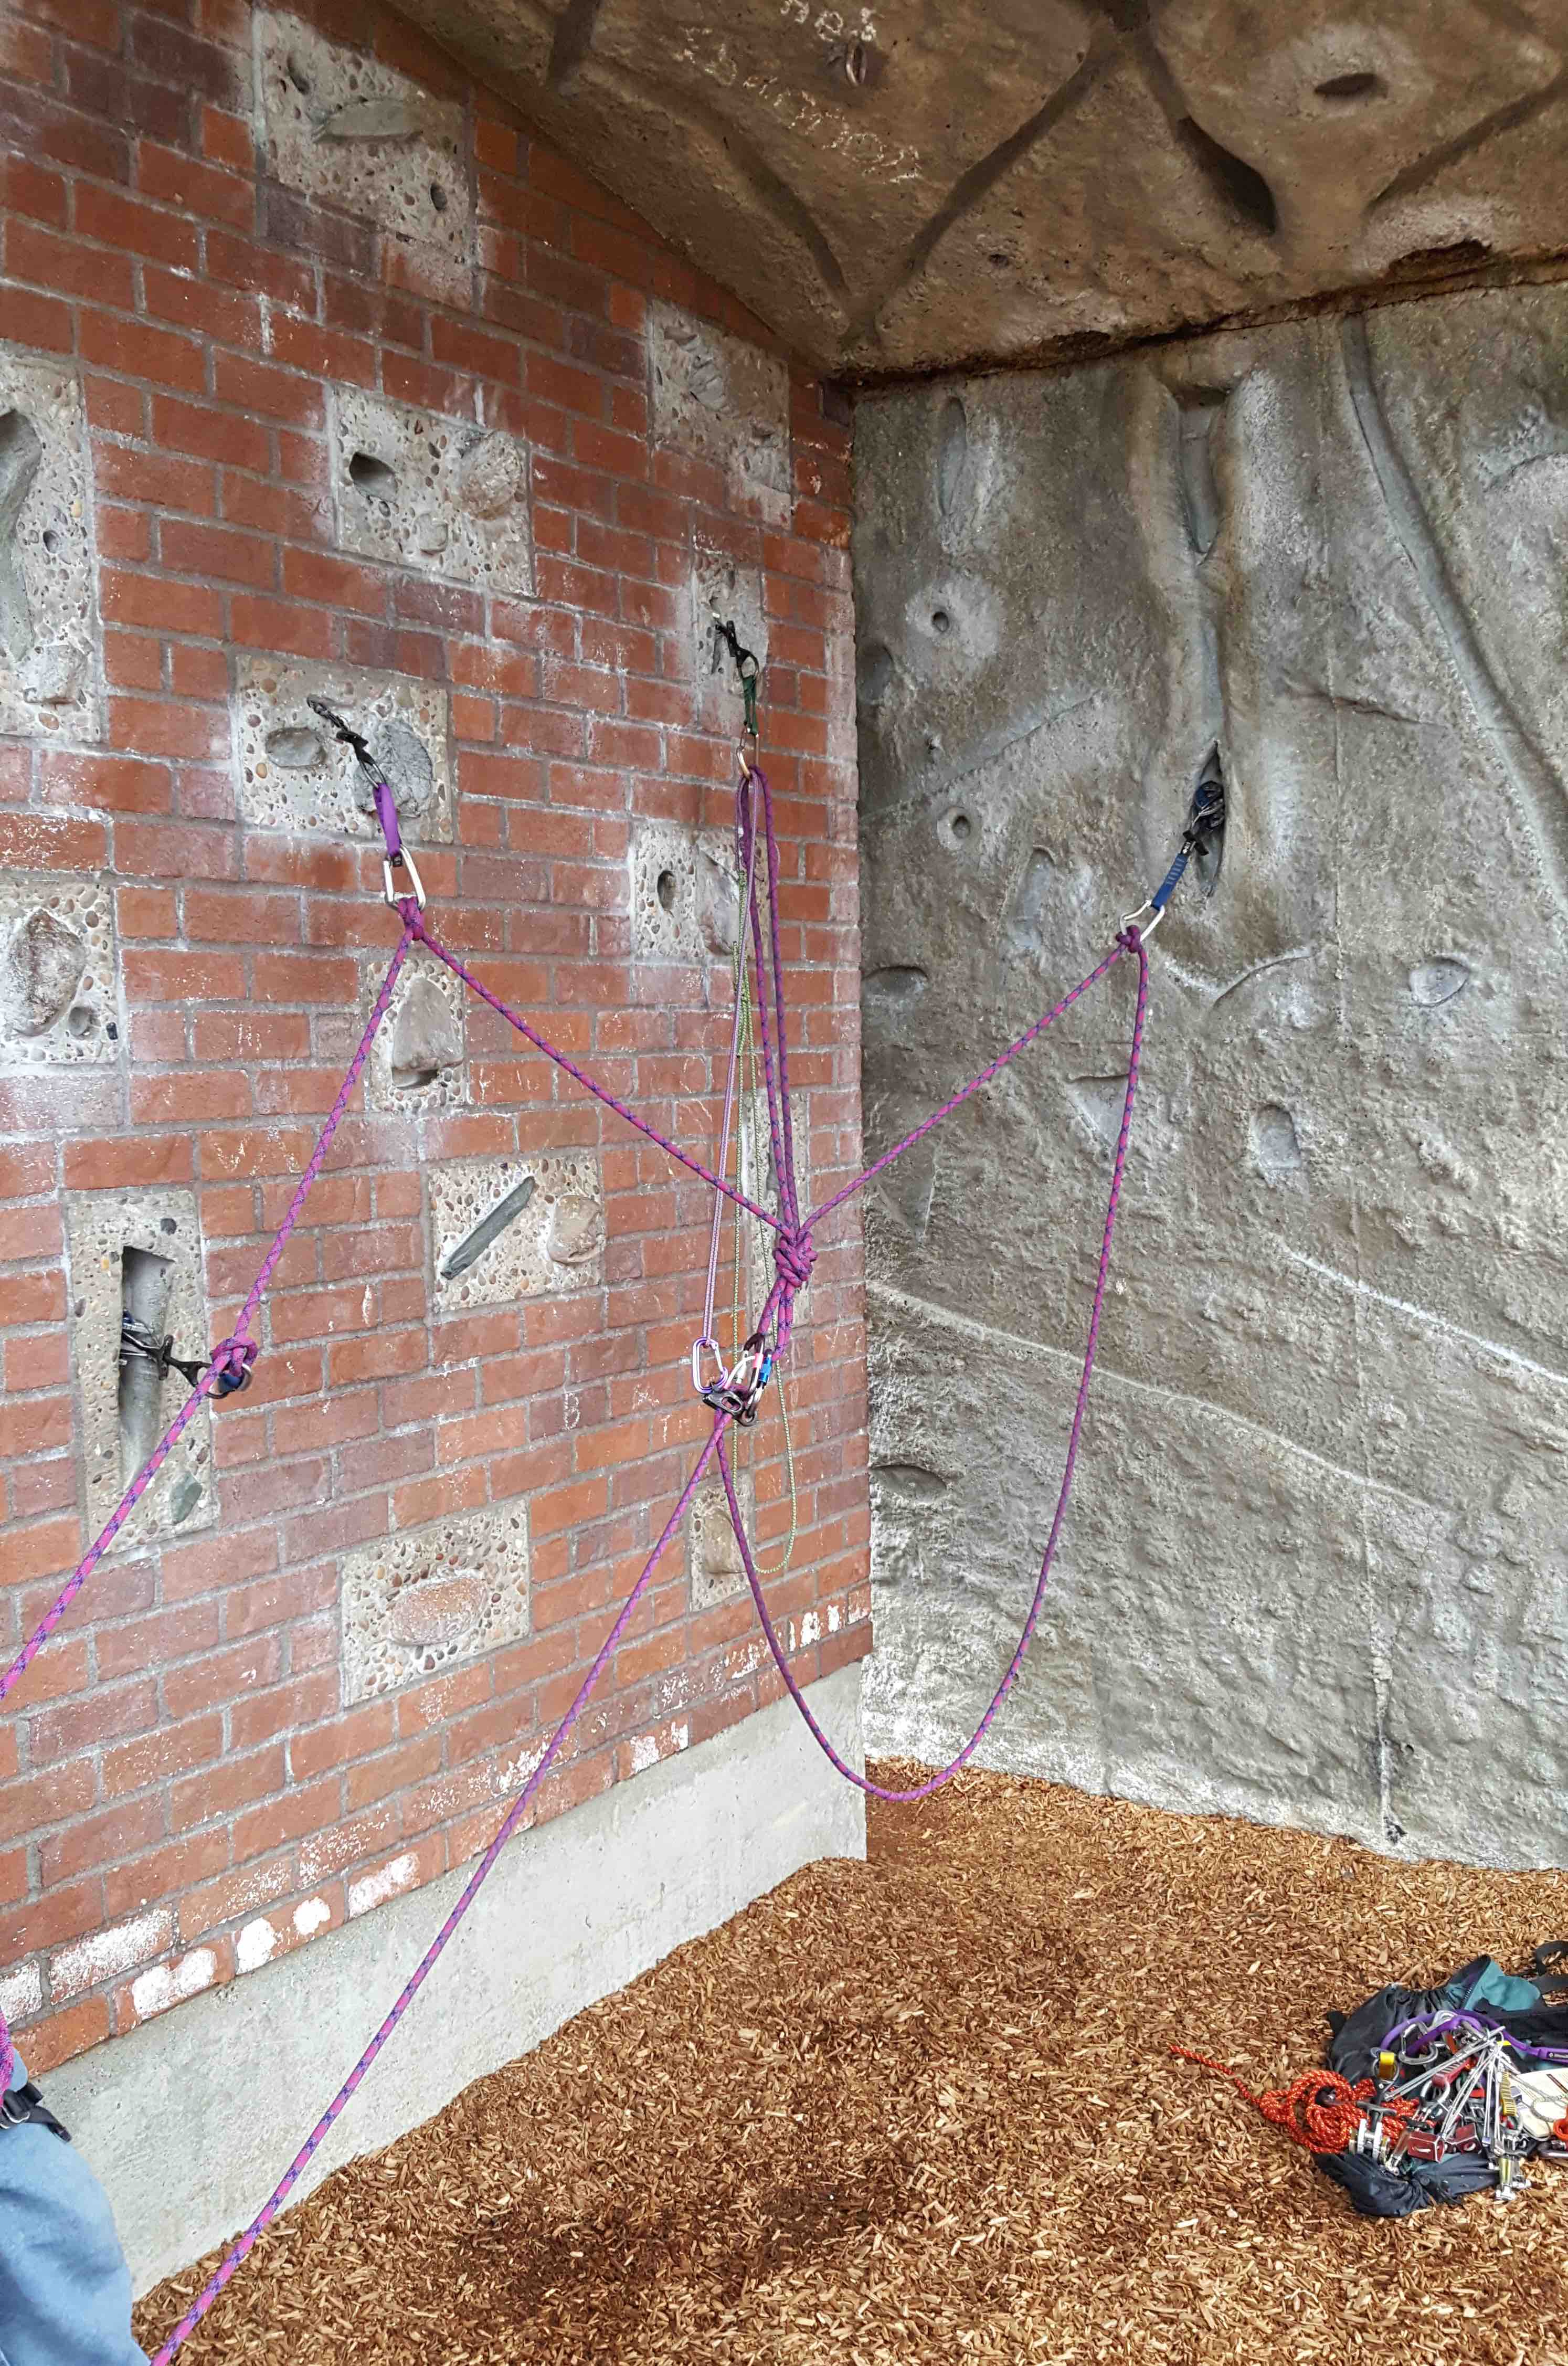
Tyler, Chris, and I met Sunday to do another round of rope-work practice at Marymoore. We drilled on anchors and Z-hauls again.
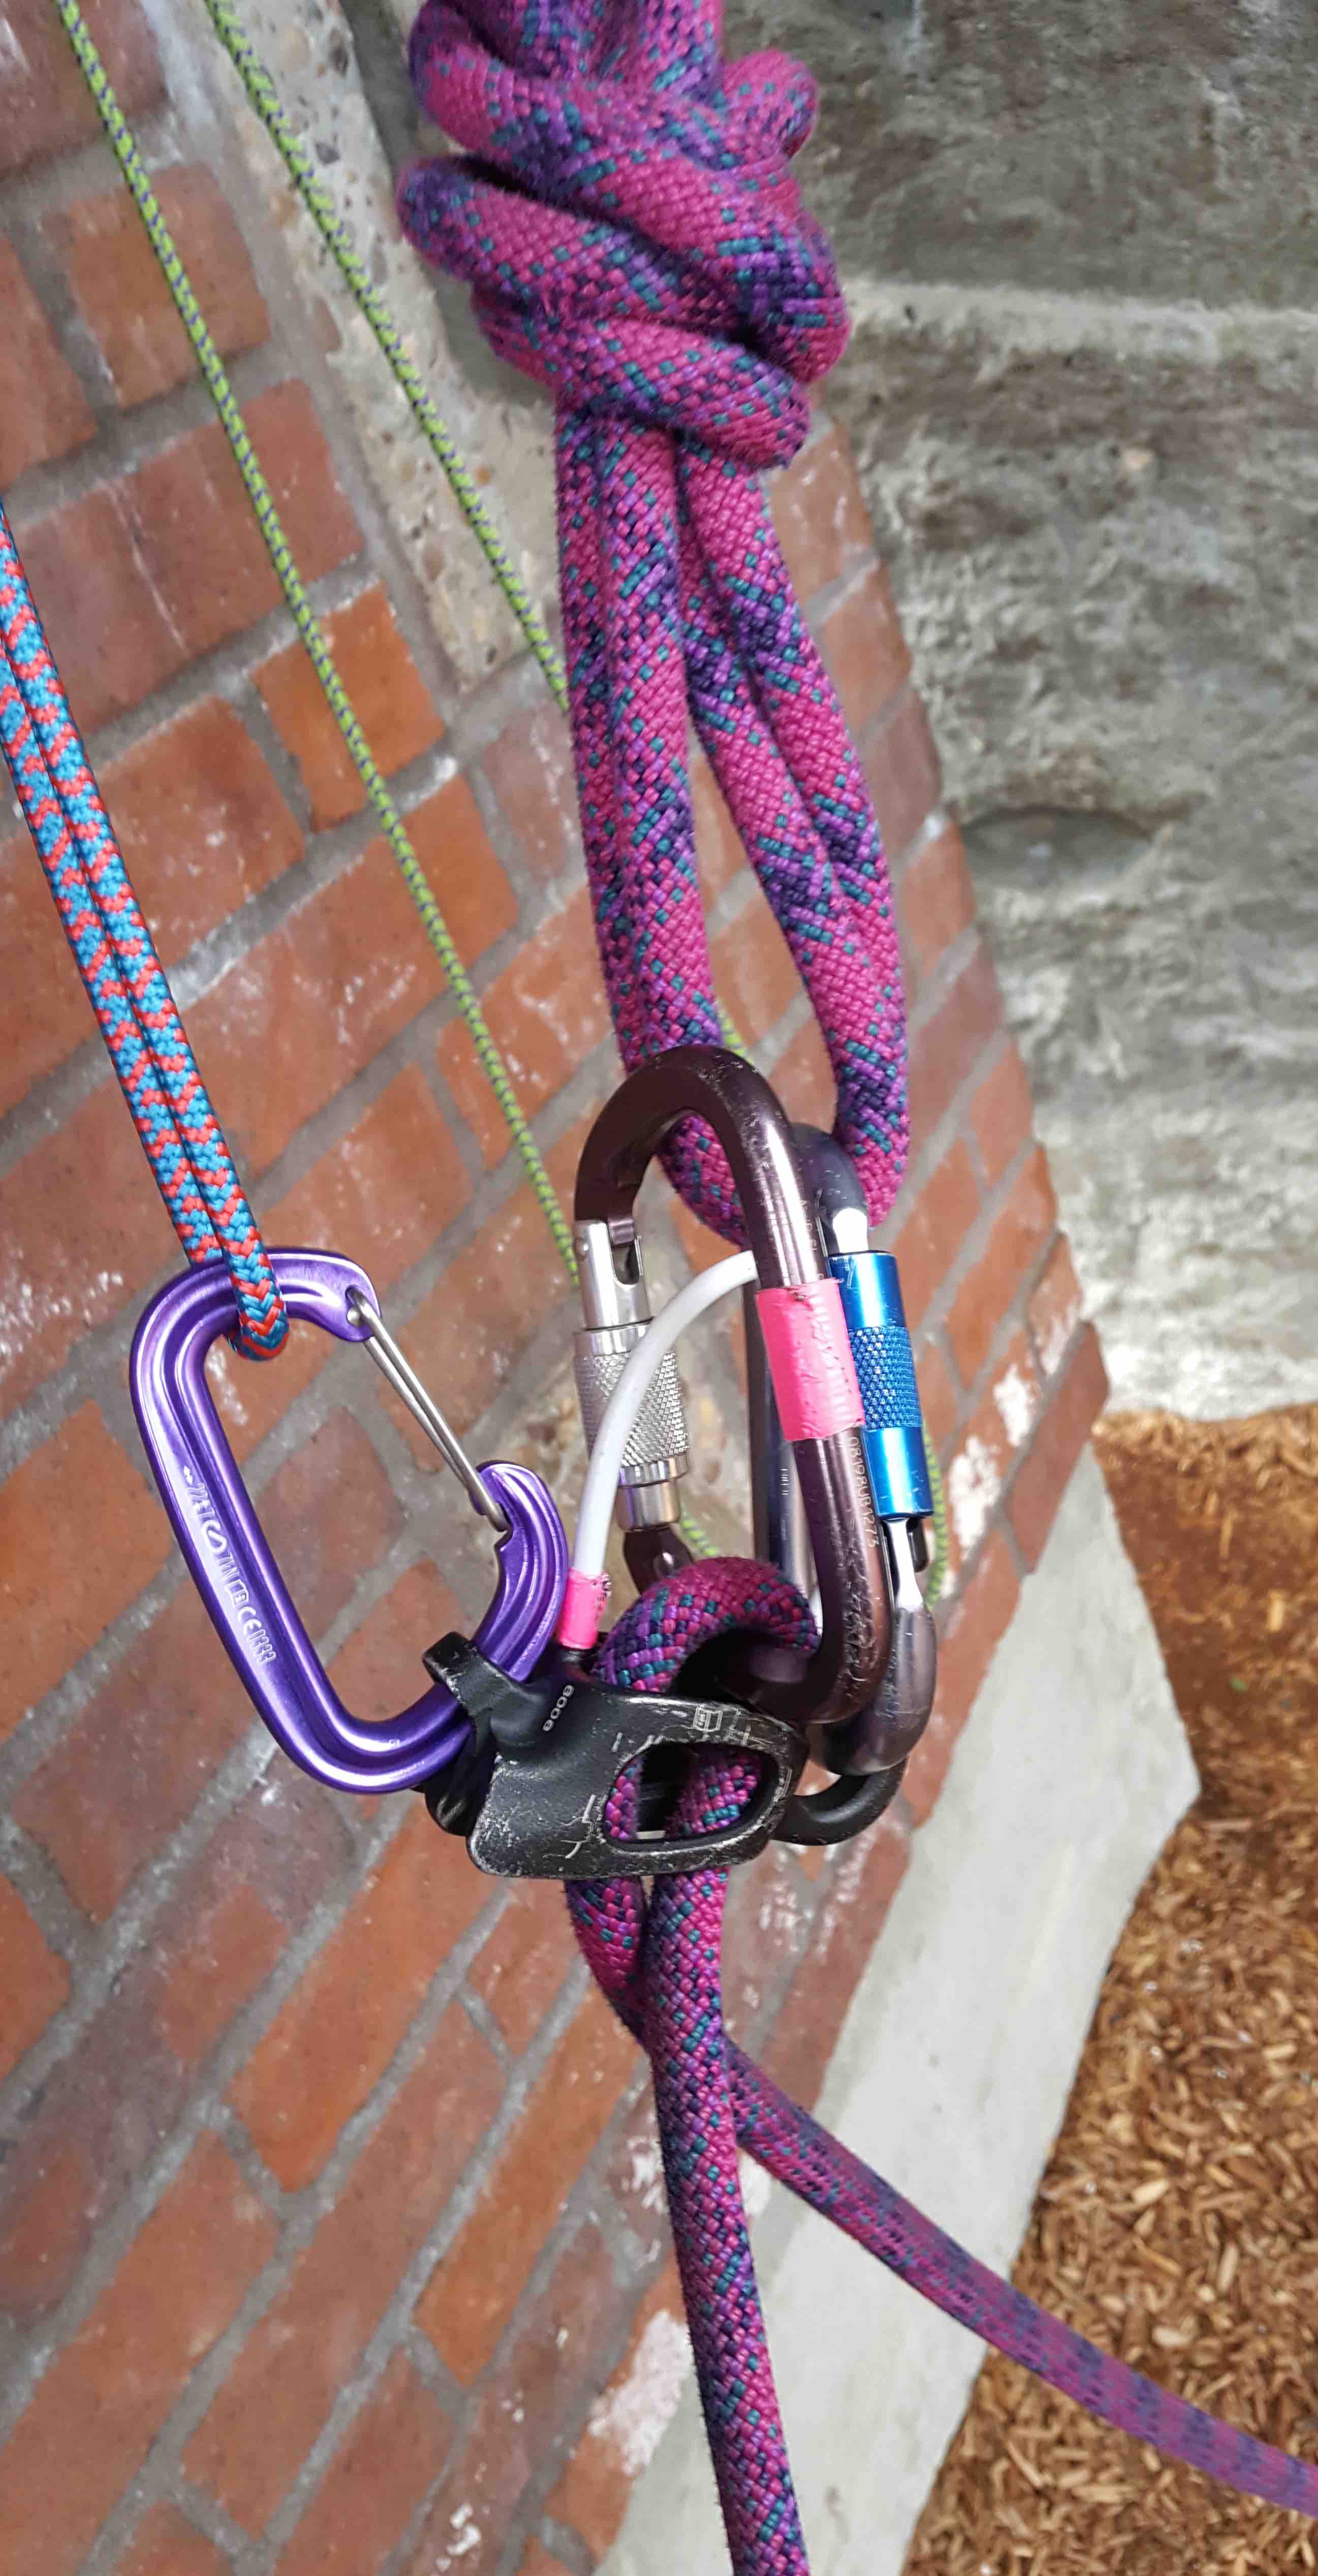
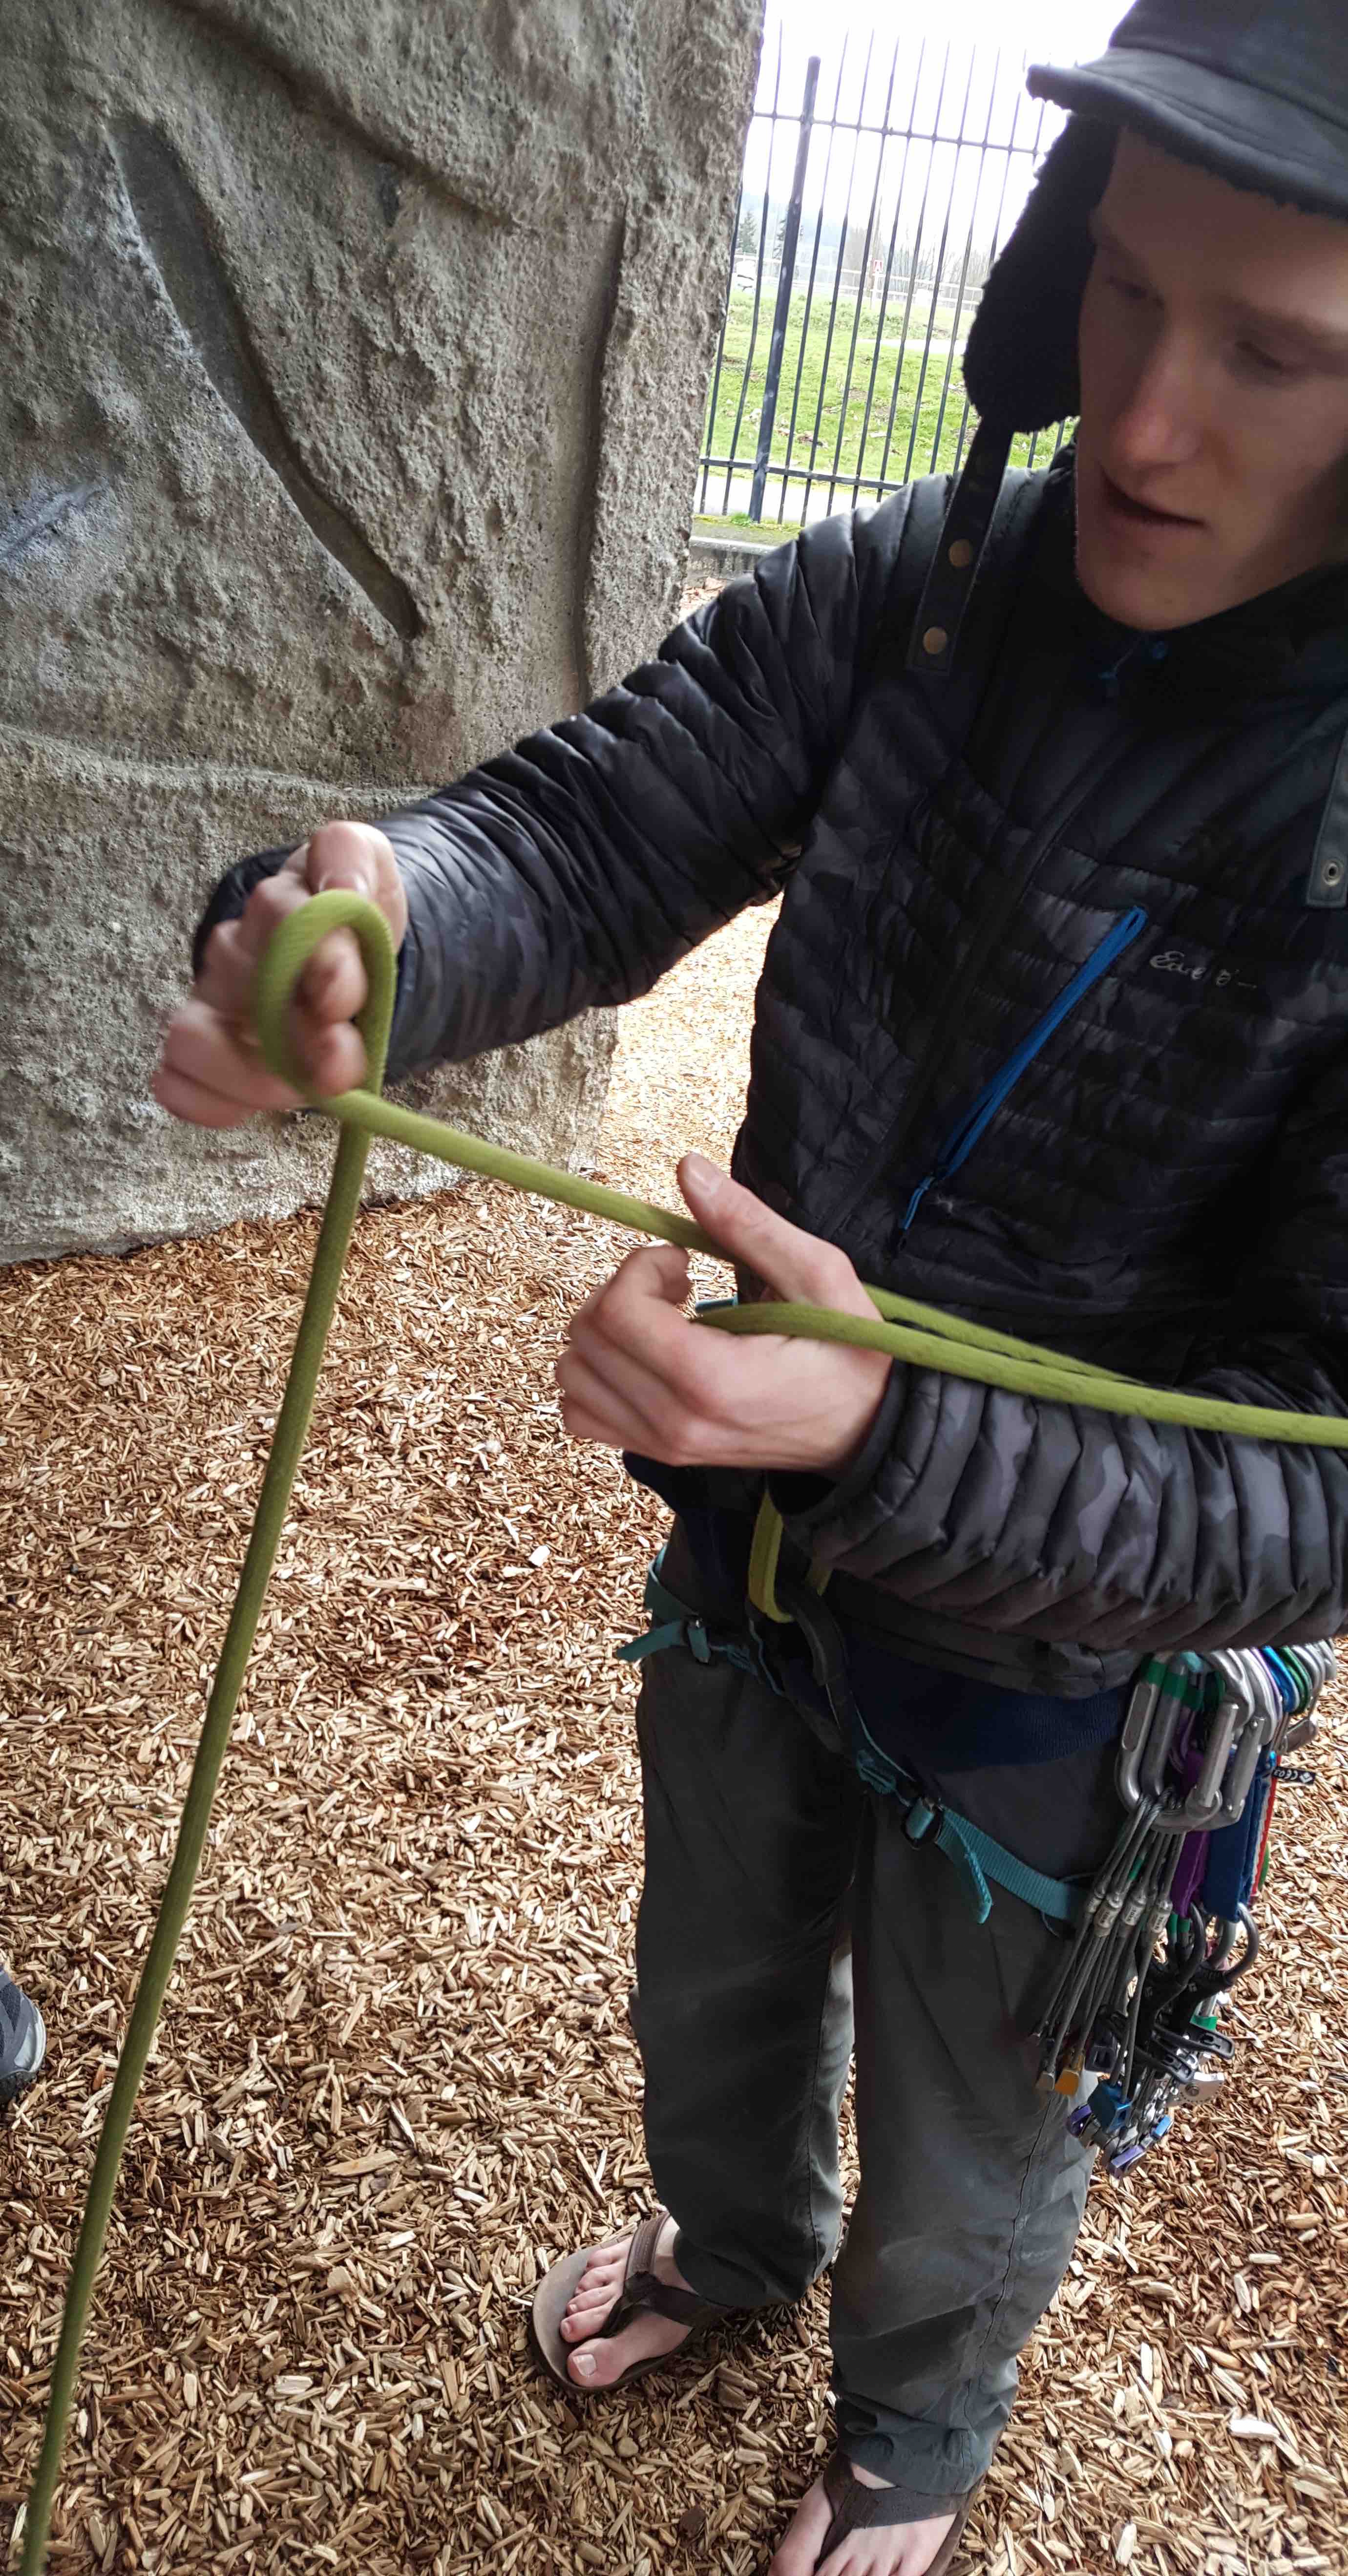
Here is Chris demonstrating one way of reliably putting a clove hitch on a carbineer. While this method uses two hands, it avoids the problem where you accidentally put a Munter and not a clove hitch on the carbineer and have to redo things.
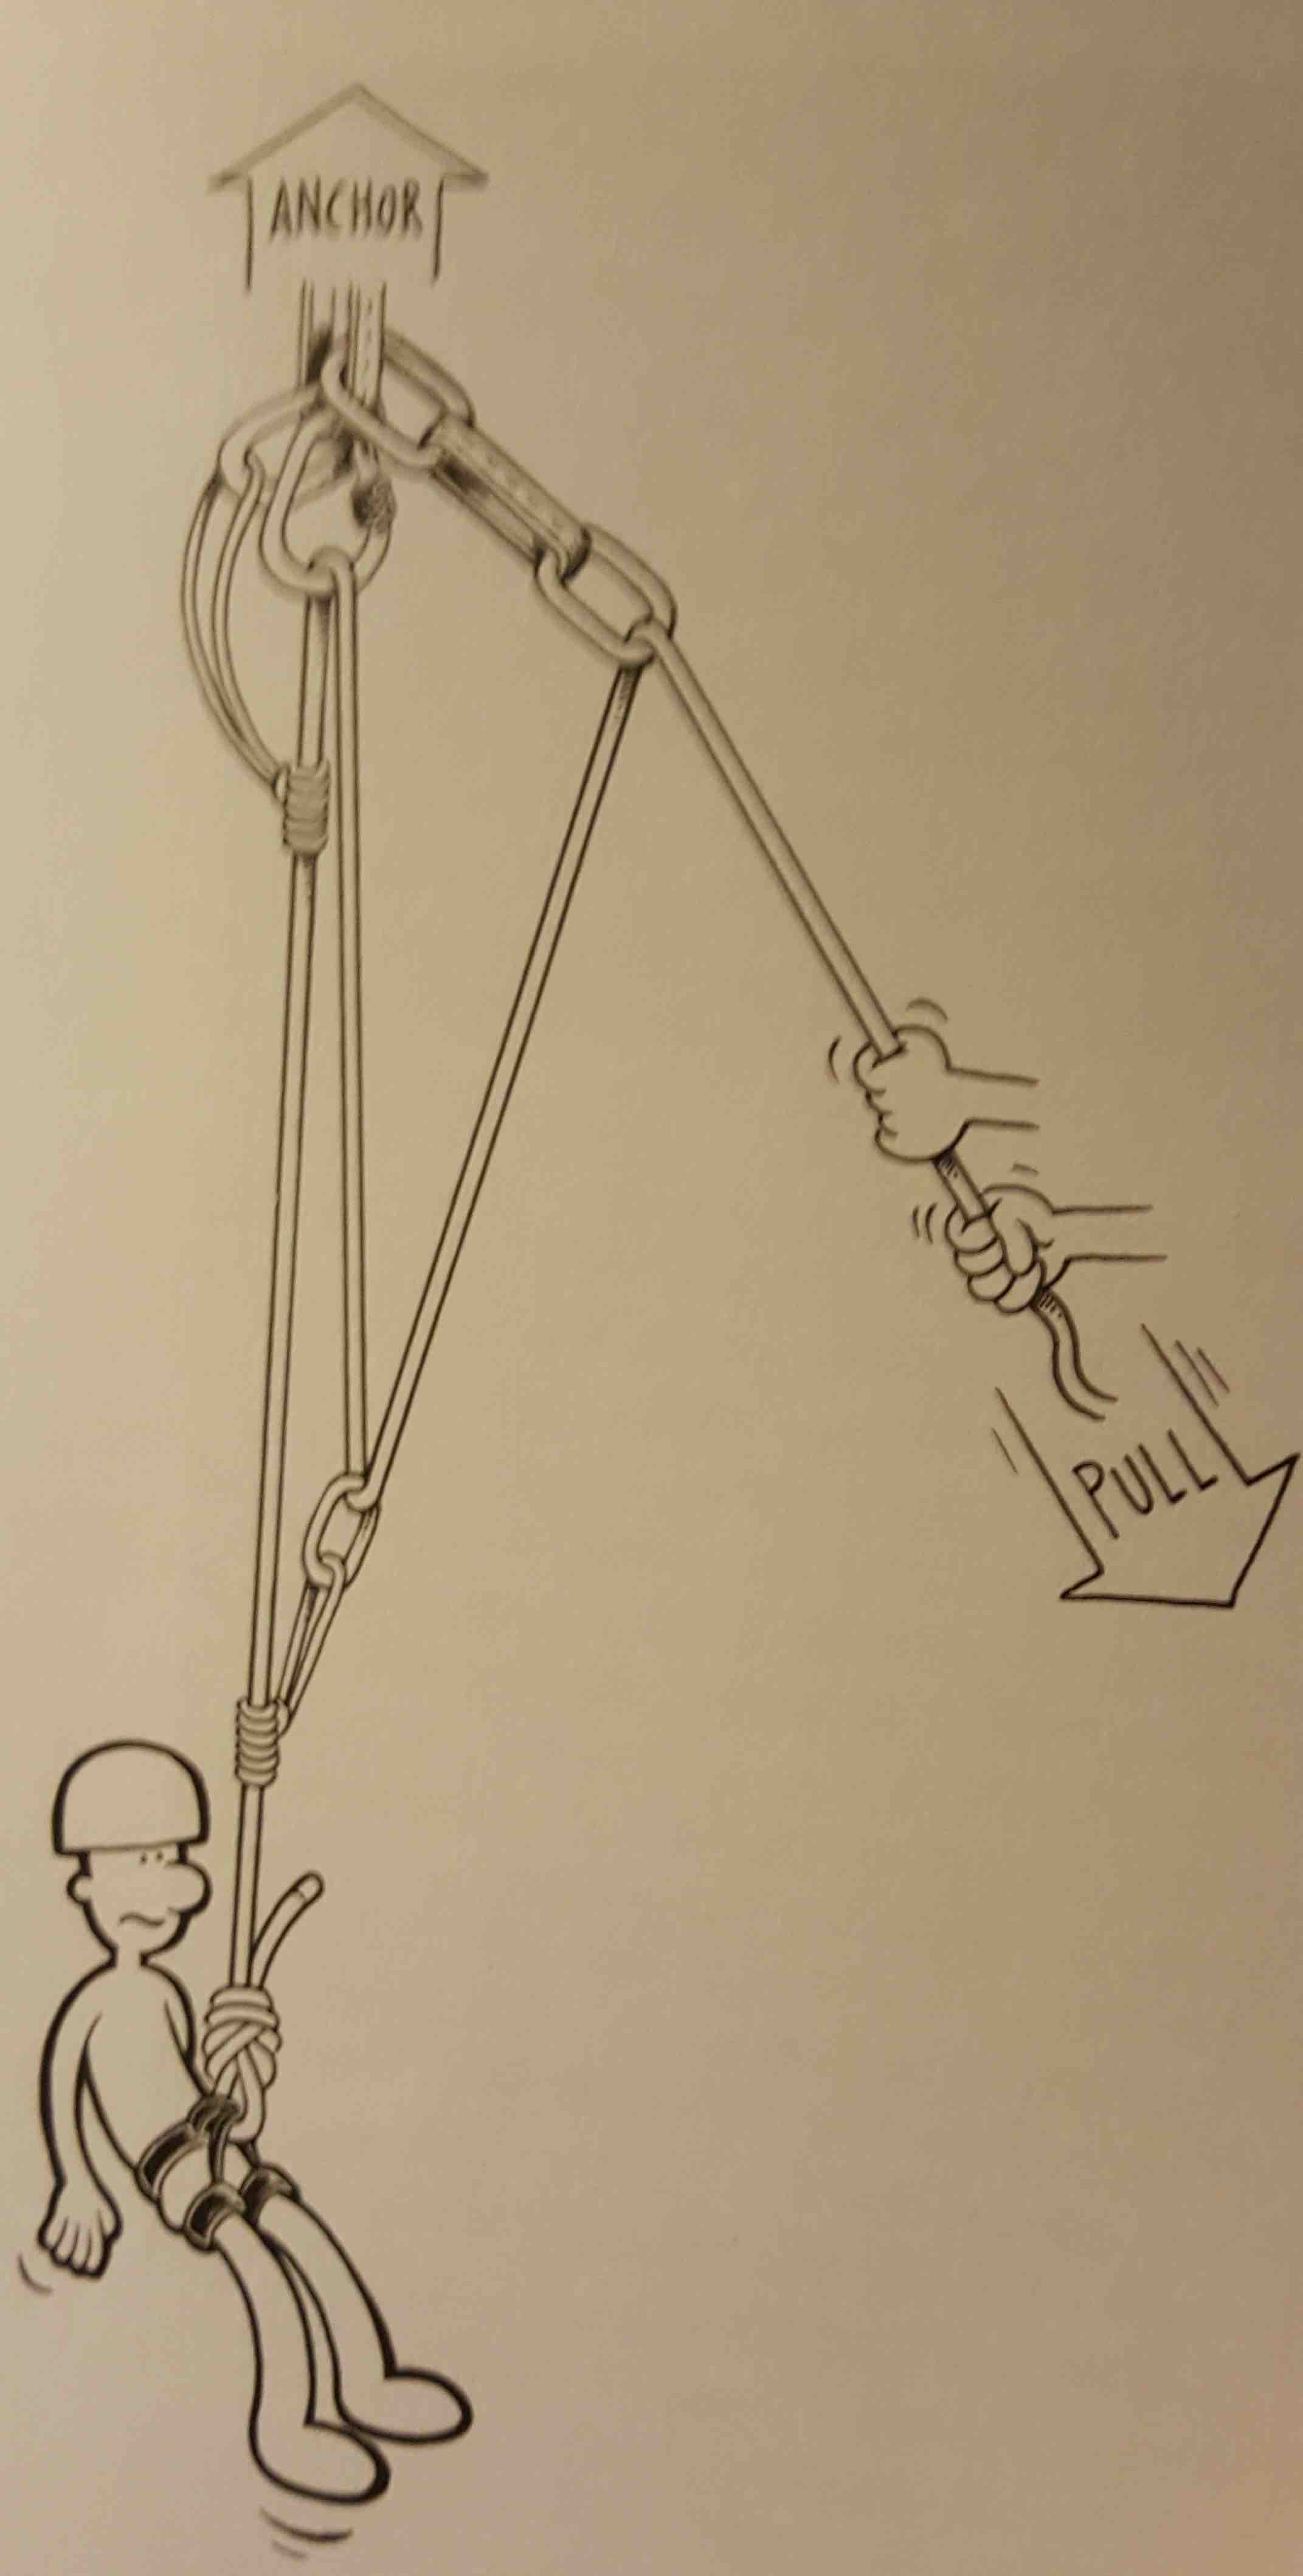
That clove hitch is used on the first piece of the anchor system we have been working on. Seen here:
I talked about this setup before – where you use the rope to build the anchor so I wont get into it here. One interesting thing with this anchor – is that since you are not using a separate anchor line – you have a moment where the last person off the anchor system has a very large potential fall while the belayer is pulling in the slack that used to be the anchor system. Now he is sitting on a single piece of pro, and holding onto the rock, and it is probably the person who climbed up and built the anchor in the first place. So a lot would need to go wrong for there to be a fall – but is something we are all talking over as part of dissecting and drilling on technique.
One thing new we were drilling on was escaping a loaded belay. The guide mode ATCs have friction horns that get engaged on a fall. The problem is you then need to “break” the lock the ATC has on the rope to lower someone. That’s hard to do with any control if they are loading the rope with their body weight.
The trick is to pull the ATC out of the locked position. Here you see a carbineer clipped into a small hole on the ATC provided for this sort of improvised handle. The purple chord seen here runs up above the ATC, through an anchor point, and extended back down to the belayer with the green chord. By pulling on the green chord, or if needed stepping into it, the ATC is pulled out of lock and the belayed person is lowered. Its easy enough to set up – but something you totally need to drill before you need to do it in the wild. It is very easy to drop someone with no control if you are not careful. The tradeoff is an auto engaging belay arresting the fall immediately, for a harder to control lowering after the catch.
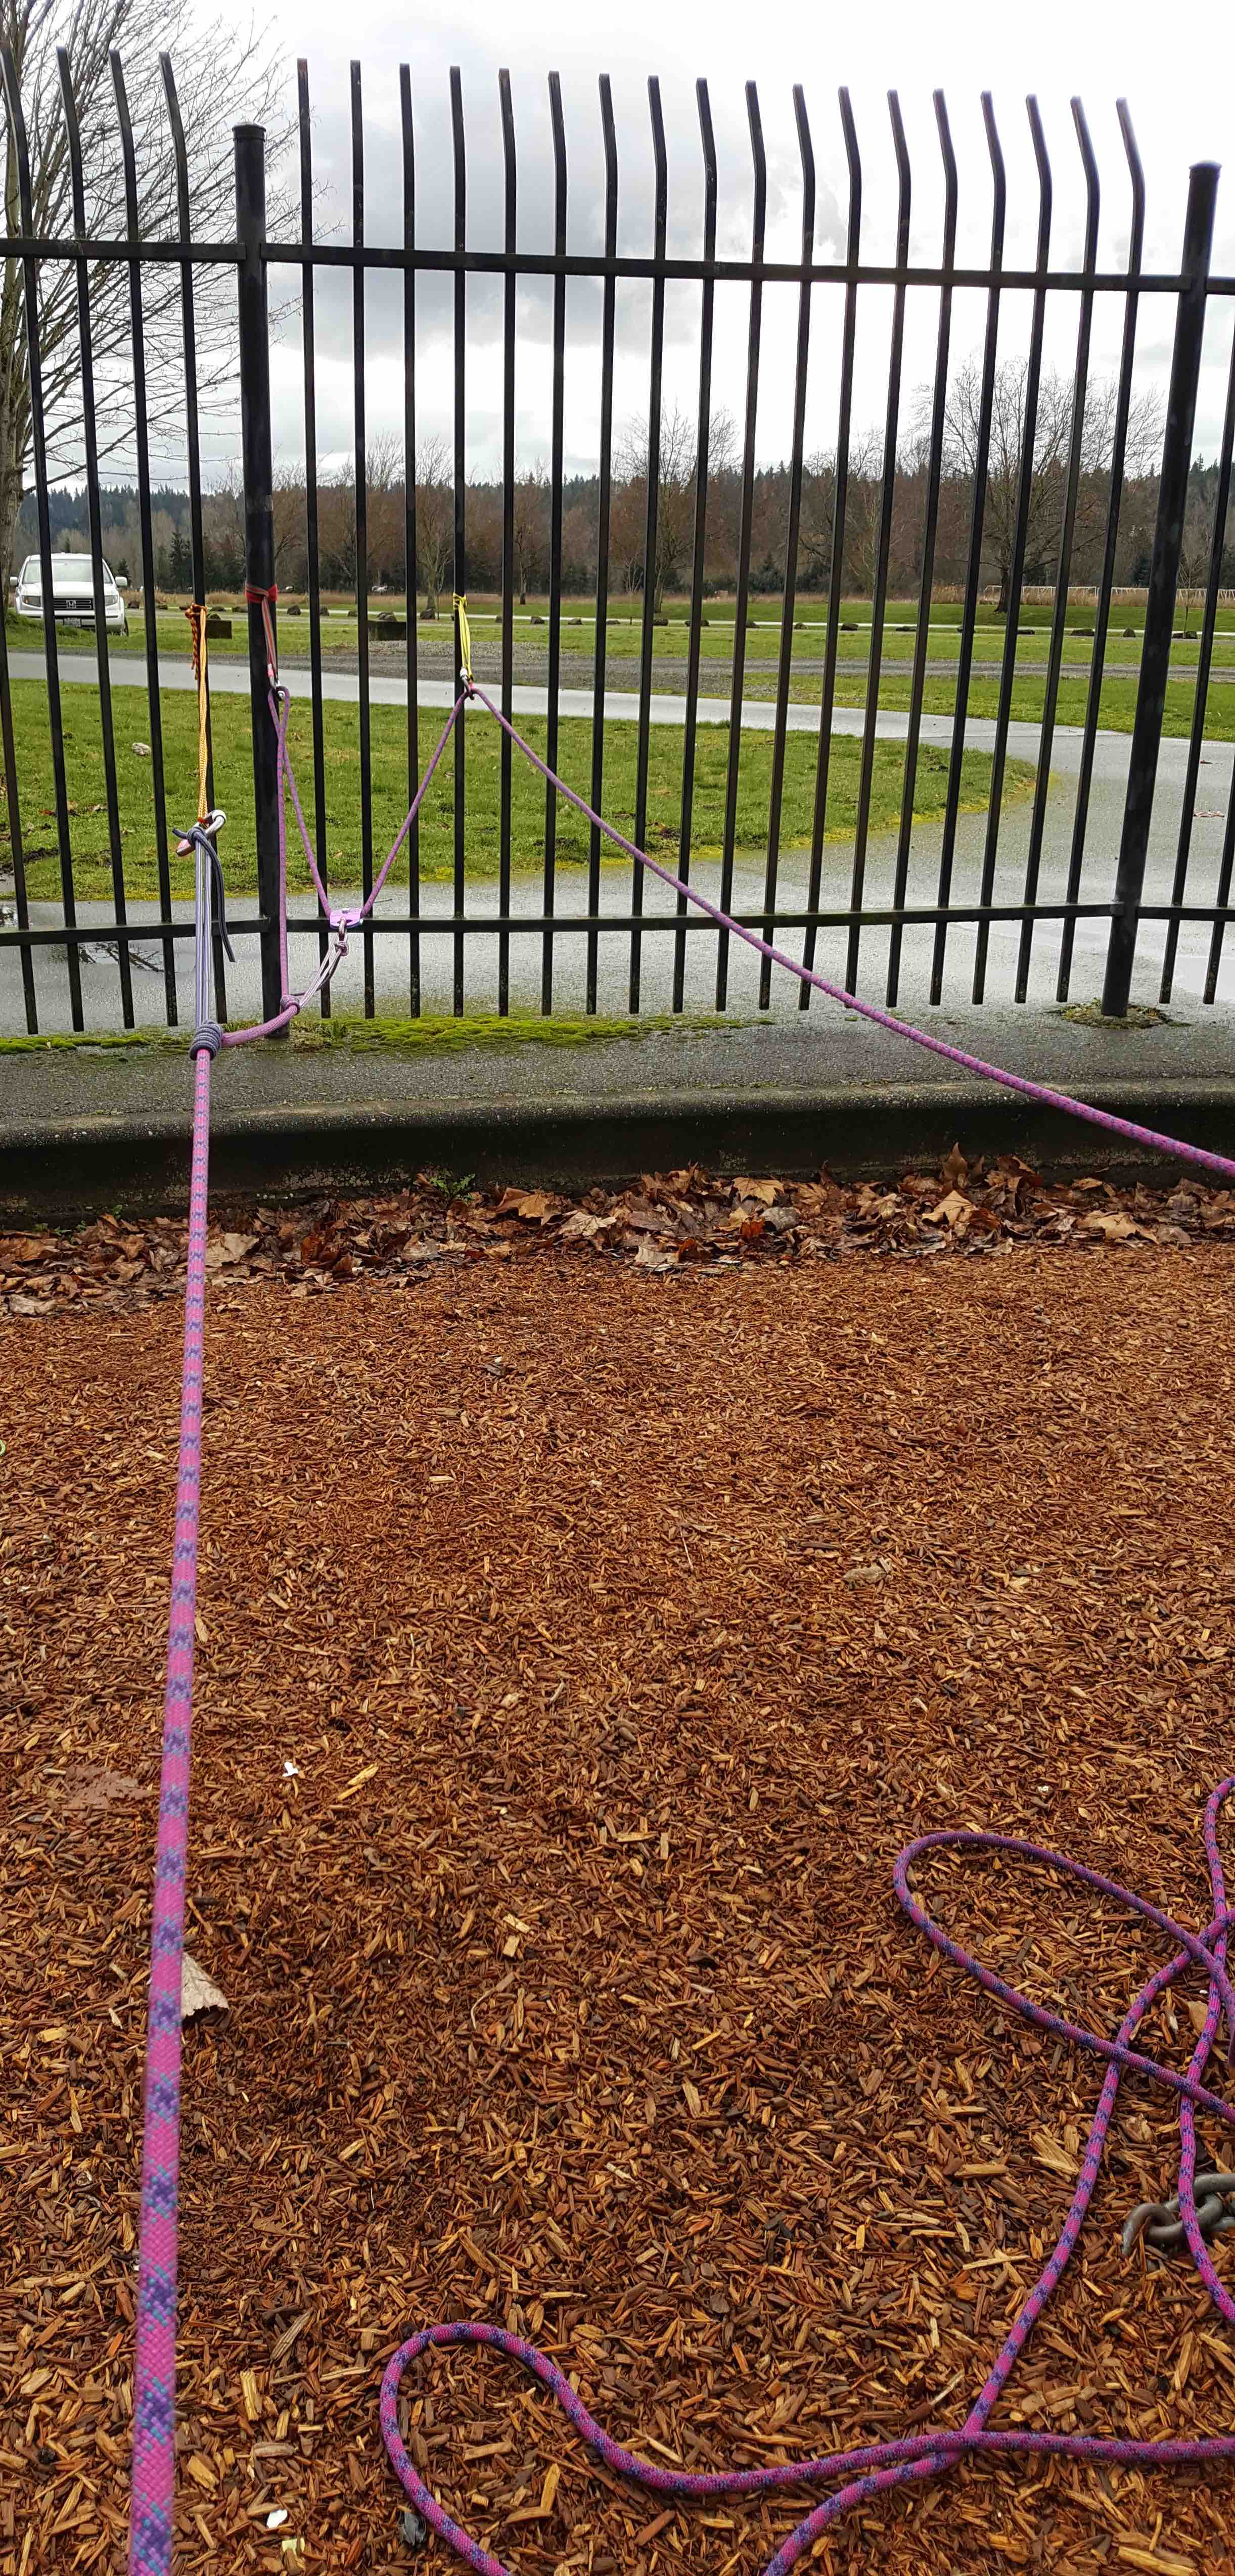
Then we went on to drill Z hauls again. We started with a simple 3:1 setup on the fence again:
We were playing with using significantly longer loops of chord for our prusiks. The thinking being if we can slide the ropes a bit farther we should be able to increase raising and lowering speeds without sacrificing safety. So before we were moving the load by 8 inches a haul, and this setup let us move it by 12-14 inches. Here you can see the pulley implementing the Z, which provides the 3:1 mechanical advantage. So basically we were building this system, but with a bully swapped in for the carabiner and not using a single master point for clarity.
Next to practice raising vertically we climbed up onto one of the walls and setup a z-haul and raised a large bag. It turns out the only picture I got of that was Chris getting ready to set the system up. It was freaking cold out and we were wanting to get out of there as soon as we drilled this – so I am afraid we stopped taking pictures. It was the same setup as on the ground, it is just critical that you get all the lengths correct for a vertical system – since the person running it is less able to move. You also need to set up the system thinking about how you will bring the load / body up the wall.
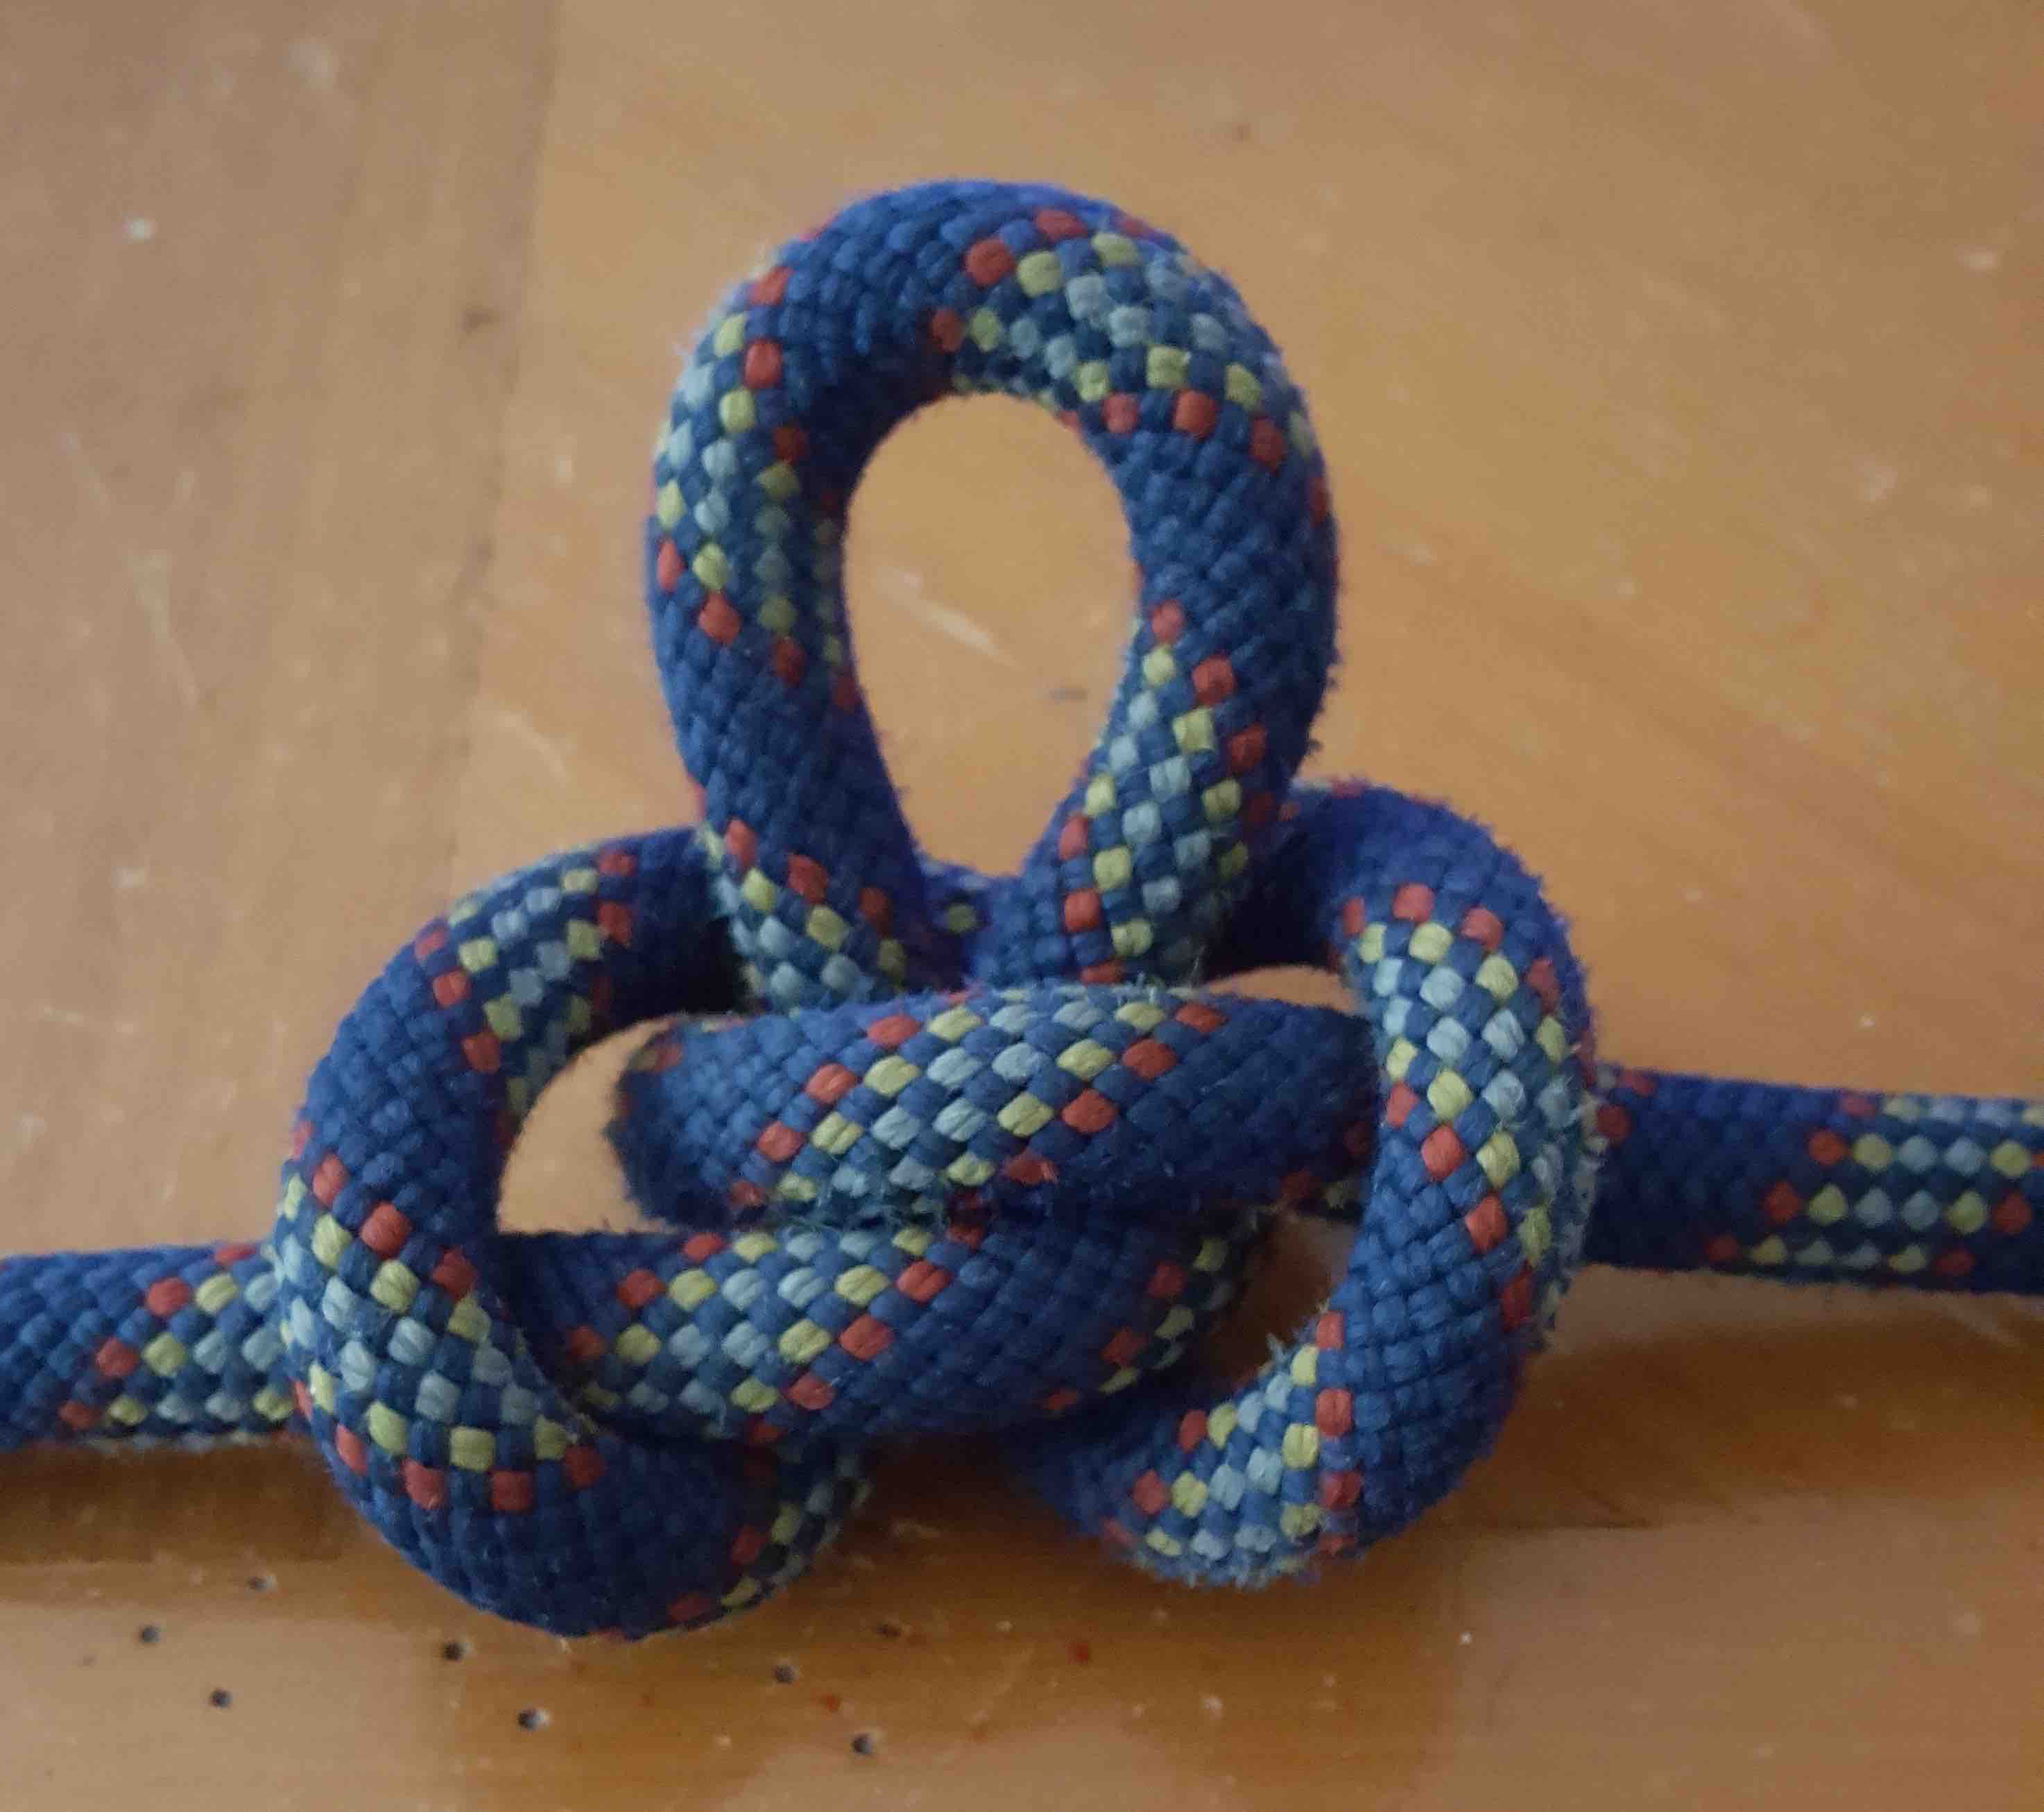
So to get back in climbing shape I have been drilling on my rope work – including my knots. For some reason one knot in particular, the alpine butterfly, has always given me trouble. It is not actually that hard a knot to tie – just for some reason it is my knot nemesis. If I am going to have to re-tie a knots its going to be a butterfly.
The one thing I never got about it was its name. Then the other day I looked down at the practice knot I had just tied and got it. The knot looks like an upside down butterfly with two little wings formed by loops, and the third loop forming a sort of abdomen. Full head slap moment, I can’t believe I never saw this before.
So Sunday was the second rope-work drill session. This is my “trip report”. While these practice sessions at the part are not real trips – I wanted to document what we have been practicing. It should be useful in a few months to look back on.
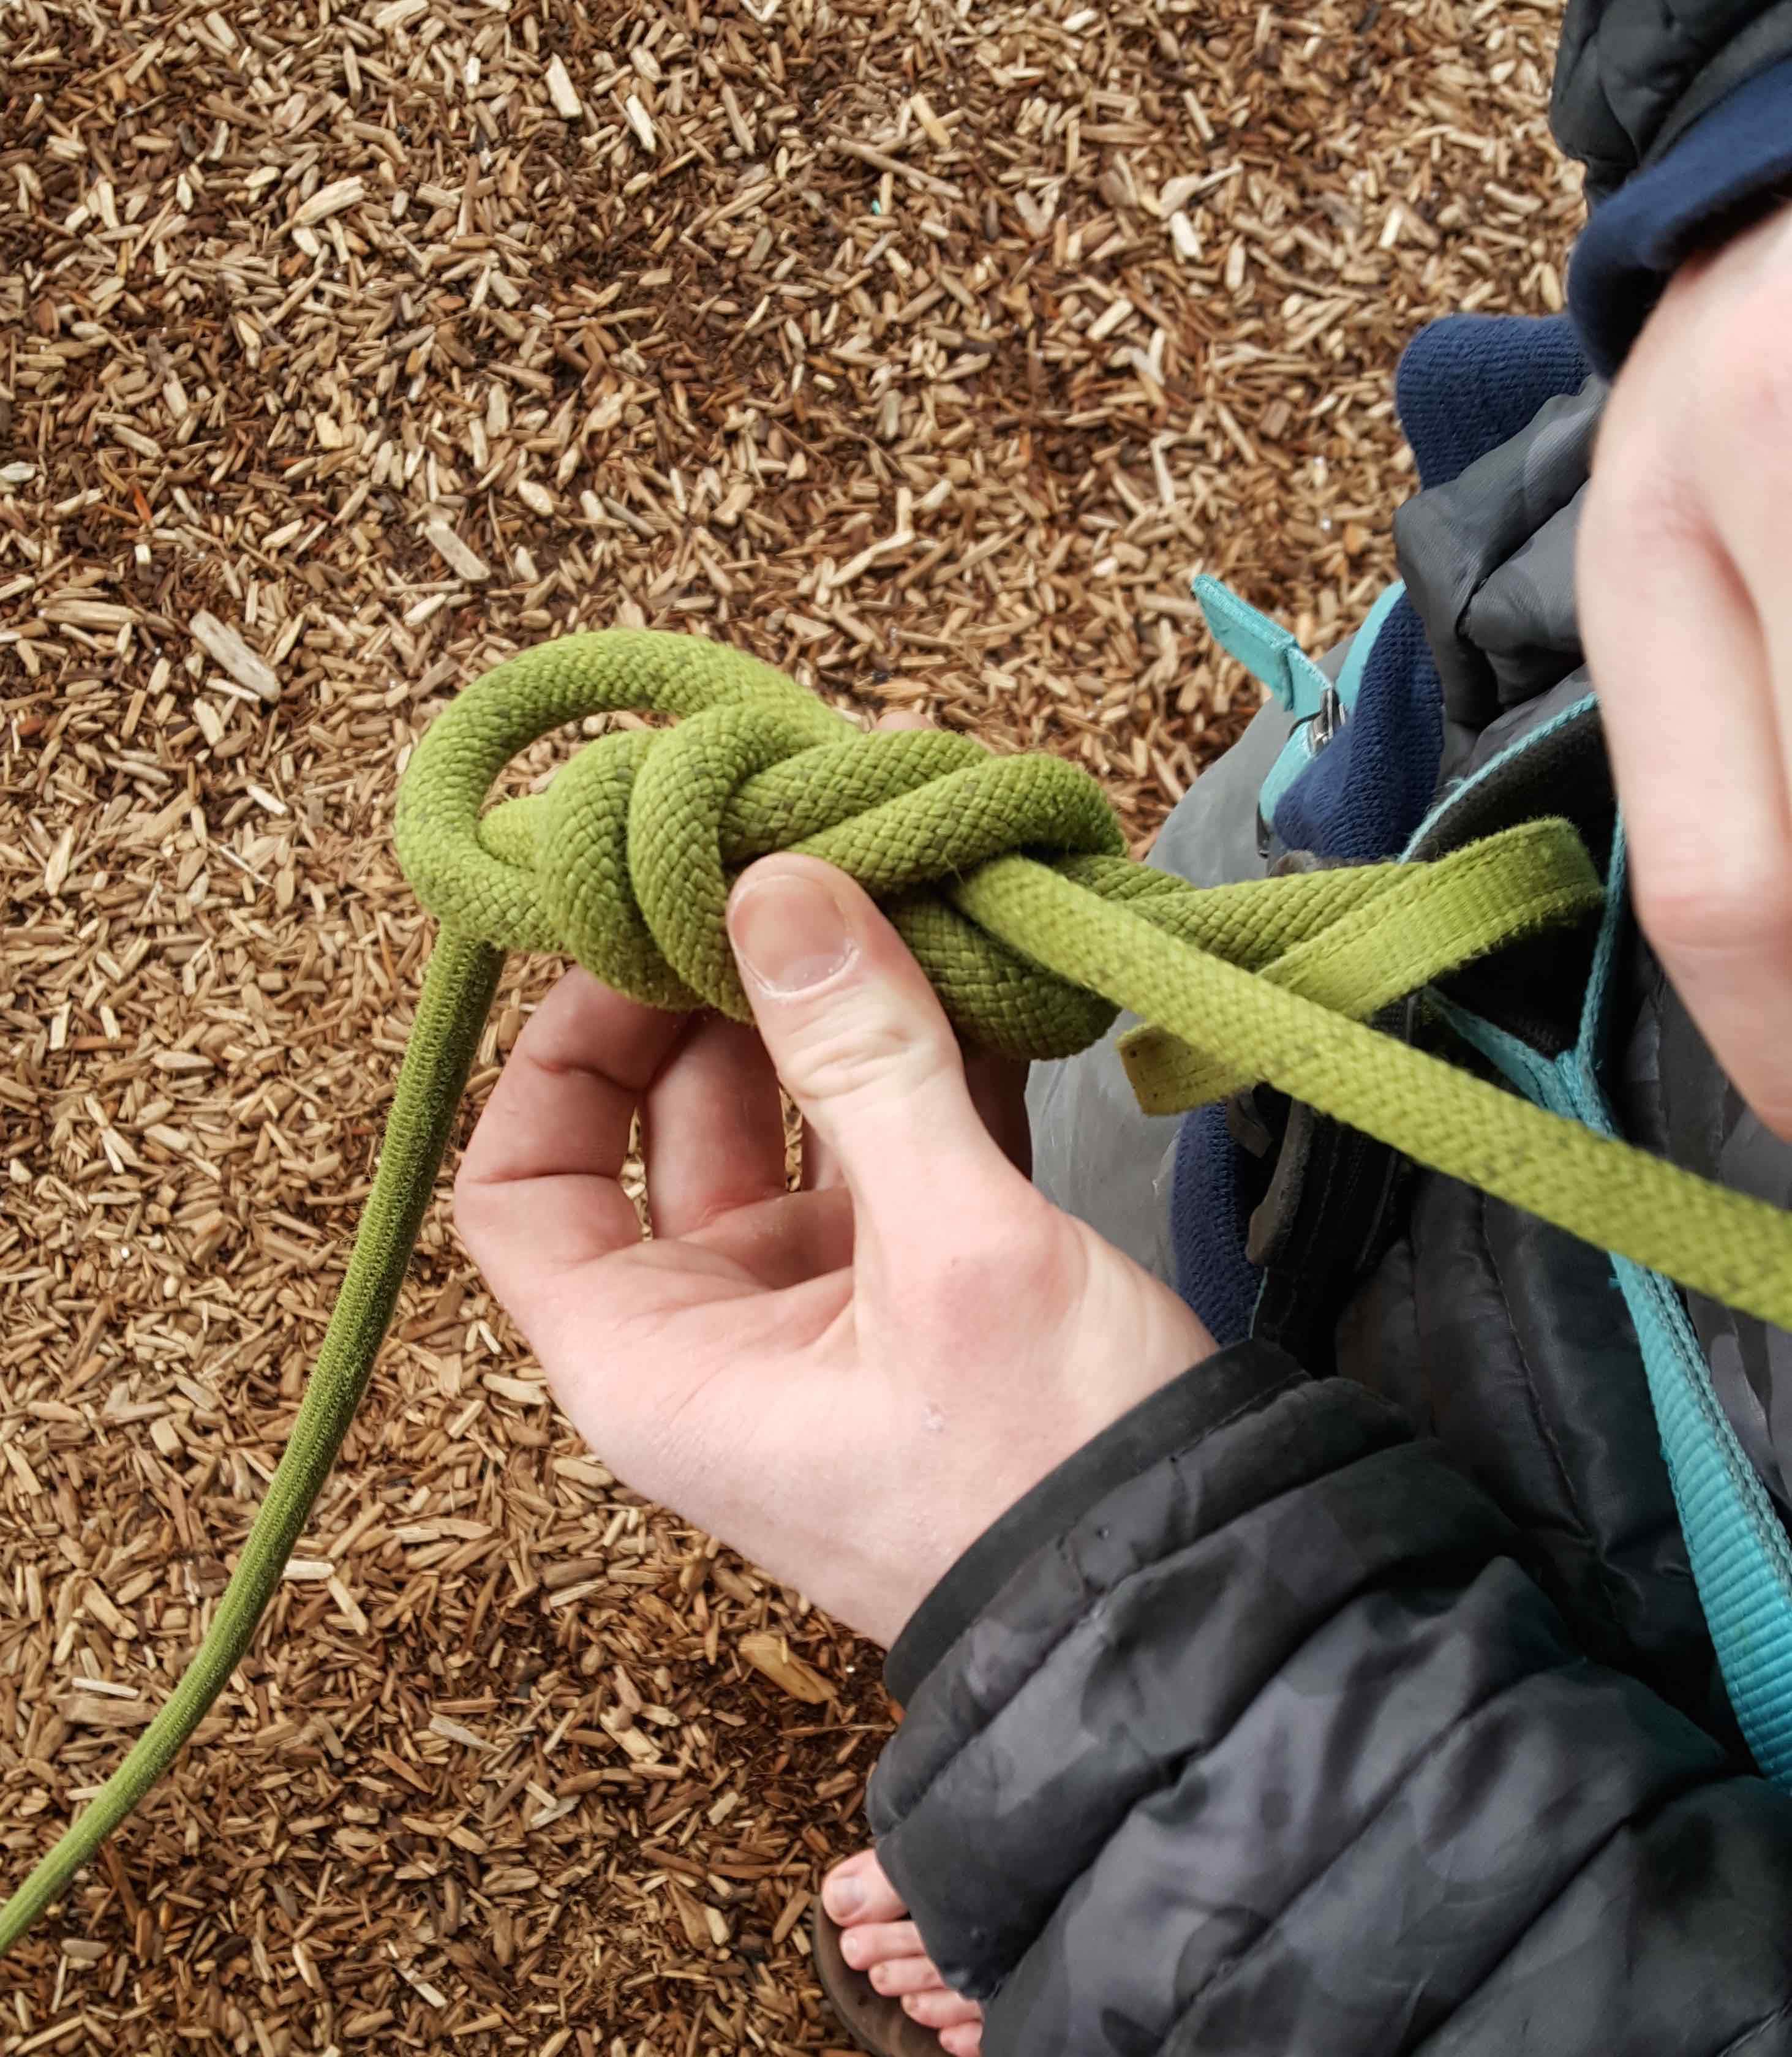
We started the day with a review of the basics again. First thing that came up was how to back up your figure eight. As opposed to the traditional long tail and stopper knot – we went over the loop back. Your tail basically loops back through the figure eight like you can see in this photo.
The reason to do this is that it reverses the tail direction, so it points back towards the climber. That saves about a foot of space in the line from the climber out to the last piece. So the climber can grab the rope closer to your master point, which is just generally useful.
Conrad showed us a cool trick for getting the tail length perfect, and the same, for every eight. He holds the tail of the rope in his hand, and wraps round his arm to feed out the exact same amount of tail every time. He also twists the rope at that new point with the trigger shaped finger position you can see in the photo. Then twist and the first figure 8 is set in the rope and you can feel the rope round the master point and finish the knot as normal.
After this we did a belay review – that’s one of those things you really have to be there for to benefit from, but we went over proper clipping technique, and how to avoid back clipping on lead.
After this we reviewed anchors. Conrad went back over his method for using the end of the rope to set up an equalized – 3 point – trad anchor. It’s the same setup as using a separate long sling – but much faster when swinging leads and you have the spare rope.
He starts by clove hitching a piece of pro at the top of the climb. He showed a clever way to do the hitch with one hand.
After that he showed building the anchor system. We went over it last time as well, and the rest of us will probably be drilling this anchor setup. It really is much faster and probably cleaner than the use of a sling.
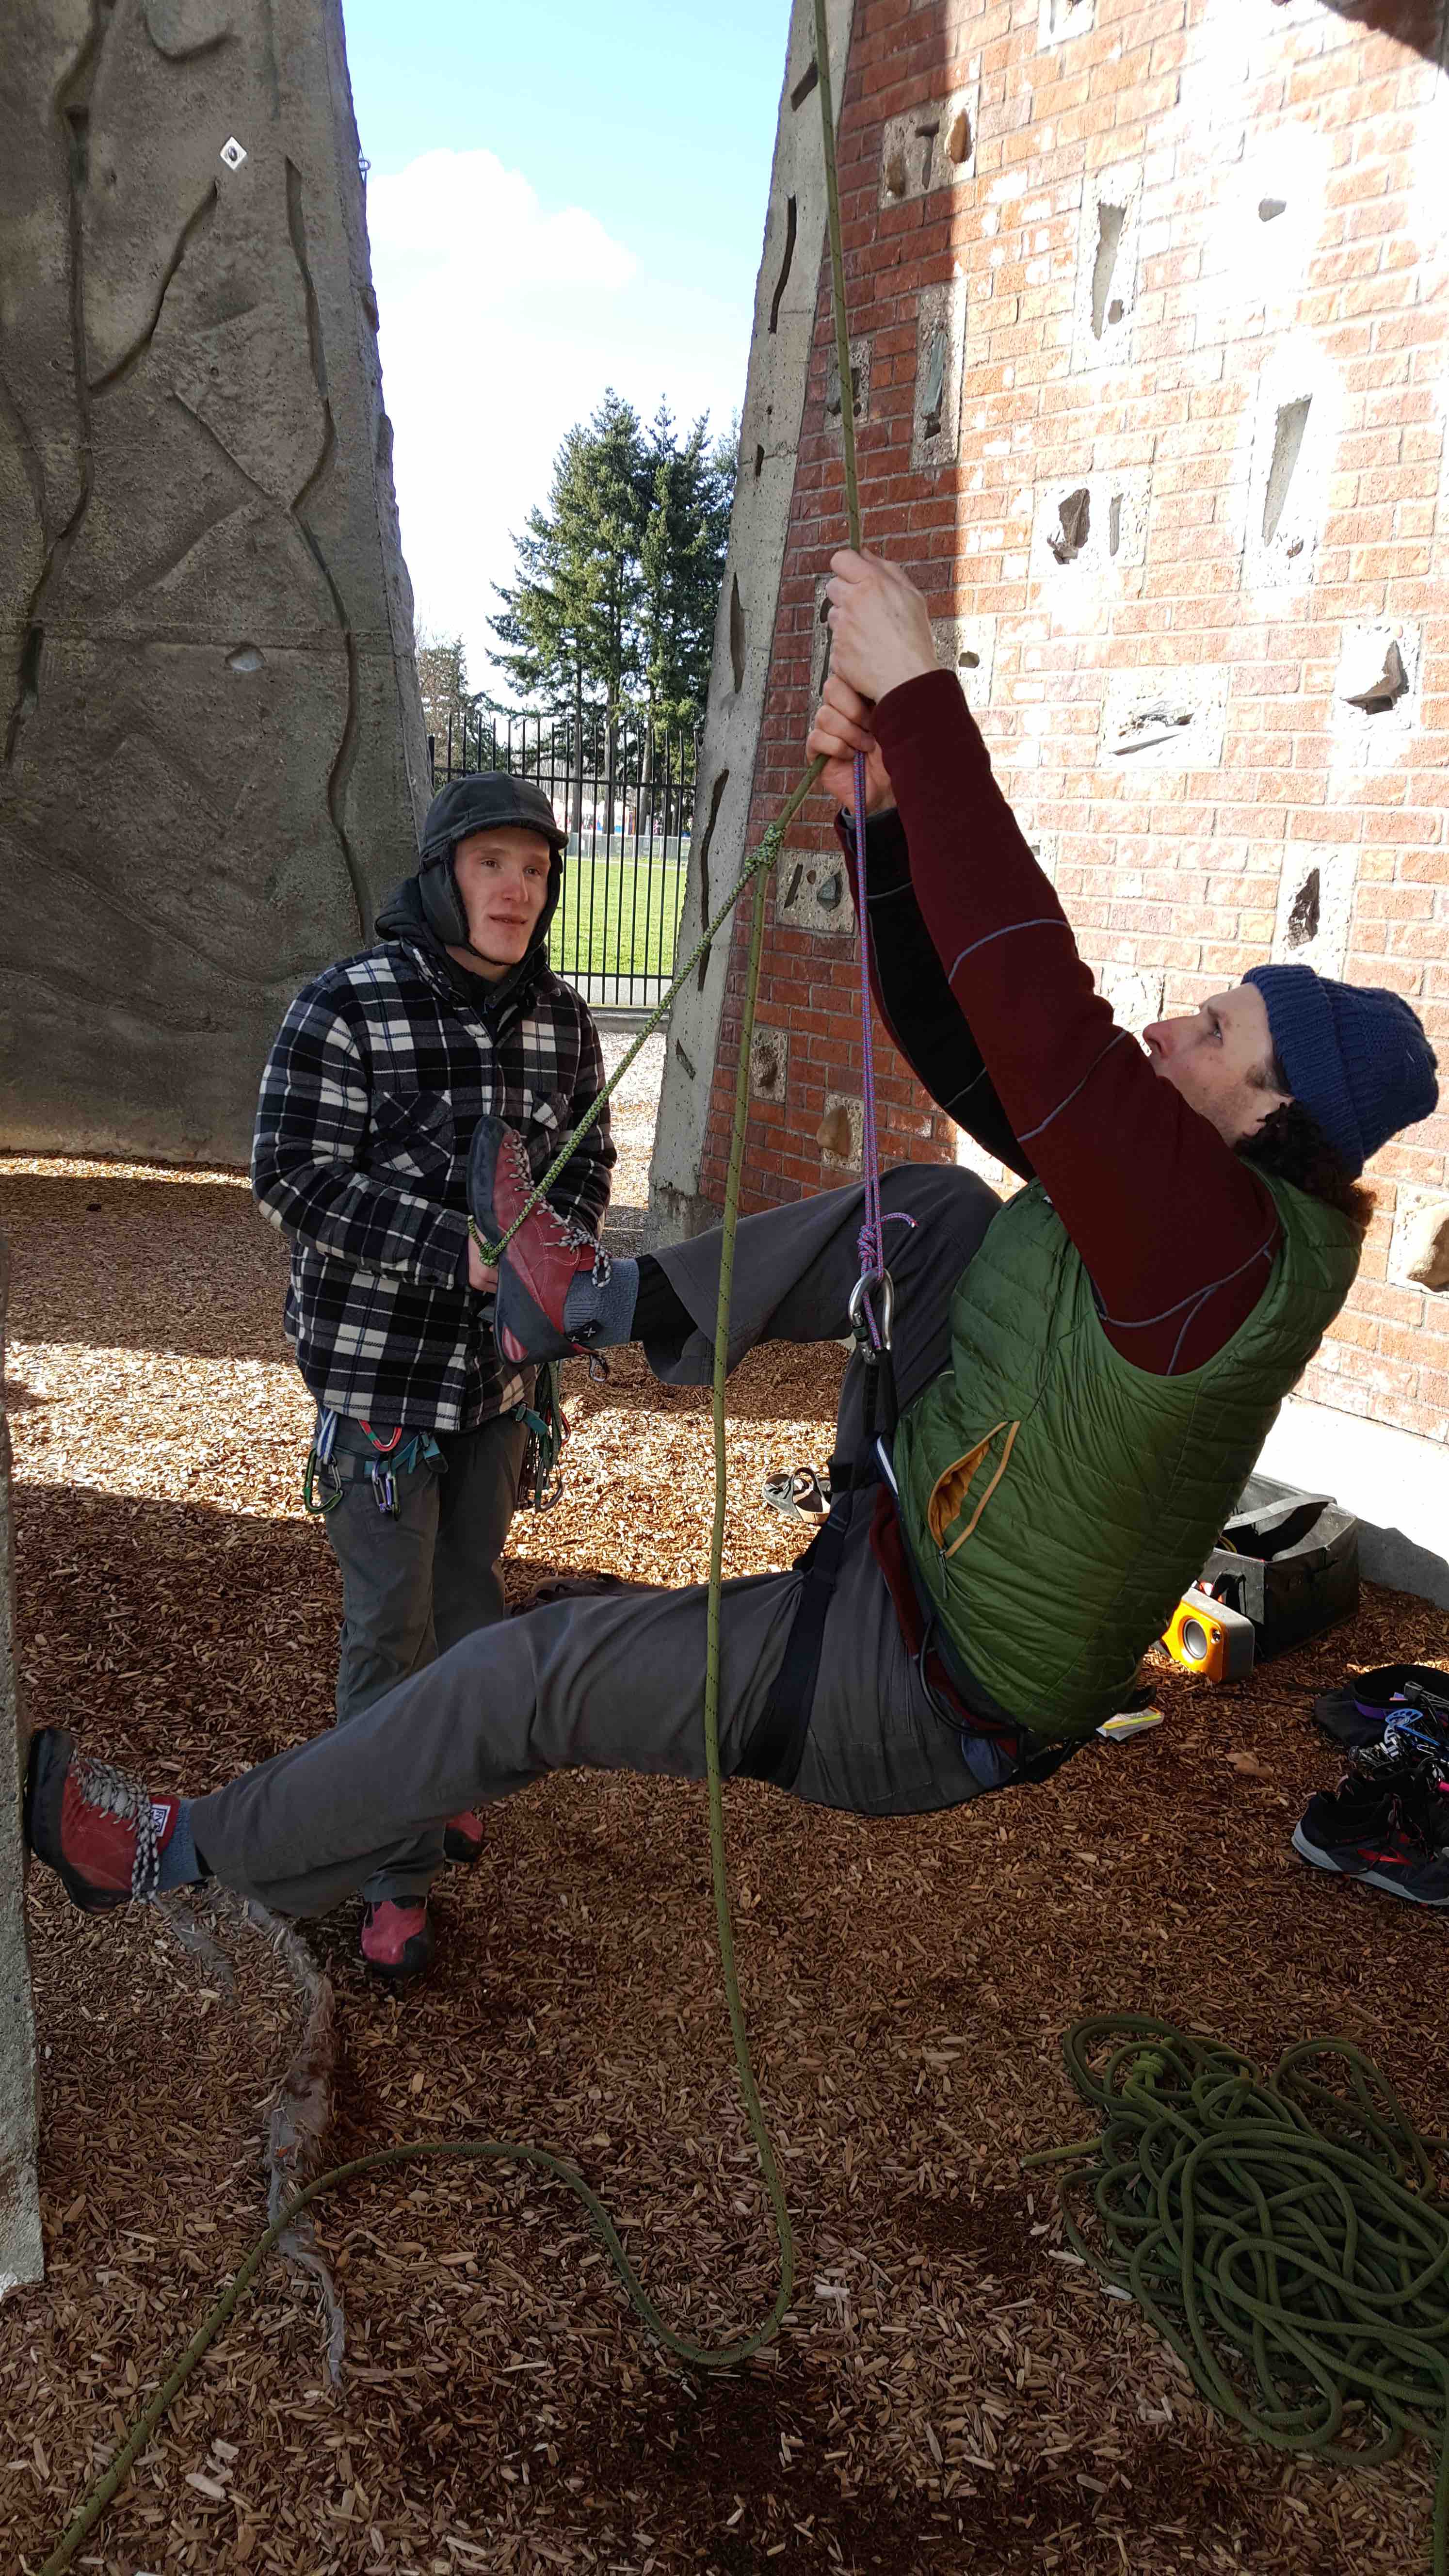
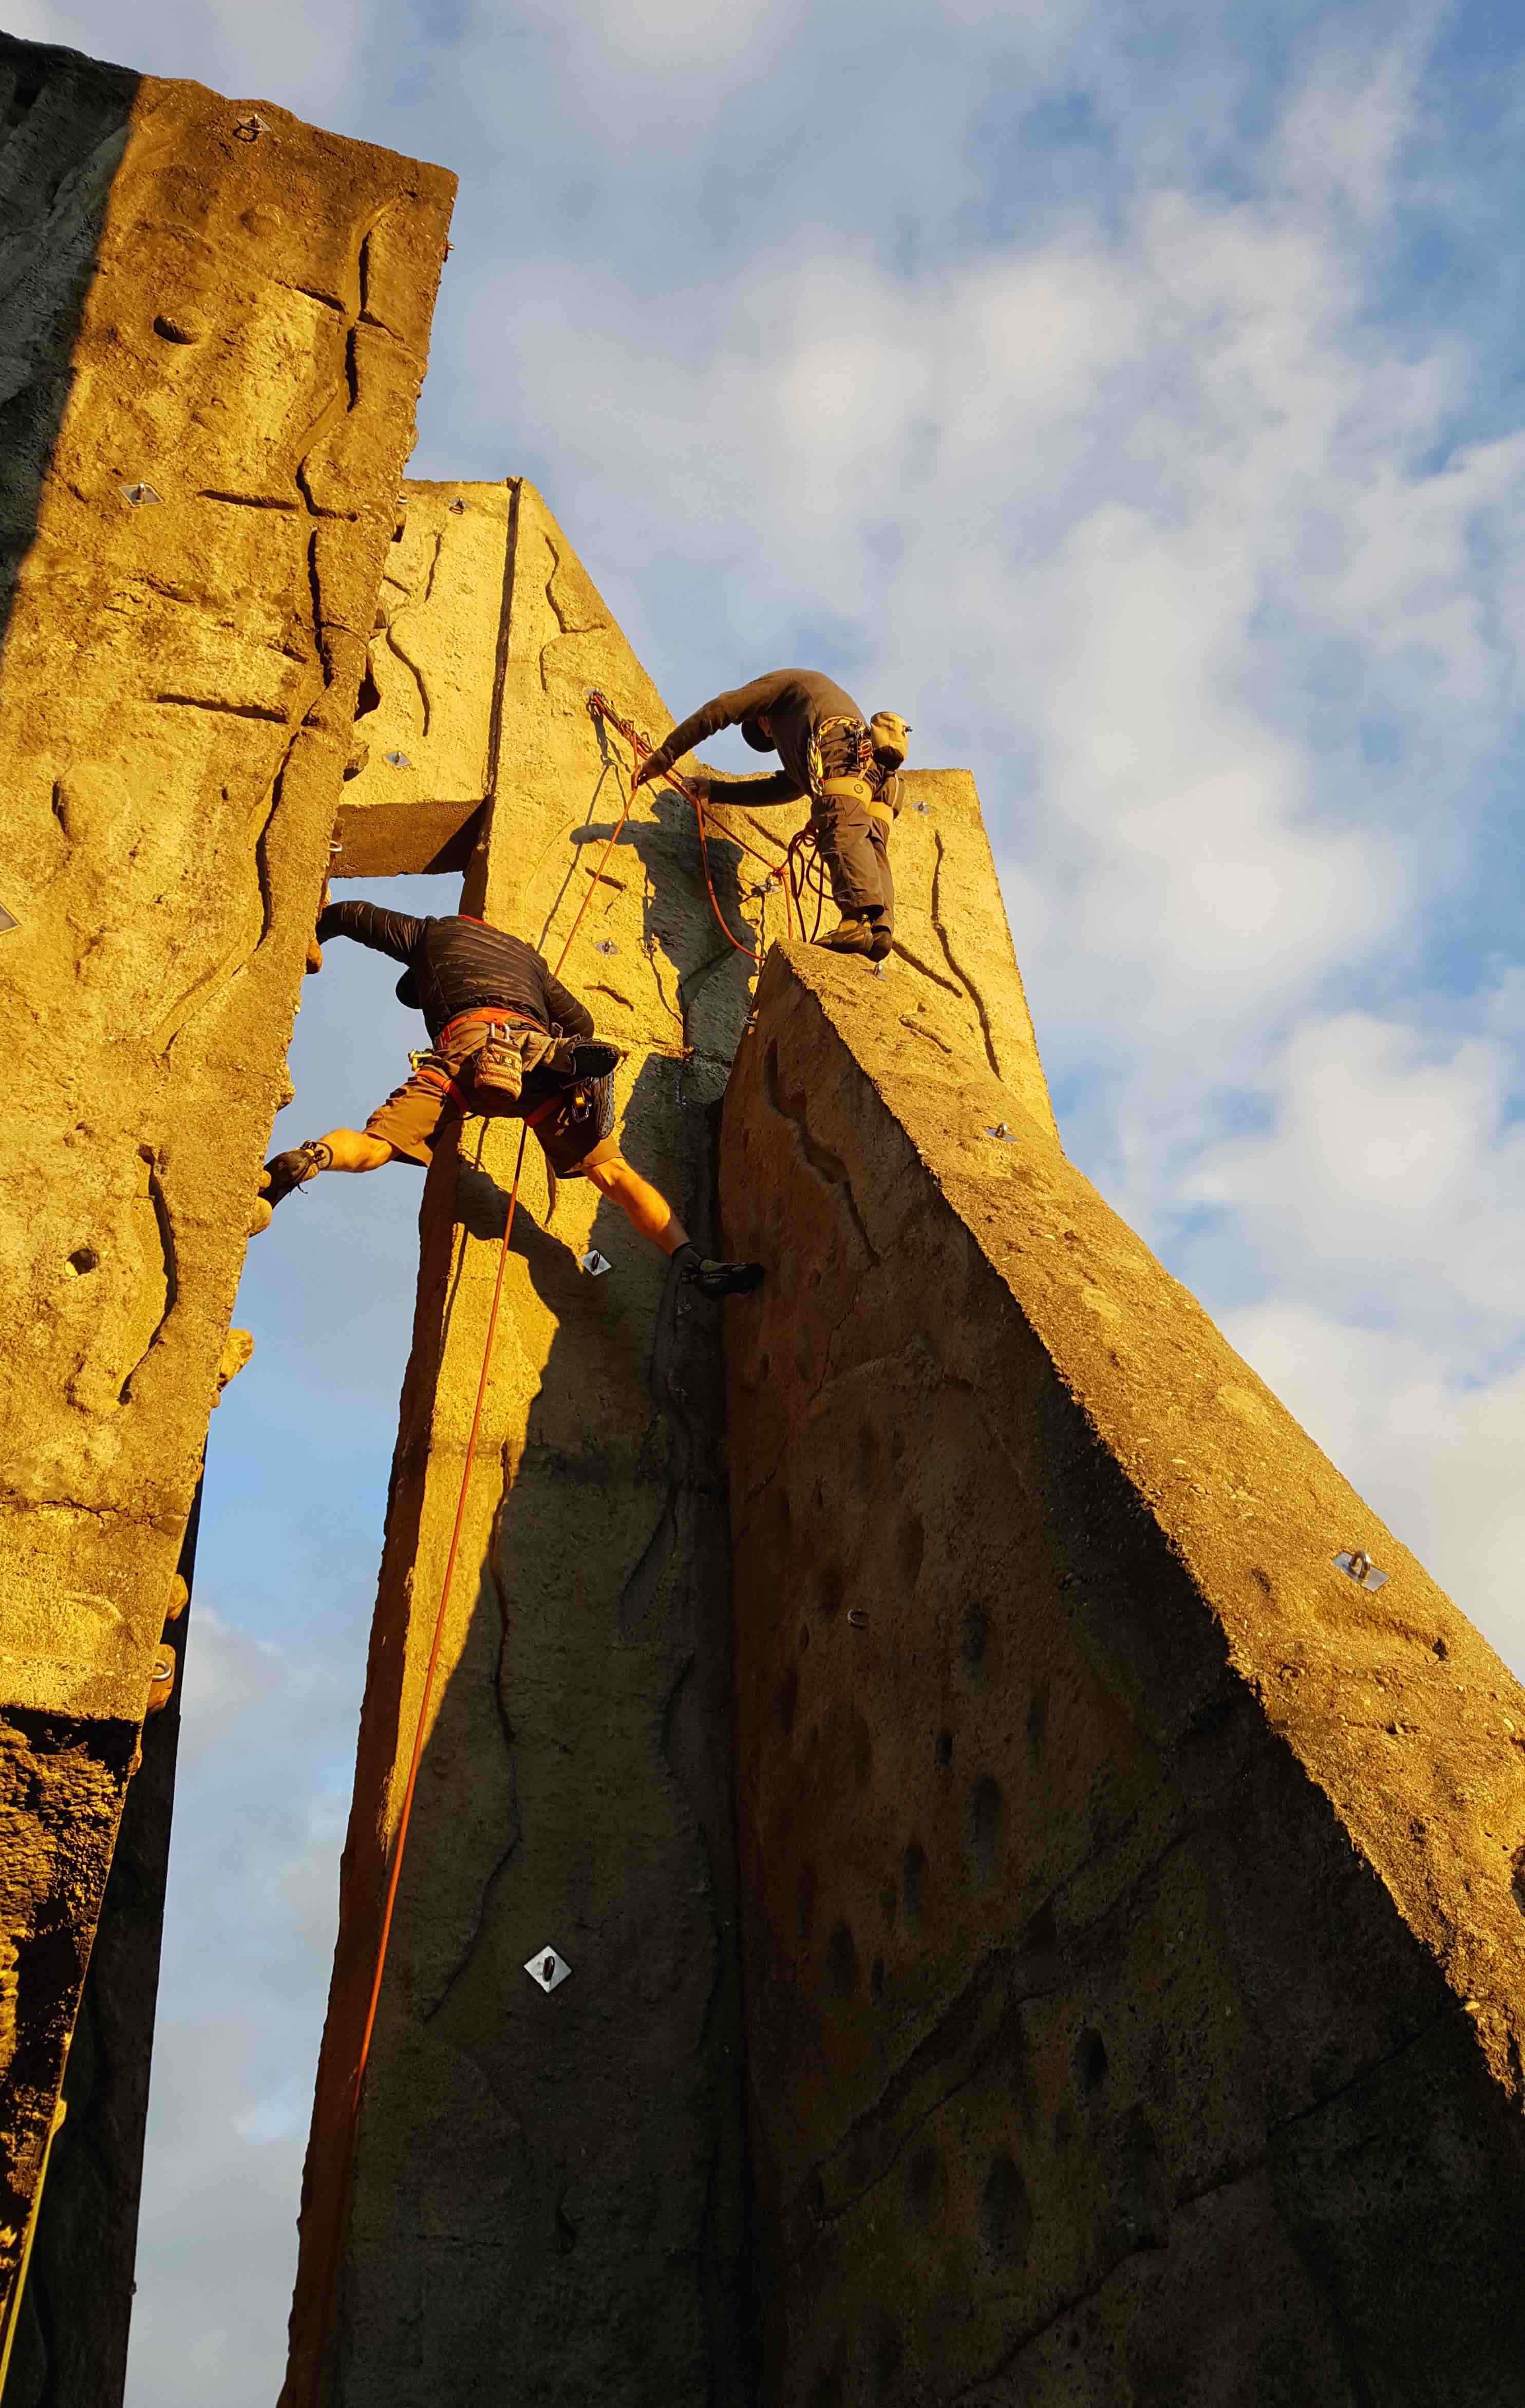
Next we went over ascending a rope with a prussic. It was, simply put as big a pain as I remembered. I’m heavy – and my friction knots kept locking up hard on the rope so my ascension was painfully slow. Unfortunately ascending a rope this way is a dead useful skill to have – so we will be practicing this again. Tyler is making it look easy here – but I kept locking up the friction knots so hard it took forever to get them un-done to be able to make the next step.
Unfortunately I didn’t take video of the rope ascending. Here is it in pictures though. Start with a friction knot attached to your master point and holding your weight. A second friction knot has a loop attached for your foot. The first move is to step up onto this loop – so it is now holding your weight unloading the first knot.
You can see here its sort of two moves to step up – getting your foot in the loop then you step into what is a deeply bent leg position – then use that leg to stand up along the direction of the rope.
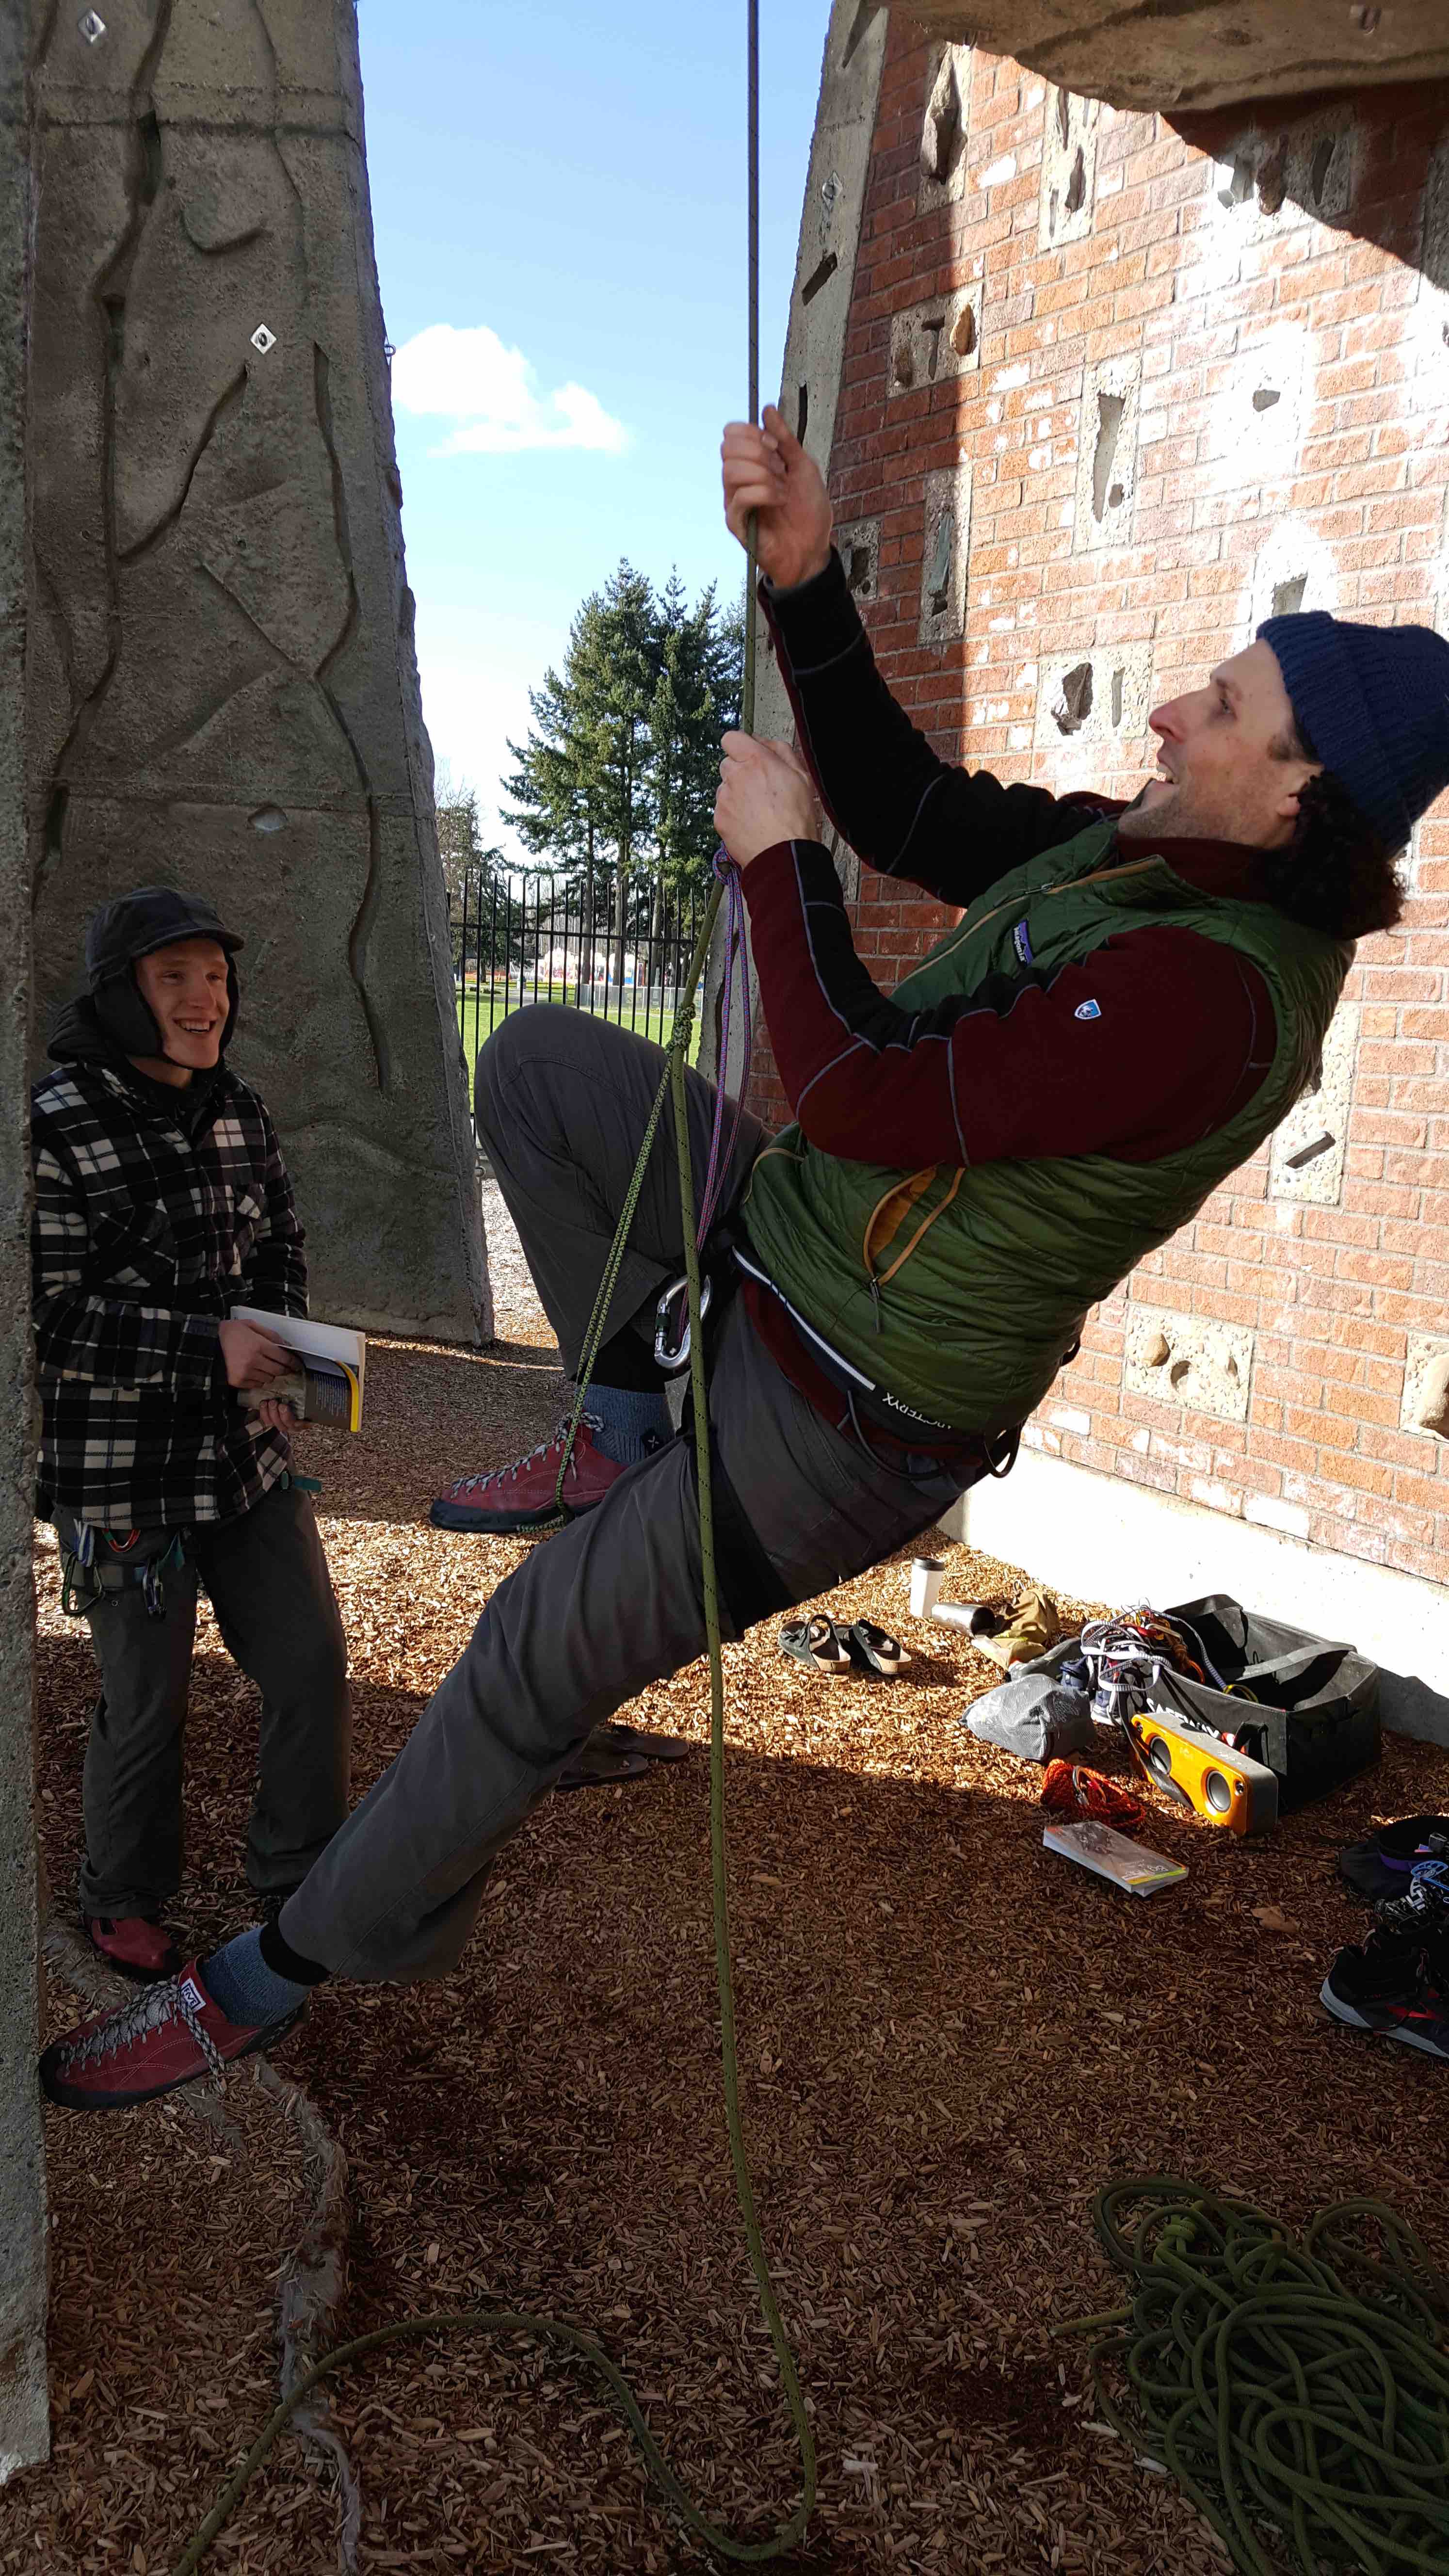
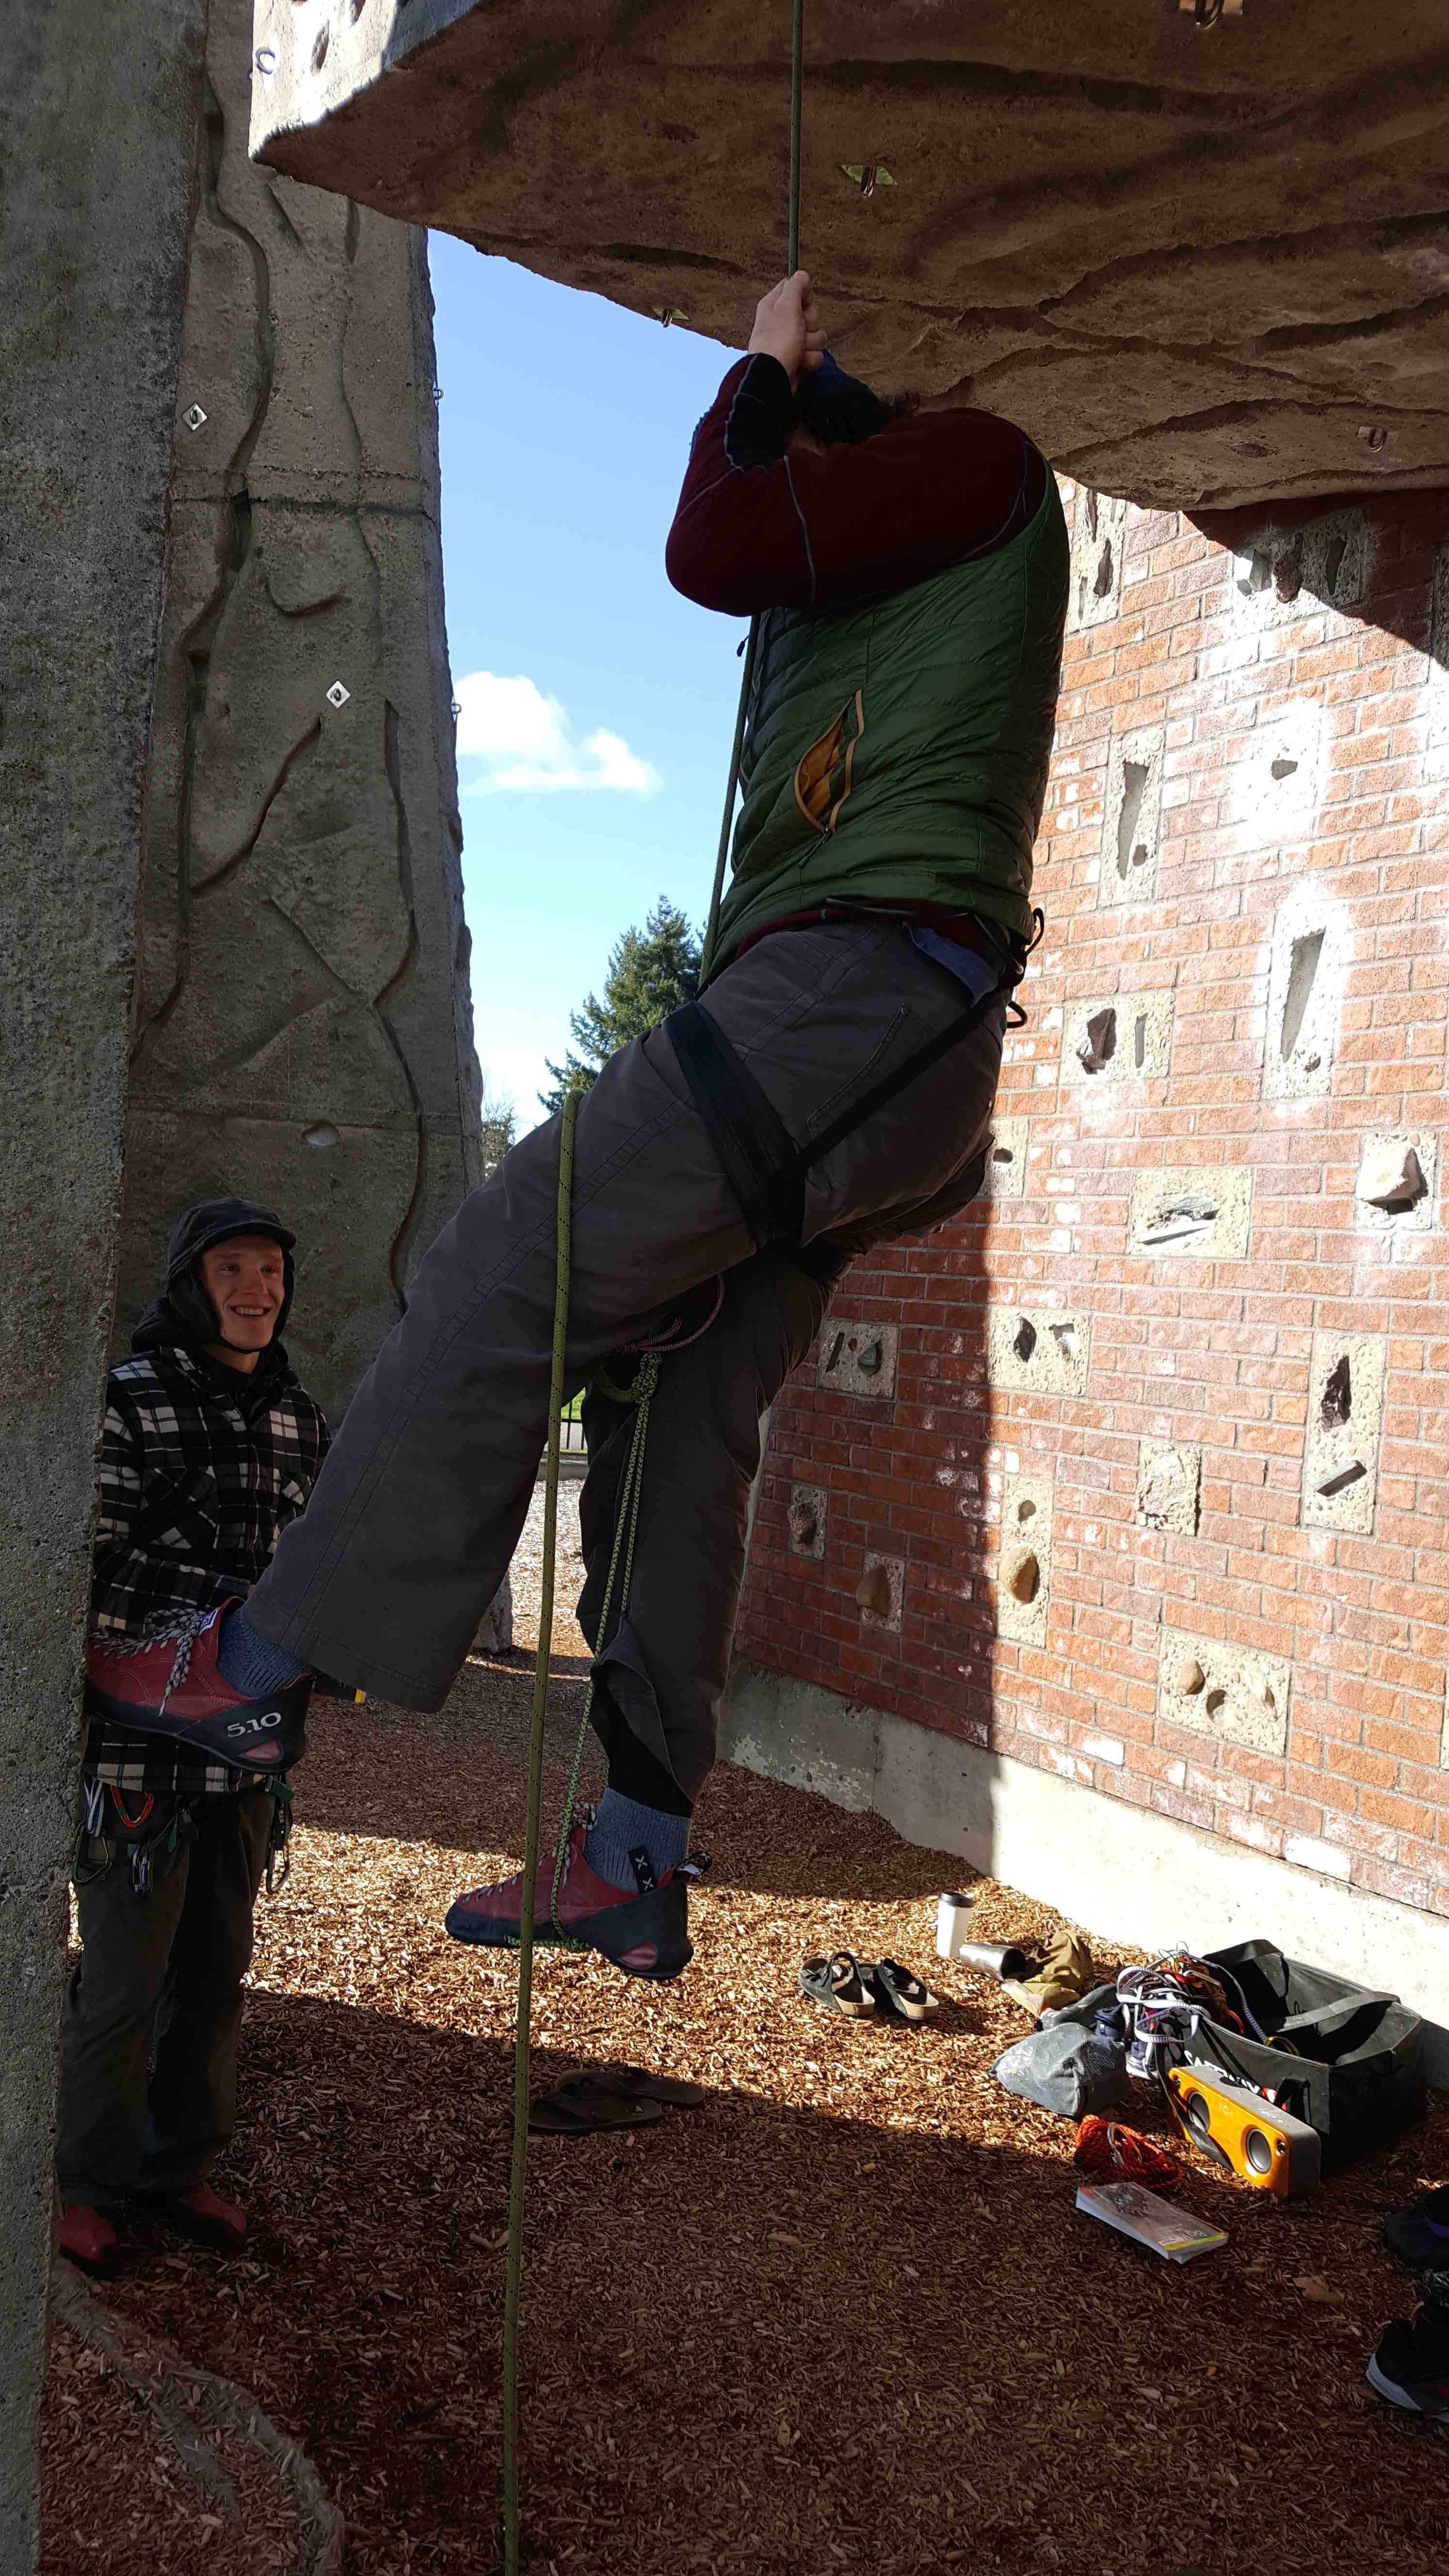
Then when you end in the third position to slide that first friction knot up, re-load it, then you sit onto the top friction knot. This unloads the lower friction knot with the foot loop. So now you can slide up the bottom friction knot and start all over again for the next step.
We ended the day by practicing setting up a 3:1 z-haul for raising and lowering people. The prusiks being used in that system are why we reviewed ascending a rope with them first. It let is practice repeatedly releasing and re-loading the knots.
Today was the first, of what will hopefully be a regular, climbing practice meet-up. We me up at Marymoore parks’s climbing wall to go over “the basics”, but we all played it by ear as to what that was going to mean.
Everyone there had some trad-clibing lead exposure – and would like to climb together in the future – so we started with anchor review. We went over how we would set up anchors, equalize them, and then reviewed belaying. It was really interesting and I learned a fair bit.
I had mostly climbed in larger slower parties when you are 3+ people running on 1-2 ropes with gear. Where as the Peterson’s, who are better climbers than I am, mostly have been focusing of fast multi-pitch swings. I’m looing forward to changing over how I set up anchors after seeing their setup. I thought I had taken pictures of the anchors – but apparently I didn’t. As part of reviewing anchors we then went over belay signals and practiced rope tug signals to make sure we were all on the same page for when we climbed together.
None us had belayed two climbers up at the same time before. So we went over that next. Then Conrad climbed up one of the walls and belayed us up onto a ledge there where there are three bolts which scream – set up an anchor on me. Cameron then built an anchor so we could review, again, the dual belay setup.
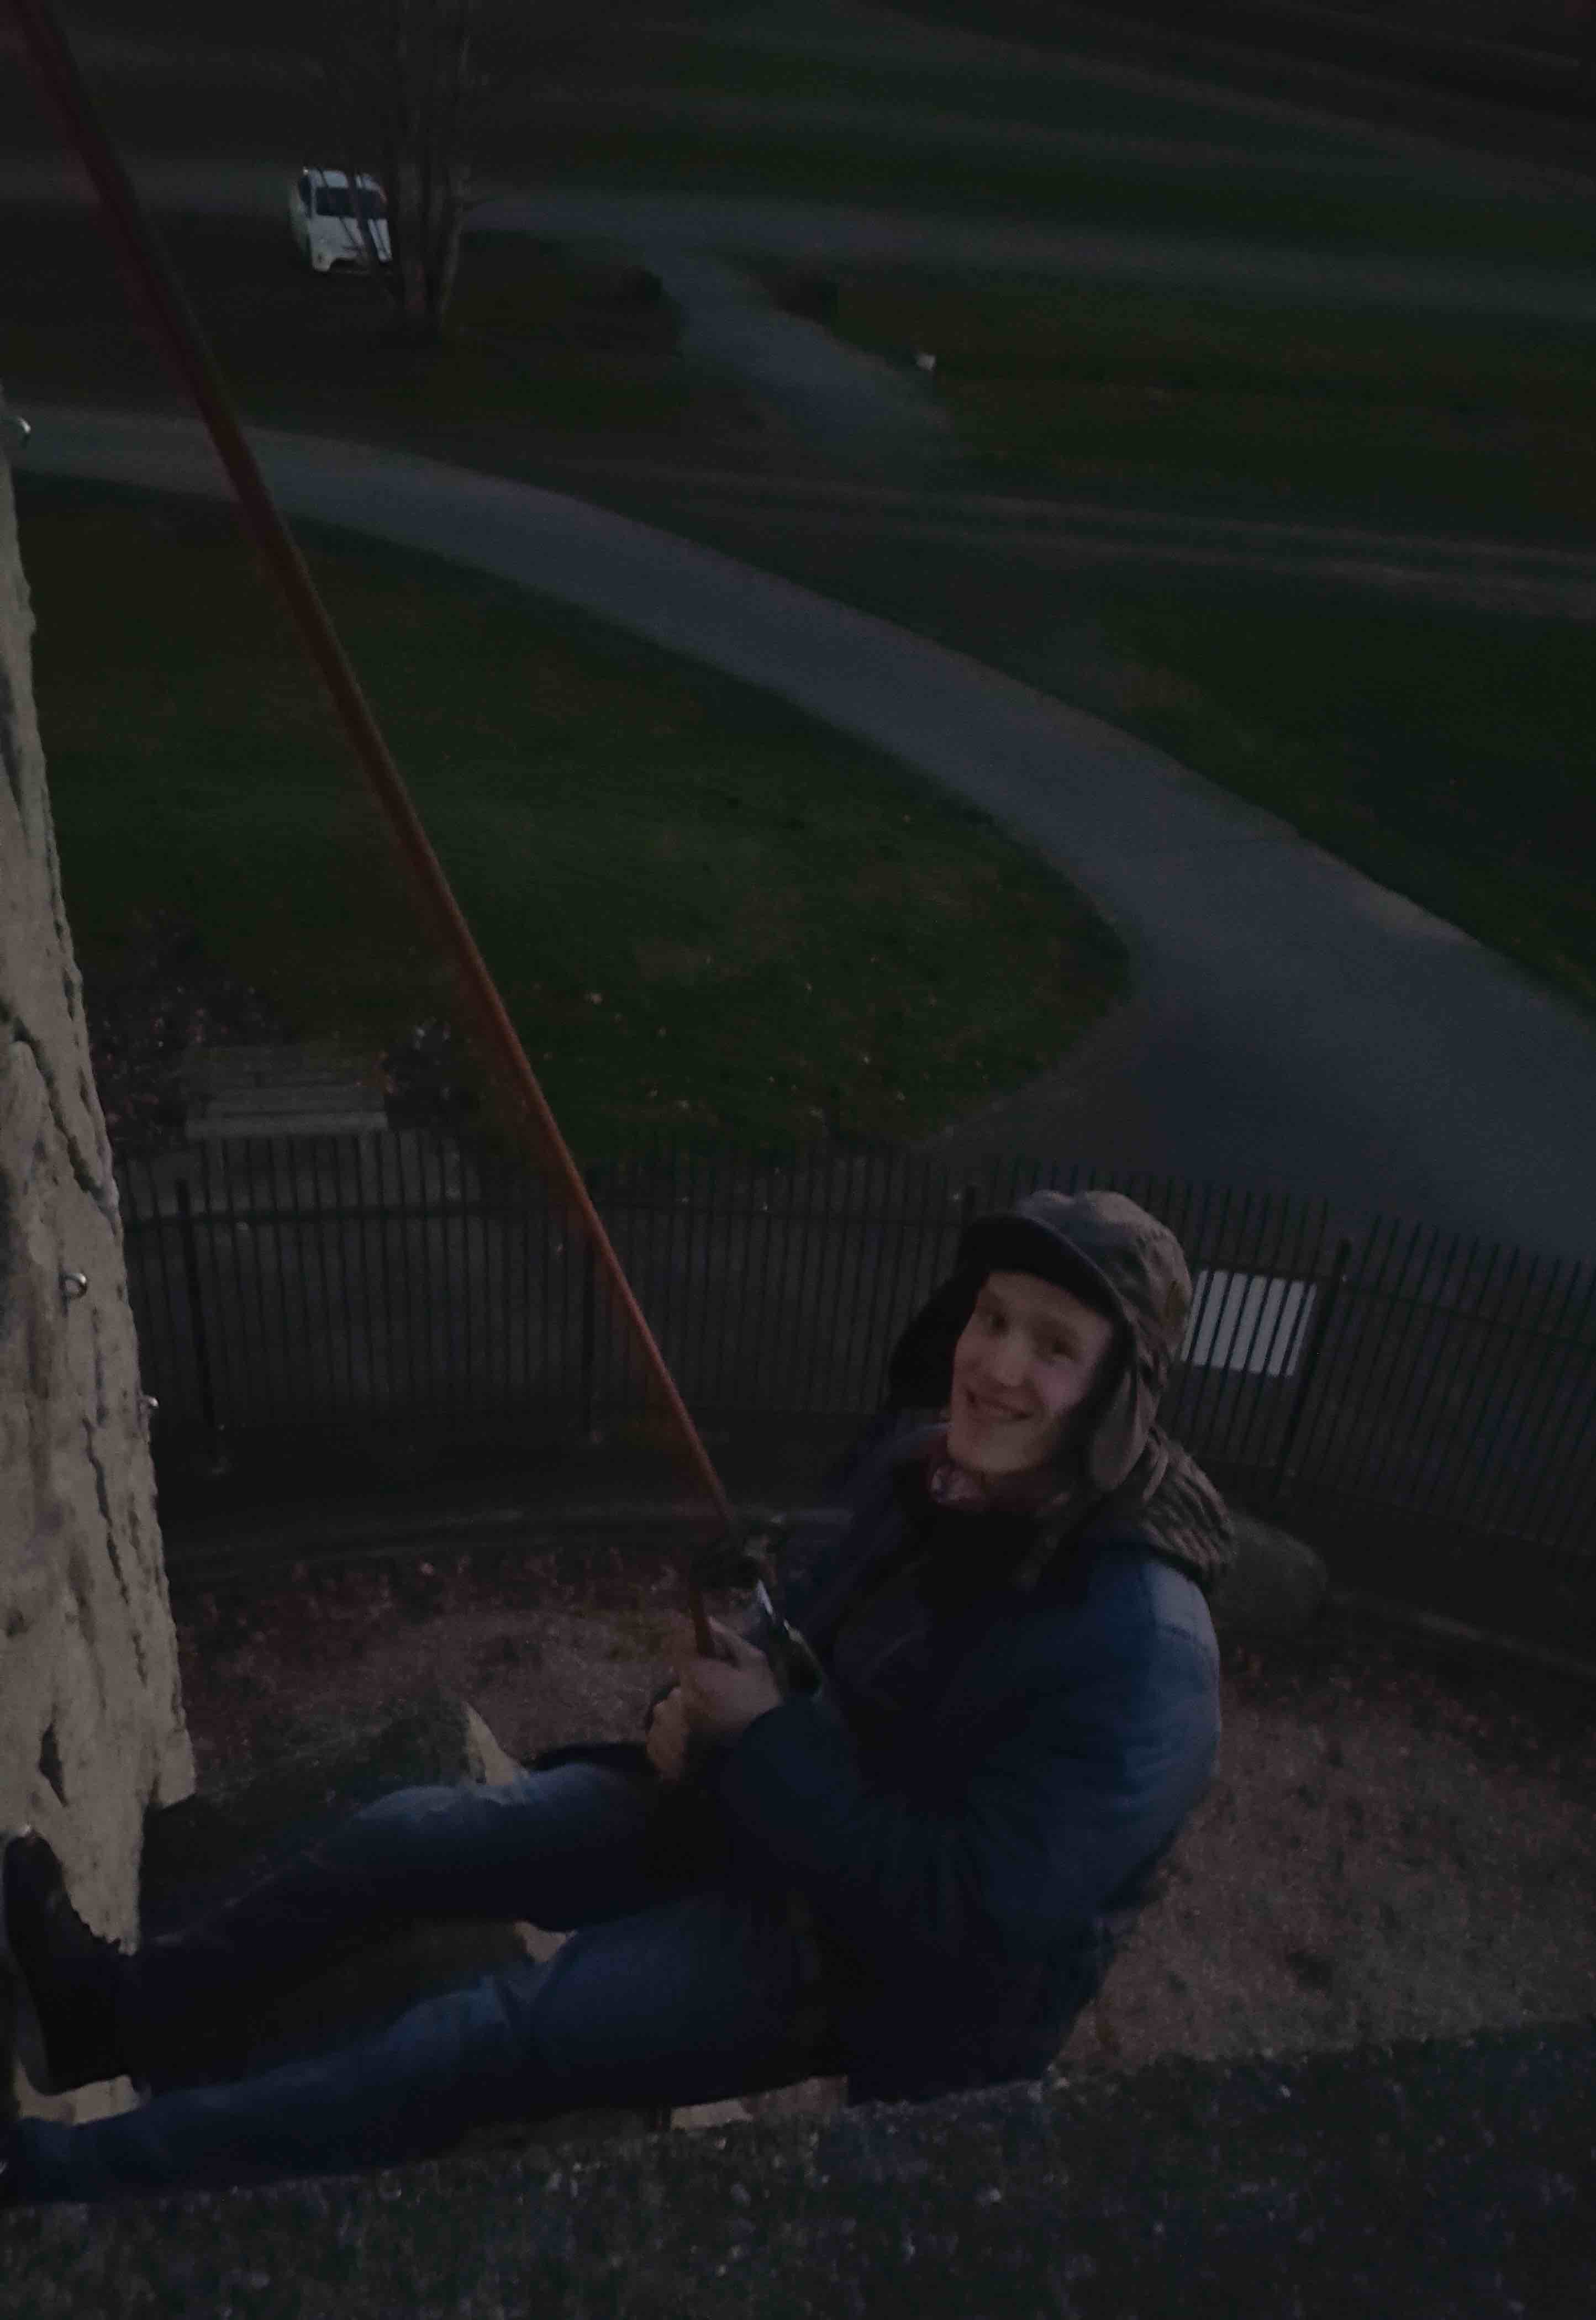
At this point it was freezing cold so we quickly reviewed rappelling techniques and bailed to go find beer and Cuban food. It was a really fun day, and I think we all have a good idea of each others skills and weaknesses.
The most embarrassing part of the day is I had not thought we would be getting very far off the ground, so I ended up having to climb the wall in running shoes with no sole edge. My feet kept paddling right off the rock, so it took forever and I was making all sorts of old man noises climbing what was at best a 5.6 climb. All the guys were nice and didn’t laugh too much.
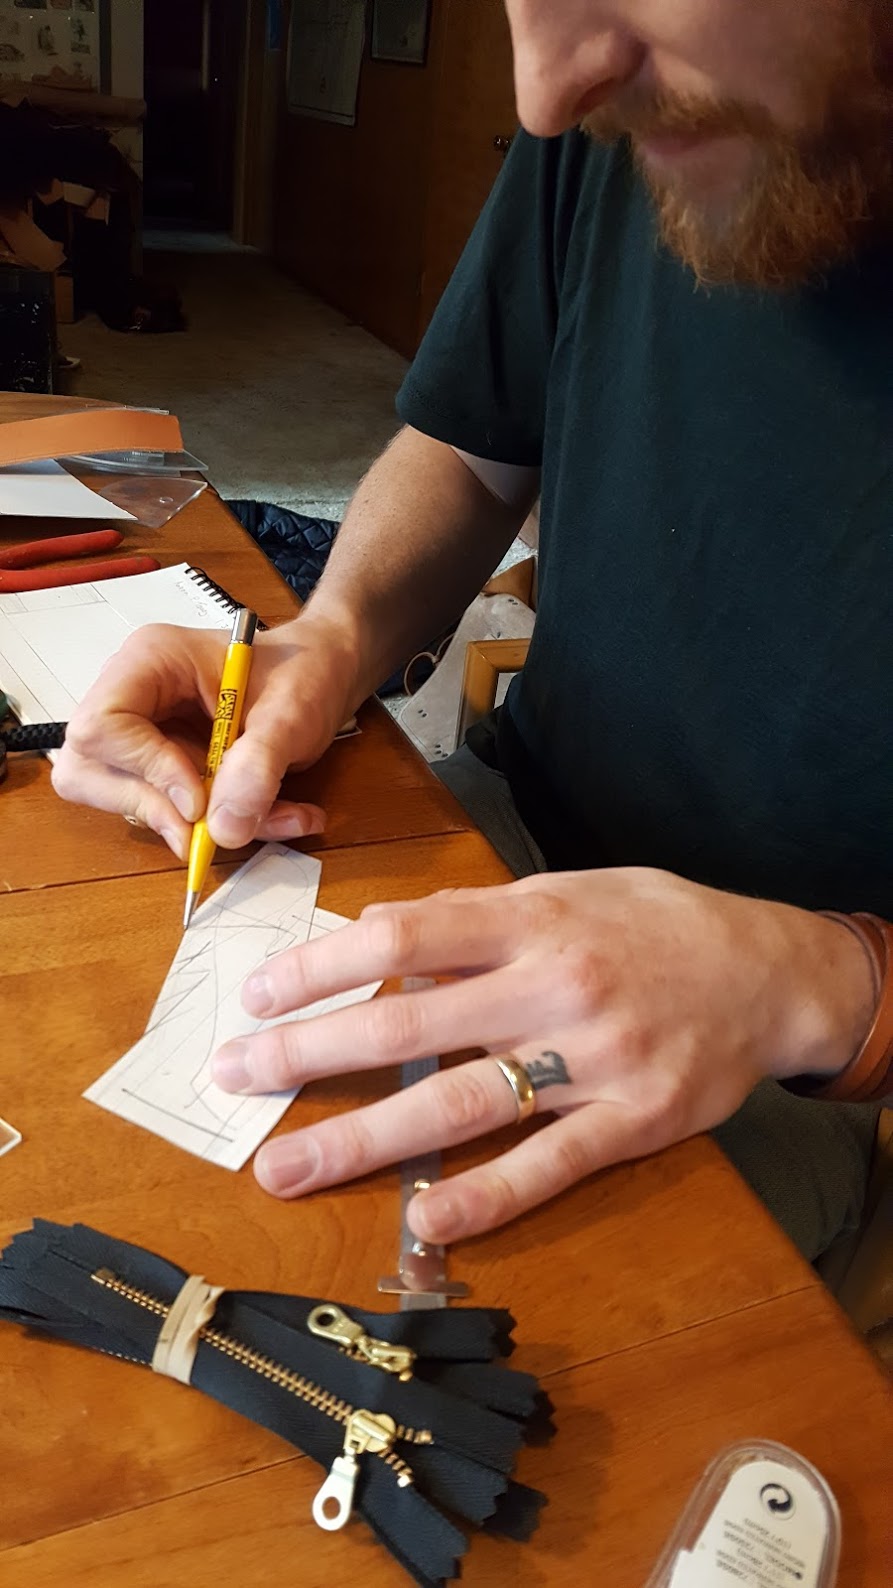
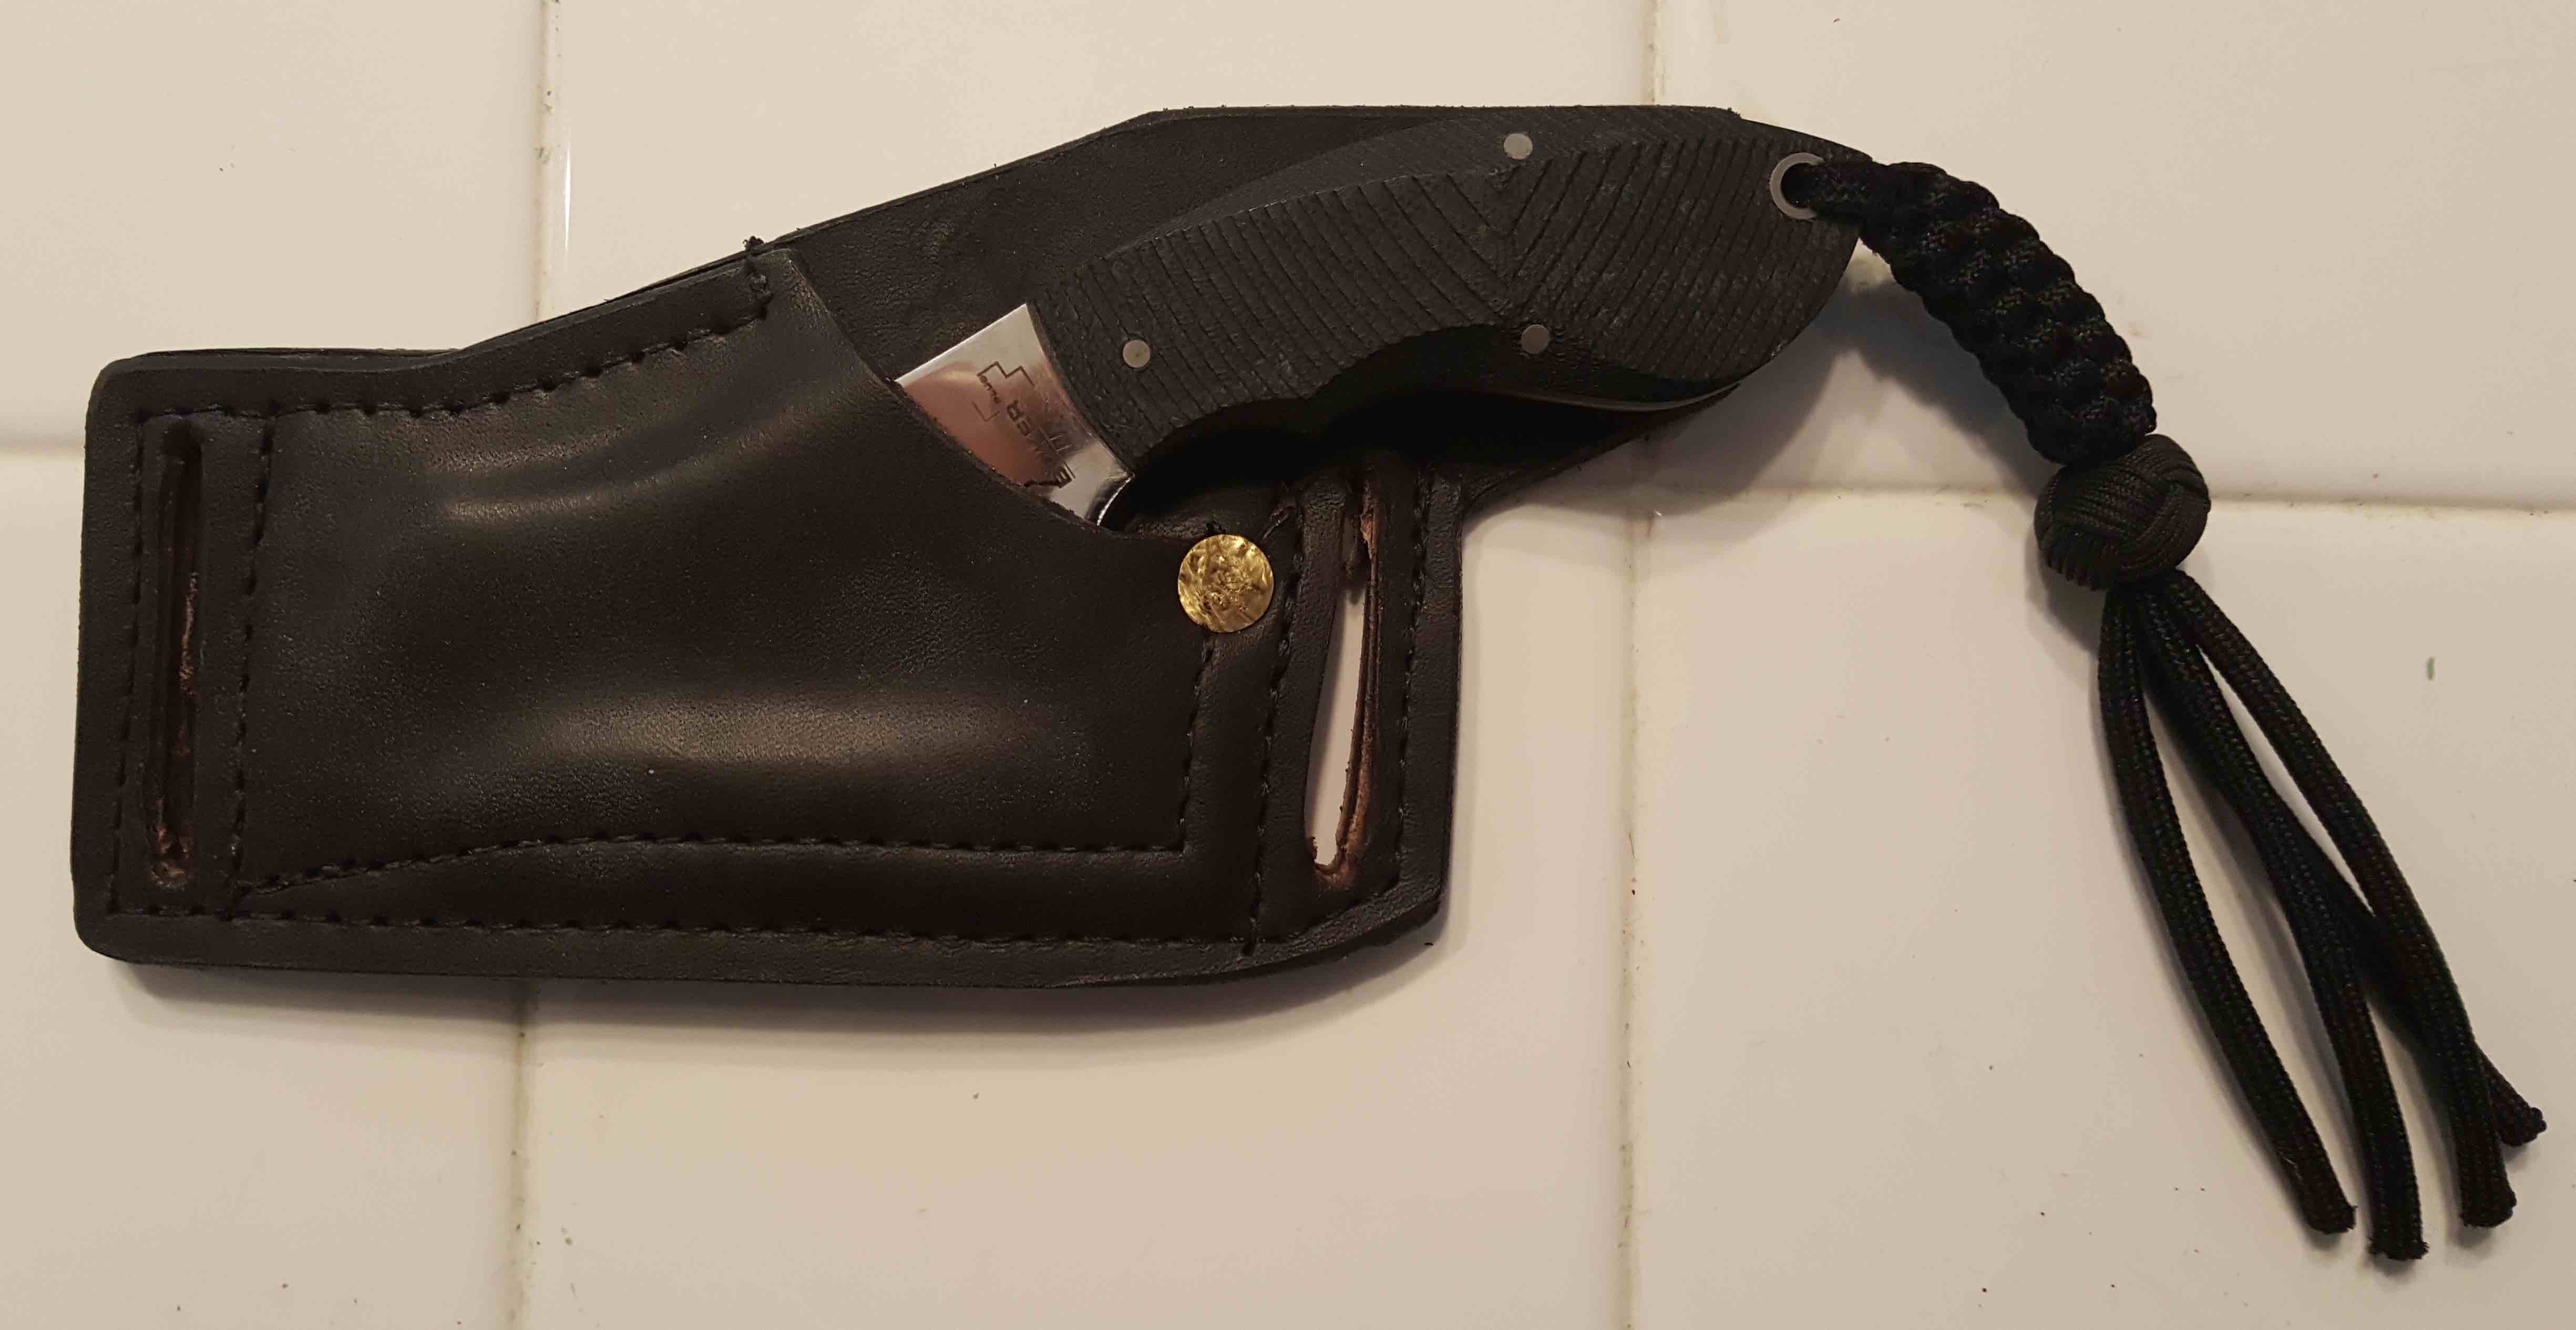
Yesterday I got to work with a craftsman to prototype up something I have been wanting for a long time, a custom knife sheath. I had been intending to make the prototypes myself – and even gone so far as ordering leather and leather working tools. Fortunately for me I met Chris from Cedrus (https://www.wearecedrus.com).
After talking for a while about what I was making – he was able to help me put together a prototype to wear around for a few weeks. The goal being to figure out any problems with the design and get it really tuned for me. At which point we could get a real one made. It is worth saying that Chris’s idea of a quick prototype is better than most custom made sheaths I have seen. If I had not watched him crank it out I just never would have believed how fast it came together.
He started by talking to me about what I wanted and why I wanted it. It was an amazingly familiar process, just a bit odd as I am used to being on the other side of things. Then we started sketching different designs out of paper.
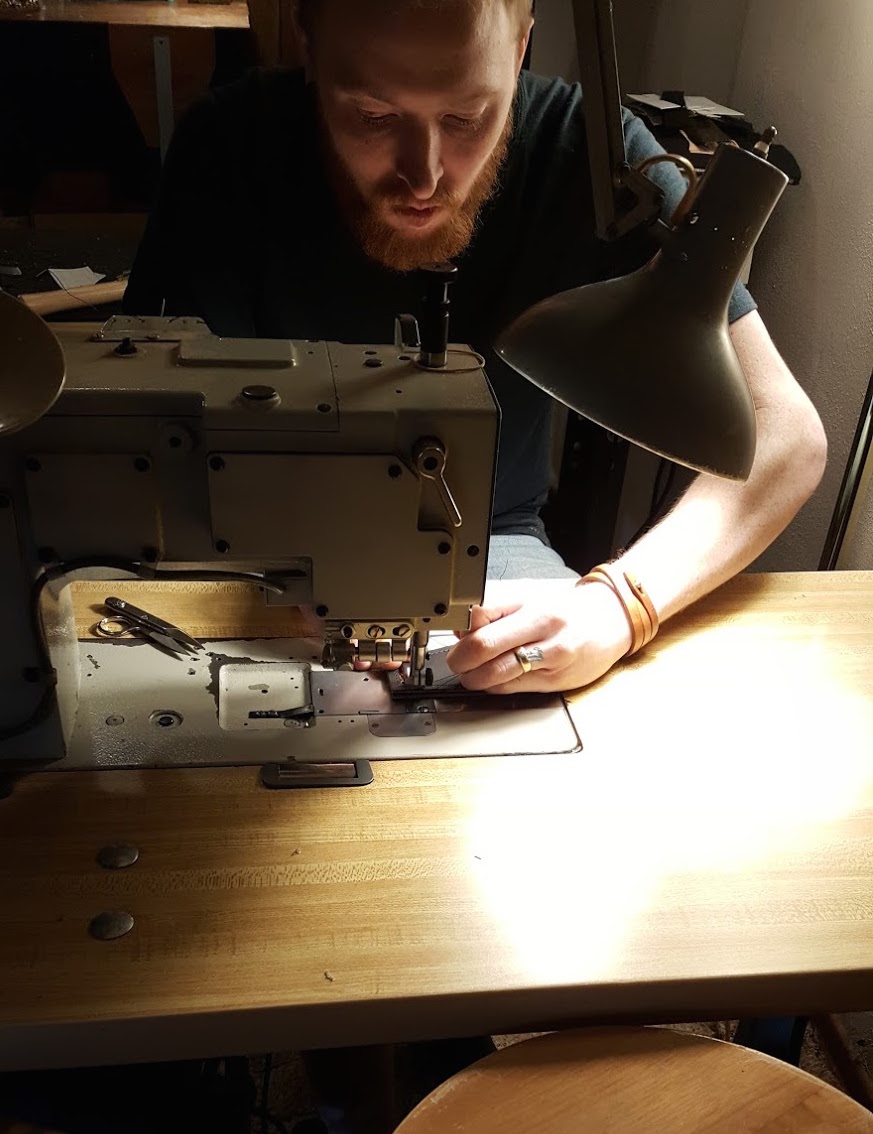
From there he cut the template pieces out of leather, and stitched it together. Probably a dozen hours of trial and error to get something similar had I attempted it myself, all done while I watched.
I always love watching a crafts person, who knows what they are doing, in their own shop just cranking through a project. Shows me just how much is left out there to learn. If you have never had something custom made for you, I can’t recommend it enough. This is already the best sheath I have worn. It is comfortable, and just disappears when you put it on. The angle of the knife handle is the angle of my hand as I reach for it. So using it just feels right. I even forgot I was wearing it when we went to clean up. If you have every worn a Kydex sheath ( a type of hard plastic), they are at best bulky and awkward and you never forget they are there. Best of all, we extended the leather with a strip so you don’t poke yourself in the back when you re-sheath the knife.
Here is the prototype we came up with. The knife is a Böker Rhino. It has a sheep foot curve to the blade and a thick spine. Best of all it is not that expensive. So it is great for heavy every day use and abuse. Best of all it does not look threatening. I love this design. It lets me horizontal carry a knife on the small of my back, without looking like I am some wacko who secretly want to be Rambo.
I’m really glad we prototyped this. I already found one or two small things I’d like to tweak for the final design, but it is already way better than I had hoped.
If you are looking for a sheath I highly recommend reaching out to Chris.
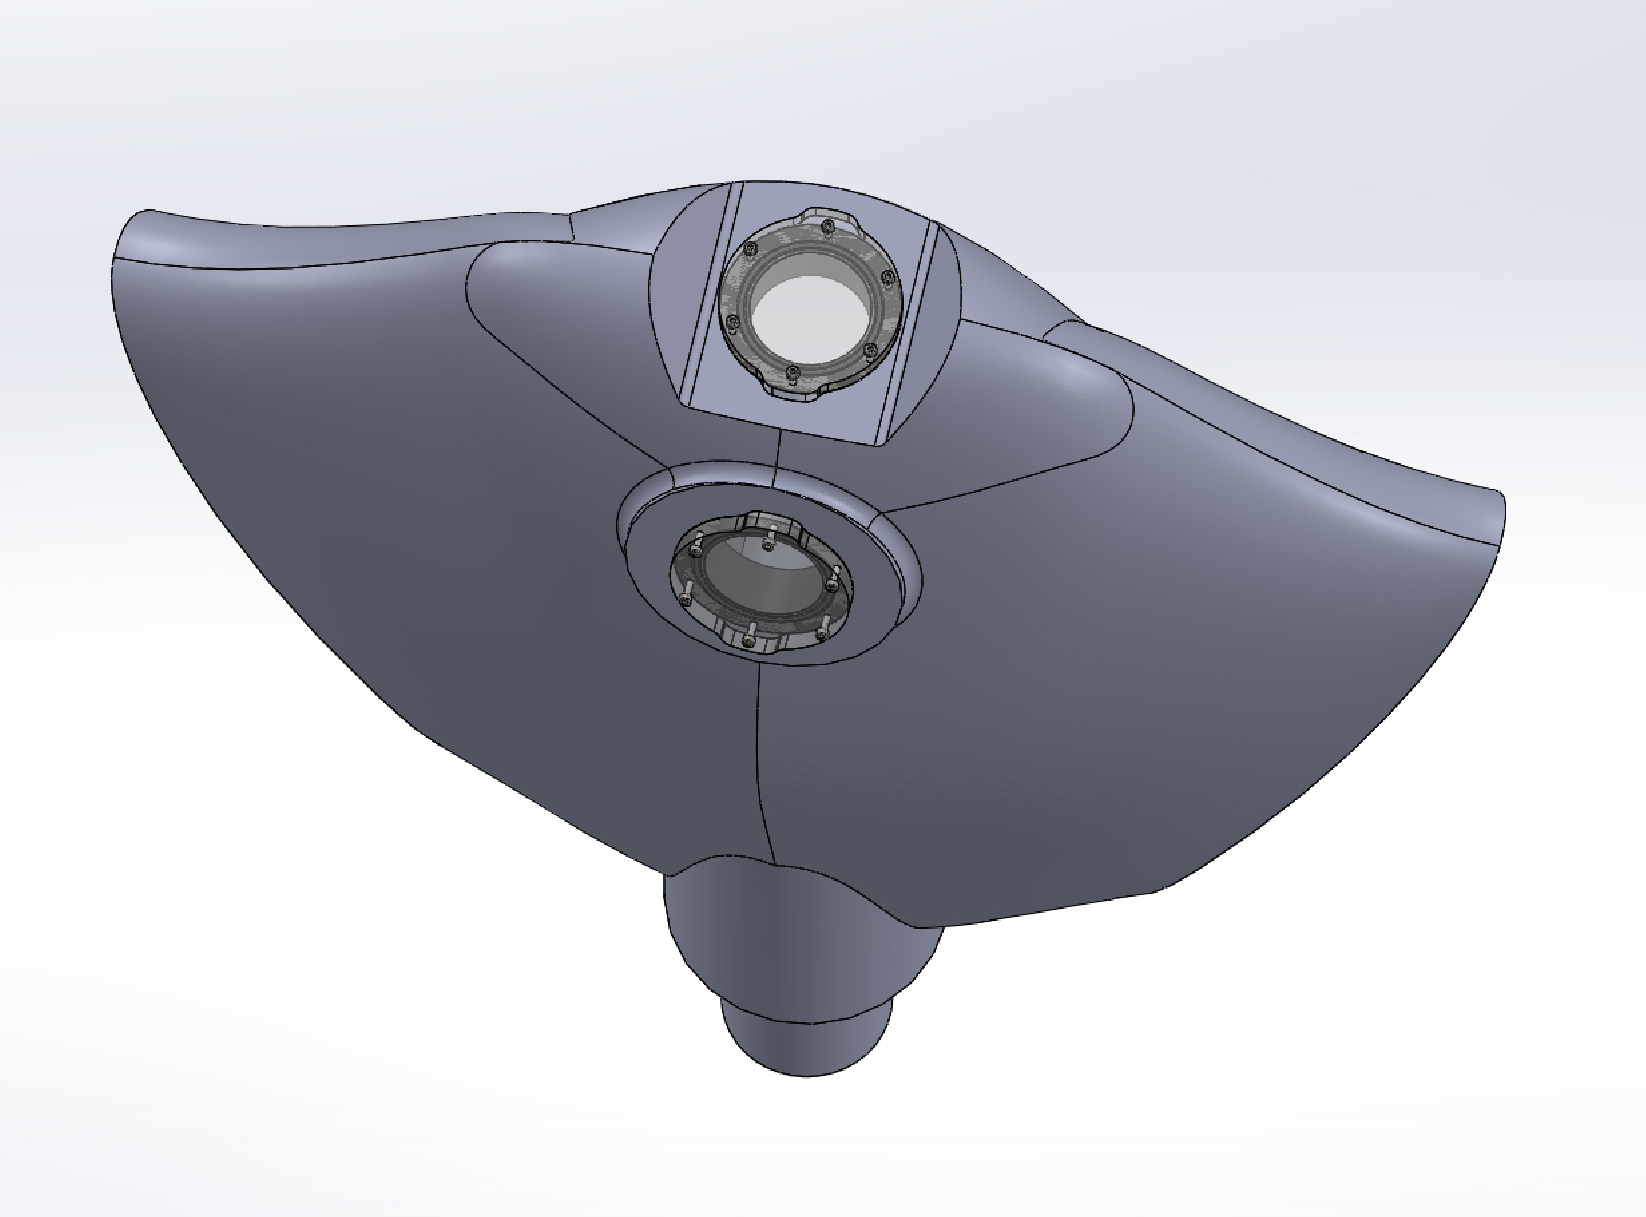
I needed to go make a bunch of tests of different techniques for epoxy cast hull construction. Rather than just test putting hatches and portholes in a bunch of simple hollow geometric shapes, I decided to go ahead and run them on a simpler and smaller hull design. Since I really liked the Manta Ray robots – I used the shape of one of those for inspiration.
Here you can see my first pass. It may look a little funny as I am designing the wings to bolt onto the frame, and they are missing in these renderings.
I am using this design to test the casting of an epoxy hull, using the BlueRobotics portholes, and different designs for a 3D printed seat for a pressure rated hatch. I may have been guilty of over engineering on my first design, since once I started digging into it I think I may be able to accomplish most of my design goals with this smaller design.
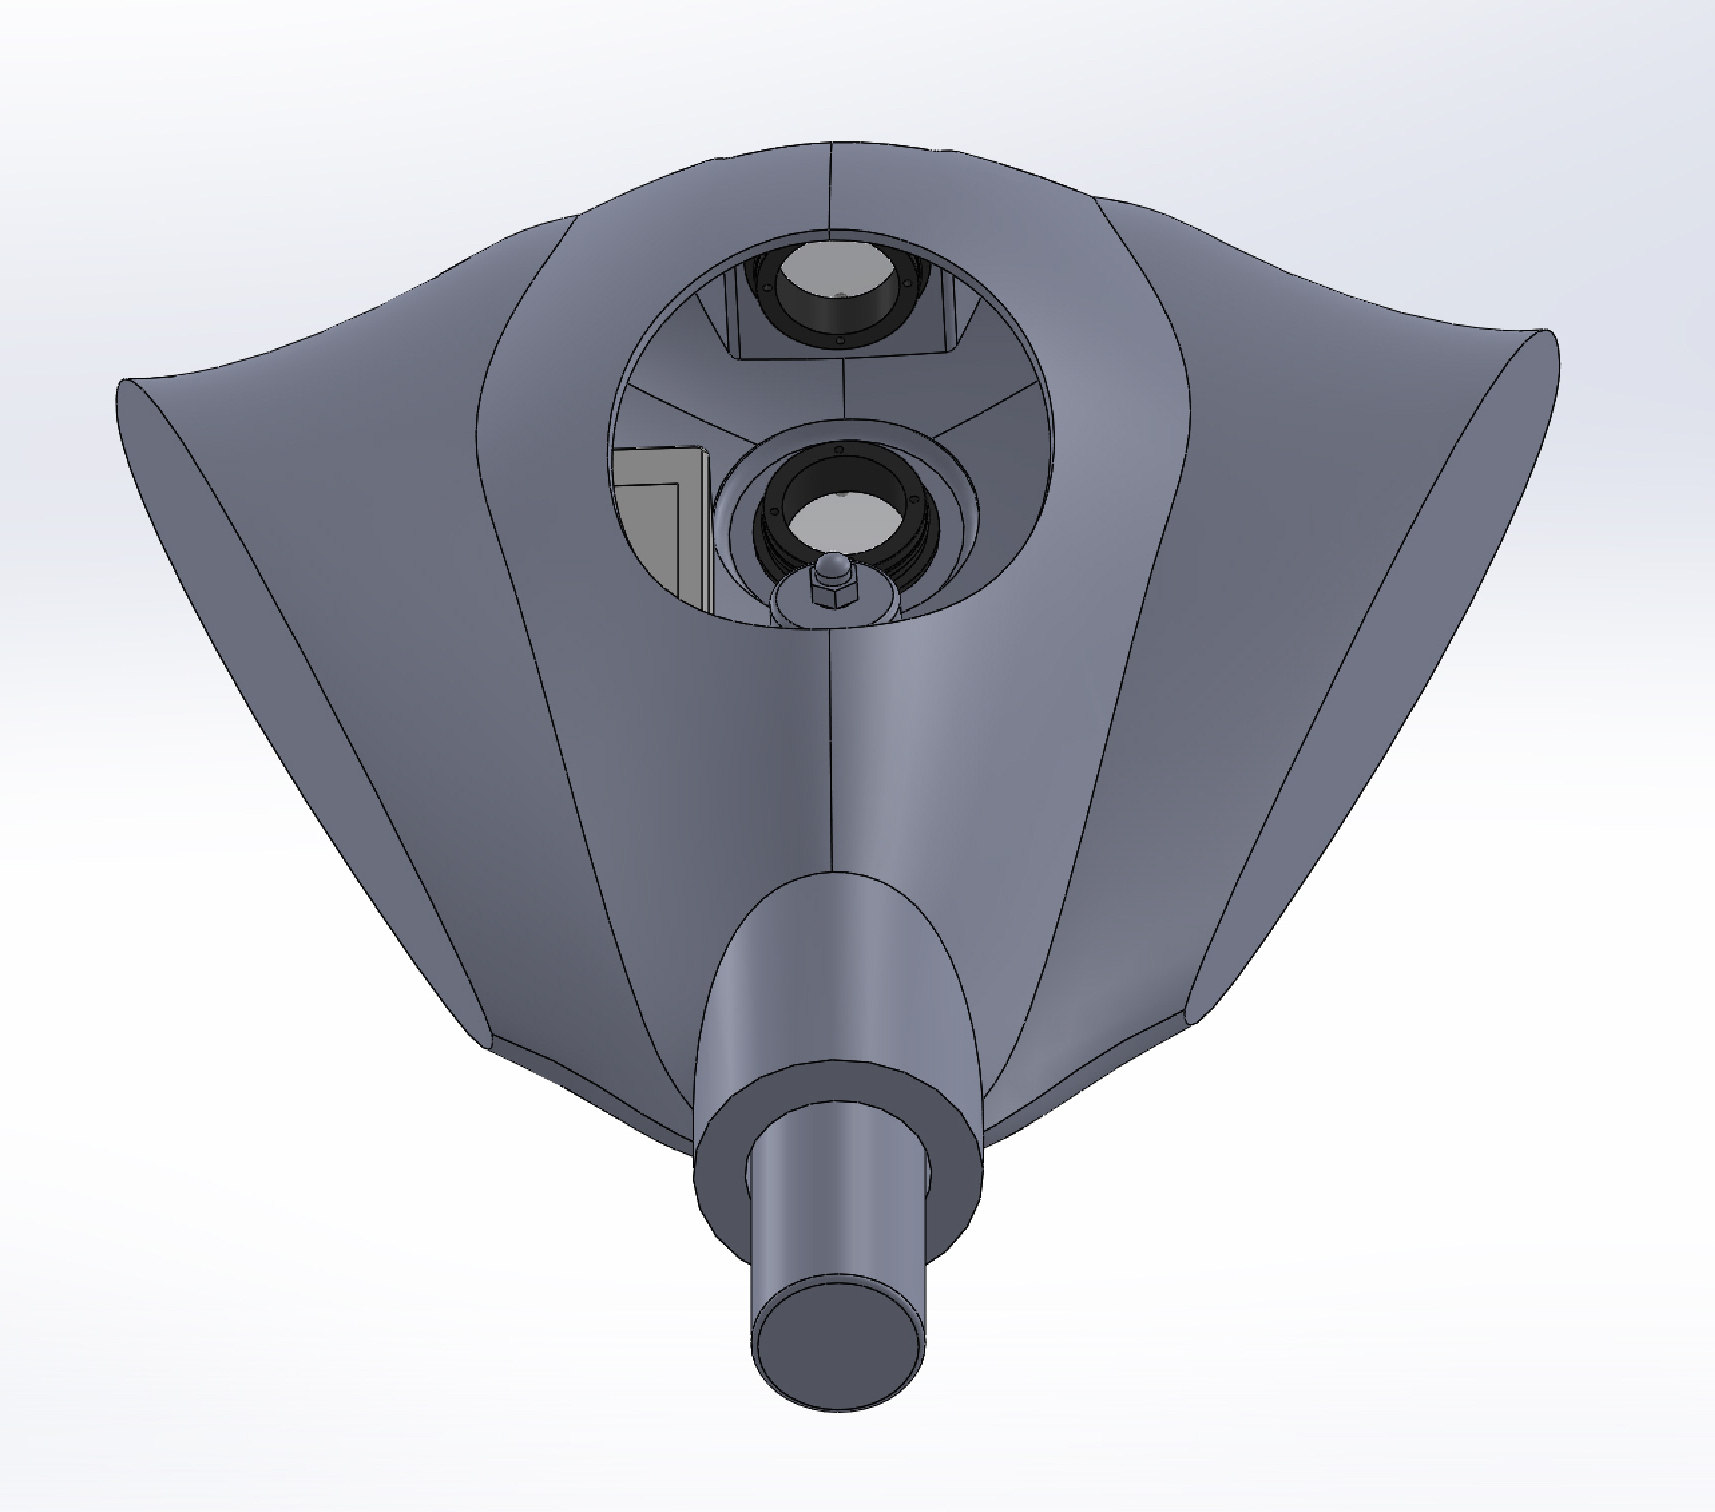
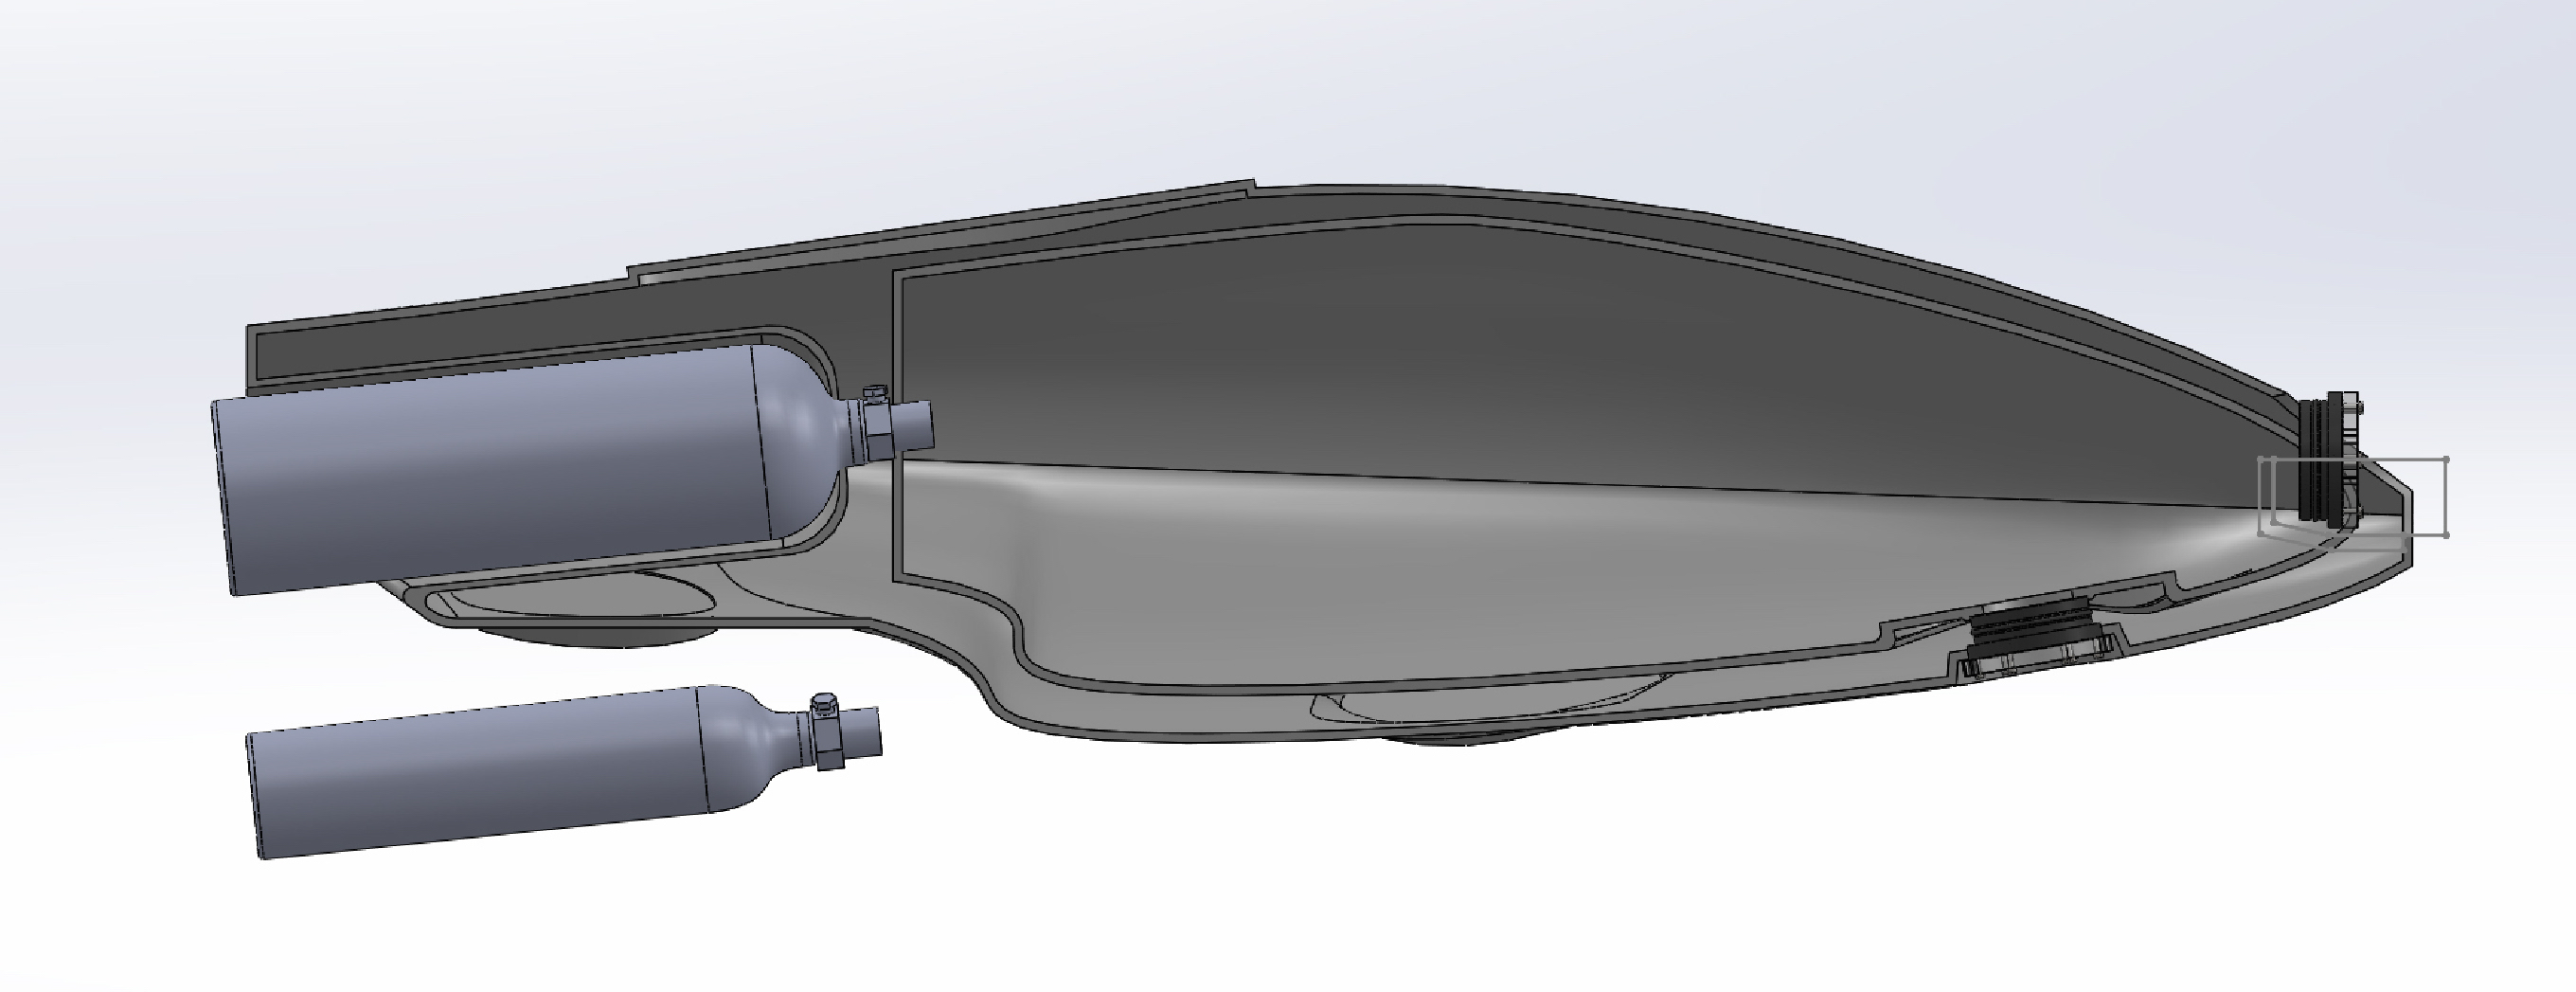
I am testing using an external tank with this design, but down graded the tanks size since the hull will be much smaller. I don’t have the printed hatch seat shown in this design though.
Heading into the holidays. Either I’m going to make a lot of progress on this project – or none. It all depends on what we pick for the holiday hack-a-thon.
I think that figuring out a way to make cheap yet pressure reliable hatches is going to be the defining design criteria for all my AUV designs. Shifting the CO2 tank to outside the hull lets me use smaller hatches, which will be easier to build.
This “Cyclops” design is my experimenting with that shift. There are two tanks shown, a 24oz and a 12oz. Tank size will drive a lot of the design – so I have taken to having both visible when sketching out a hull design.
I’m starting to think I need to introduce some more separation of all these variable before I start building – so I may do spin up a design with a smaller hull to work out technique and construction details.
As part of the latest skills review – I am going back over my coding and trying to get better. Being honest I have been pleasantly surprised, but embarrassed, by some of the places I have found I have room for improvement. It is worth it though – cause sometimes you catch gems like this.
When traversing trees, I tend to traverse them like they were graphs, and using queues. So for the problem of traverse a binary tree (not a BST), and return the largest value in each row I wrote the following code:
What I just ran across was someone who wrote the following code for the same problem. He is using a list as opposed to a queue – but the logic of what we are doing is about the same. Only his double nested loop traversal of the list should be much faster. It avoids a lot of pushing and popping operations, and leaves the constructed search list intact. I am posting this here so I can come back and look at this later. This is the kind of thing I am going to want to stew on and see where else it might be a useful thing to have in the toolbox.
    vector largestValues(TreeNode* root) {
        vector result;
        list current;

        if (root != nullptr) {
            current.push_back(root);
        }

        while (current.size()) {
            int max_value = INT_MIN;
            int size = current.size();
            while (size) {
                TreeNode* node = current.front();
                max_value = max(max_value, node->val);
                current.pop_front();
                if (node->left != nullptr) {
                    current.push_back(node->left);
                }

                if (node->right != nullptr) {
                    current.push_back(node->right);
                }
                size--;
            }
            result.push_back(max_value);
        }

        return result;
    }