Tyler, Chris, and I met Sunday to do another round of rope-work practice at Marymoore. We drilled on anchors and Z-hauls again.
Here is Chris demonstrating one way of reliably putting a clove hitch on a carbineer. While this method uses two hands, it avoids the problem where you accidentally put a Munter and not a clove hitch on the carbineer and have to redo things.
That clove hitch is used on the first piece of the anchor system we have been working on. Seen here:
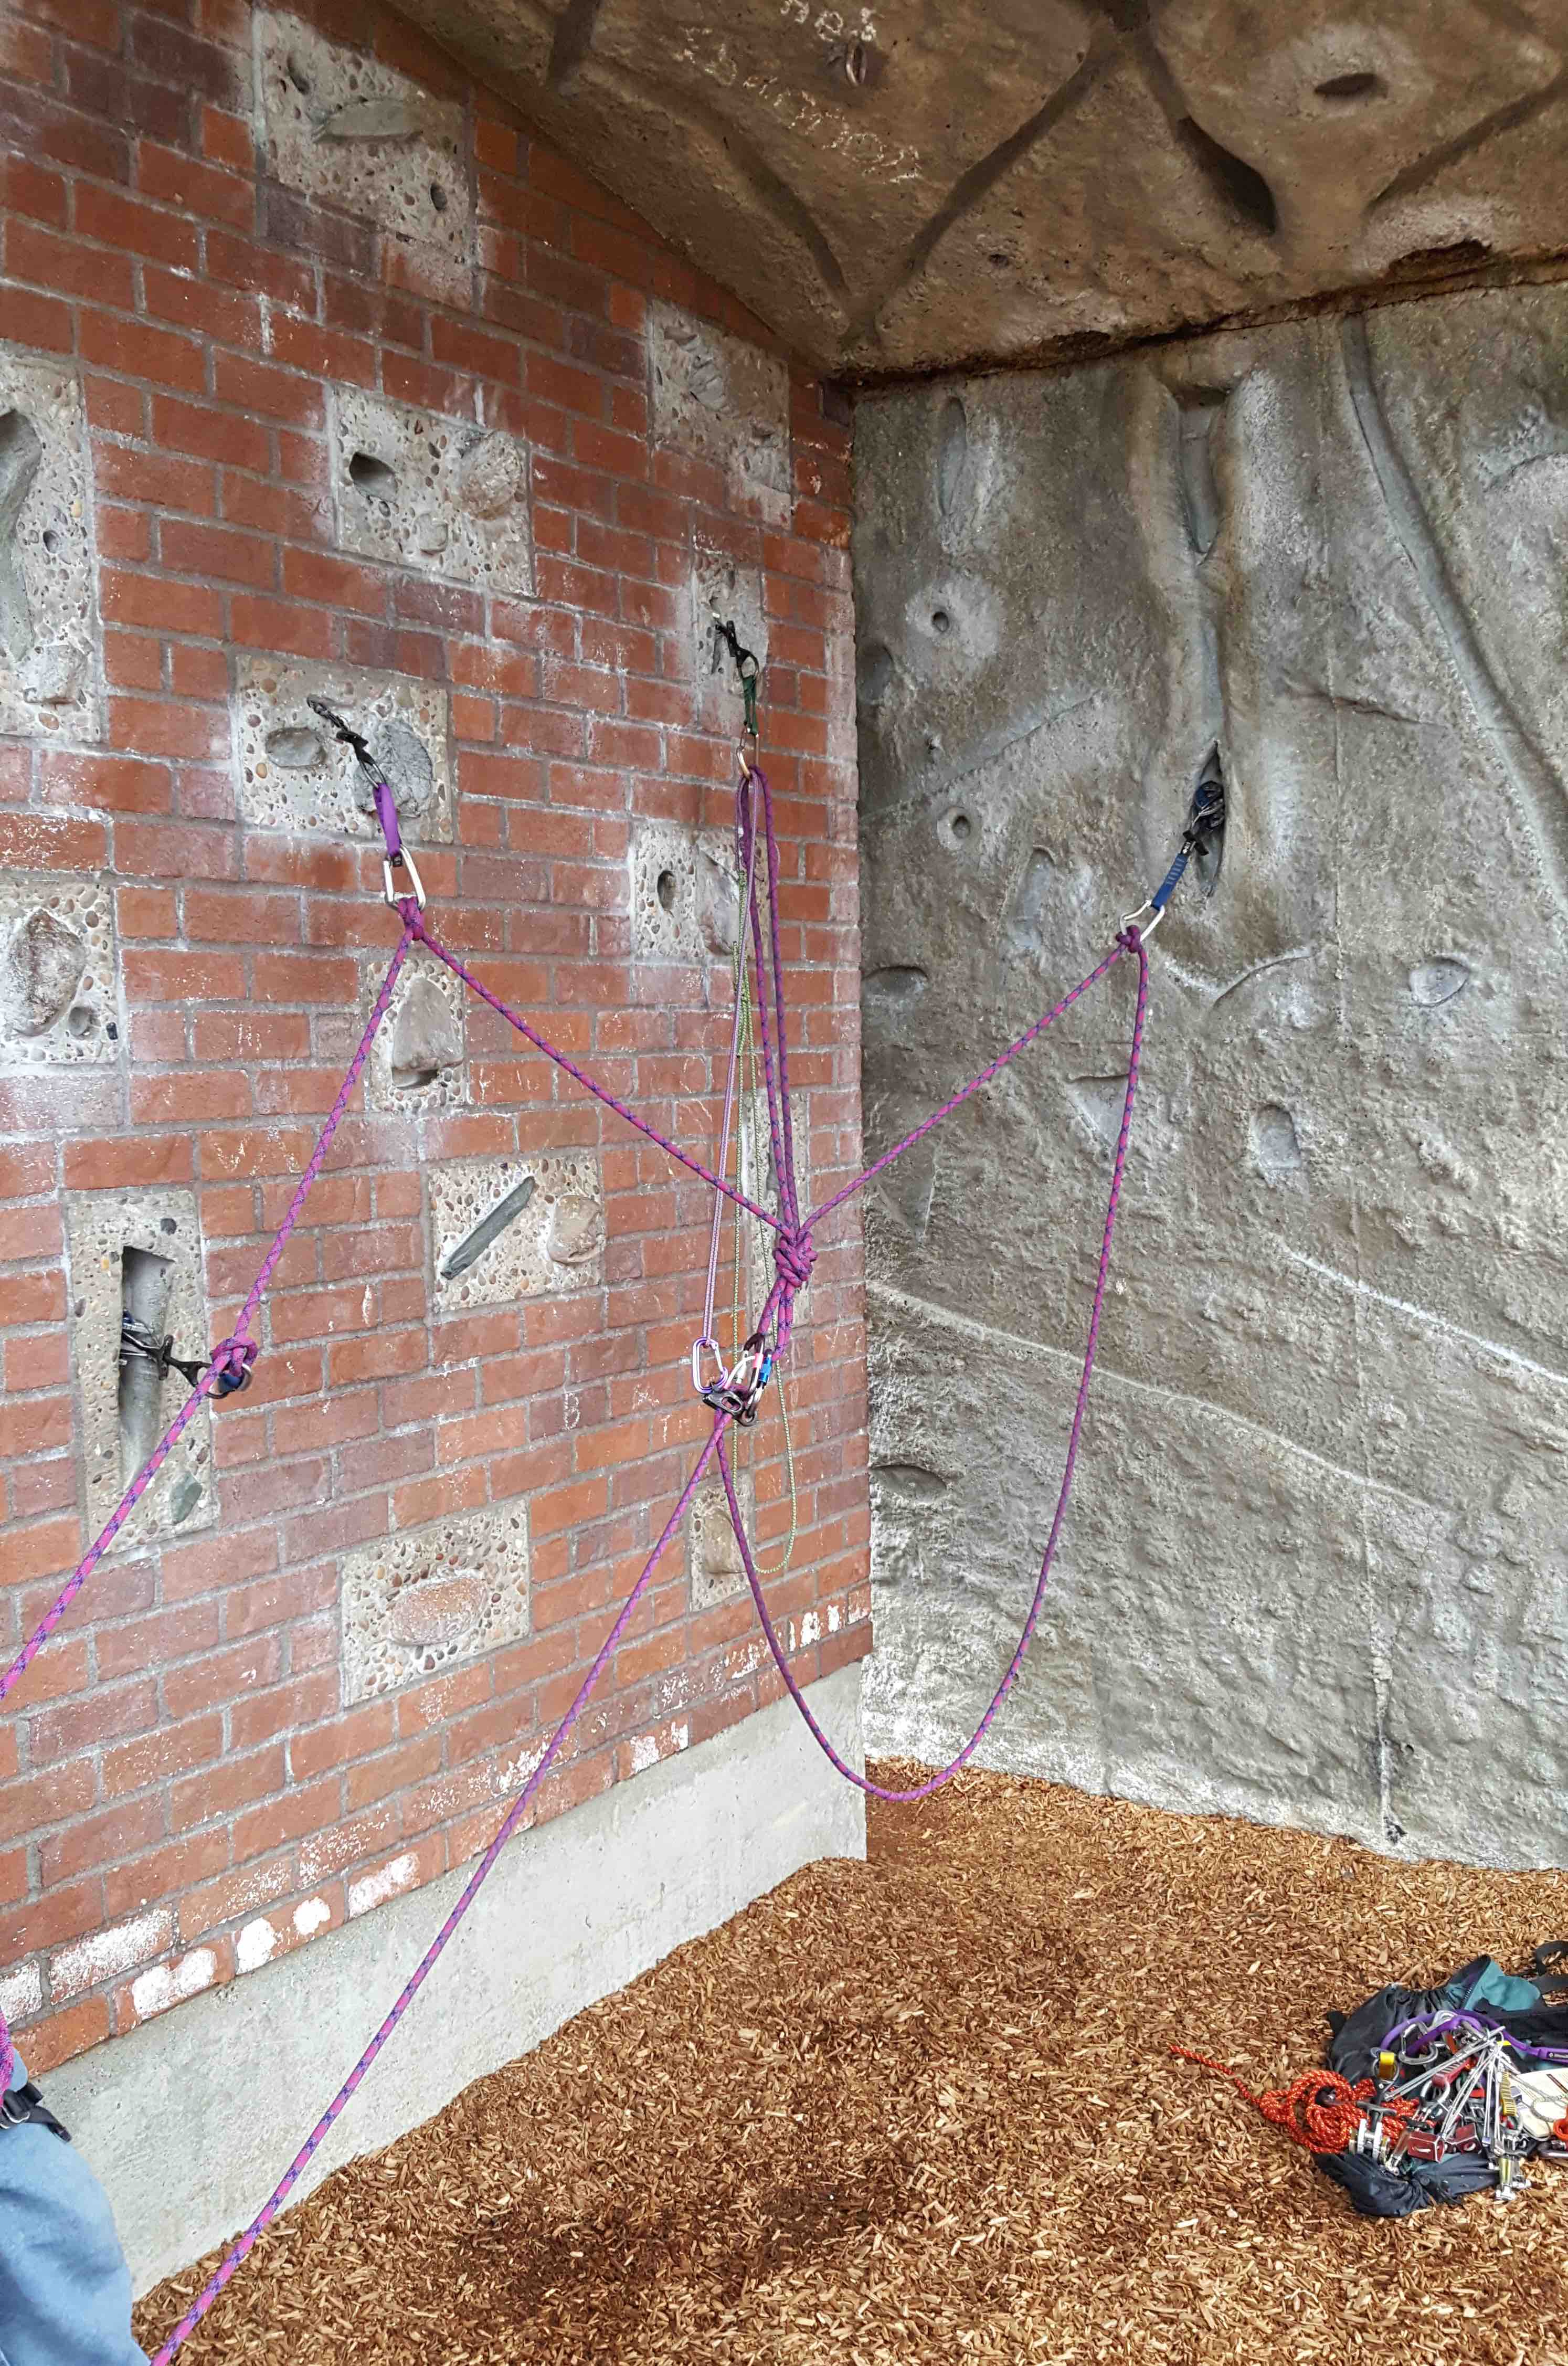
I talked about this setup before – where you use the rope to build the anchor so I wont get into it here. One interesting thing with this anchor – is that since you are not using a separate anchor line – you have a moment where the last person off the anchor system has a very large potential fall while the belayer is pulling in the slack that used to be the anchor system. Now he is sitting on a single piece of pro, and holding onto the rock, and it is probably the person who climbed up and built the anchor in the first place. So a lot would need to go wrong for there to be a fall – but is something we are all talking over as part of dissecting and drilling on technique.
One thing new we were drilling on was escaping a loaded belay. The guide mode ATCs have friction horns that get engaged on a fall. The problem is you then need to “break” the lock the ATC has on the rope to lower someone. That’s hard to do with any control if they are loading the rope with their body weight.
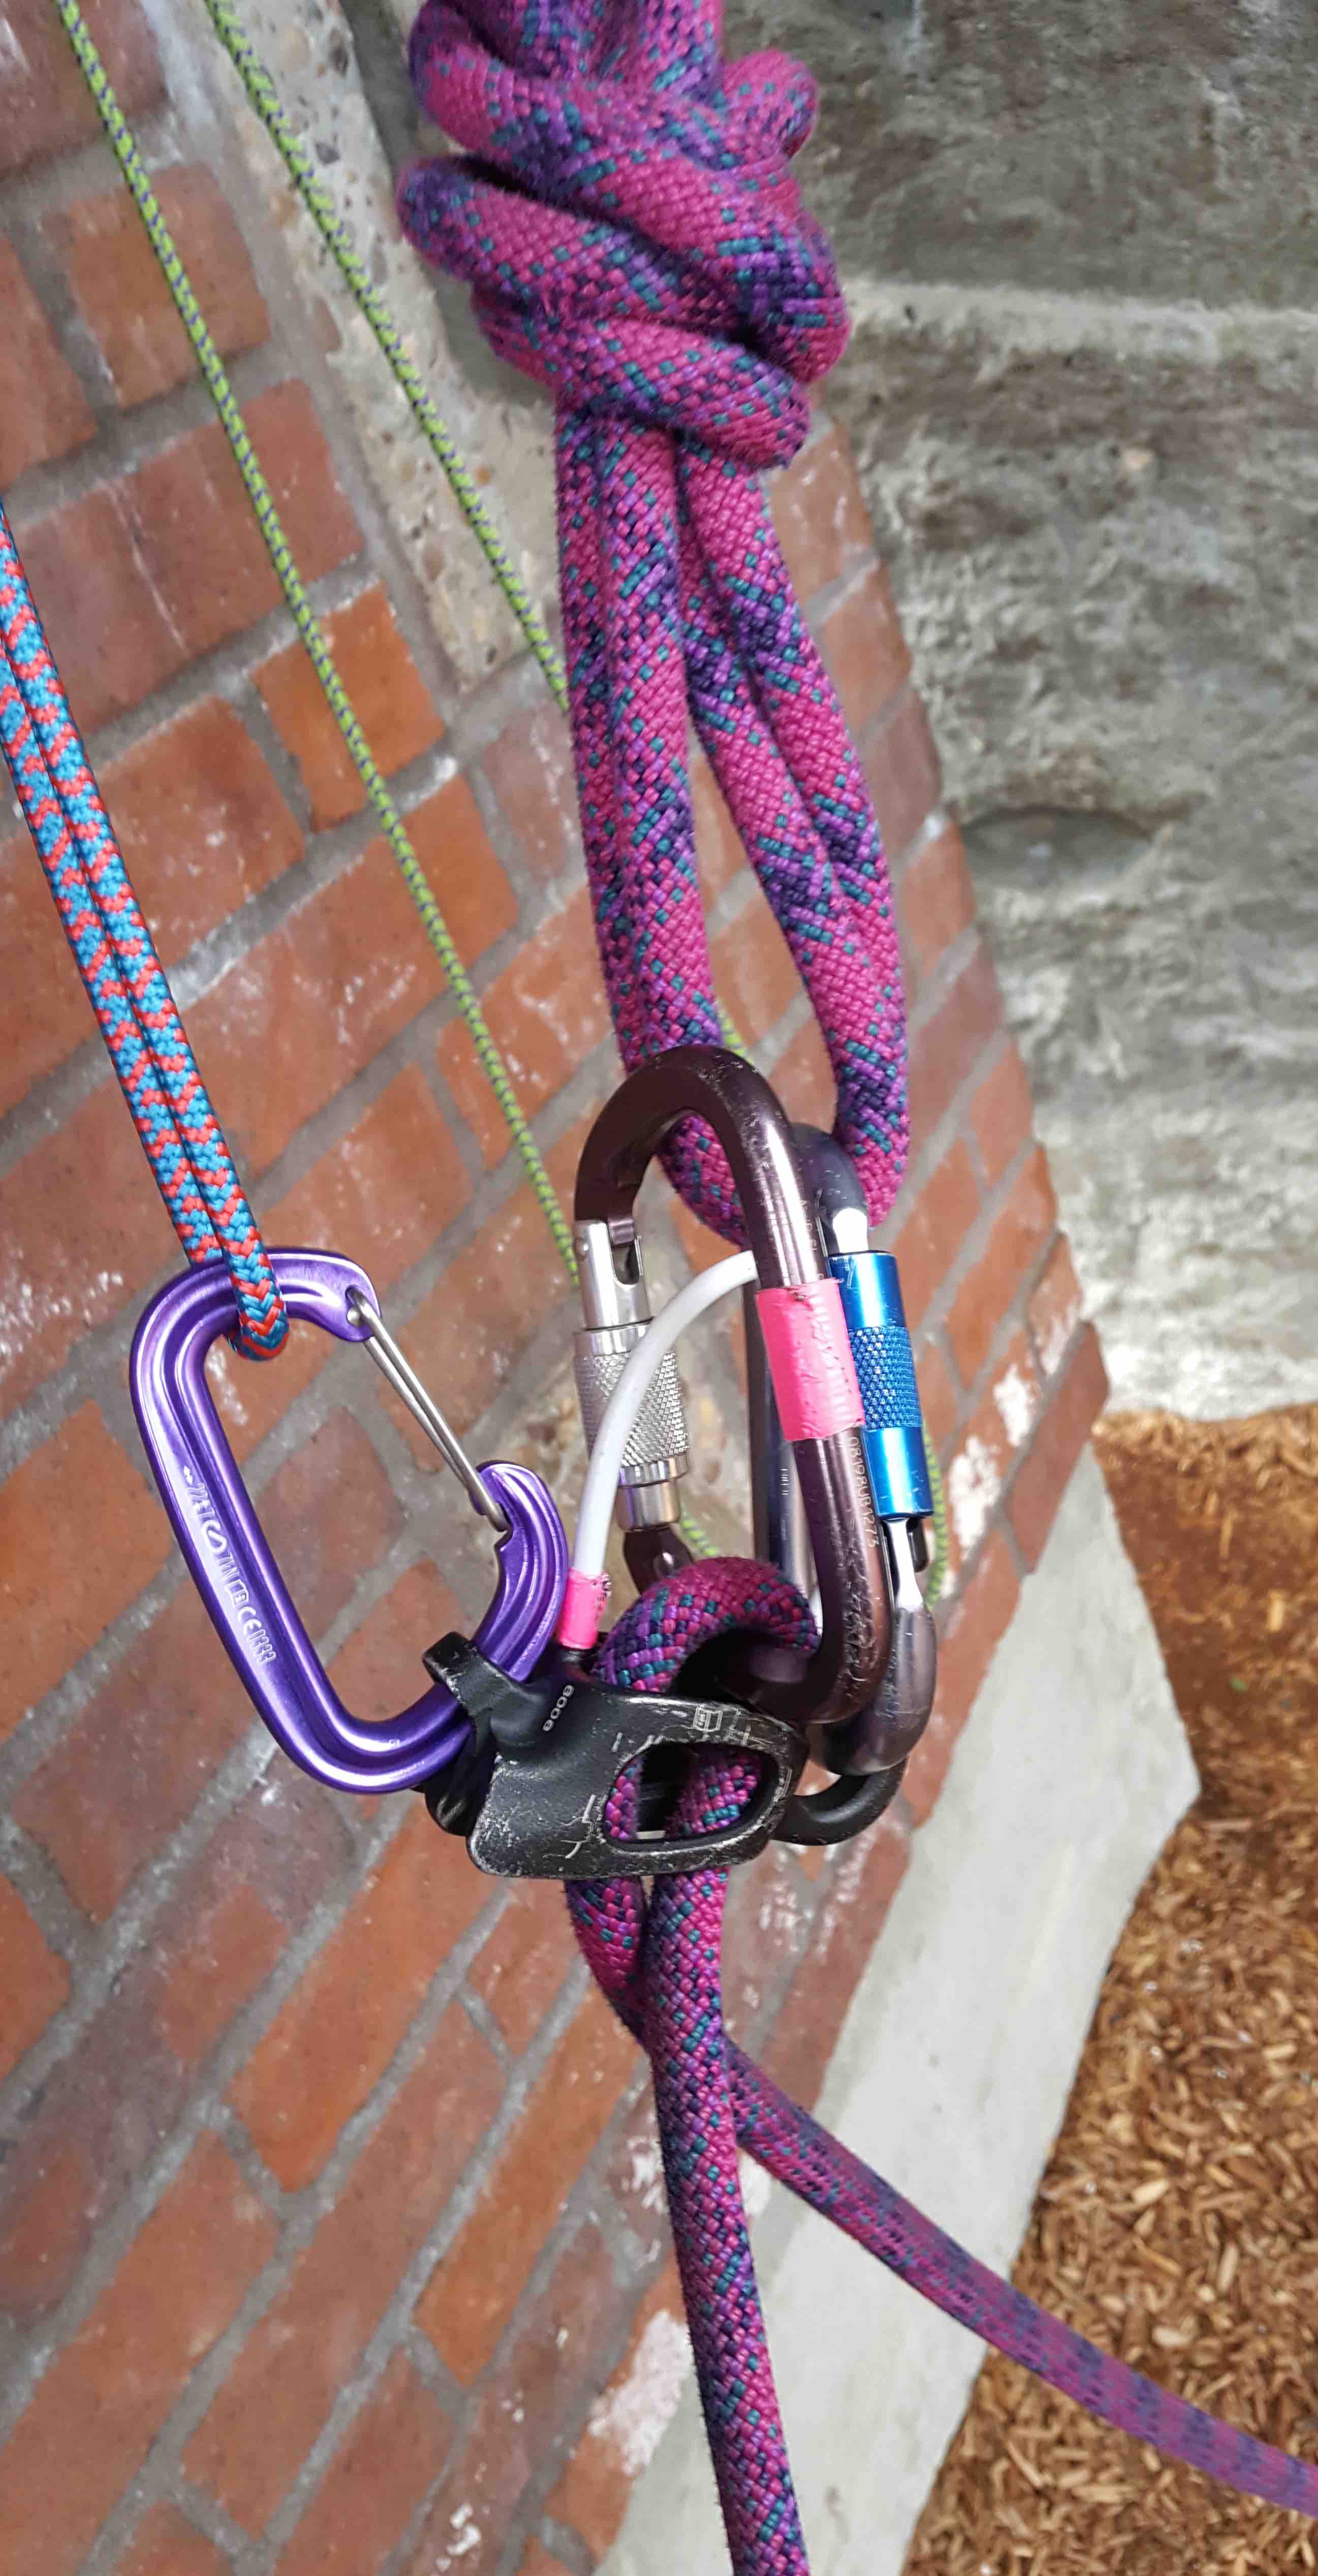
The trick is to pull the ATC out of the locked position. Here you see a carbineer clipped into a small hole on the ATC provided for this sort of improvised handle. The purple chord seen here runs up above the ATC, through an anchor point, and extended back down to the belayer with the green chord. By pulling on the green chord, or if needed stepping into it, the ATC is pulled out of lock and the belayed person is lowered. Its easy enough to set up – but something you totally need to drill before you need to do it in the wild. It is very easy to drop someone with no control if you are not careful. The tradeoff is an auto engaging belay arresting the fall immediately, for a harder to control lowering after the catch.
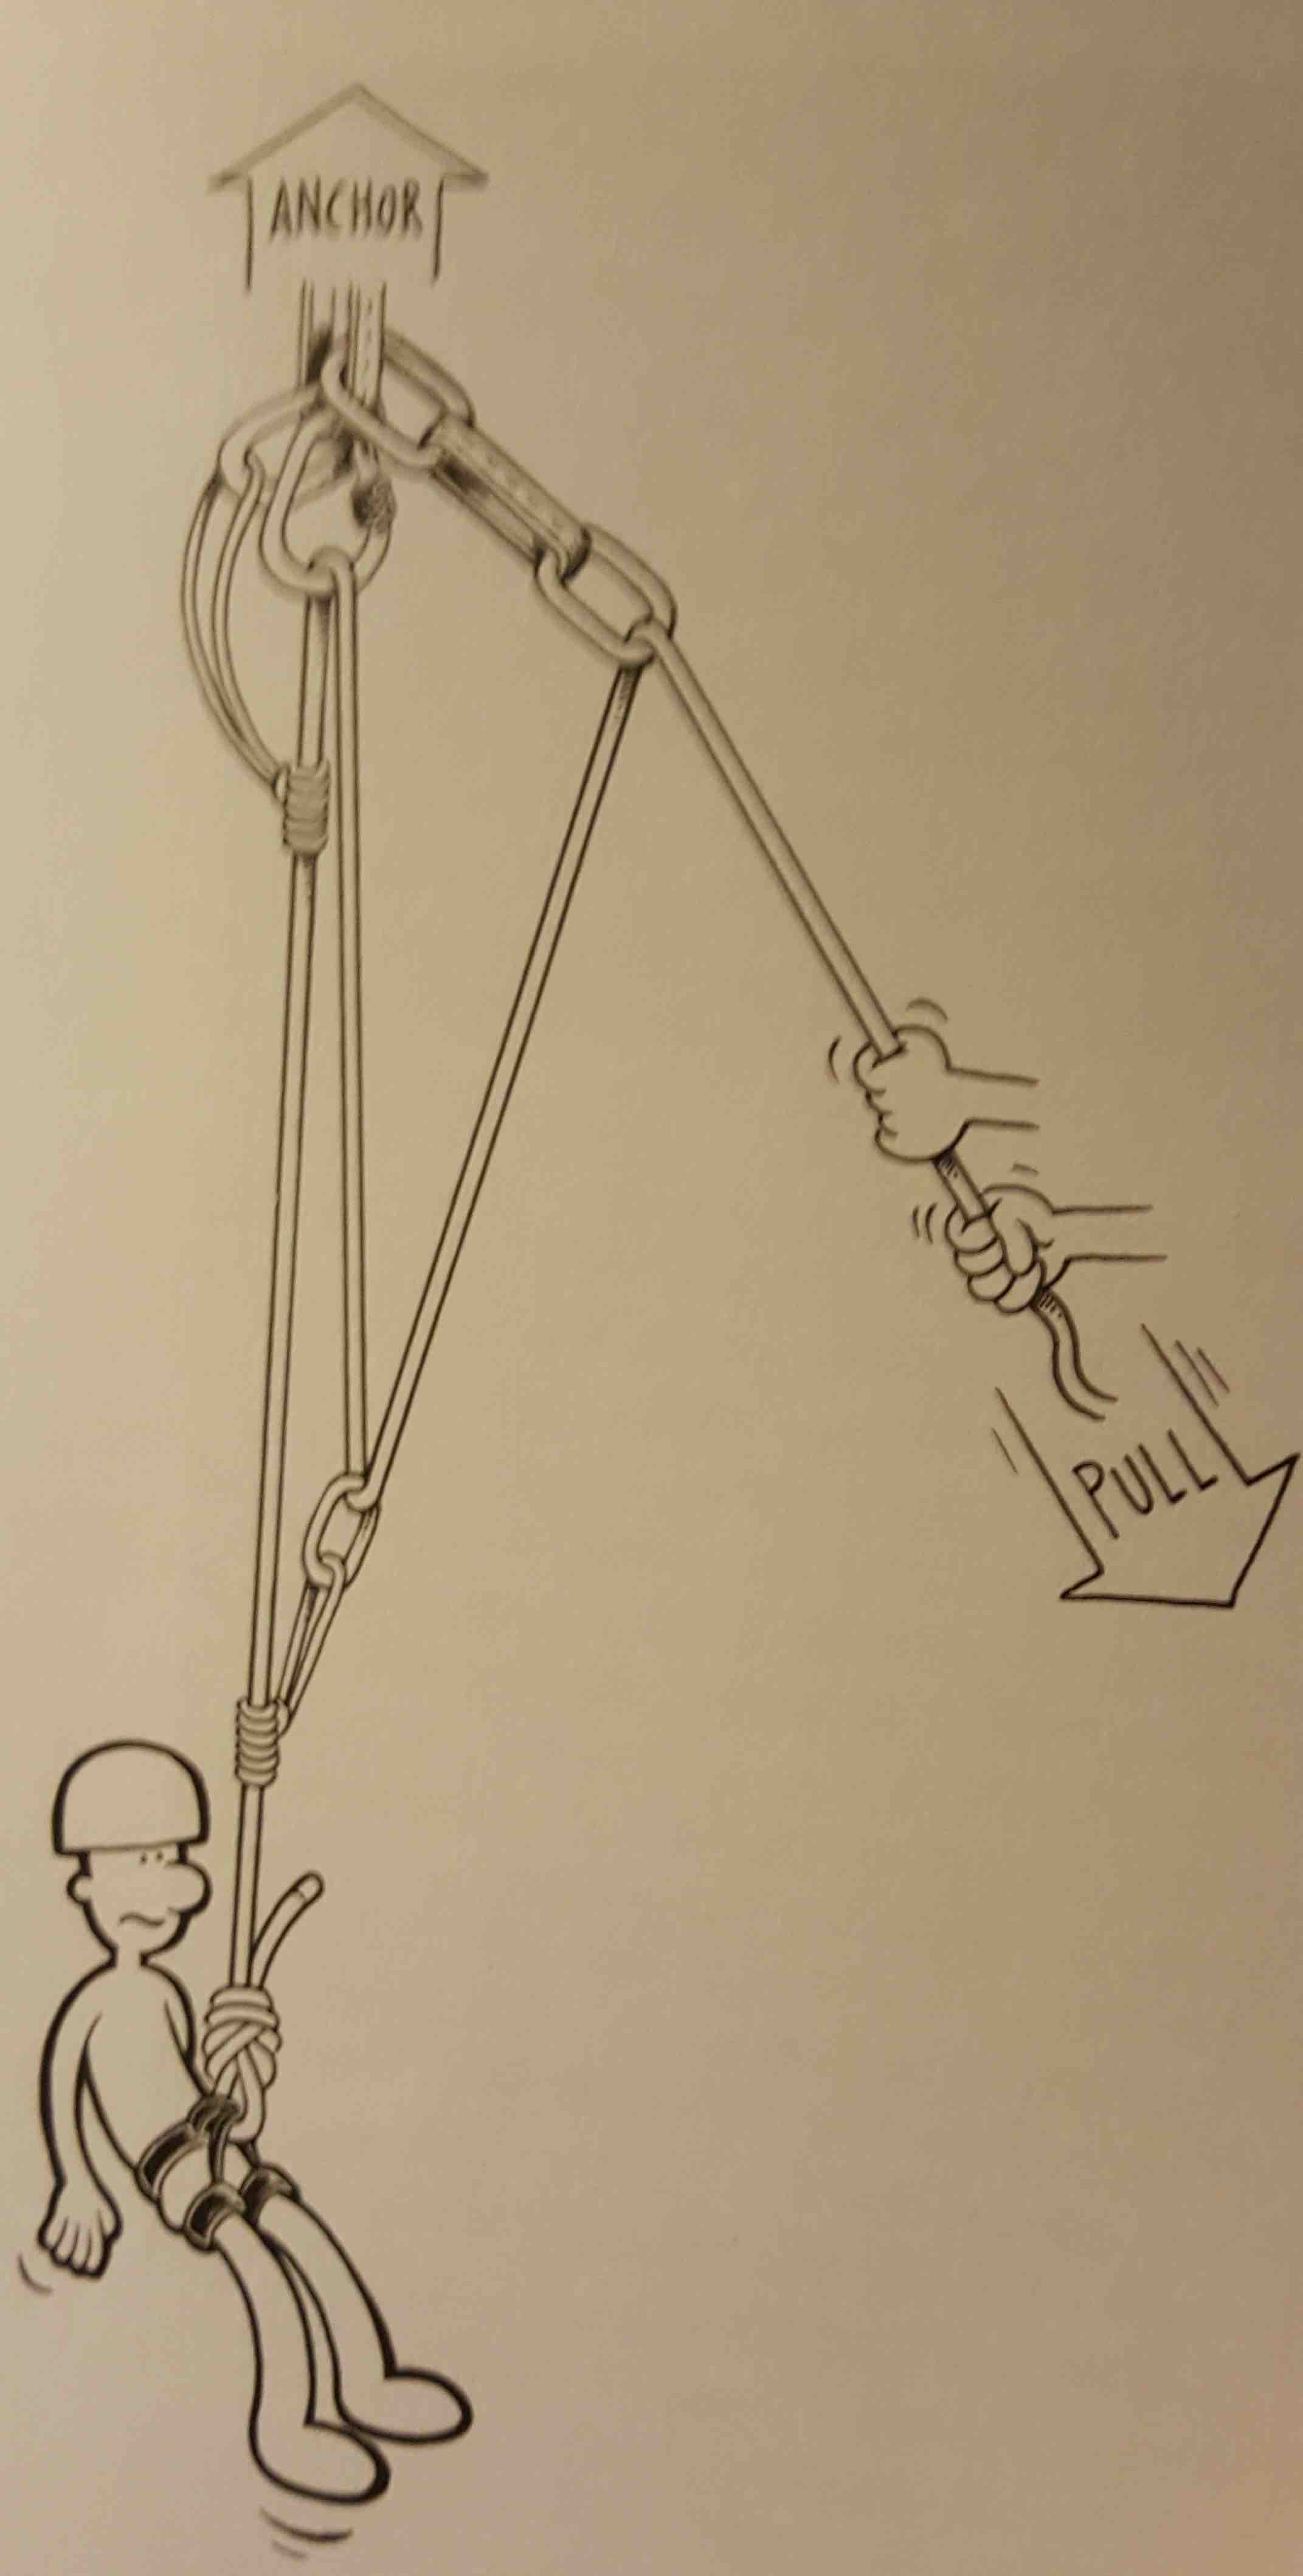
Then we went on to drill Z hauls again. We started with a simple 3:1 setup on the fence again:
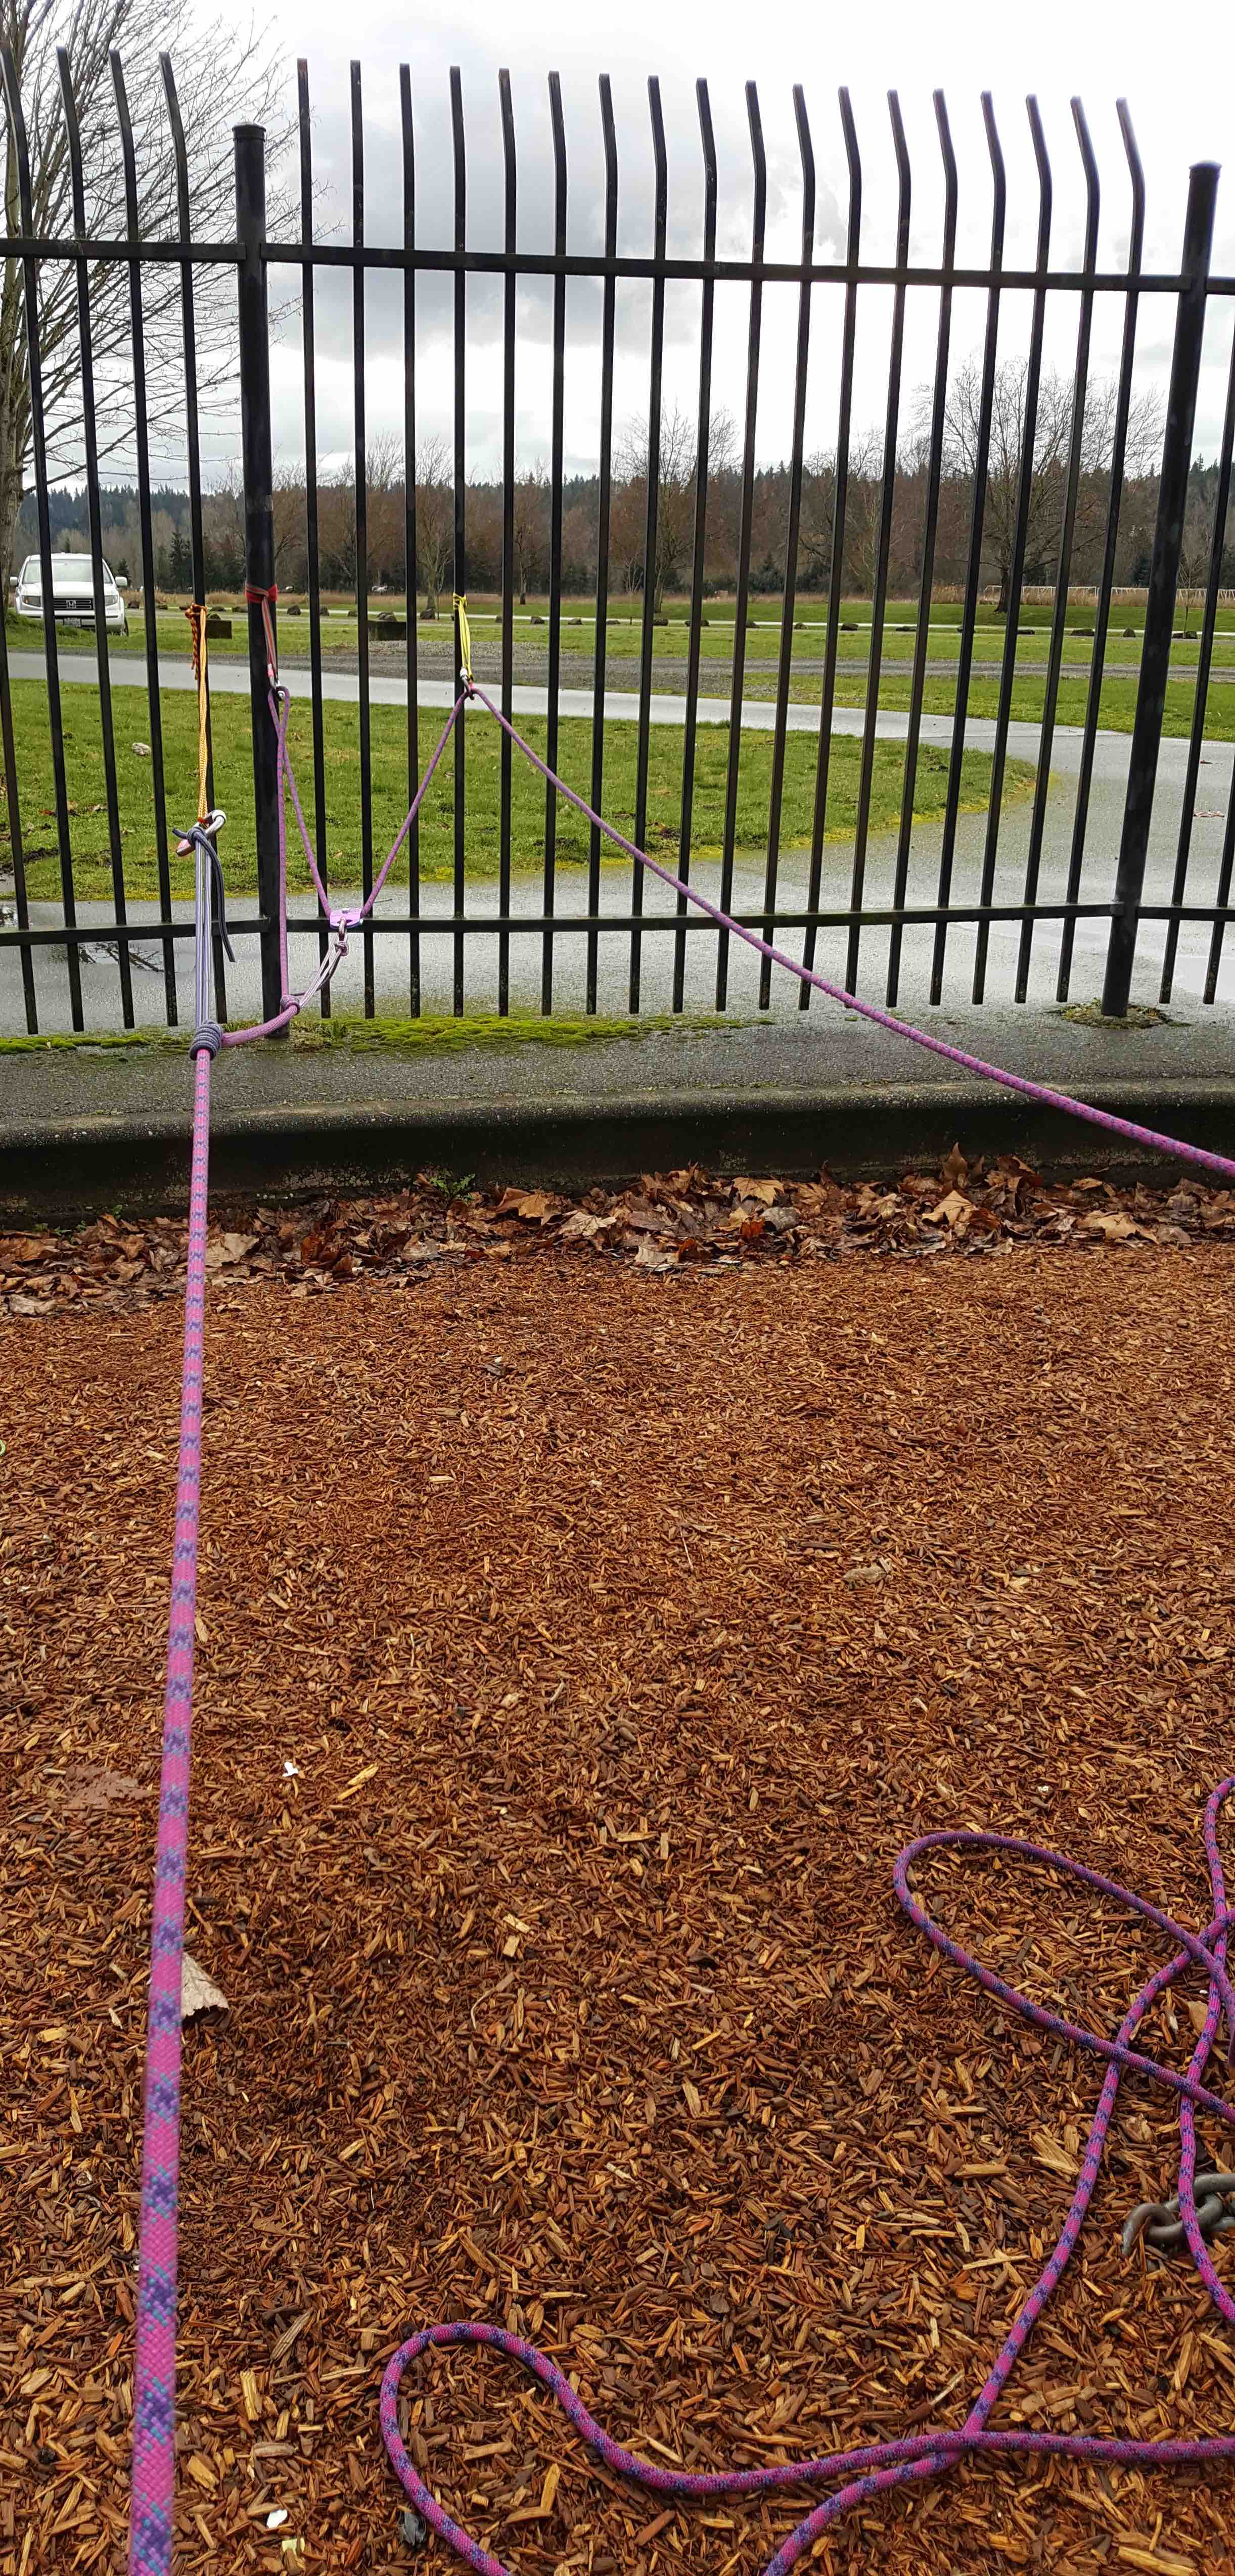
We were playing with using significantly longer loops of chord for our prusiks. The thinking being if we can slide the ropes a bit farther we should be able to increase raising and lowering speeds without sacrificing safety. So before we were moving the load by 8 inches a haul, and this setup let us move it by 12-14 inches. Here you can see the pulley implementing the Z, which provides the 3:1 mechanical advantage. So basically we were building this system, but with a bully swapped in for the carabiner and not using a single master point for clarity.
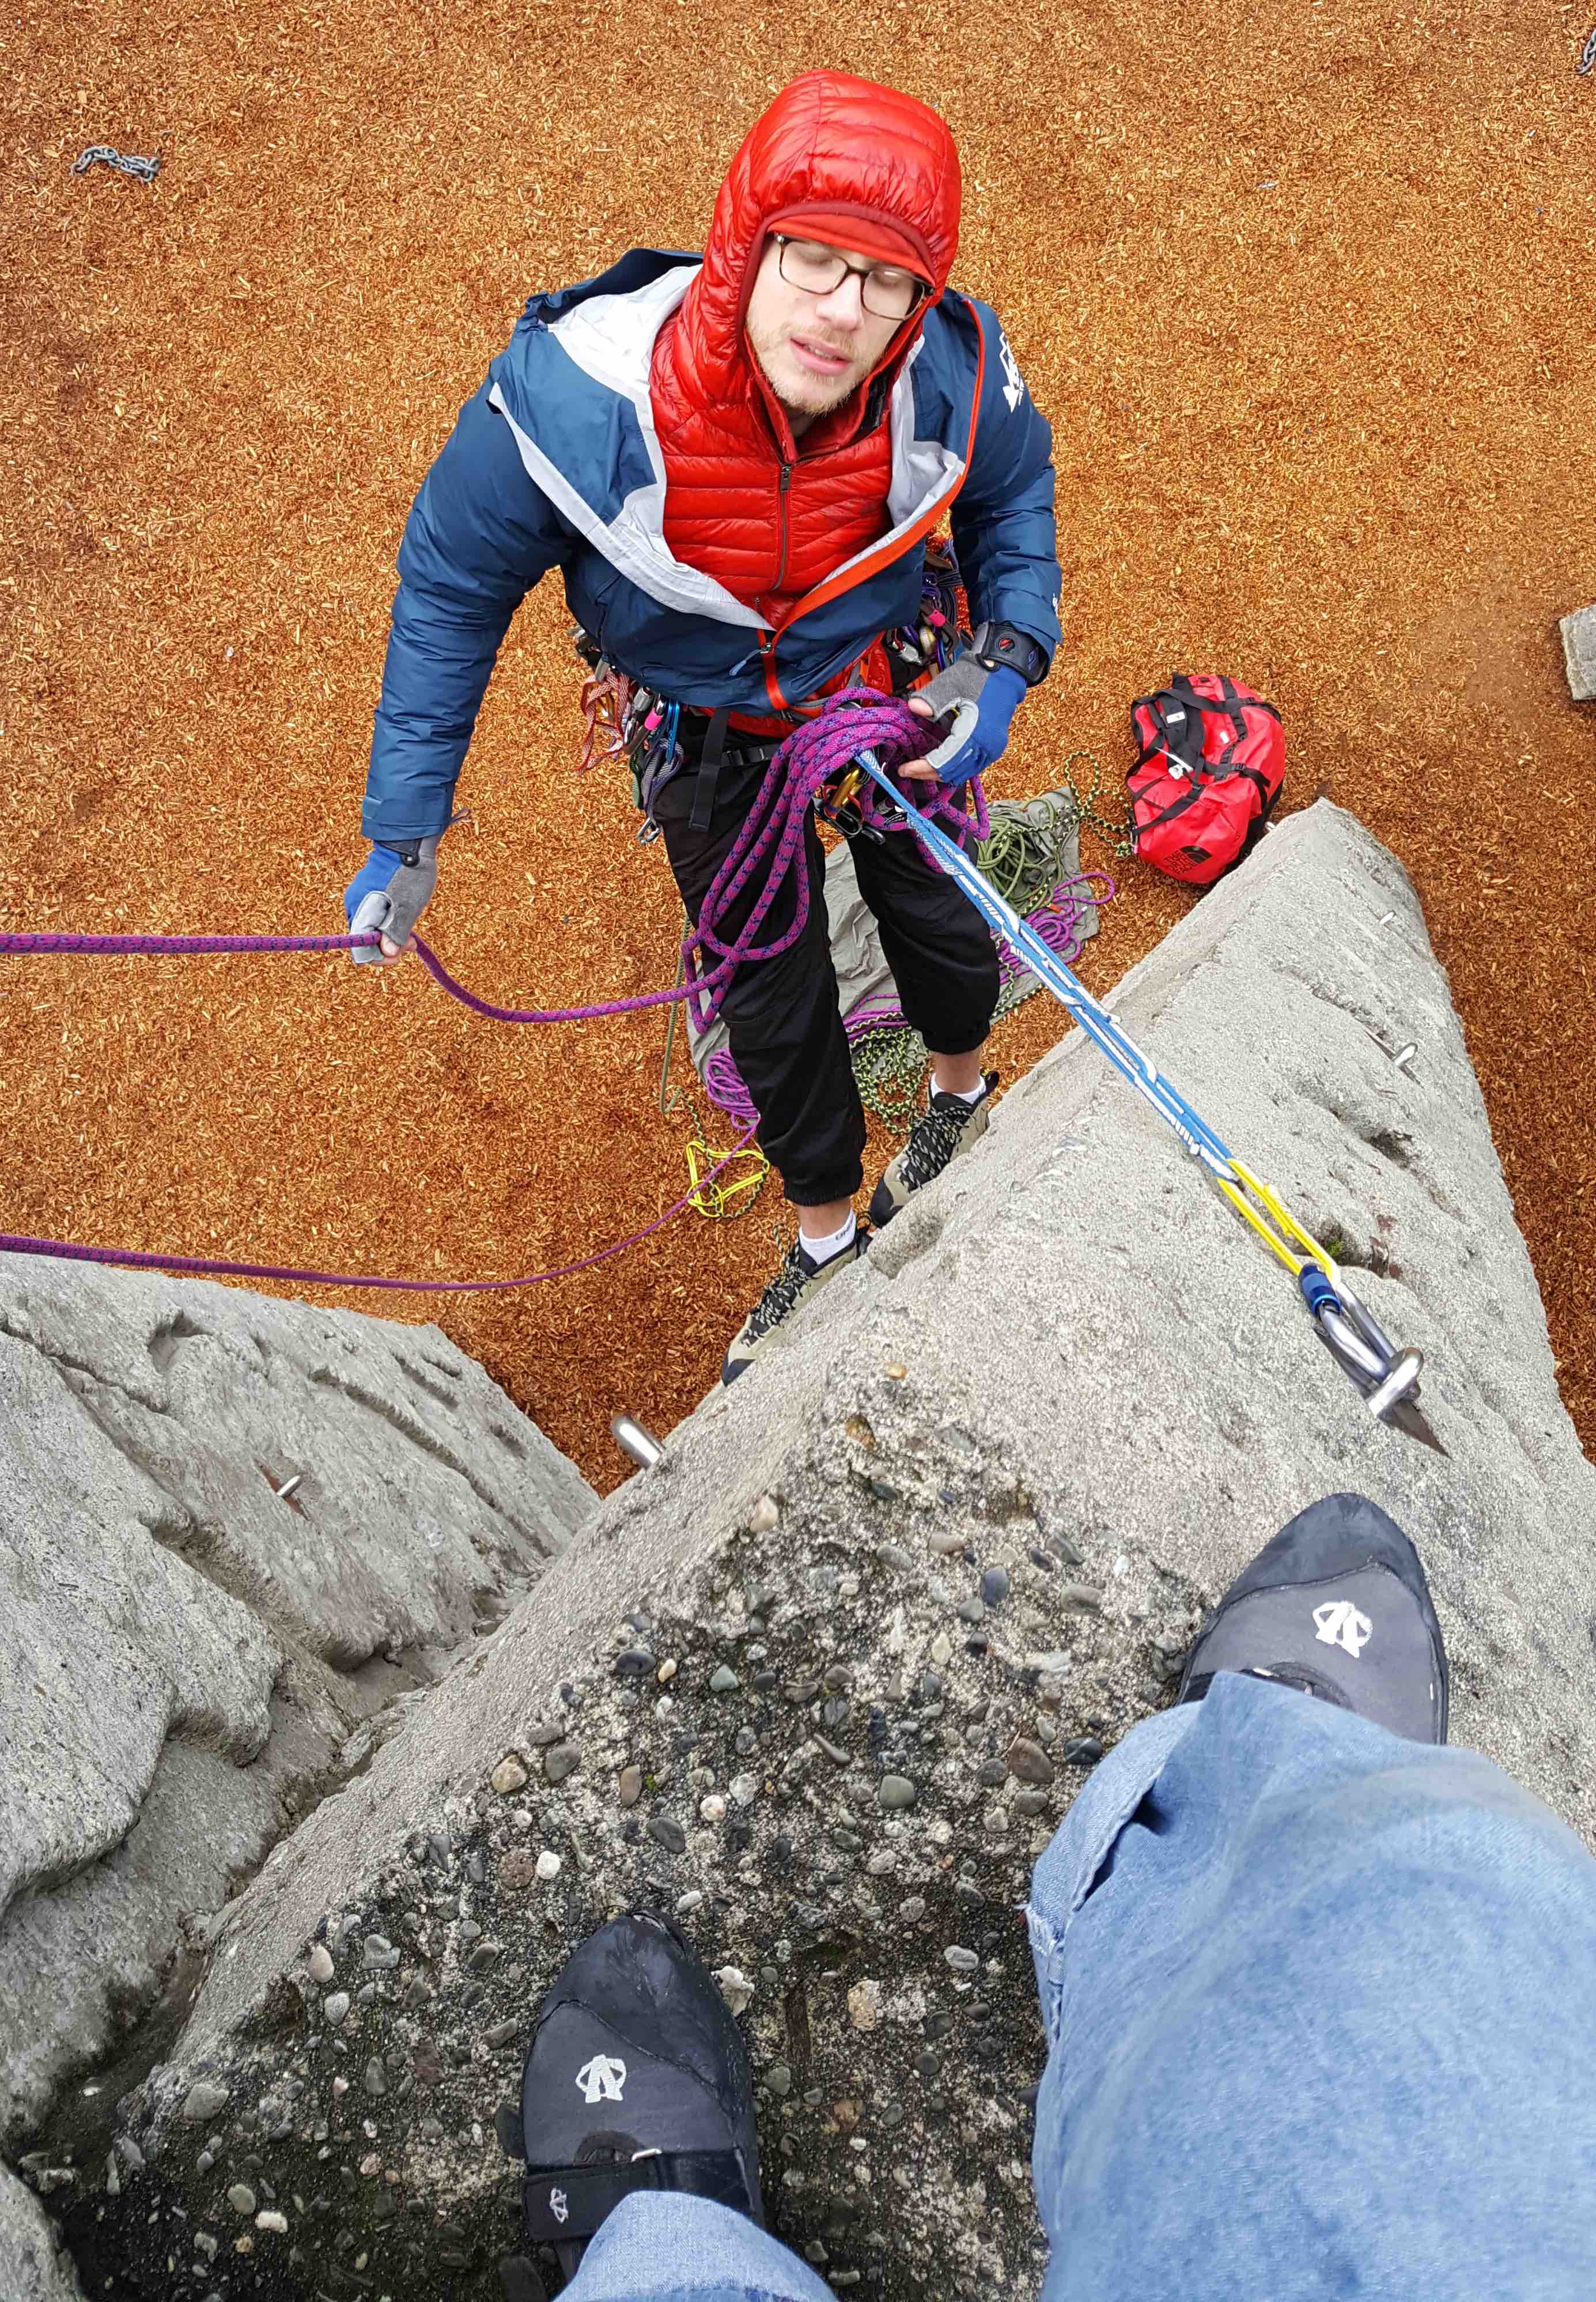
Next to practice raising vertically we climbed up onto one of the walls and setup a z-haul and raised a large bag. It turns out the only picture I got of that was Chris getting ready to set the system up. It was freaking cold out and we were wanting to get out of there as soon as we drilled this – so I am afraid we stopped taking pictures. It was the same setup as on the ground, it is just critical that you get all the lengths correct for a vertical system – since the person running it is less able to move. You also need to set up the system thinking about how you will bring the load / body up the wall.