Categories
Projects Robits!

Ray inspired hull prototype

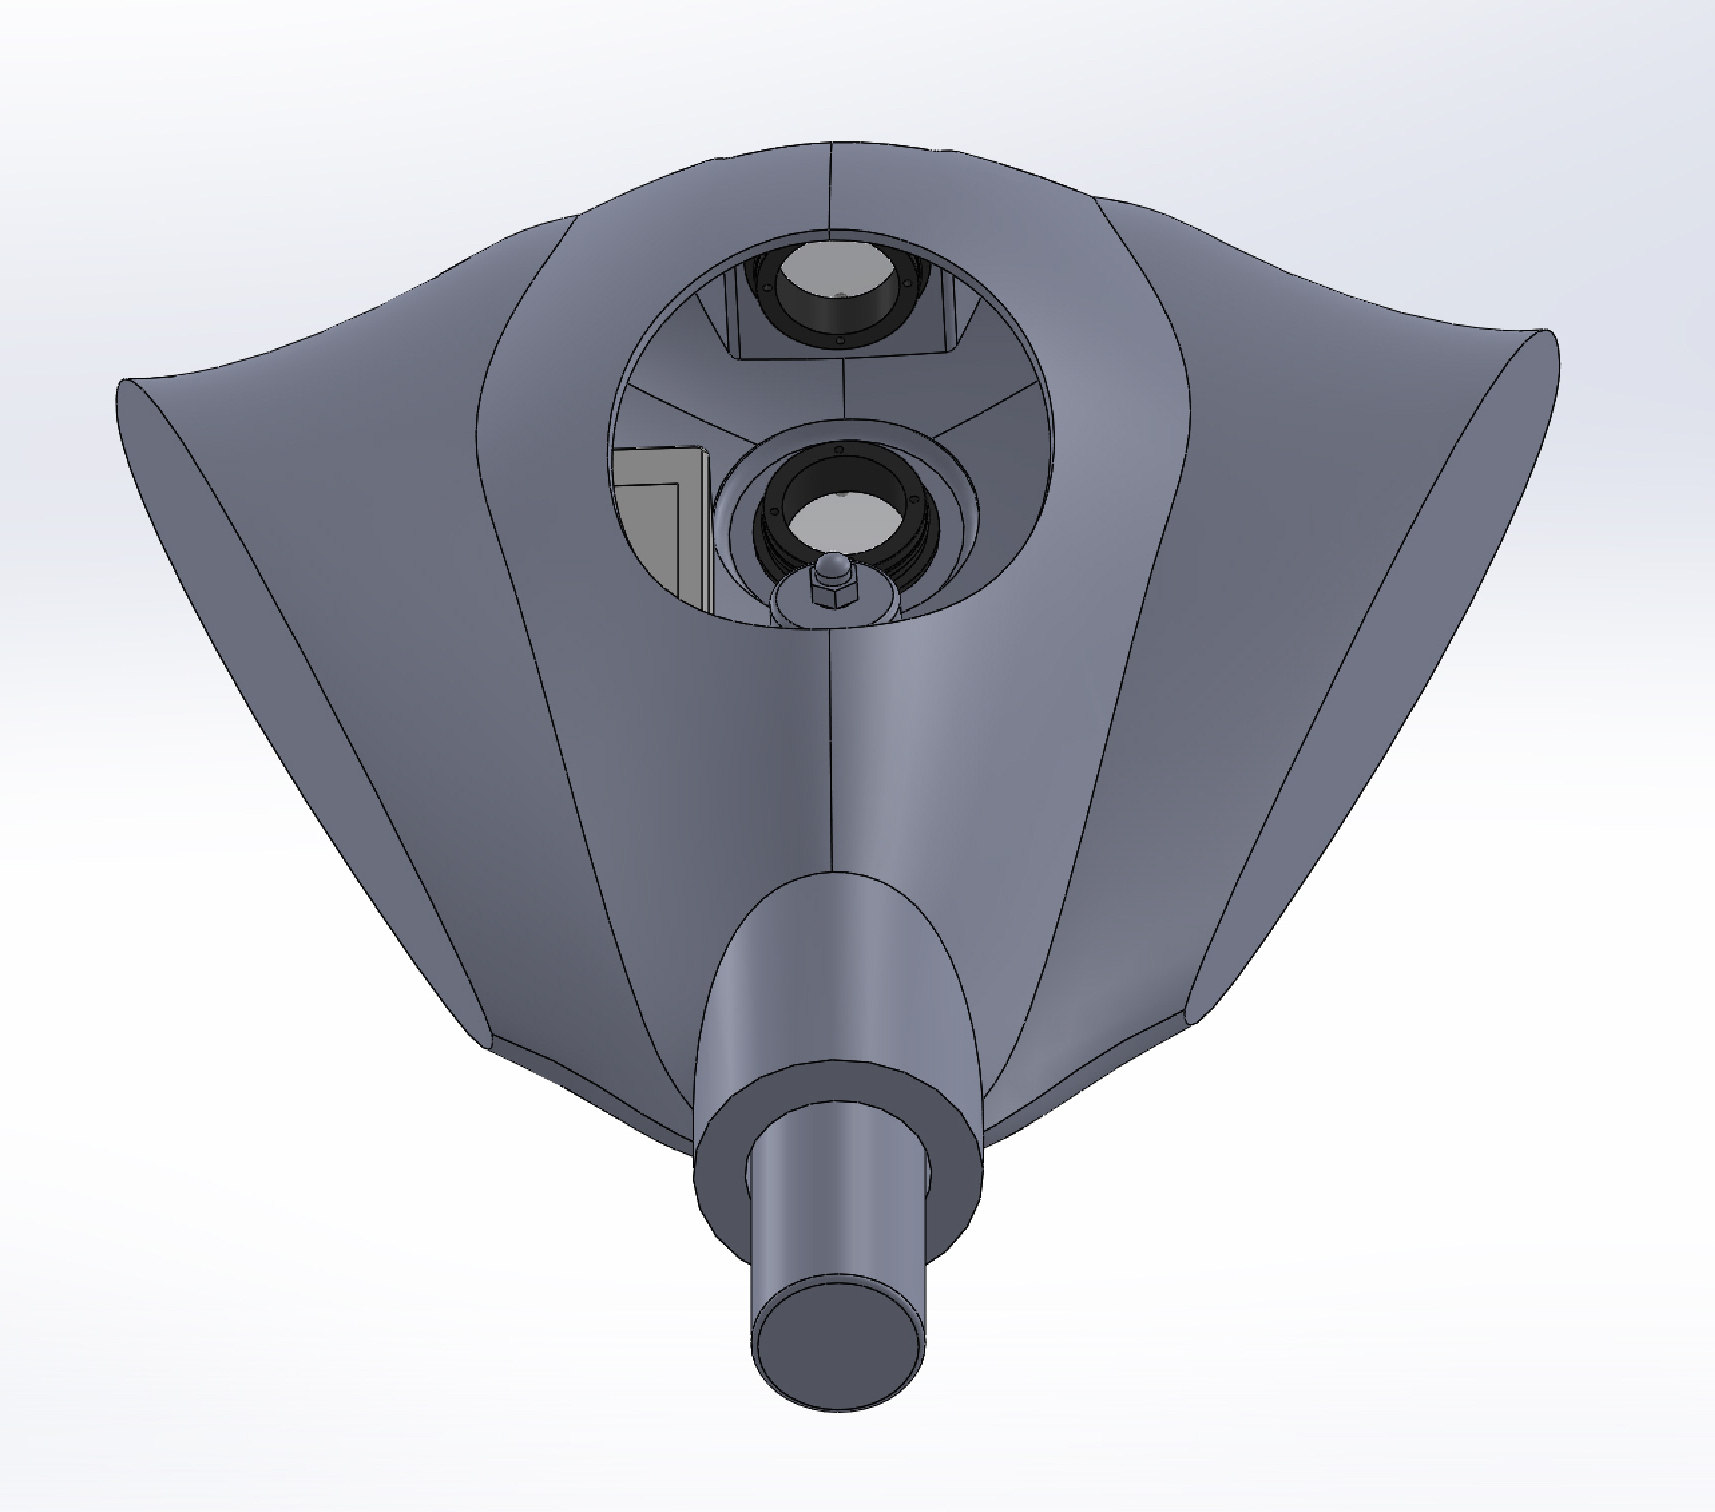
I needed to go make a bunch of tests of different techniques for epoxy cast hull construction. Rather than just test putting hatches and portholes in a bunch of simple hollow geometric shapes, I decided to go ahead and run them on a simpler and smaller hull design. Since I really liked the Manta Ray robots – I used the shape of one of those for inspiration.

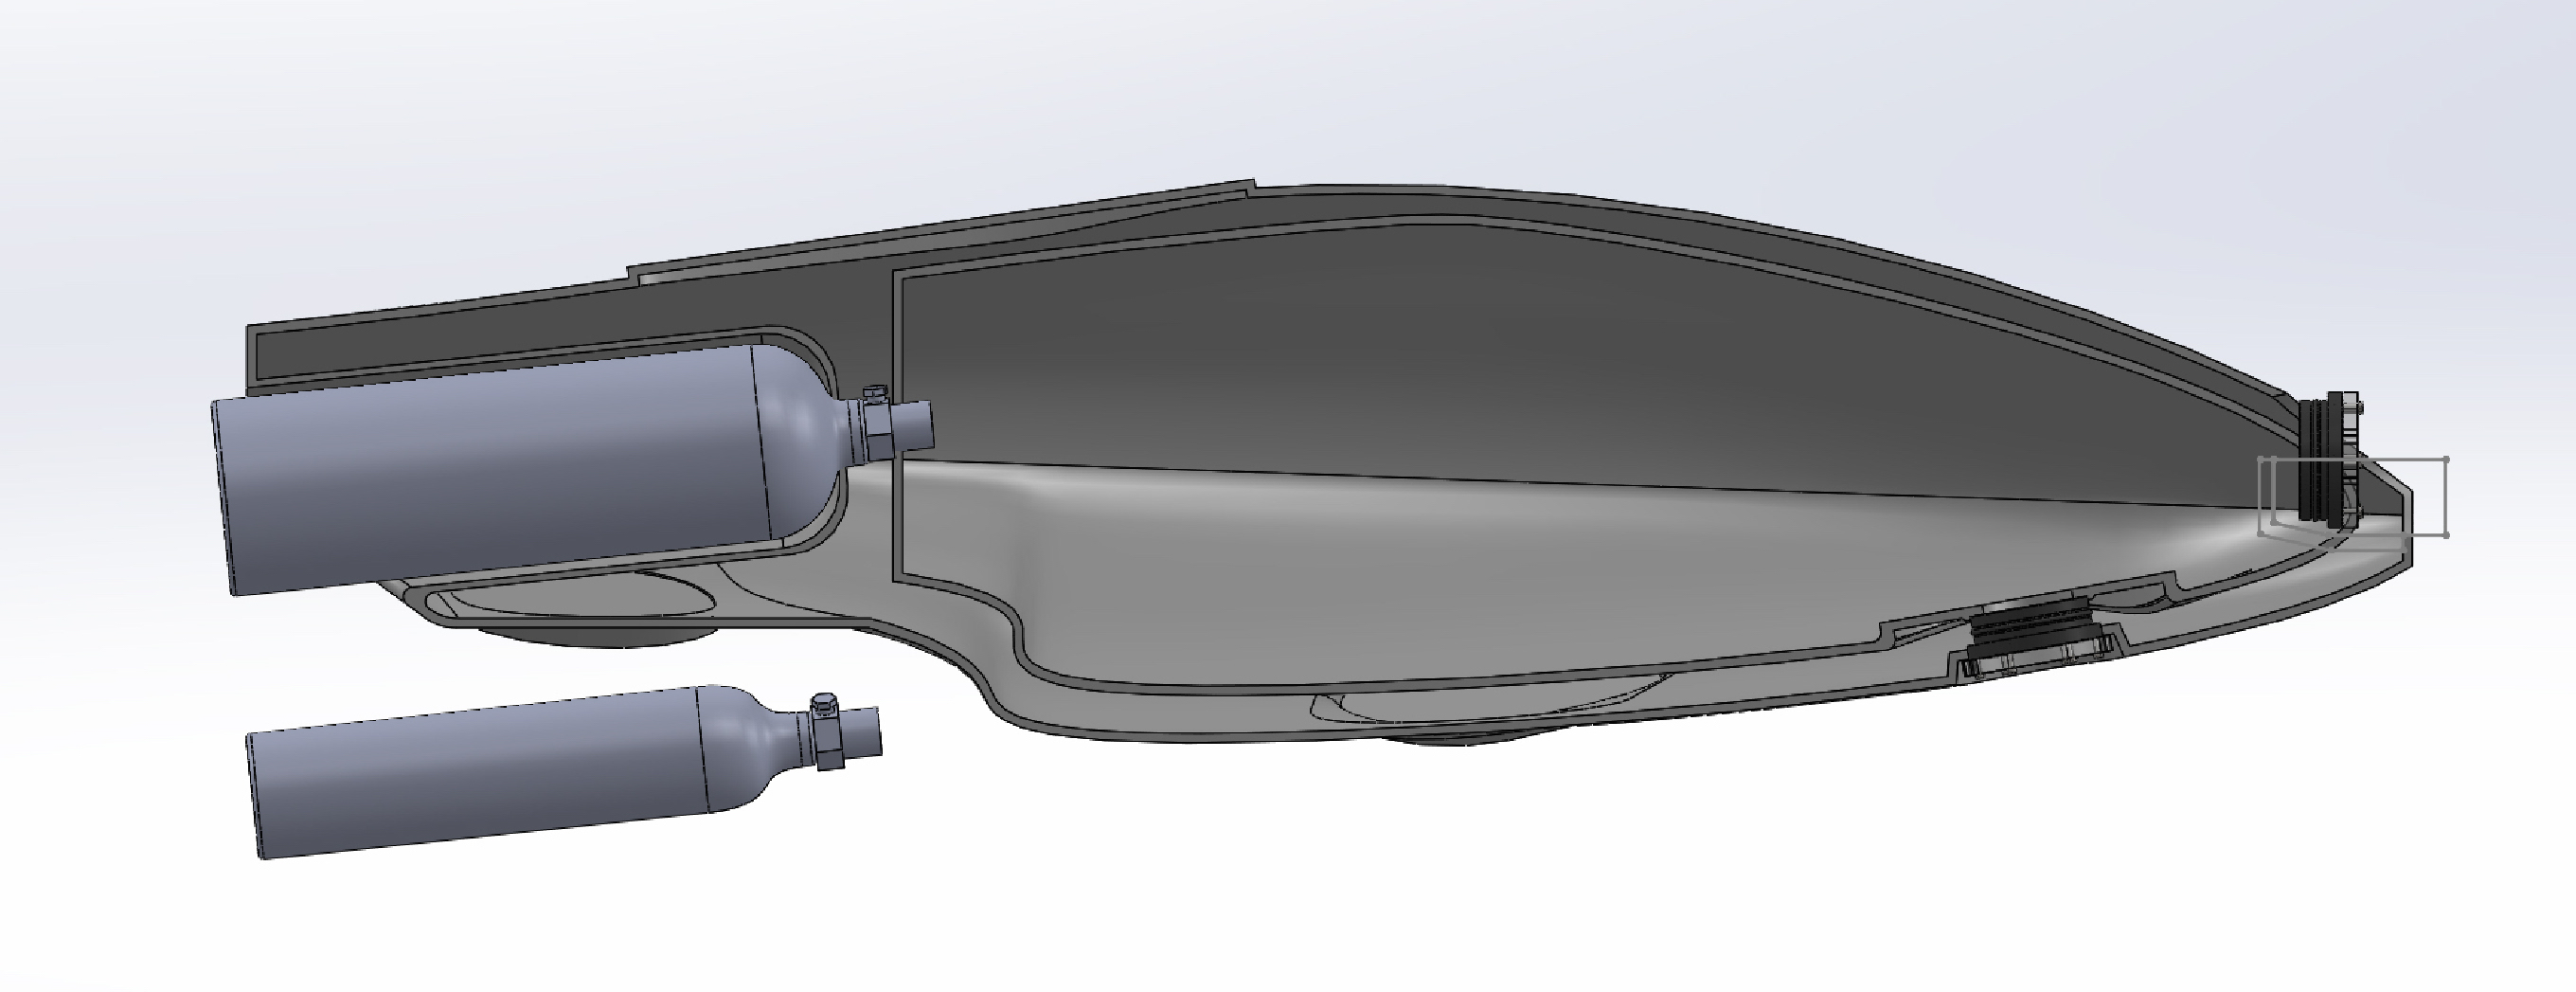
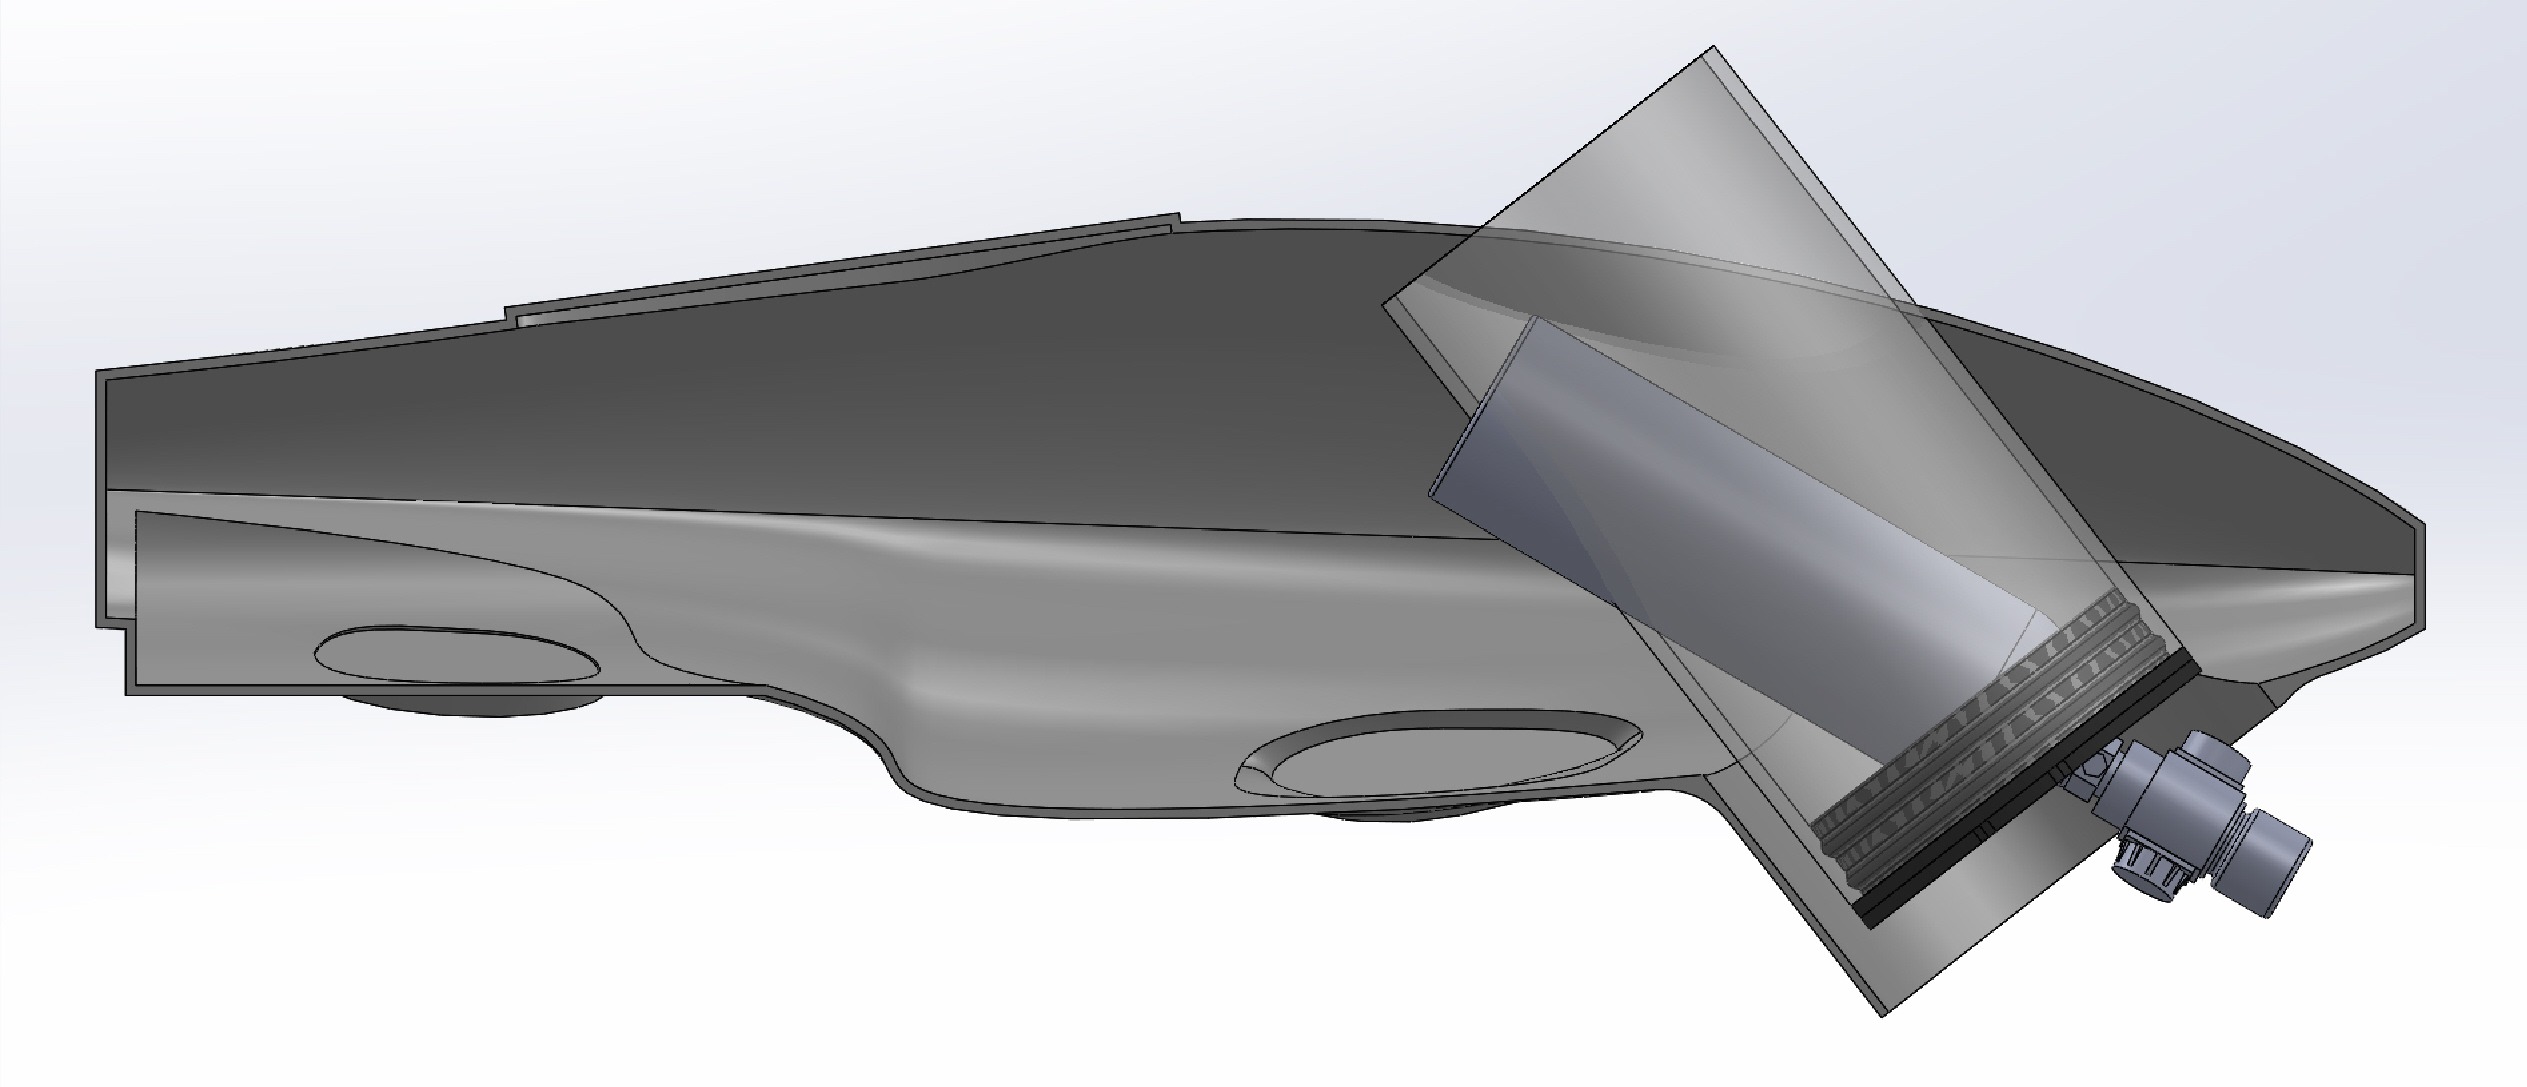
Here you can see my first pass. It may look a little funny as I am designing the wings to bolt onto the frame, and they are missing in these renderings.

Shol_P1

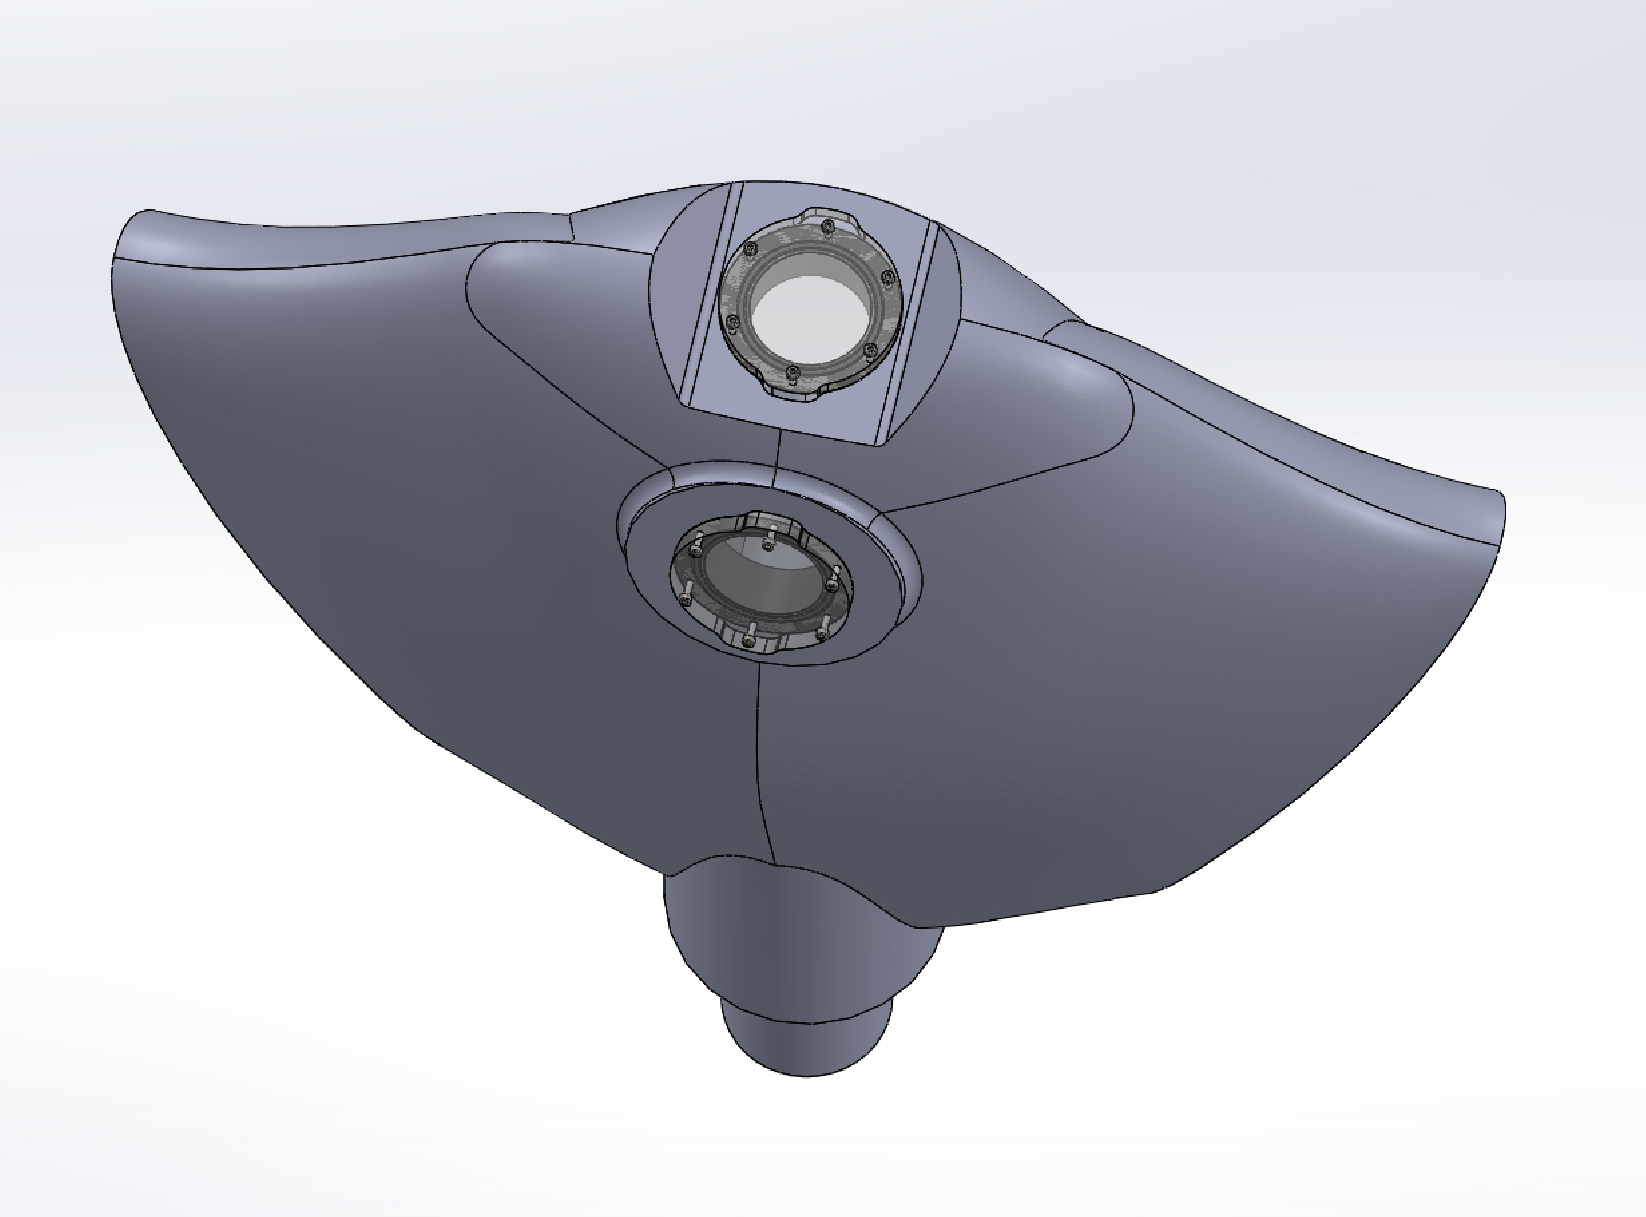
I am using this design to test the casting of an epoxy hull, using the BlueRobotics portholes, and different designs for a 3D printed seat for a pressure rated hatch. I may have been guilty of over engineering on my first design, since once I started digging into it I think I may be able to accomplish most of my design goals with this smaller design.

I am testing using an external tank with this design, but down graded the tanks size since the hull will be much smaller. I don’t have the printed hatch seat shown in this design though.

Shol_P2

Heading into the holidays. Either I’m going to make a lot of progress on this project – or none. It all depends on what we pick for the holiday hack-a-thon.

Categories
Uncategorized

Get the Tank out

I think that figuring out a way to make cheap yet pressure reliable hatches is going to be the defining design criteria for all my AUV designs. Shifting the CO2 tank to outside the hull lets me use smaller hatches, which will be easier to build.

This “Cyclops” design is my experimenting with that shift. There are two tanks shown, a 24oz and a 12oz. Tank size will drive a lot of the design – so I have taken to having both visible when sketching out a hull design.

Cyclopse_P1

I’m starting to think I need to introduce some more separation of all these variable before I start building – so I may do spin up a design with a smaller hull to work out technique and construction details.

Categories
Programming

A Cool way to do tree / graph traversal

As part of the latest skills review – I am going back over my coding and trying to get better. Being honest I have been pleasantly surprised, but embarrassed, by some of the places I have found I have room for improvement. It is worth it though – cause sometimes you catch gems like this.

When traversing trees, I tend to traverse them like they were graphs, and using queues. So for the problem of traverse a binary tree (not a BST), and return the largest value in each row I wrote the following code:


    vector largestValues(TreeNode* root) {
        vector maxrowval;
        
        if( root == NULL )
            return(maxrowval);
        
        queue > treesearch;
        treesearch.push(make_pair(root,0));
        
        while( !treesearch.empty()){
            TreeNode* curNode = treesearch.front().first;
            int curDepth = treesearch.front().second;
            treesearch.pop();
            
            if( maxrowval.size() <= curDepth ){
                maxrowval.push_back(curNode->val);
            }
            
            if( maxrowval[curDepth] < curNode->val ){
                maxrowval[curDepth] = curNode->val;
            }
            
            if( curNode->left != NULL ){
                treesearch.push(make_pair(curNode->left, curDepth+1));
            }
            
            if( curNode->right != NULL ){
                treesearch.push(make_pair(curNode->right, curDepth+1));
            }
        }
        
        return( maxrowval );
    }

What I just ran across was someone who wrote the following code for the same problem. He is using a list as opposed to a queue – but the logic of what we are doing is about the same. Only his double nested loop traversal of the list should be much faster. It avoids a lot of pushing and popping operations, and leaves the constructed search list intact. I am posting this here so I can come back and look at this later. This is the kind of thing I am going to want to stew on and see where else it might be a useful thing to have in the toolbox.


    vector largestValues(TreeNode* root) {
        vector result;
        list current;
        
        if (root != nullptr) {
            current.push_back(root);
        }
        
        while (current.size()) {
            int max_value = INT_MIN;
            int size = current.size();
            while (size) {
                TreeNode* node = current.front();
                max_value = max(max_value, node->val);
                current.pop_front();
                if (node->left != nullptr) {
                    current.push_back(node->left);
                }
                
                if (node->right != nullptr) {
                    current.push_back(node->right);
                }
                size--;
            }
            result.push_back(max_value);
        }
        
        return result;
    }

Categories
Projects Robits!

Scratch that hatch

I am building my AUV to be a configurable platform on which to try out a bunch of ideas, so I am going to need some sort of hatch through which I can assemble, repair, and modify the internal components.

My first thoughts were to make a sort of beveled seat you can see here. The beveled seat in the hull mates to a complimentarily beveled plug piece. You have a rubber layer between the two pieces, and the more water pressure there is on the plug the tighter the seal.

Modor_BigBelly_NoTail_Printable_V4

Unfortunately after talking this design over with some friends who has a lot of experience deploying things deep in the ocean, I decided not to use the wedge hatch. Apparently at depth even slight deformations of the hull can corrupt the seat seal, and the hatch will sweat water into the pressure chamber. My maximum target depth for this is only 250 feet, but I would like the design to be able to stay submerged for very long periods – so a sweating seal is a problem.

Right now the leading contender is using the pressure rated caps Blue Robotics sells for their watertight enclosures. Here you can see a hull design where a 6-inch plug has been added towards the nose. The tank you can see is a 24 Oz CO2 tank and pressure regulator. I’m checking that I can install the tank and regulator through the hatch.

Modor_Bigbelly_Hatch_Assem

I have not found a hatch position that I like yet, but the one pictured is as close as I have come. Things get a lot easier if I switch the CO2 tank to be screwed on from outside the pressure hull, while keeping the pressure regulator contained in the hull, so that’s what I am likely to try next.

One nice part about using the Blue Robotics pressure flanges – is that they offer clear outer faces of an optical quality. So I can easily add internal cameras looking outward through the hatches. So if I can make this hatch style work, I will probably add several smaller ones for camera and sensor mount points.

Categories
For Friends & Family Quotes

The Killer Rabbit of Caerbannog

I just found out my nephew had never seen Monty Python’s Killer Rabbit of Caerbannog sketch! Posting it here to share with him, everyone else – enjoy!

Follow. But! Follow only if ye be men of valor! For the entrance to this cave is guarded by a creature so foul, so cruel, that no man yet has fought with it… and lived! BONES of full fifty men lie *strewn* about its lair! So! Brave knights! If you do doubt your courage or your strength, come no further, for death awaits you all with nasty, big, pointy teeth…

Categories
For Friends & Family I am going to try Science!

Science Fair Ideas

[This ones for my nephew]

Tristan,

Here are some examples of the robotic jamming actuators I was talking about. The actuator is a ballon filled with coffee grounds. Then when they pull all the air out of the ballon, it squeezes the granules of coffee together, and it becomes solid. The actuator works by pushing it up against an object to pick up while it is soft. Then drawing out the air to harden the actuator. This traps that part letting you pick the part up.

Here is a home build version that uses a syringe, a ballon, a funnel and some tubing to make the actuator. The syringe is used to pull out the air.

This is another home build jamming actuator, but instead of a syringe they use a home vacuum to draw out the air.

It would be a lot of work, but you could build a robotic arm sort of like this one, but with a jamming actuator as opposed to the gripper you can see in the video. If you liked this idea, if you drew up plans I can print them for you.

If you like the arms, but don’t like the jamming actuators check this out. These guys made arms from syringes and popsicle sticks, then had them fight in a robot arm sumo matches!

More details on these arms here: Hydrolic-JudoBots

If we designed a version of this type of arm to be printed, I could make you enough parst for two arms. Then you could wrestle them with your friends.