I love the smell of prototyping in the morning! Of course I am only ever seem to smell my prototypes cooking after a long day of hacking – but still there is nothing like the smell of prototypes in the early evening!
I am working on a small team prototyping a new IOT device. Over the last few days we brought up the prototype hardware I designed, getting the components stuffed, tested, and the main control chip successfully programming and running debugging software. The MKW40Z160 is just an awesome chip – I am looking forward to using it on a lot of projects. They integrated everything but the kitchen sink when designing it – Bluetooth, DC/DC converters and battery charger, capacitive touch sensors, and a boatload of peripherals.
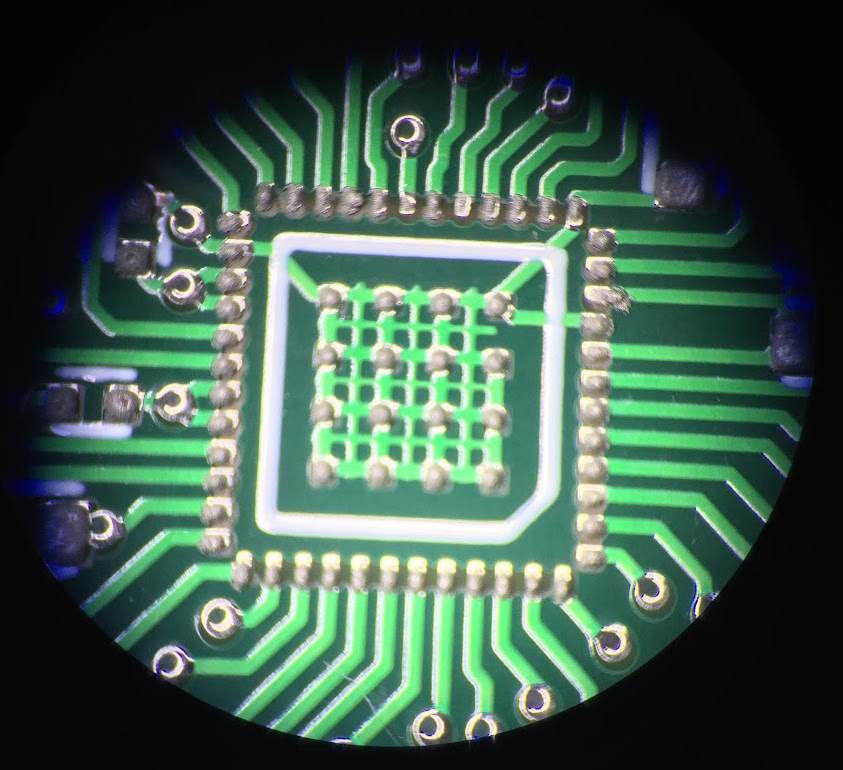
The one problem with prototyping around the MKW40Z160 is that its pin pitch is a on the small side. The suggested footprint has a 3-mil inter pad spacing. For hand stuffed prototypes that had me nervous. A 3-mill spacing is not a problem when using a hand solder paste dispenser and hot air nozzle to reflow the chips one at a time, however testing this design required making make a small volume runs by hand. It turned out to not be a problem at all.
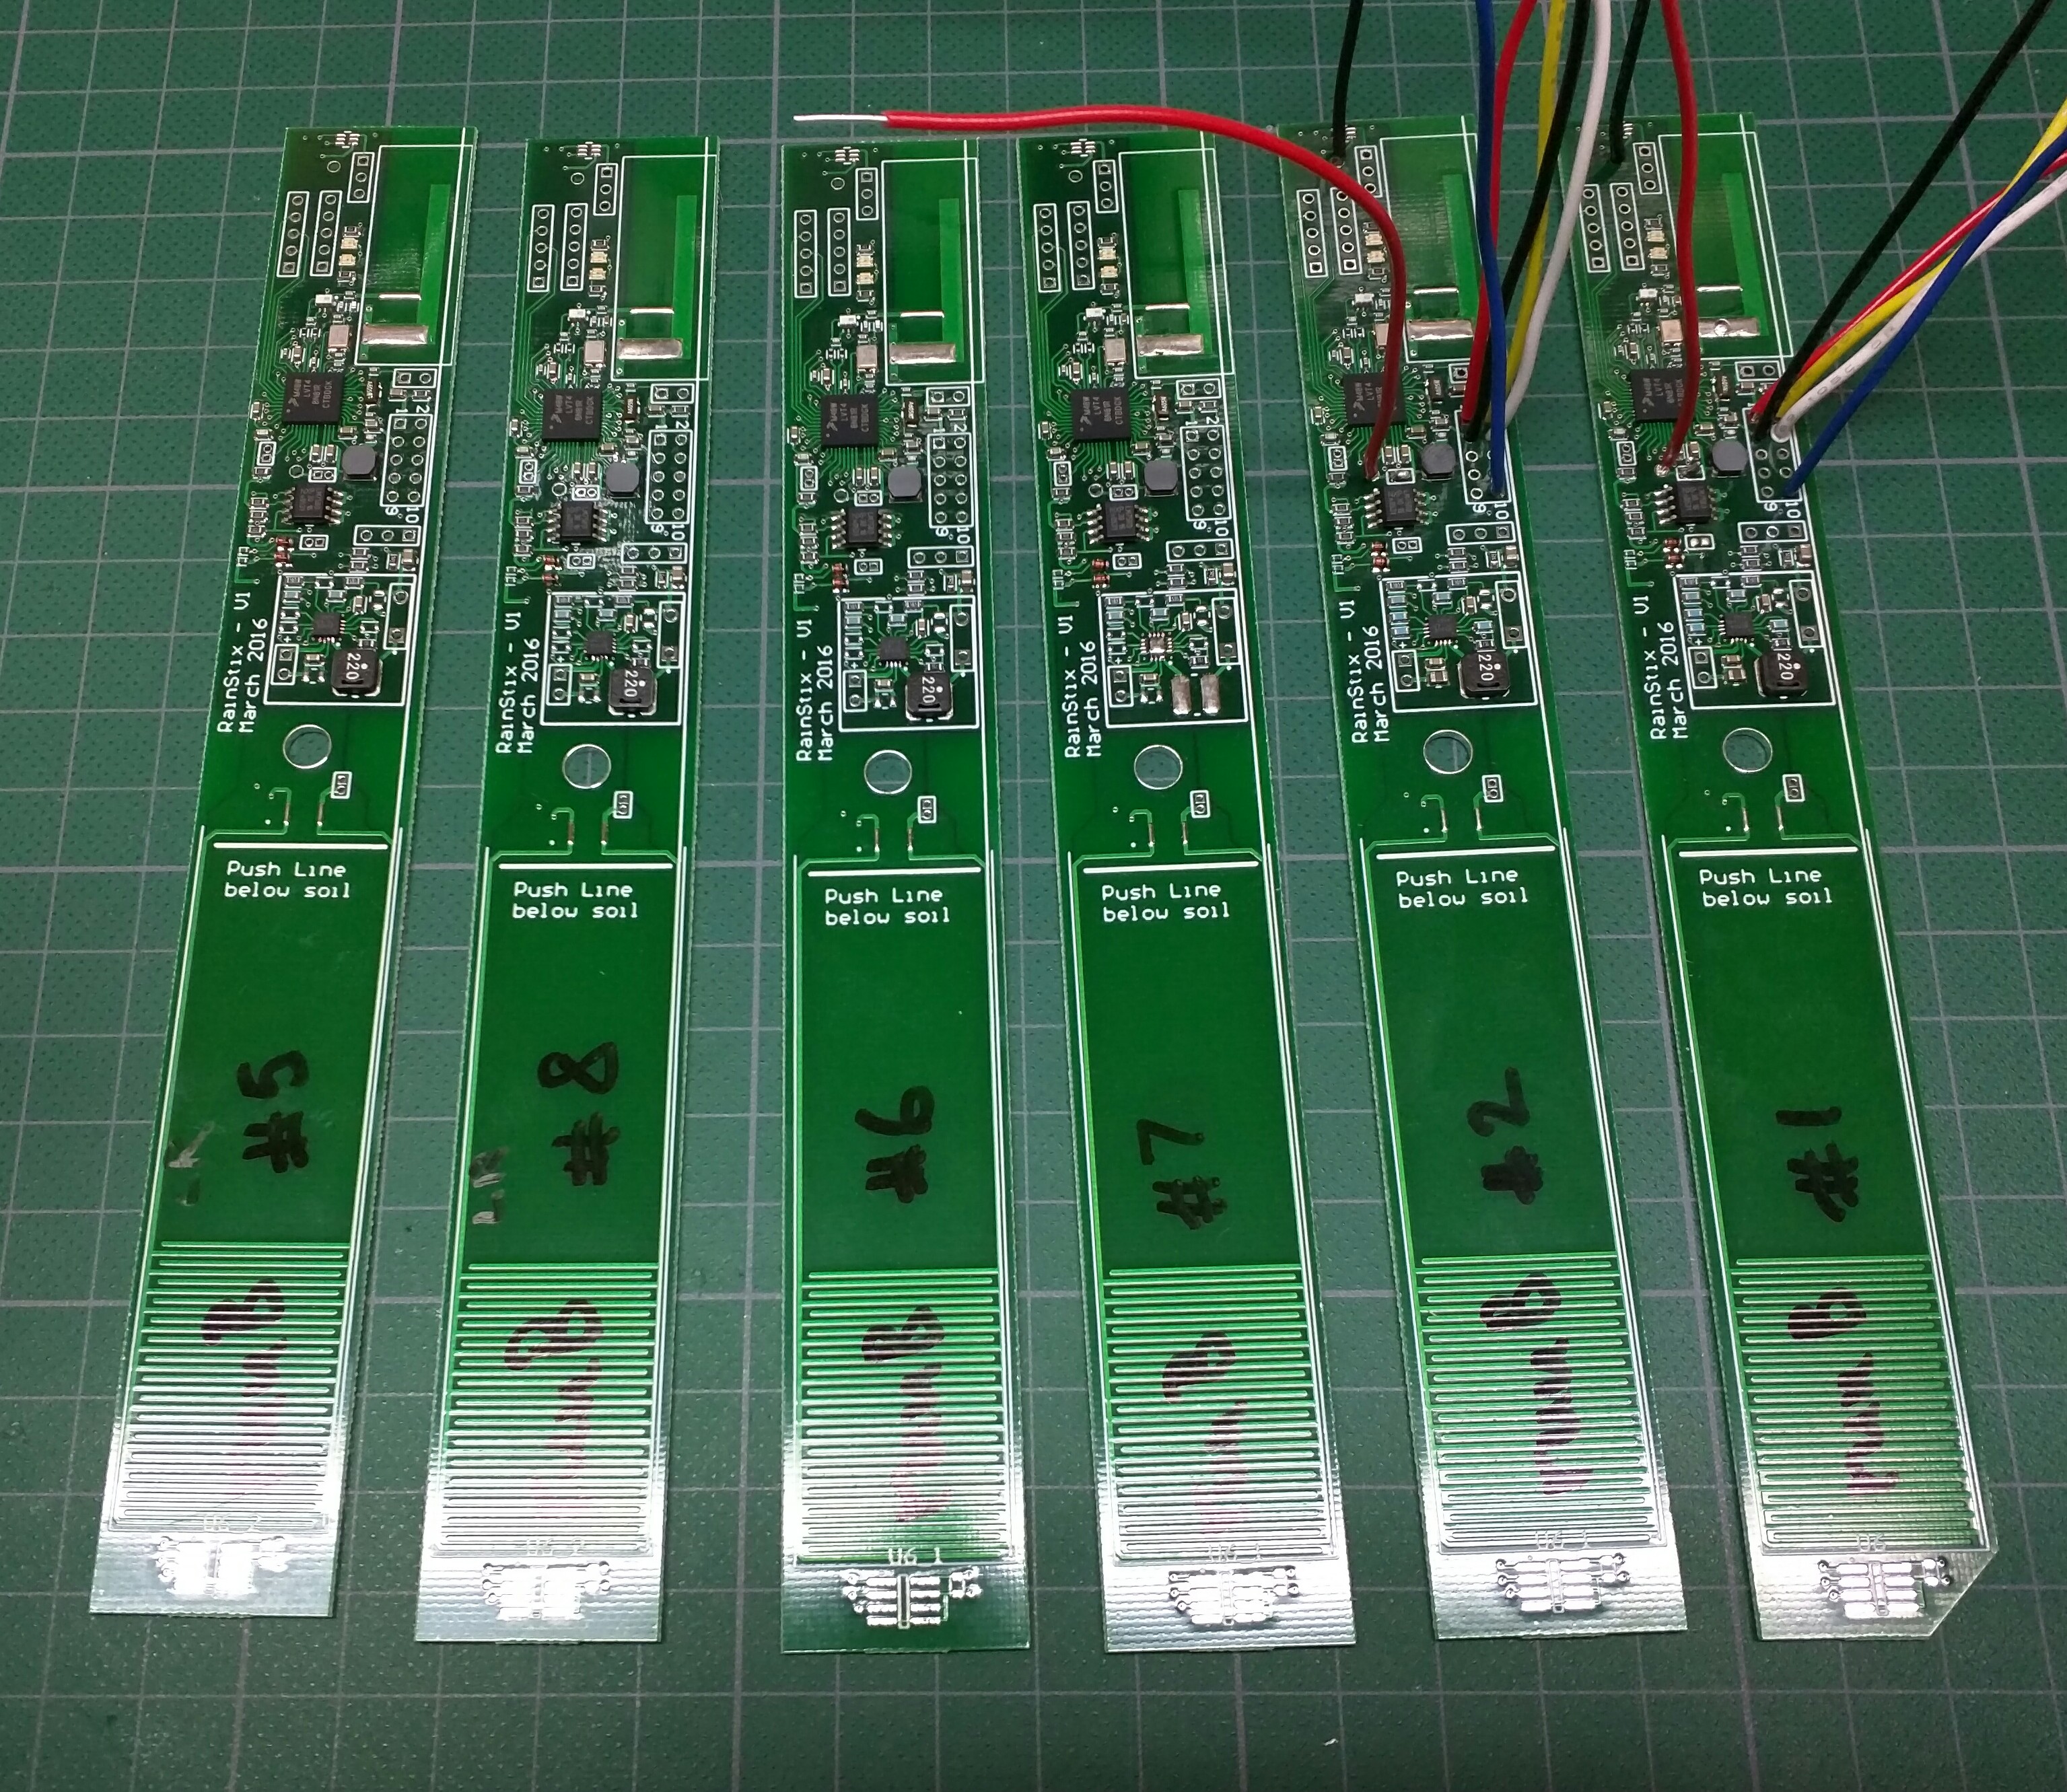
We got the boards from SeedStudio, and were pleasantly surprised by the board quality. We ordered a solder mask stencil with the order, and used the stencils to pull solder paste onto our boards.
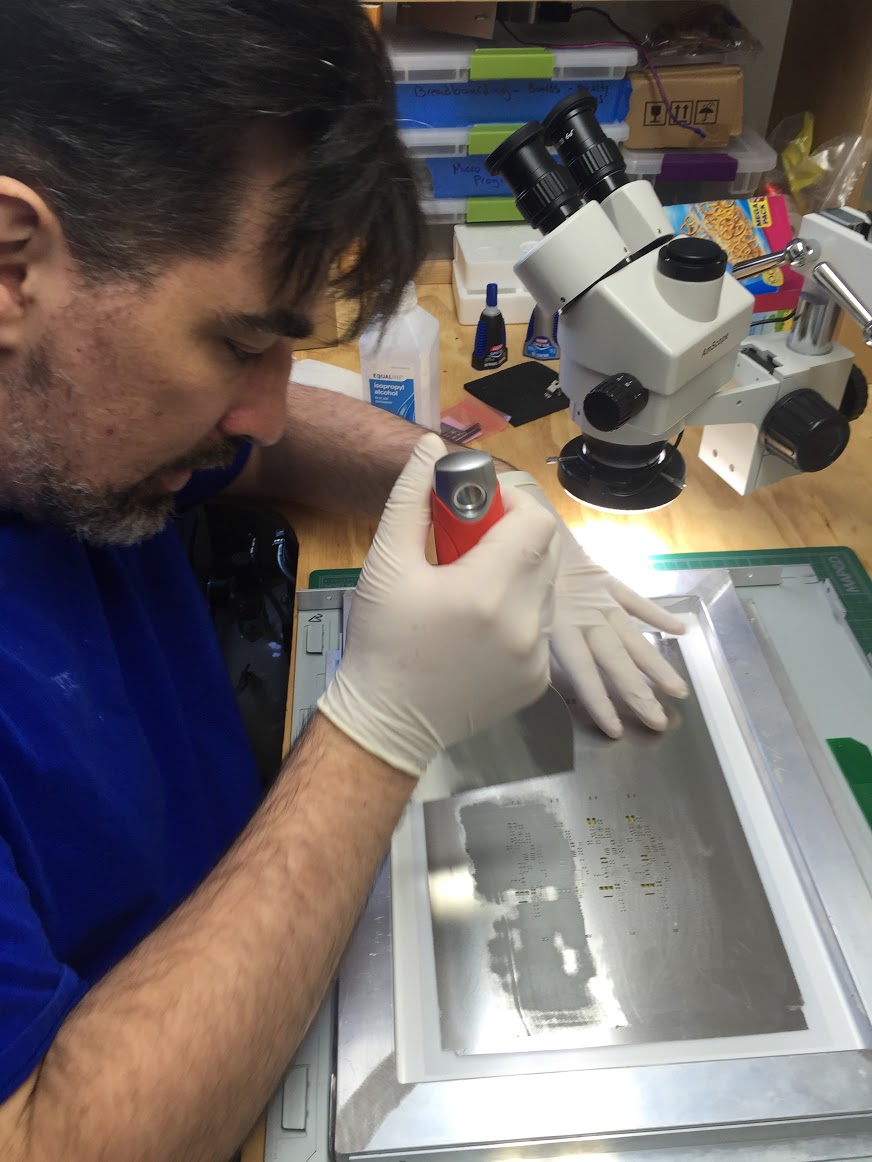
The stencils were welded to an aluminum frame, and intended to be used with a stencil alignment jig. We were able to get by making a red-neck jig from some PCB off cuts, and angle iron. We used score and snap taps on our panelized design. We glued the snapped off pieces down to a sheet of metal to hold the boards in place. We then aligned the frame over the PCB under the microscope. Once the stencil was aligned one of us held it in place while the other glued 1/4 inch aluminum angle iron around the frame to hold it in place. It worked surprisingly well. Once the glue dried we could pull and reseat the stencil over boards quickly and accurately.
When pulling solder past onto the boards it is important you get a clean, slow, pull when putting the paste down. You can not easily go back and fix a bad pull. We had some luck using a clean metal squeegee to scrape the stencil at a right angle from the previous pull, then re-pulling the solder past, but the results – while usable – were never as good as just getting it right the first time.
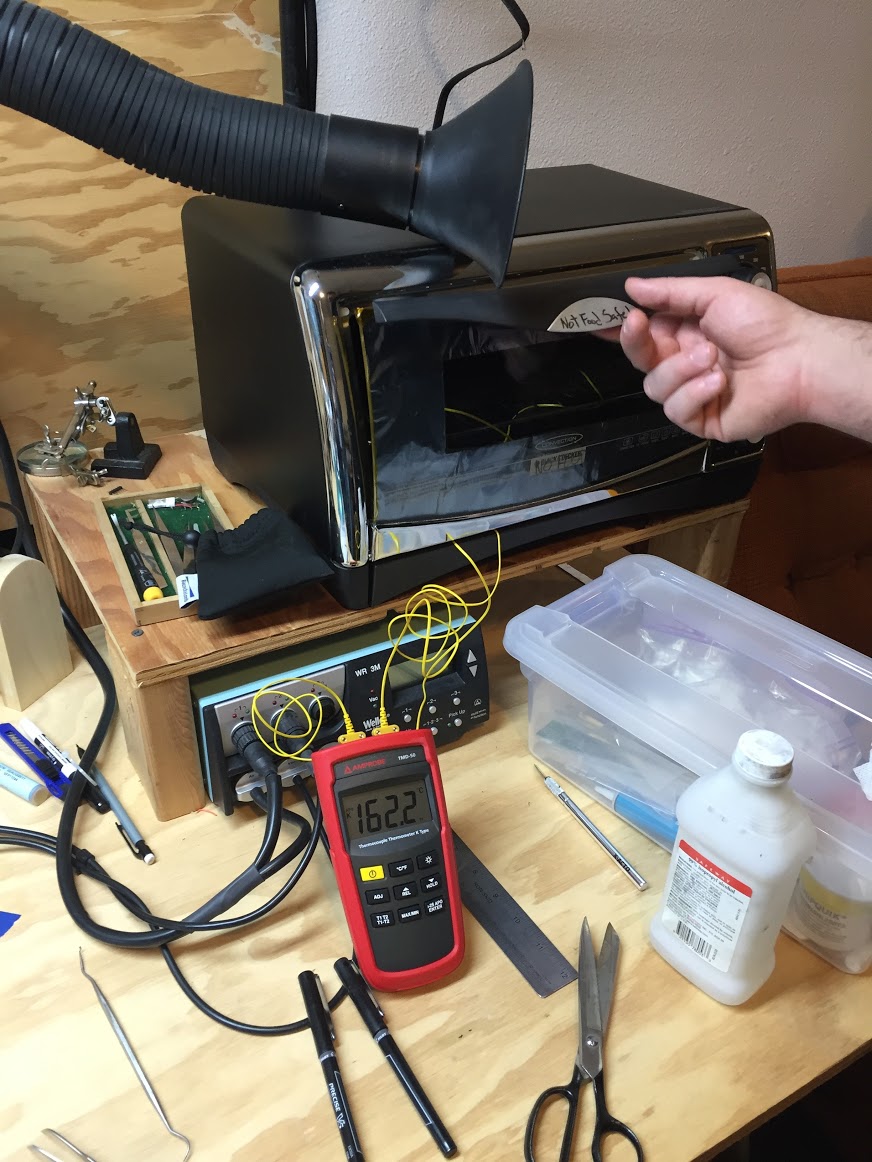
The next step was reflowing the boards. Despite what you will read online – avoid the solder skillet technique; it is garbage. Toaster oven reflow actually works really well. I never had much luck with my own toaster oven reflow attempts until I made two small modifications.
The first oven modification was adding aluminum foil to the front window of the oven. You loose most of your heat out the glass front of the oven, and adding a layer of aluminum foil, held down by Kaptan tape, reflects a lot of the heat back into the oven. I initially cut a small viewing hole in the foil, but I would not recommend that as it creates a huge thermal stress on the glass. The second oven modification was adding dual temperature sensors to monitor the inside of the oven directly. For $60-70 from amazon you can pick up a dual probe temperature sensor, and it negates the need for the “window” in the aluminum foil.
With these modifications you can reflow conventional solder pastes, but we experimenting with low temperature solder paste, but so far the stuff is proving awesome – you only need to heat things to 160C as opposed to 250C. So much faster and easier to use.