Categories
Data Machine Learning

Decision Tree Classifiers – A simple example

Here is a simple “Machine Learning” Python program using scikit-learn’s DecisionTree classifier to use height and weight to predict your body type. For the record – this is why people hate BMI and things like it. After writing this I think I need to go on a diet.

Identification Trees – often called decision trees – provide a way to deterministically map a bunch of qualitative observations into predictions. Basically the predictions are a set of observed output states, and we are looking for observable features, inputs, that we can use in a tree of tests.

Training builds the decision tree from two sets of data, our set of observations and a set of labels corresponding to each of the observations. Each node in the tree represents a test that cuts the training set with a number of cuts – the results of each of those cuts going on to either subsequent tests, or to a leaf node representing a specific output label or state.

The MIT open courseware video Identification Trees and Disorder is a good introduction.

So lets say we wanted to determine based on someone’s height and weight if they were overweight or not. To get some training data we could take bunch of random samples of a representative population of people – ask them their height and weight and then create labels for each person determining if they were of a normal weight, overweight, or obese. That would not be a fun data set to try and collect – so lets cheat.

The Body Mass Index or BMI is an equation already derived from population health data that roughly maps height and weight into a number, the BMI. The BMI can be used to predict if a person is under weight, normal weight, and over weight, or obese. The BMI equation is roughly BMI = [(weight in pounds * 703)/(height in inches squared)]. A BMI of less than 18.5 are underweight, BMIs between 19 and 25 reflect a normal weight, a BMI of 25-30 correspond to being overweight, and a BMI over 30 signals obesity. So BMI equations let us build a table mapping height and weight to a table that would be representative of uniform sampling of a large population.

So using BMI sampling data here is a simple Python program using sklearn’s DecisionTree classifier to tell you if you are obese, overweight, or normal weight.


from sklearn import tree

BMI_features = [ “NOR”, “NOR”, … lots of data here … , “OBE”, “OBE”]
Height_in_Weight_lbs_samples = [[91,58],[96,58], … lots of data here … ,[279,76],[287,76]]

# Create identification tree from BMI table.
clf = tree.DecisionTreeClassifier()
clf = clf.fit(Height_in_Weight_lbs_samples, BMI_features)

looping = True
while( looping ):
weight = input(“Enter your weight in lbs: “)
if not weight:
break

height = input(“Enter your height in inches: “)
if not height:
break

prediction = clf.predict([[weight,height]])
print(“It appears that you are:”, prediction, “\r\n” )

Output of the program looks something like this. Yeah, I’m regretting both dessert and choosing this example.


Enter your weight in lbs: 225
Enter your height in inches: 70
It appears that you are: [‘OBE’]

Enter your weight in lbs: 175
Enter your height in inches: 70
It appears that you are: [‘OVE’]

Enter your weight in lbs: 168
Enter your height in inches: 70
It appears that you are: [‘NOR’]

Enter your weight in lbs:

Sometimes it can be useful to look directly at the generated decision tree. This code generates a visualization of the tree.


# Generate a graph visualizing the trained decesion tree.
import graphviz
dot_data = tree.export_graphviz(clf, out_file=None)
graph = graphviz.Source(dot_data)
graph.render(“BMI_Table”, view=True)

I put this code, including the full data sets for training up at: git@github.com:aarontoney/Machine_Learning_Examples.git
Categories
For Friends & Family I am going to try Science!

Science Fair Ideas

[This ones for my nephew]

Tristan,

Here are some examples of the robotic jamming actuators I was talking about. The actuator is a ballon filled with coffee grounds. Then when they pull all the air out of the ballon, it squeezes the granules of coffee together, and it becomes solid. The actuator works by pushing it up against an object to pick up while it is soft. Then drawing out the air to harden the actuator. This traps that part letting you pick the part up.

Here is a home build version that uses a syringe, a ballon, a funnel and some tubing to make the actuator. The syringe is used to pull out the air.

This is another home build jamming actuator, but instead of a syringe they use a home vacuum to draw out the air.

It would be a lot of work, but you could build a robotic arm sort of like this one, but with a jamming actuator as opposed to the gripper you can see in the video. If you liked this idea, if you drew up plans I can print them for you.

If you like the arms, but don’t like the jamming actuators check this out. These guys made arms from syringes and popsicle sticks, then had them fight in a robot arm sumo matches!

More details on these arms here: Hydrolic-JudoBots

If we designed a version of this type of arm to be printed, I could make you enough parst for two arms. Then you could wrestle them with your friends.

Categories
BrightLeaf I am going to try Science!

Fun with data!

So lately I have been playing with data measuring light levels throughout the day. I am fascinated With just how much my brain and eyes filter and smooth my perception of light, making me unaware of startlingly large changes.

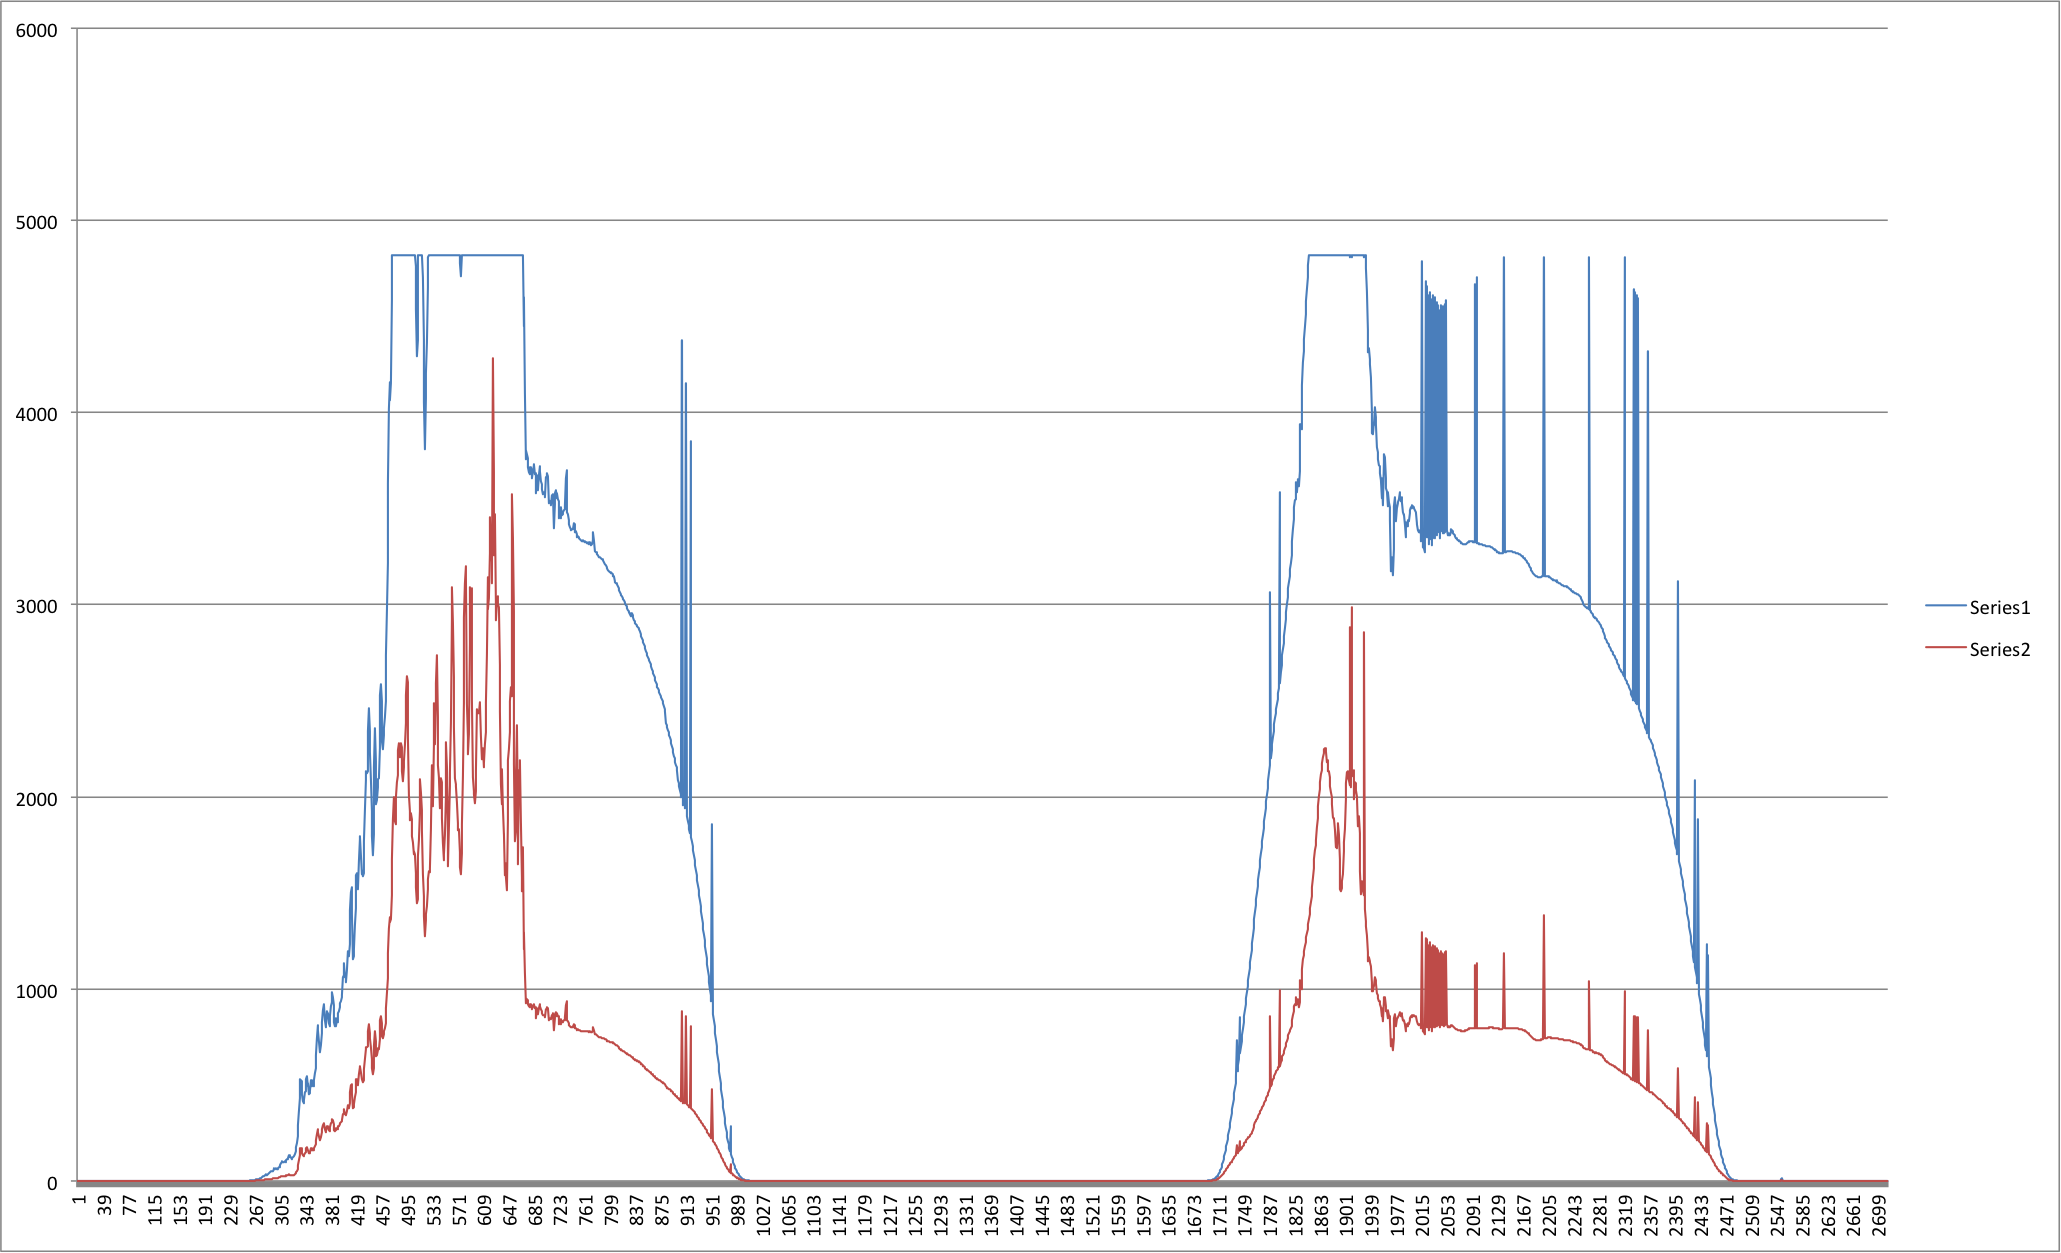
This graph shows data taken from the same light sensor sampling over two days. The red series of data reflects UV light levels, and the blue reflects UV + Visible light levels.

sensor_id85_day2

Two back-to-back days can vary in duration by 40 minutes! Sure sunrise and sunset times between two days only change slightly, but cloud cover and weather has a massive impact on the light profile of the day. During darkening leading up to sunset the brightness can halve every seven-minute for two hours without it being noticeable!

Some data is just fun to play with.

Categories
Chemistry I am going to try Science!

First try at an ammonia fountain

Last night a friend came over and we tried to set up an ammonia fountain. We are both working on improving our working knowledge of chemistry – and the ammonia fountain is a good project to practice a bunch of basic labs skills. It is also fun to watch.

I didn’t have any Phenolphthalein, so my partner in crime/chemistry suggested that we use the juice from boiled red cabbage as our PH indicator. The cabbiage contains an anthocyanis (flavins) pigment. You just boil the sliced up cabbage for about a half hour – then drain off the now purple fluid. That fluid changes to either red or green depending on PH of material added to it. Both of us were surprised at how well the homemade indicator worked.

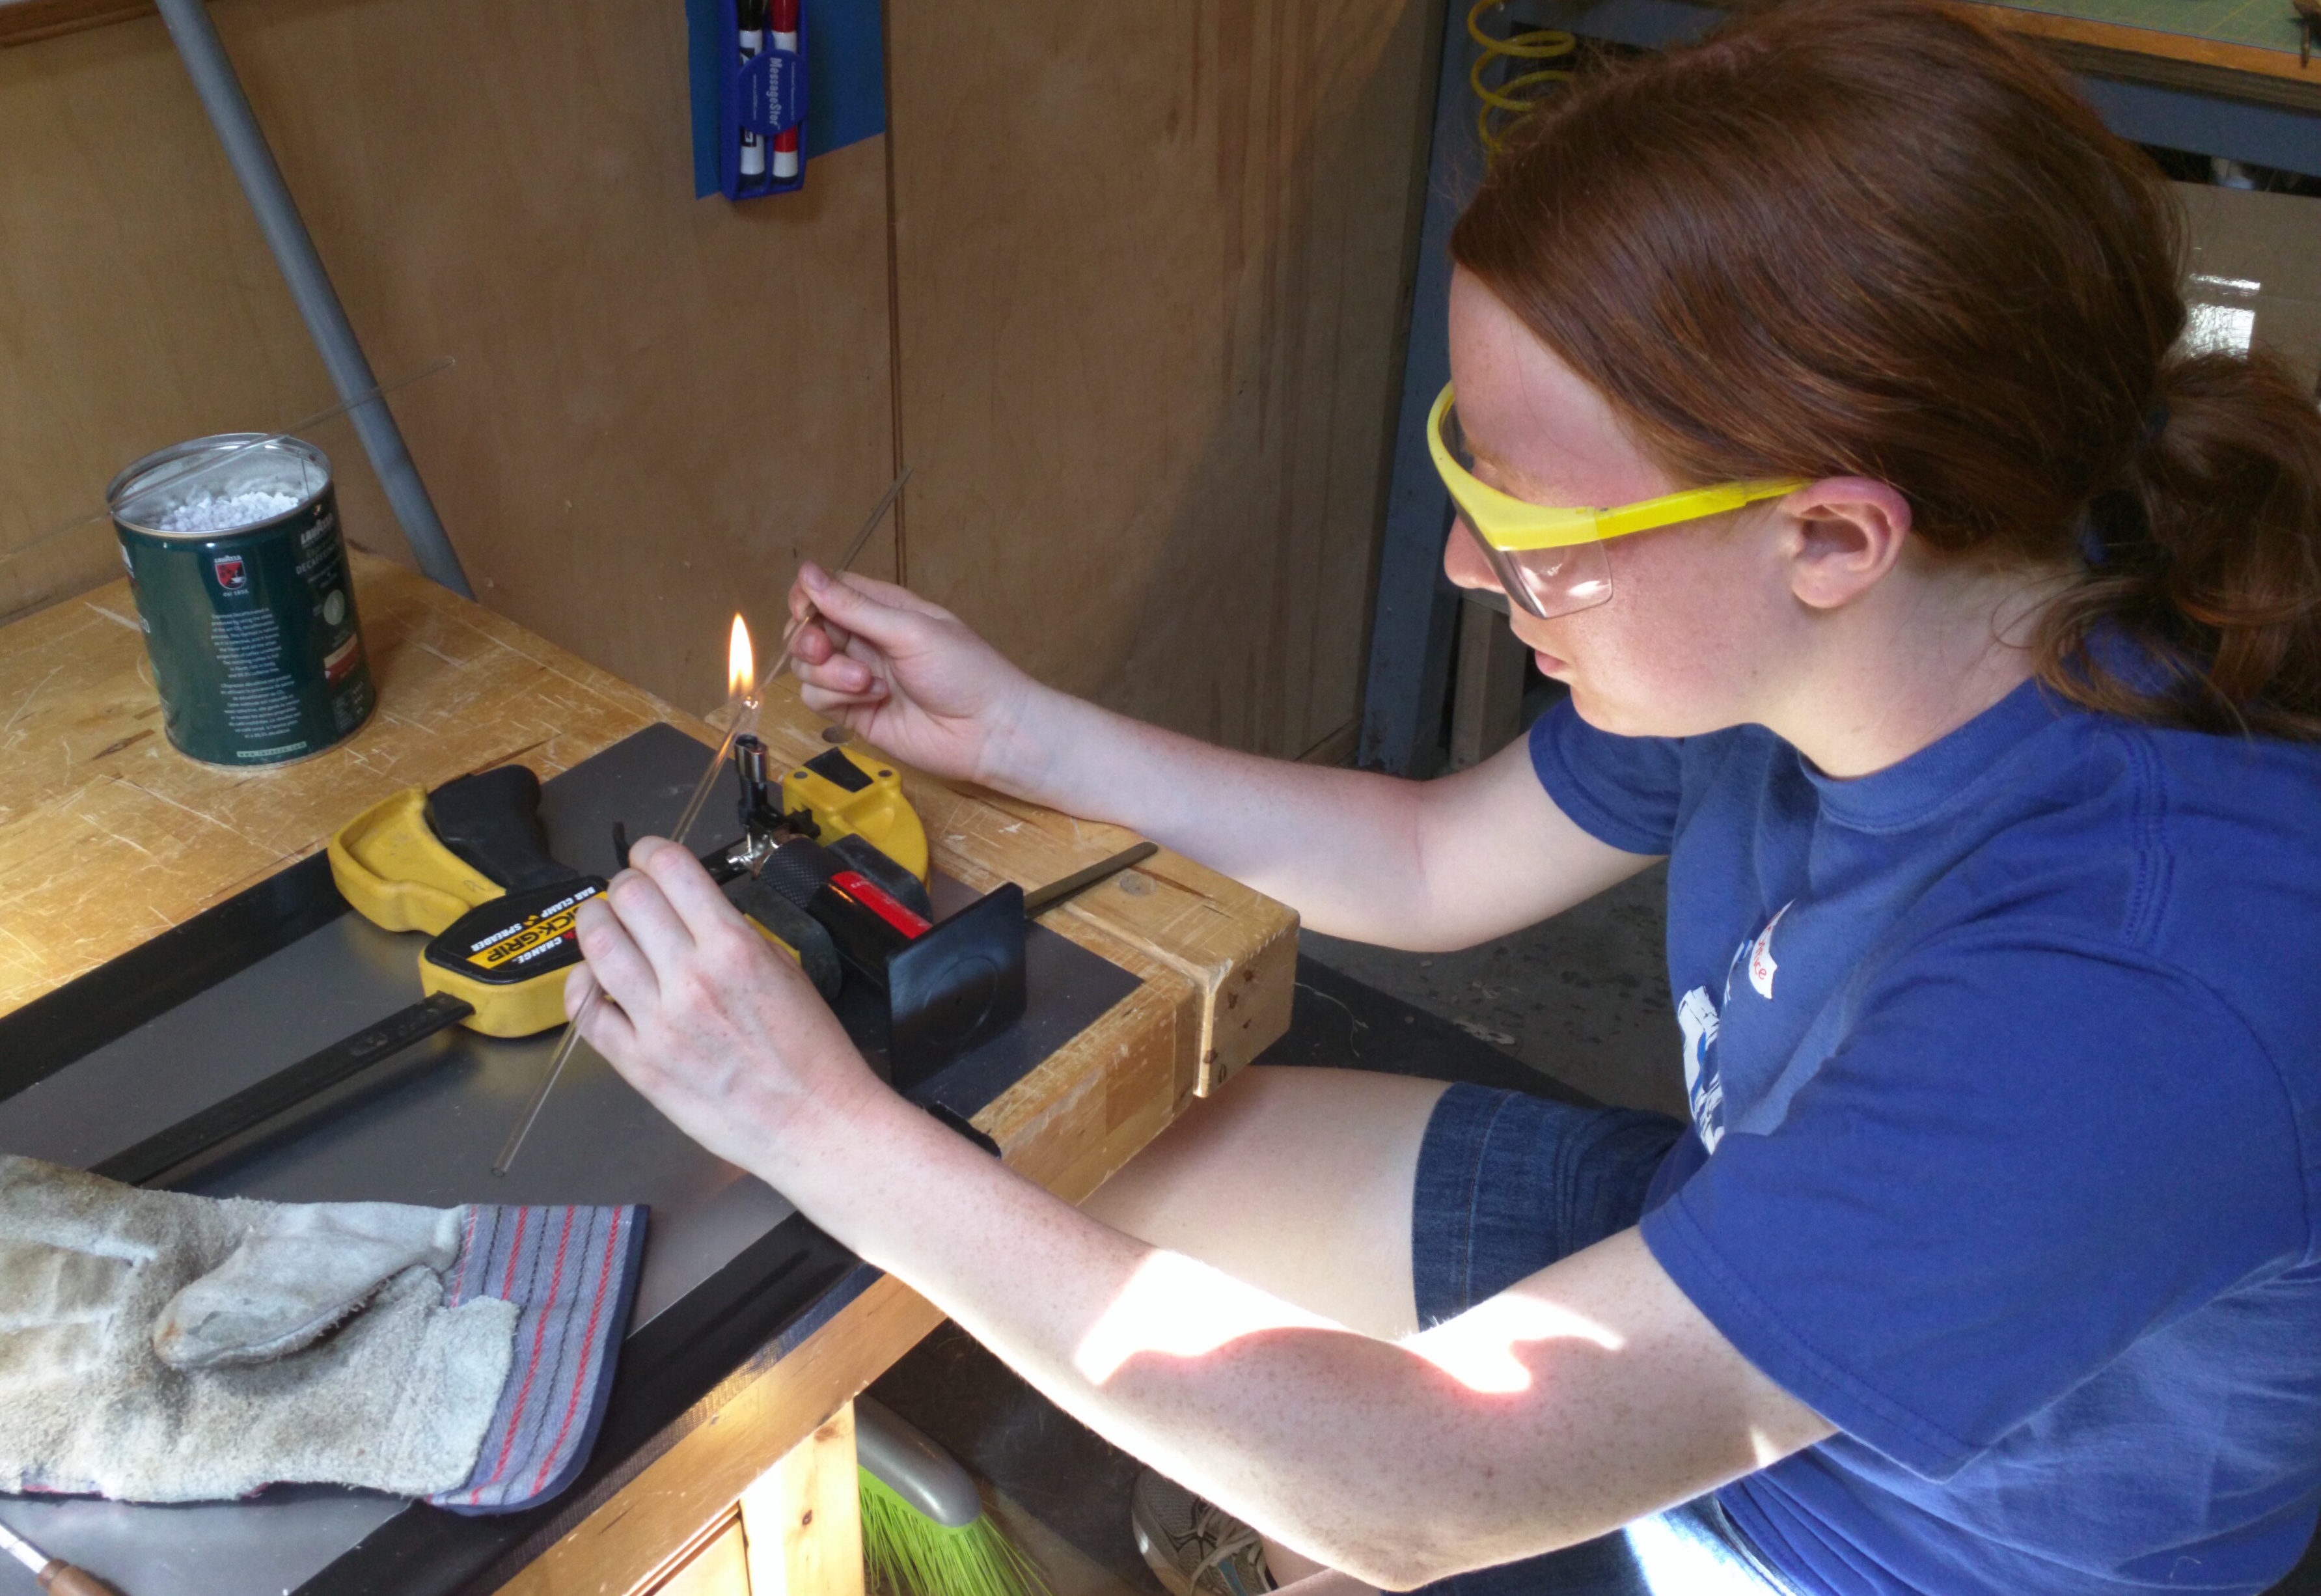
Where things kind of went off the rails was with our seals. I don’t have much in the way of chemistry equipment yet – so I am making or buying what I need for each experiment. We started the day cutting and bending sections of gas tubing for connecting the different vessels together. I then drilled out solid rubber stoppers to the appropriate size to snuggly fit the tubes. While I need to get something hotter than a butane torch so it does not take forever, hot working the glass was fun.

Bending Glass Tube
Bending Glass Tube

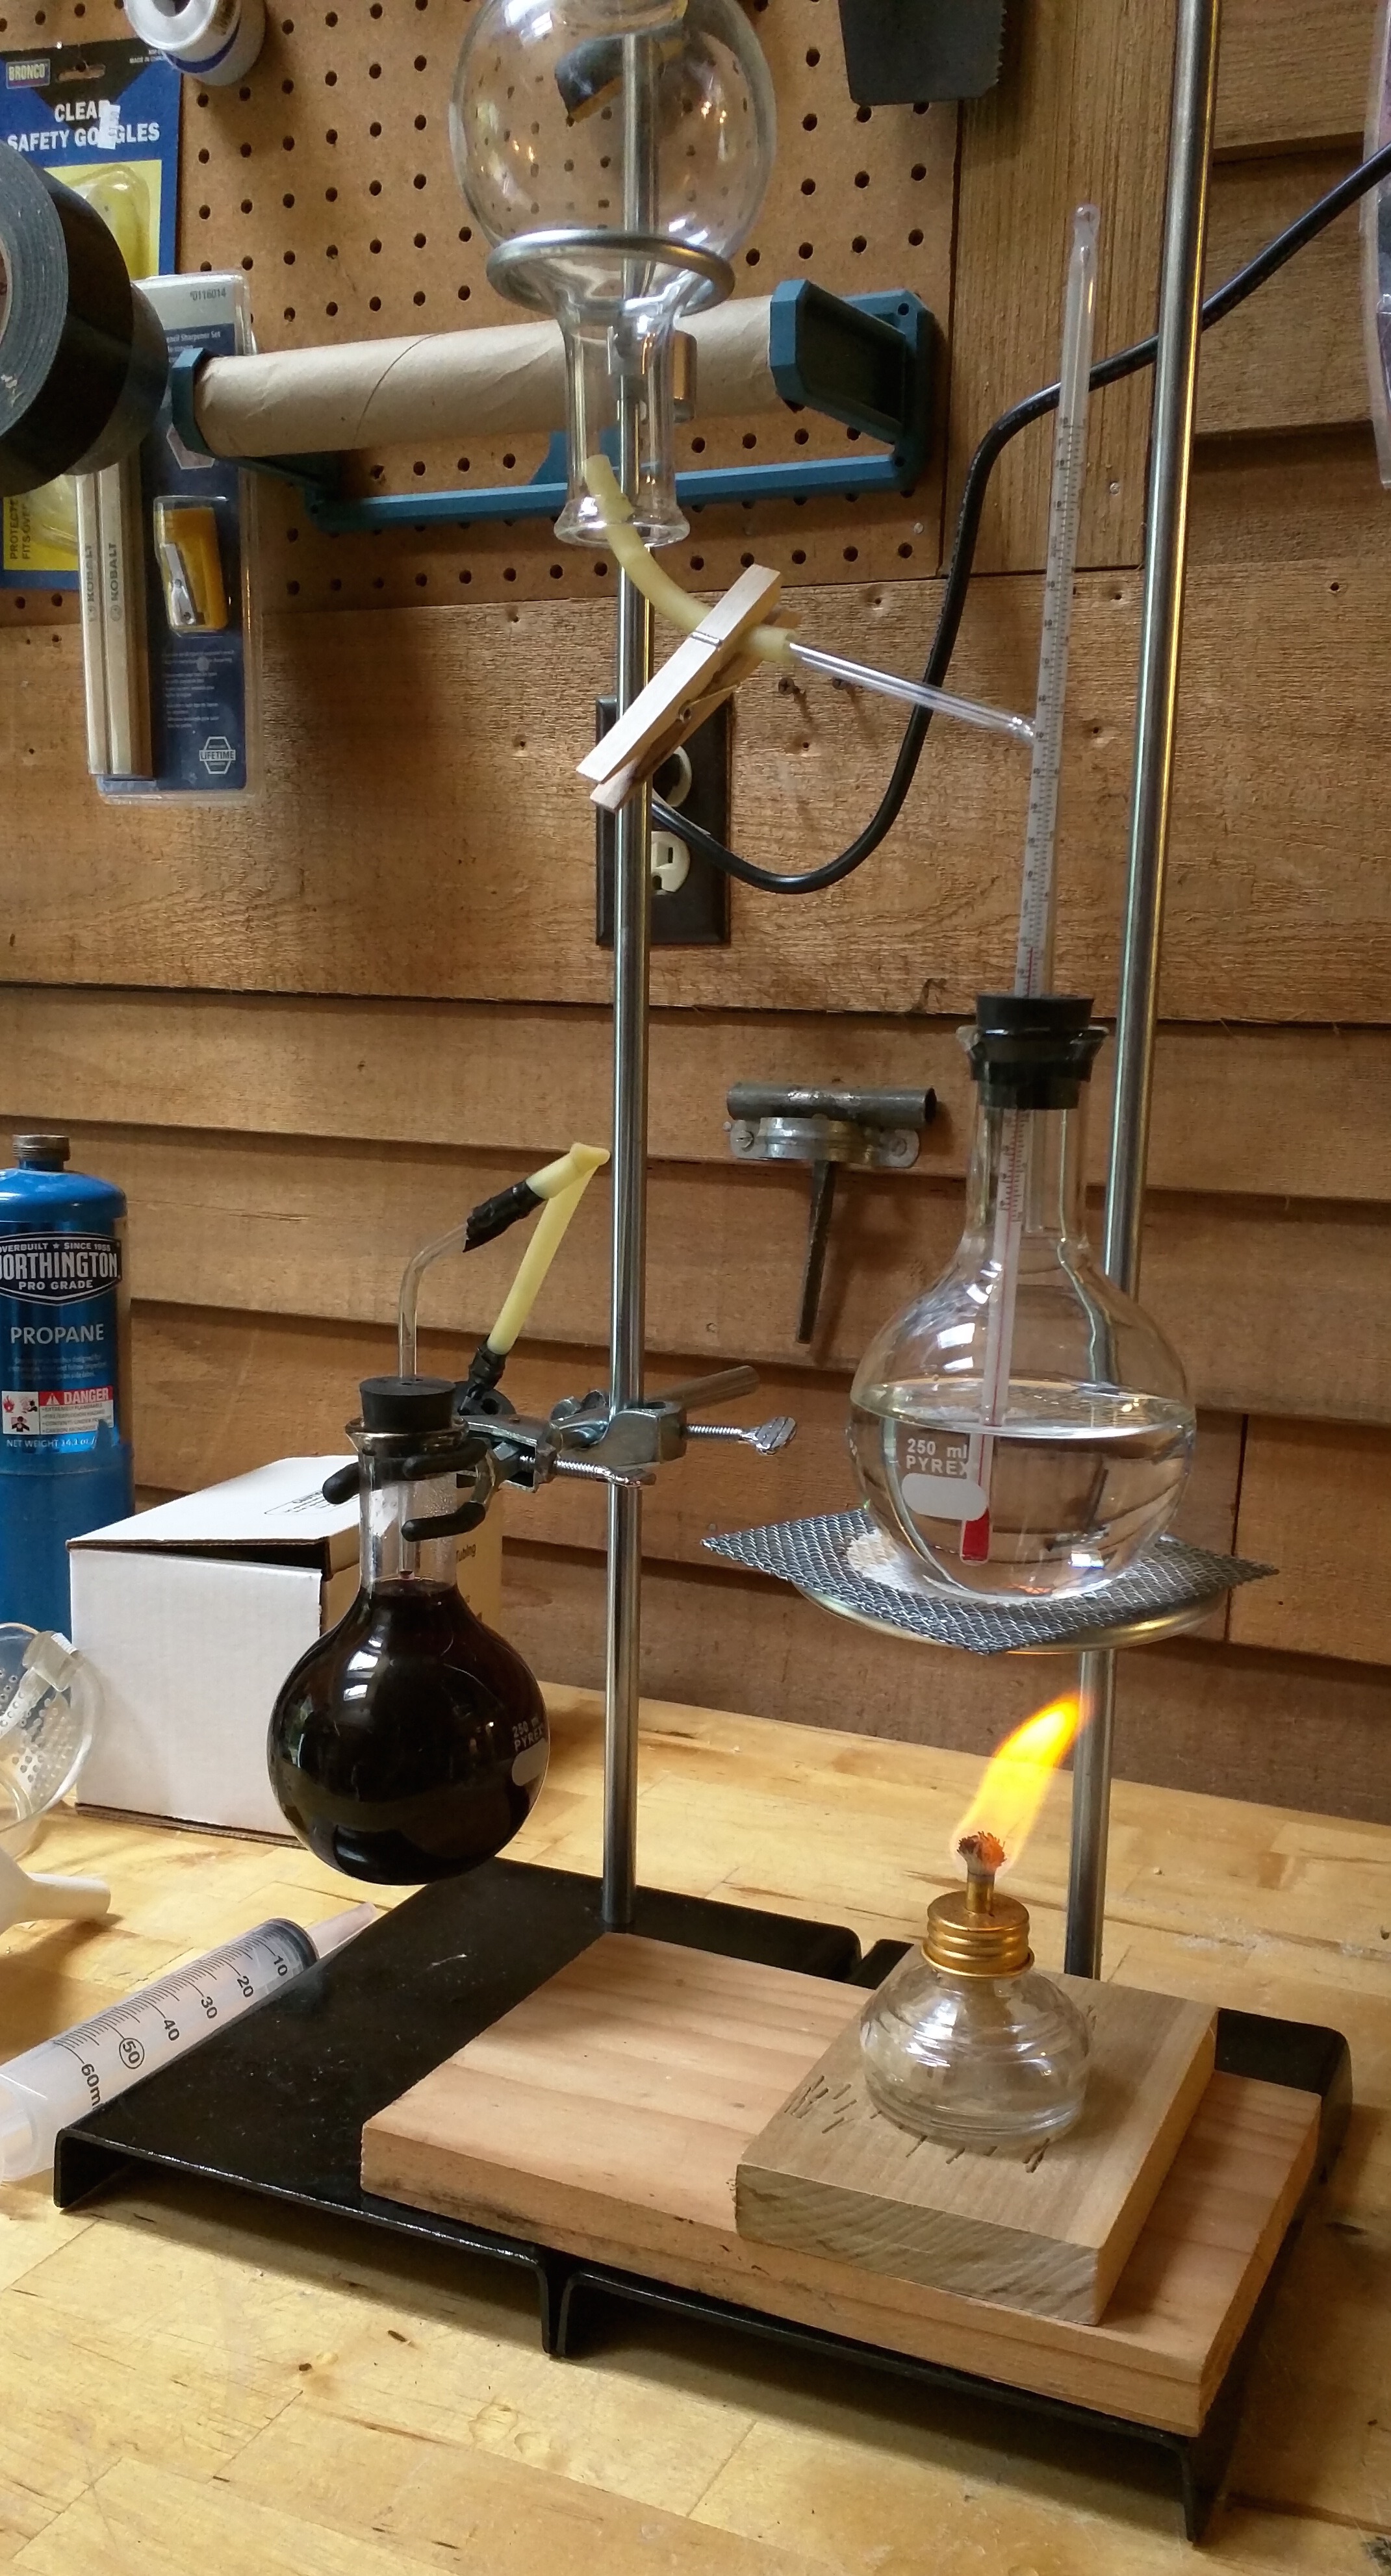
The problem came from out inter-tube connections. To make it easier to un-stopper and re-stopper we used latex surgical tubing to connect the glass pipes. The NH3 glass will eat away at the latex, but at a slow enough rate I was not worried about it for this experiment. We used clothes pins as low pressure release seals on the surgical tube. Our problem was that the inner diameter of the tubing was too large, and even with tape over the ends we never got a good enough seal. This first attempt at an ammonia fountain did go off – however while it started to fountain PH indicator, which changes color in the presence of gaseous NH3, the poor seal quality quickly let enough air into the system that it kills the pressure difference which drives the fountain.

First Try at an Ammonia Fountain

In the picture you can see the heated flask where we were off gassing NH3 connected to our inverted flask used to catch the lighter than air NH3 gas. Once the inverted flask is full of NH3 gas, we remove the feed tube, then re-stopper the inverted flask connecting it to the flask full of PH indicator. Squeezing the dropper injects some water into the inverted flask, water that absorbs the NH3 creating a partial vacuum in the flask, which in turn draws the PH indicator up the tube creating the fountain. The indicator has the fluid change color when it enters the inverted flask.

All in all a fun day, we just need to re-do the experiment once I buy a few things. We will probably use a larger flask as well. A 250mL boiling flask just does not have enough volume to look impressive once the fountain gets going. Still, this already looks like a great experiment to do in teaching science to kids. Because of the ammonia gas I am going to hold off at least another year before trying it with my nephew – but this one is definitely going in the rotation. The color change and the fountain look like magic.

Categories
Chemistry

Common Household Chemicals

Just posting this so I keep it handy. They put together a nice list of common household chemicals, their chemical formulas, and where you can find them.

Here is a clickable link to their list http://www.chymist.com/Common%20chemicals.pdf here.

Categories
Chemistry

Generating ammonia (NH3) gas

So I want to run some experiments that need small amounts of ammonia gas. I was already looking to use off gassing from ammonium hydroxide, when I ran across this video about creating small quantities of ammonia gas for lab experiments. It has a good explanation and a better procedure than I had intended to use.

Looking at the other videos from FlinnScientific, they have posted a few awesome demonstrations and experiments. Check out their “Whoosh Bottle” for one to get kids attention!

Categories
I am going to try Science!

Dr. T explains our distillation setup, with our added ice bath

So as Dr. T showed in our earlier posts – we are using a distillation kit from Amazon to get us started.

distillation_equipment_June25th_2015

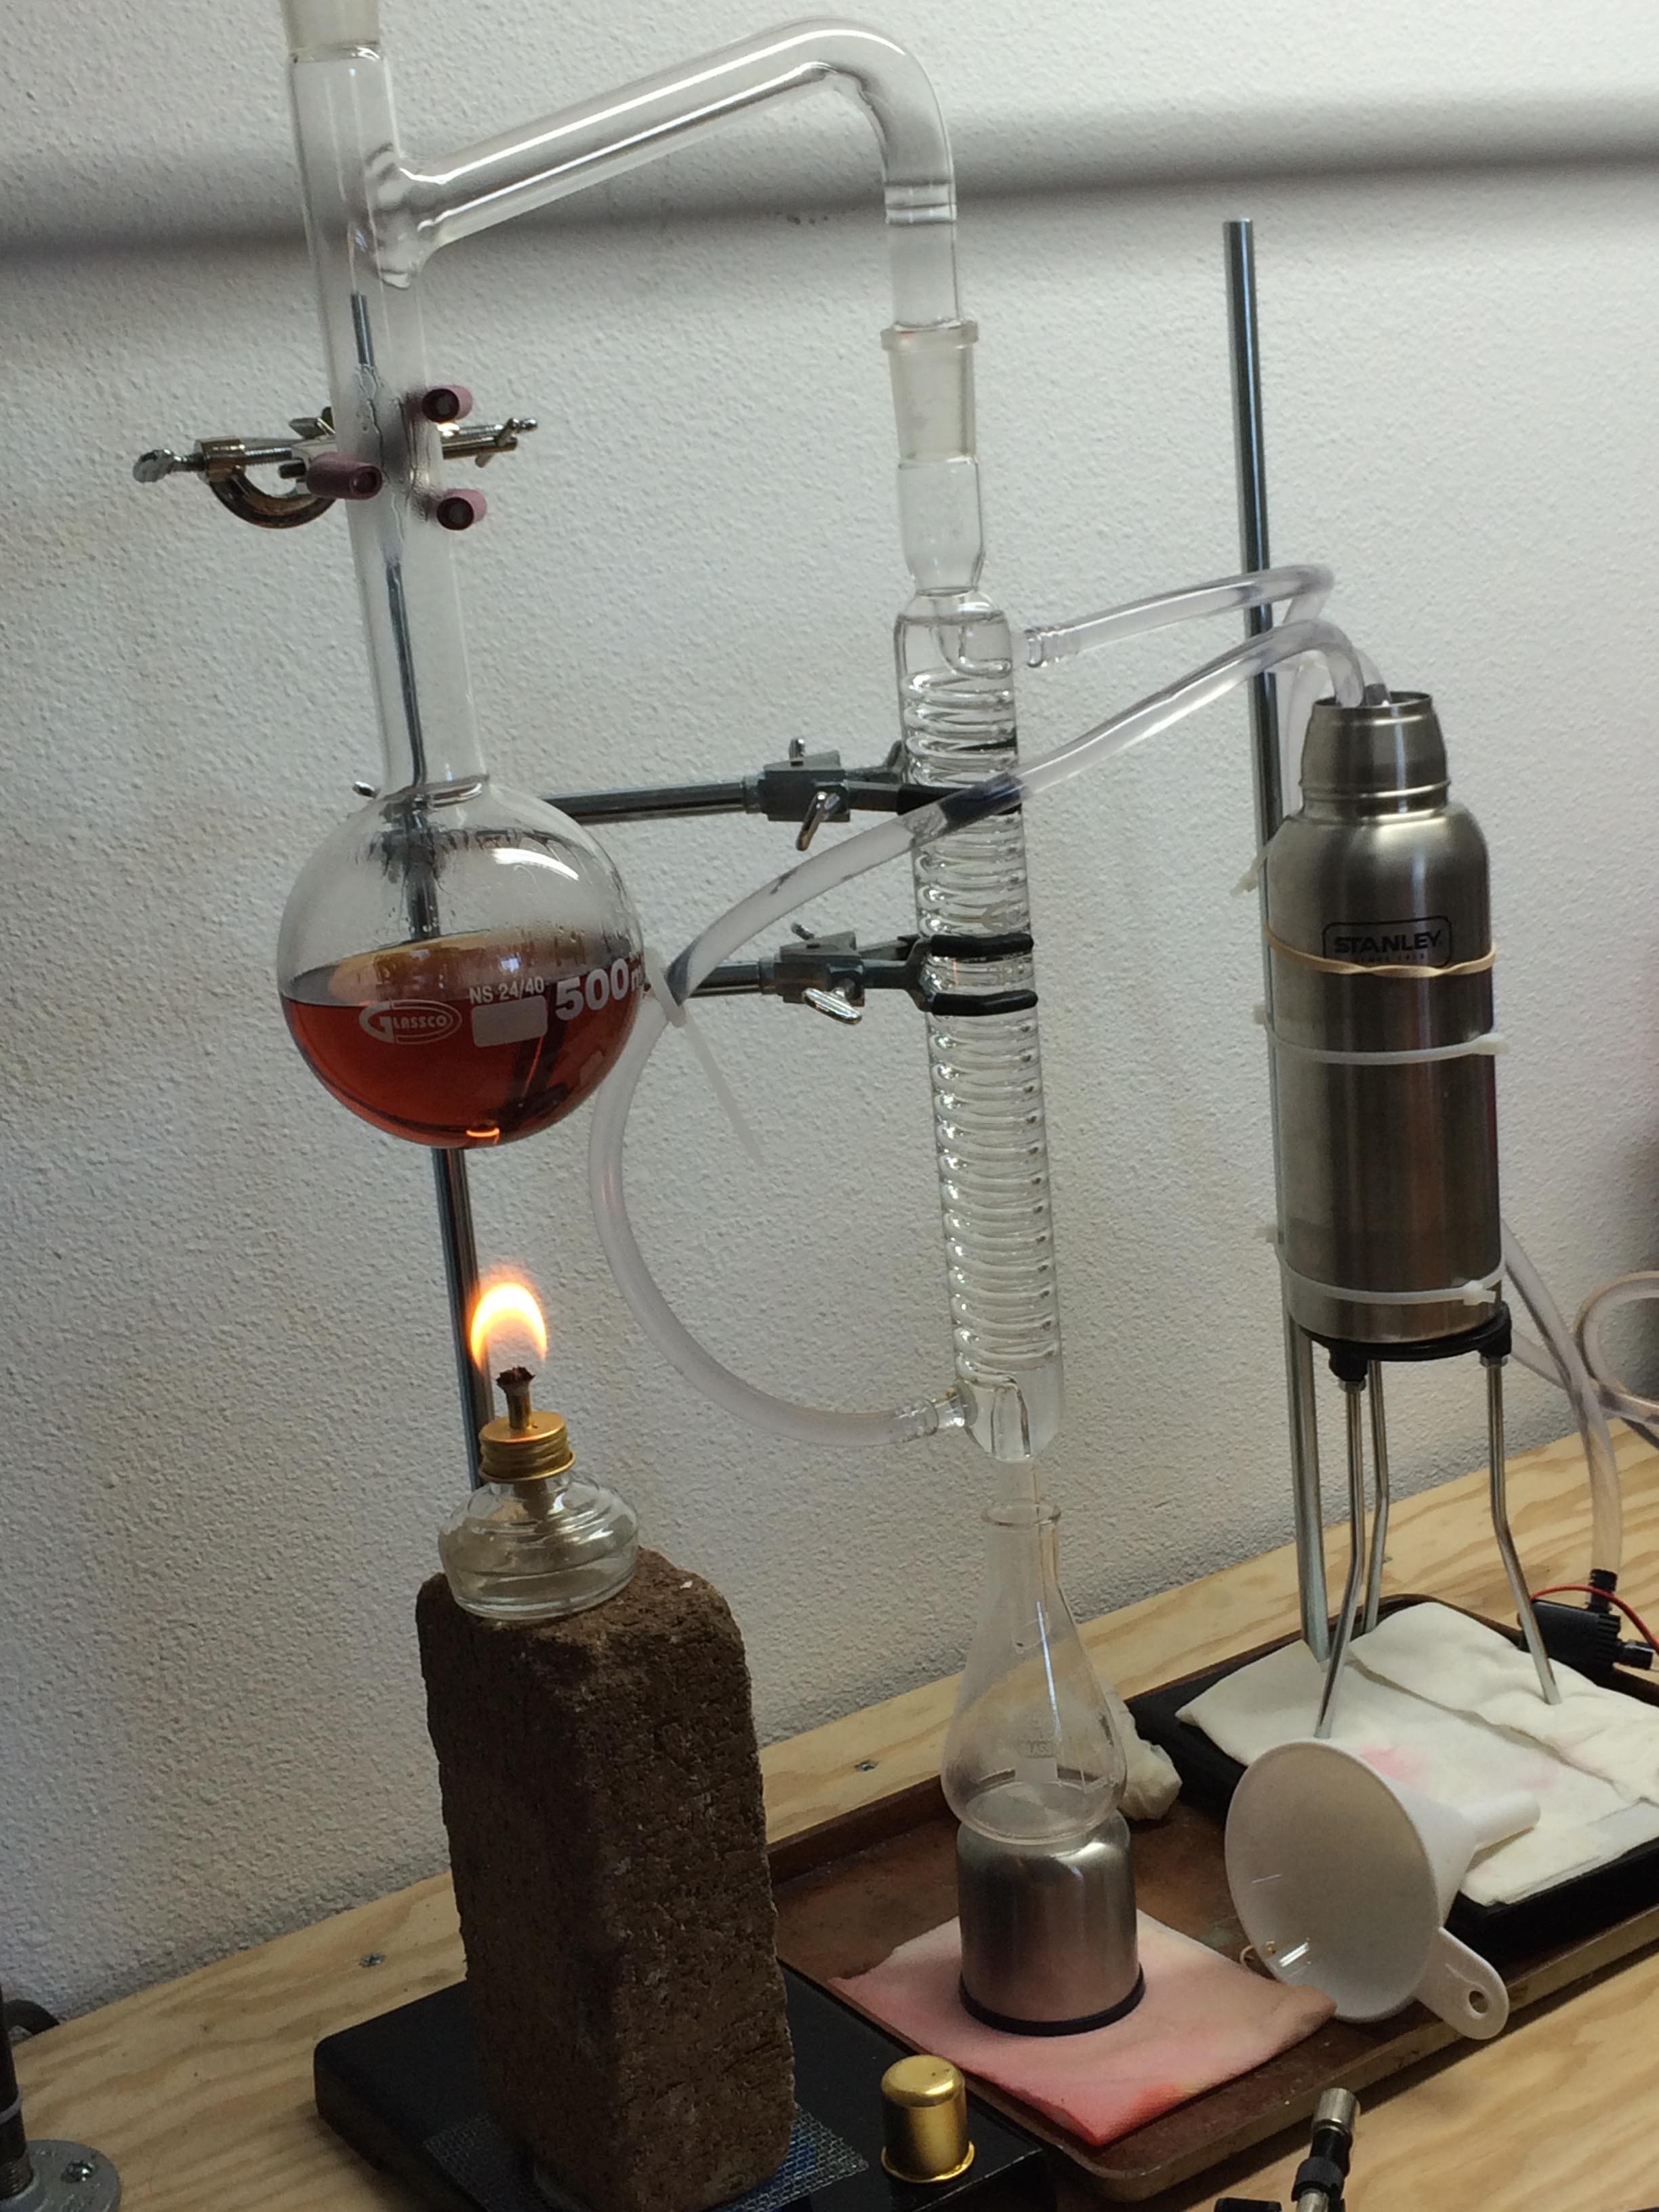
The only problem is that the kit is supposed to be cooled from water running from a tap, through the Graham condenser, and down the drain. My not wanting to waste water aside, I don’t have a sink in my shop. So we rigged up a heat sink suitable for the same tubing running into and out of the Graham condenser, and added a thermos to act as an ice bath.

A small pump cycles the water from the ice bath, through the Graham condenser, through the heat sink, and then back into the ice bath. We add a few ice cubes to the bath to get it started and then let things cool from there. To that we added a
Peltier Thermo-Electric cooling module from Adafruit. That keeps pumping heat out of the system. We just grabbed the tubing from the hardware store.

Planing out experiments

Here’s video of Dr. T talking us through the setup we ended up using.

Categories
I am going to try Science!

Dr. T explains the setup of our distillation experiment

In this episode Dr. T is explaining the distillation equipment we are setting up. The goal of the project is to use an alcohol powered distiller to create alcohol in order to re-load the lamp. The project is a two-for-one. This year we are learning about distillation and the states of matter. Next summer we get to use the same setup to look at conservation of energy.

So my degrees are in Electrical Engineering and Computer Science, so working as Dr. T’s lab assistant, or Igor as he insists on calling me, is the first time I have been playing with “the wet stuff” in decades. As a result I didn’t already have the gear we would need. I went with a distillation kit from Amazon to get us started.

The kit comes with a boiling flask, a Graham condenser, and an Erlenmeyer flask ground to fit together. Just as important it comes with stands and hardware to hold them.

The only problem is that the kit is supposed to be cooled from water running from a tap and down the drain. My not wanting to waste water aside, I don’t have a sink in my shop. So we rigged up a heat sink suitable for the same tubing running into and out of the Graham condenser, and added a thermos to act as an ice bath. Dr. T will be covering that in the next post.

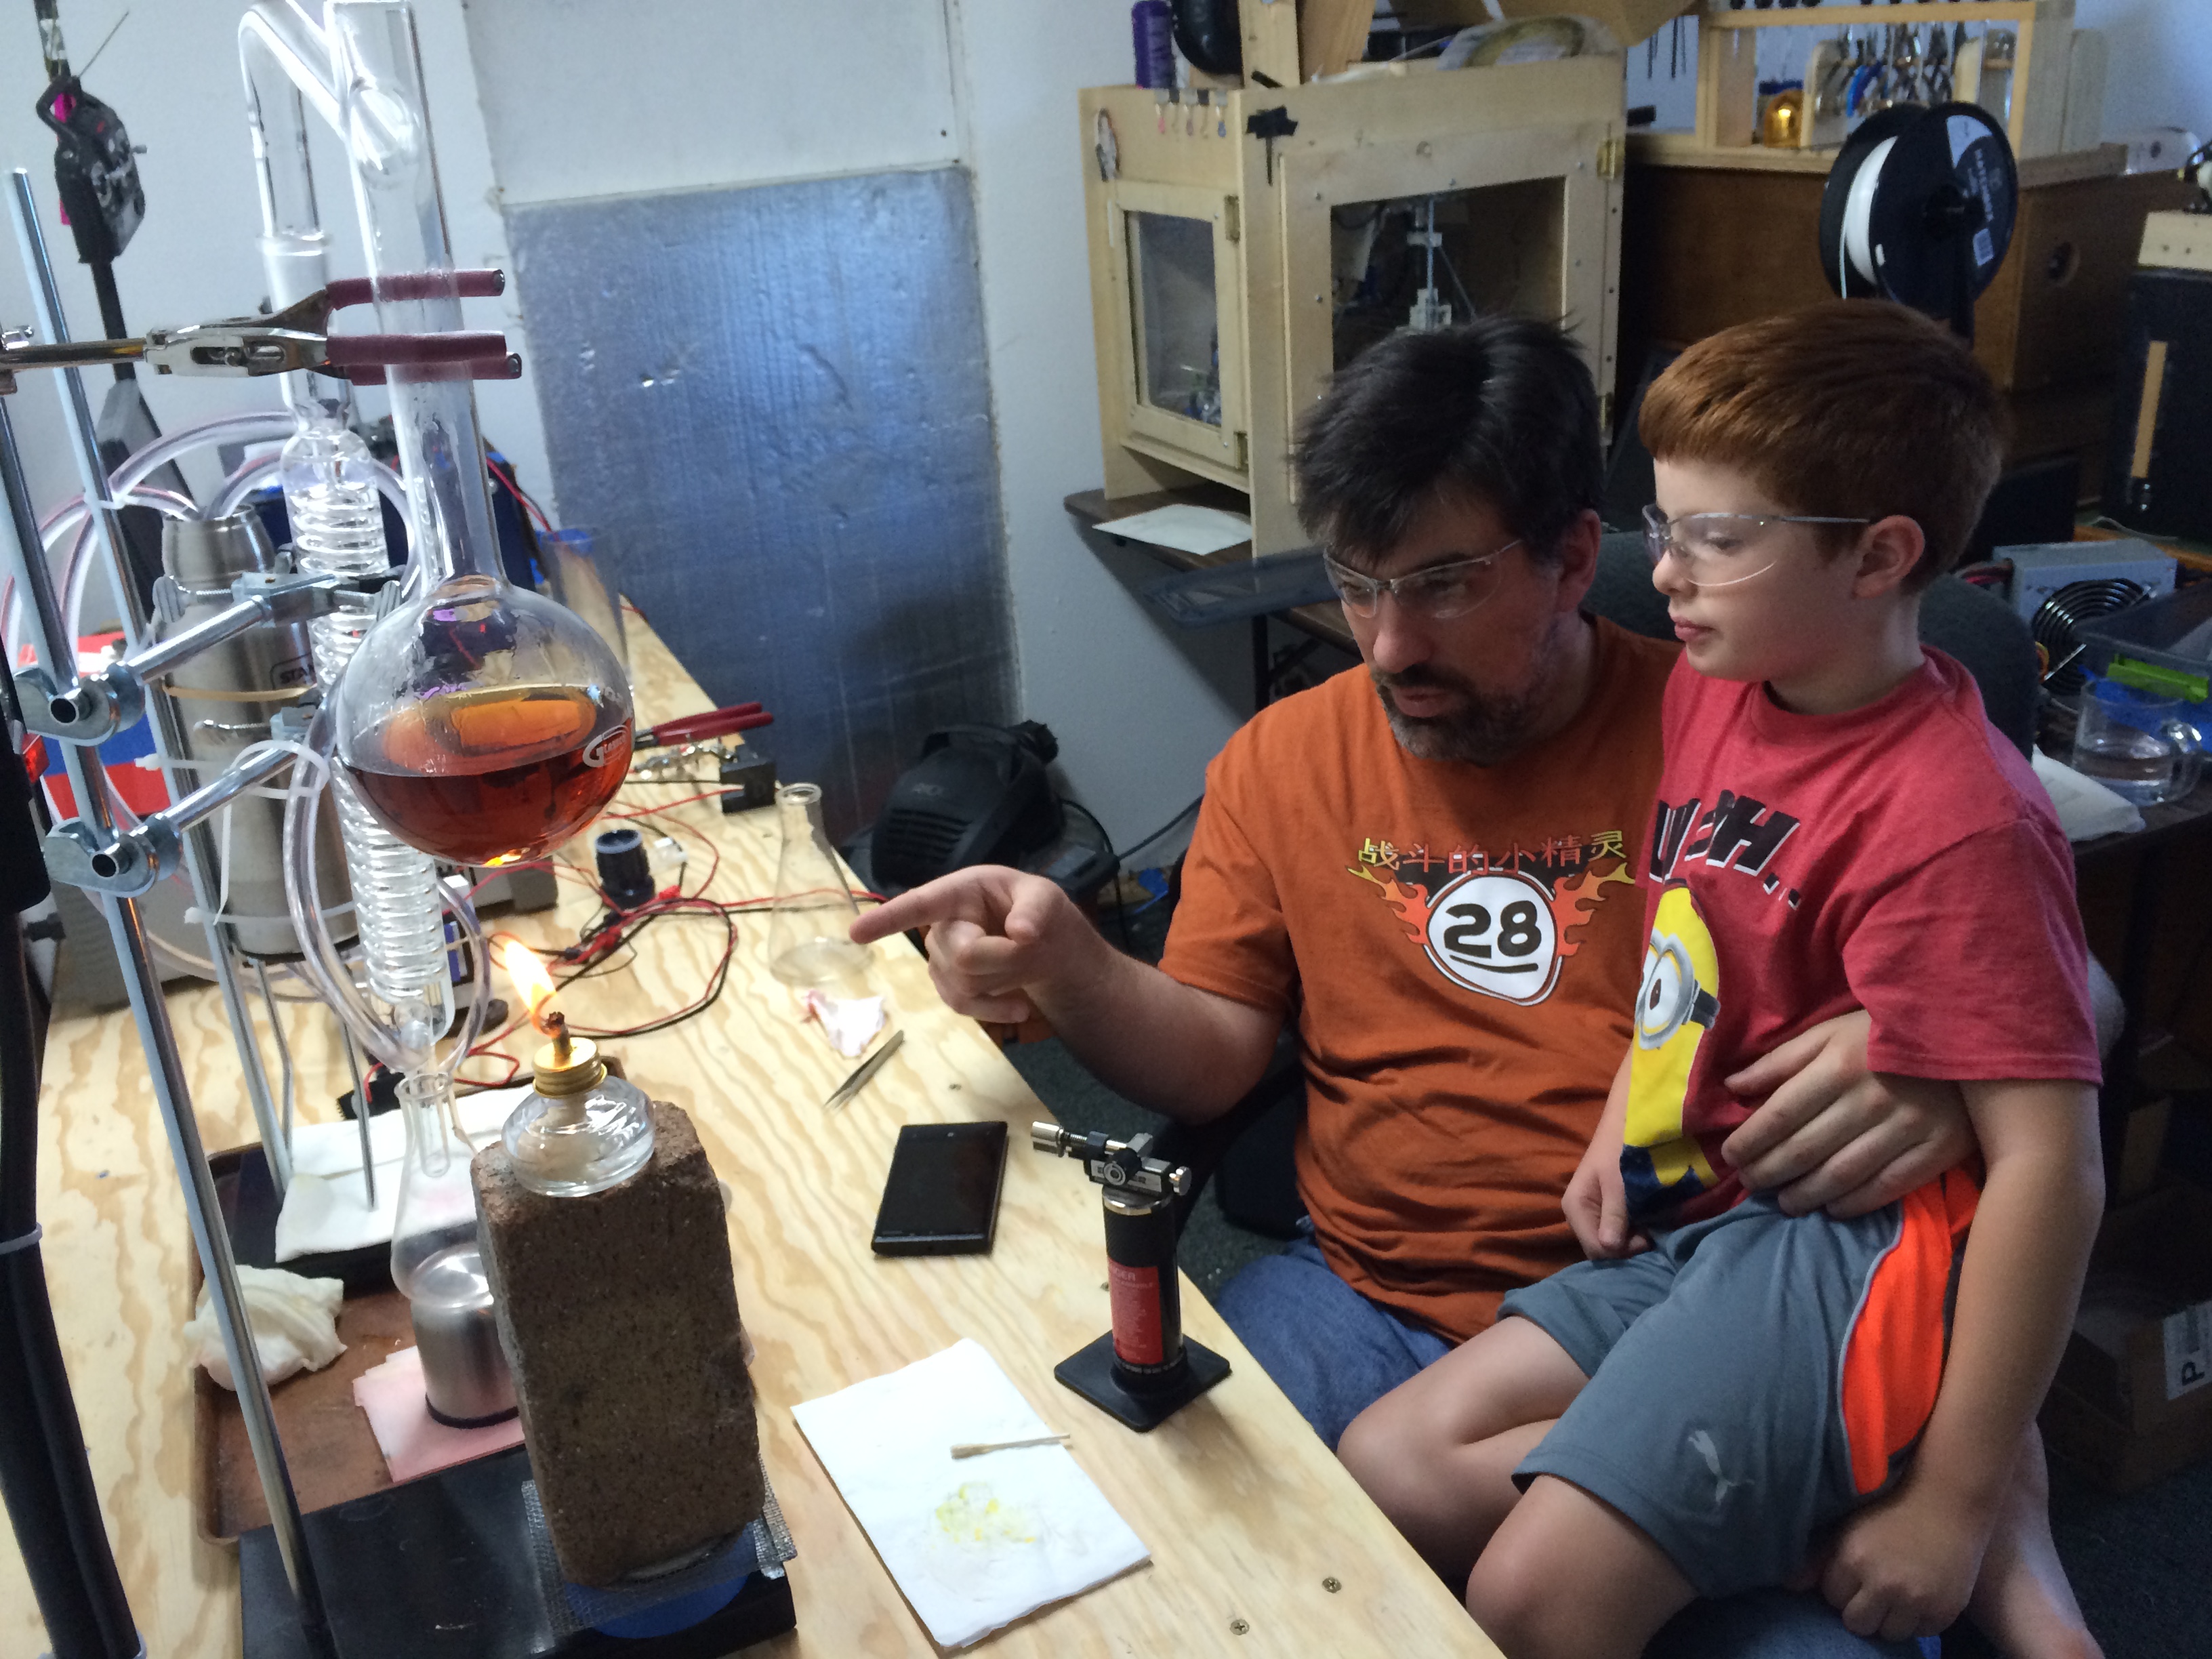
For now, here is Dr. T explaining the initial setup of our apparatus.

Categories
I am going to try Science!

Dr. T explains the baking soda volcano!

The baking soda volcano has been a classic in the Tony house for decades. Basically you mix baking soda and white vinegar then watch things erupt.

The main component of vinegar is acetic acid CH3COOH. Baking soda is NaHC03. When you mix them you get:

CH3C00H + NaHC03 => (CH3C00-)(Na+) + H20 + C02

That C02 being released is the cause of the fizzing. The food coloring is just a nice touch to give things the color of lava.

Here is my nephew Dr. T explaining things.

Categories
I am going to try Science!

A Non-Newtonian fluids and shear thickening science project

Non-Newtonian is both insanely cool, and something a young mad scientist in training can directly experience and play with. Cornstarch mixed with water is a shear thickening Non-Newtonian fluid.

Shear thickening is basically what it sounds like; the fluid thickens when shear forces are applied. The fluid thickens when you apply forces into the fluid. The most spectacular example of this effect is people running across tubs filled full of the stuff. Run fast enough and the fluid supports them, but stop or run slow enough and they start to sink into the fluid. Another cool example of shear thickening is to fill the cone of a speaker pointed up with the fluid. Then playing sound causes the fluid to do all sorts of weird things.

Even though larger volumes of the fluid lend themselves to spectacular demonstrations, you can do some really cool science experiments with less than a cup of corn-starch. My nephew was visiting on short notice and we were able to put this experiment together only on what I had in the house for cooking.

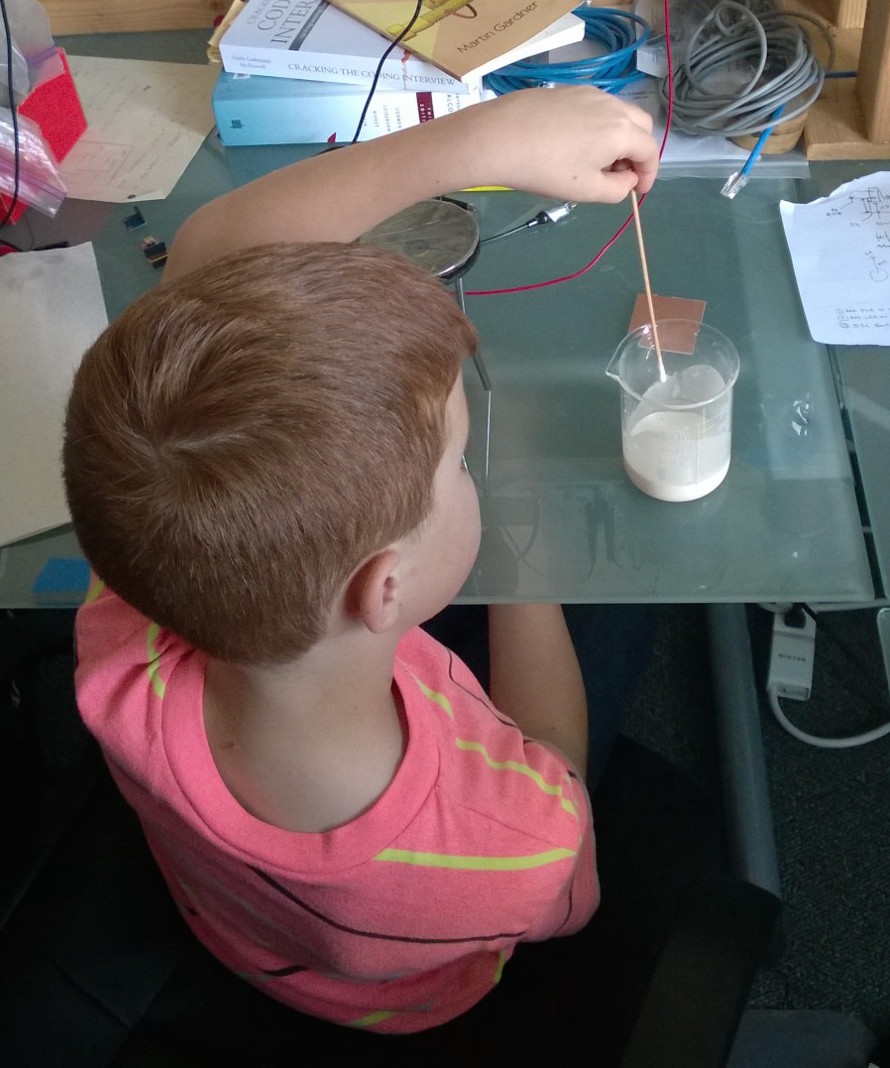
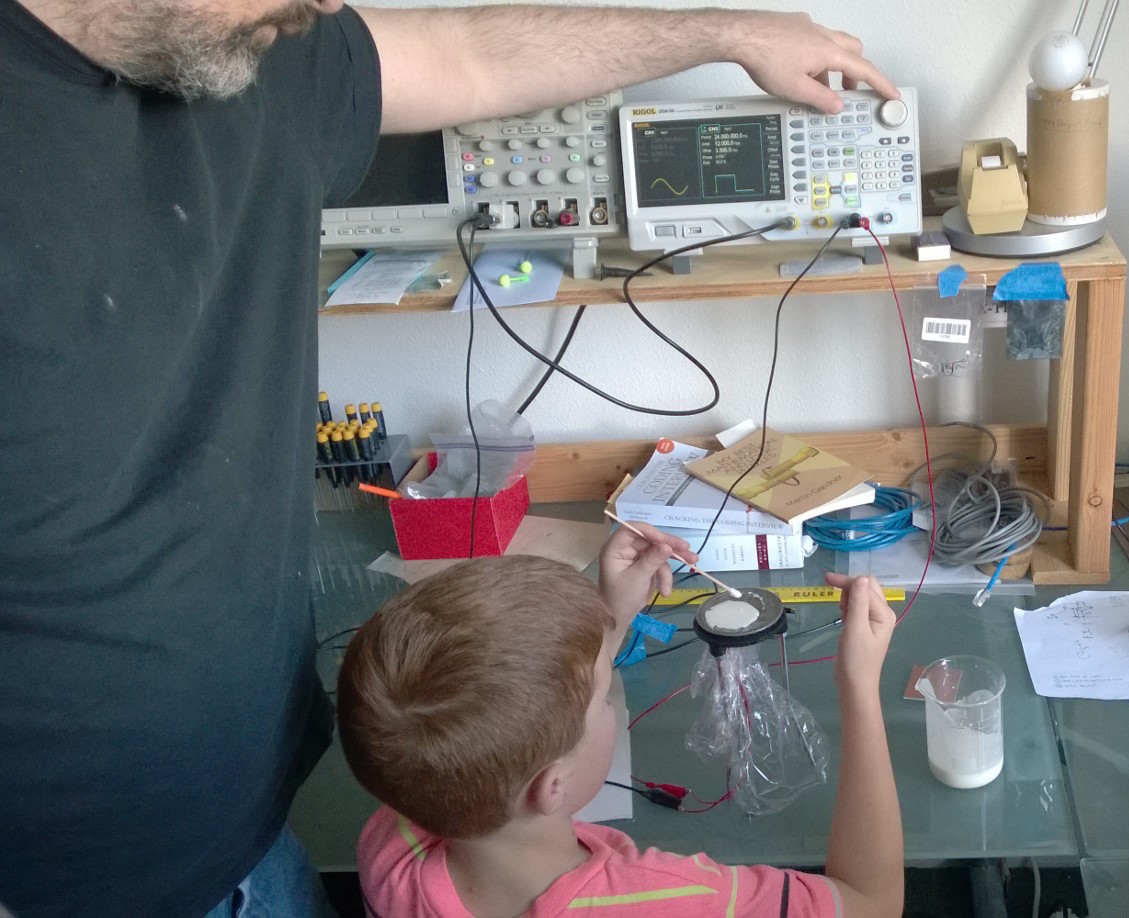
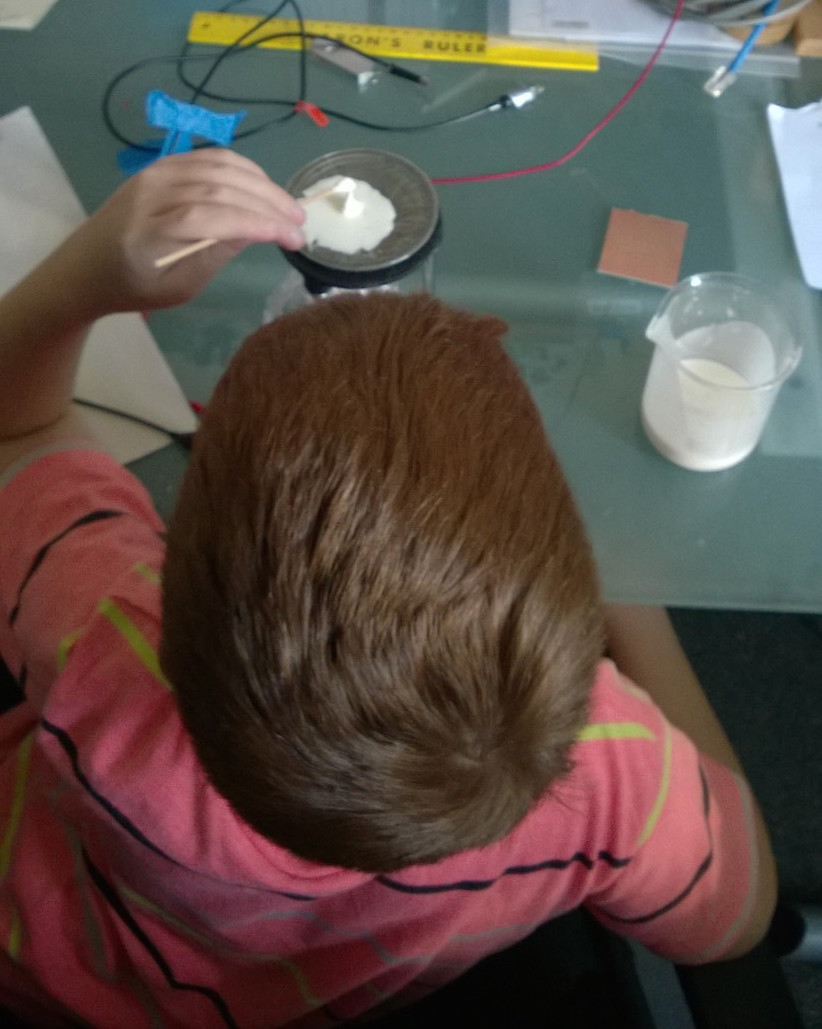
We mixed up a mixture of cornstarch to water at 35:65 by weight. That’s actually a bit soupy a mix, but it made it easier to work with for a longer time with my nephew. Next we covered a small speaker with plastic wrap. My nephew was able to use used a cotton swab to stir the cornstarch slurry in the beaker, then spoon it out onto the speakers surface.

Cornstarch_and_sound_loading

Once the cornstarch was on the speaker we used a function generator to sweep different frequencies and waveform shapes. While driving at fixed frequencies let us feel differences in the fluid at different frequencies, and let us do better science, it wasn’t as interesting as just driving random sound. My nephew still thought it was cool – but I think I am going to do another run of this with him using a larger speaker and sound.

Cornstarch_and_sound_different_sounds

When we were driving the speaker we could turn the function generator off and on having the material in the speaker switch from acting like a fluid, to acting like a solid – which was cool for an 8 year old. What also worked was showing him how driving at different volumes and frequencies changed the viscosity.

Cornstarch_and_sound_mixing

Its hard to see in the picture, but with the shear-thickening my nephew was able to drag and lift the liquid around like it had a very high viscosity right up until it started acting like a solid and breaking. At which point it would fall back into the pool acting alike a liquid. Hard to describe, but a cool illustration of both viscosity and Non-Newtonian shear thickening.

All in all I highly recommend this for anyone wanting to show kids that science is cool. If you don’t have any of the electronics, you can mix up a small quantity of cornstarch and water in the palm of a kids hand. Then when you tap it, it turns solid for a moment. Not as cool as using the speaker, but fast and can show kids something cool in a few minutes.